Table of Contents

Related Manuals for BARIX Instreamer


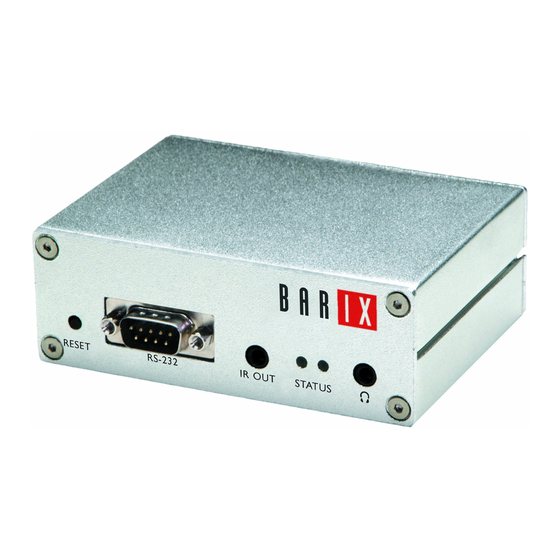
Summary of Contents for BARIX Instreamer
- Page 1 U s e r M a n u a l Instreamer Network audio encoder for commercial, industrial and security applications Firmware: V3.17 Released: 25th July 2011 Supports • INSTREAMER (legacy) • INSTREAMER 100 • EXSTREAMER 1000, 500 • ANNUNCICOM series...
-
Page 2: Table Of Contents
Table of Contents 1Introduction..............7 1.1About the “Instreamer” firmware...........7 1.2Features..................8 1.3Installing the device...............9 1.4Additional documents..............9 1.5Preloaded Firmware..............10 1.6About this manual...............10 Links to chapters...............10 Links to the Dictionary...............10 Bookmarks pane in Adobe Acrobat...........10 Chapter overview..............11 2Device Status and Control...........12 2.1Status and Control..............13 Refresh..................13... - Page 3 Encoding & Frequency..............20 Encoding Quality...............20 Advanced Encoder Settings............21 A/D amplifier gain..............21 MP3 Frame CRC..............22 MP3 Bitreservoir Mode.............22 MP3 Channel Mode Extension..........22 MP3 Copyright Protection............22 MP3 Stream Type..............22 MP3 Emphasis................22 3.3Streaming settings..............23 Streaming mode................35 Control GPI ................35 Active open/closed..............35 Send Contact Closure Information..........35 Trigger level................35 Pre Trigger Start...............36 Post Trigger Play..............36...
- Page 4 Domain Name ................42 Port #..................43 SNMP settings................43 Trap Target IP Address.............43 Low Audio Level................43 High Audio Level...............43 Trap Repeat................43 Silence Timeout................43 3.4I/O Settings.................44 CTS close command..............44 CTS open command..............44 Commands................44 3.5Control settings................45 UDP command port..............45 TCP command port..............45 Web server port................45 3.6Serial settings................45 Baud rate..................46 Data bits..................46...
- Page 5 SNMP Community Read............51 3.8Additional Features..............52 livefeed.xml................52 listen.xml...................52 4Reverting to factory defaults........53 Hard default settings..............54 5Rebooting the device...........55 6Updating the device.............56 6.1Downloading the latest firmware..........56 6.2Serial Rescue................57 6.3Web Update................57 7Dictionary..............65 8Legal Information............67...
-
Page 7: 1Introduction
Barix Exstreamers to create more flexible, more cost-effective distributed audio systems. The built-in serial interface allows data to be relayed to another Barix device, a PC or a server using the “Serial Gateway” functionality of the “Instreamer” firmware. -
Page 8: Features
User Manual “Instreamer“ - V3.17 - 25th July 2011 1.2 Features • Generates MP3 streams at adjustable bit rates (VBR) from analog or digital (optical/coaxial S/P DIF) sources • Generates G.711 (aLaw/uLaw) streams at 8 or 24 kHz sample rate from an analog source •... -
Page 9: Installing The Device
(e.g. Streaming Client V2.10 or later). 1.3 Installing the device For the installation of the Barix Instreamer 100 or the legacy Barix Instreamer please refer to the corresponding “Quick Install Guide”. A printed version is included in the box and can also be downloaded from our site www.barix.com. -
Page 10: Preloaded Firmware
User Manual “Instreamer“ - V3.17 - 25th July 2011 1.5 Preloaded Firmware Barix preloads the Instreamer 100 with the “Instreamer” firmware version. If other HW is being used then the factory firmware will have to be replaced. Before continuing with this manual make sure that the firmware version is up to date and corresponds with this manual. -
Page 11: Chapter Overview
User Manual “Instreamer“ - V3.17 - 25th July 2011 Chapter overview This manual is divided into the following chapters: • Device Configuration (explaining all configuration parameters) • Updating the Firmware (explaining how to update or how to change from “standard firmware”) •... -
Page 12: 2Device Status And Control
(see the Quick Install Guide) • a standard web browser Open your web browser and type in the address of the Barix device in the URL field and hit the “Enter” key. • Example: “192.168.0.12” You will see the following window content: The top frame shows the logos “INSTREAMER”... -
Page 13: Status And Control
User Manual “Instreamer“ - V3.17 - 25th July 2011 2.1 Status and Control Refresh The status frame page is refreshed every couple of seconds. To refresh it on demand click the reload button left of the word “Status”. Status Shows the current status "INACTIVE" or "SENDING". -
Page 14: Inputs
User Manual “Instreamer“ - V3.17 - 25th July 2011 Click the "CLR" link to deactivate the RTS output. The LED next to "RTS OUT" has the following meaning: GREY for inactivated, GREEN for activated. Inputs Inputs 1-4 are available on an Exstreamer 1000 or 500, inputs 1-8 are available on an Annuncicom 1000. -
Page 15: 3Device Configuration
(see the Quick Install Guide) • a standard web browser Open your web browser and type in the IP address of the Barix device in the URL field and hit the “Enter” key. • Example: “192.168.0.10” You will see the following window content: The top frame shows the logos “INSTREAMER”... -
Page 16: Network Settings
User Manual “Instreamer“ - V3.17 - 25th July 2011 3.1 Network settings This chapter explains how to adjust the network settings of the Barix device. We recommend that you set a Static IP address. With a static (permanent) address the device does not have to get a new IP address at power on or reboot. -
Page 17: Netmask
User Manual “Instreamer“ - V3.17 - 25th July 2011 The automatic options are as follow: • “0.0.0.0” for automatic discovery (Discovery order: BOOTP, DHCP, IPzator, AutoIP) To enable automatic discovery but disable certain IP discovery functions set all but the third value to zero. -
Page 18: Gateway Ip Address
User Manual “Instreamer“ - V3.17 - 25th July 2011 Gateway IP Address A correct setting of the Gateway IP address is needed to stream to the Internet or to destinations outside your local network (LAN). Enter the 4 values of the desired Gateway IP address e.g.:... -
Page 19: Audio Settings
- 25th July 2011 3.2 Audio settings This chapter explains how to adjust the audio input and output settings of the Barix device. Input source Choose the desired input source. Line mono and MIC input are mono, the other settings are stereo. -
Page 20: Encoding & Frequency
User Manual “Instreamer“ - V3.17 - 25th July 2011 Encoding & Frequency Choose between six different MP3, 8 G.711 and 13 PCM encoding settings. The bit rate used for 8 and 24kHz G.711 and PCM is displayed in kbit/sec. in the table below. -
Page 21: Advanced Encoder Settings
Choose the desired gain (“-3” up to “19.5” dB) for the line input A/D amplifier. Note: The line input sensitivity has changed from 2 Volts peek to peek on legacy devices to 4 Volts peek to peek on the new “Instreamer 100” (less sensitive). Device Configuration... -
Page 22: Mp3 Frame Crc
User Manual “Instreamer“ - V3.17 - 25th July 2011 MP3 Frame CRC If set to “enable”, the encoder will include the CRC- 16 in each MP3 frame. MP3 Bitreservoir Mode The “Bitreservoir” is used to compensate the differences between the predefined frame sizes. If set to “used”, the encoder will use the bitreservoir. -
Page 23: Streaming Settings
User Manual “Instreamer“ - V3.17 - 25th July 2011 3.3 Streaming settings These settings adjust the streaming mode, parameters and destinations. Device Configuration... -
Page 24: Streaming Mode
User Manual “Instreamer“ - V3.17 - 25th July 2011 Own Name You can enter the name of the Barix Instreamer here. This name will be returned when using the DISCOVER command (see technical documentation). Streaming mode Streaming is started depending on the selected operating mode: •... -
Page 25: Trigger Level
User Manual “Instreamer“ - V3.17 - 25th July 2011 Trigger level The Trigger level is only used when Streaming mode is set to send on Level. Select a value between 0 and 32767. Open the Device status page and look for the Input peak value to get a hint for the trigger value. -
Page 26: Udp Tx Source Port
Port is used. Radio Path Enter a radio path to listen to the transmitted stream of this Barix Instreamer using a device that is able to play MP3 radio stations (also PC software like WinAmp). The URL to connect is http://x.x.x.x/p where x.x.x.x is the IP address of this device and /p is... -
Page 27: Shoutcast Stream
User Manual “Instreamer“ - V3.17 - 25th July 2011 Shoutcast stream Select if the stream is private or public (icy-public header). Taken into account only for connection with Shoutcast source stream type selected. Default setting is “public”. Type of Service/DSCP This field uses 6 bits (bit 2-7) only, bit 0-1 not used. -
Page 28: Stream To
User Manual “Instreamer“ - V3.17 - 25th July 2011 The following table illustrates the DSCP values: Stream to There are up to 8 destinations to stream to. Each one can be directed to a device, or a multi- or broadcast address (destination connection types) or be set up as a listener waiting for a connection to be initiated by the other side (listener connection types). -
Page 29: Stream To Disabled Entry
(network address translation) we recommend to use BRTP which can use port 80 and no change to the router is required. Only the router on the “Instreamer” side has to have an open port 80 forwarding requests to the “Instreamer”. -
Page 30: Stream To Brtp Entry
User Manual “Instreamer“ - V3.17 - 25th July 2011 (e.g. 4040), enter an IP for a UDP unicast destination (e.g. “192.168.0.11). Stream to BRTP entry Set the connection type to “BRTP” (Barix Real Time Protocol) for a BRTP server (up to 32 clients). The IP “0.0.0.0”... -
Page 31: Stream To Shoutcast Source Entry
Ice/Shoutcast (Security settings). The IP “0.0.0.0” will let the Instreamer act as a Shoutcast server itself waiting for a connection on the port selected under “Port#”. The function is then limited to a single client (a media player like Winamp) and only one entry is allowed to be set to Shoutcast server (IP 0.0.0.0). -
Page 32: Port
User Manual “Instreamer“ - V3.17 - 25th July 2011 Port # Enter the port number for each destination (between 0 and 65535). If this port is set to 0 then the default ports are used (Internet Radio 80, TCP 2020, UDP 3030). -
Page 33: I/O Settings
CTS signal on the serial connector is deactivated Commands Commands can be joined using the “&” character and will be executed sequentially. For further commands refer to the “Instreamer technical documentation”. SENDING MODE c=84 : Deactivate the sending mode, if not send... -
Page 34: Control Settings
TCP. To disable set this port number to “0”. Web server port Defines the port on which the web server of the Barix Instreamer can be reached. If set to "0" the default HTTP port 80 is used. -
Page 35: Baud Rate
User Manual “Instreamer“ - V3.17 - 25th July 2011 Baud rate Select the serial transmission speed from “300” to “115200” Baud (bits per second). Data bits Select “7” or “8” data bits. Parity Select “no”, “even” or “odd” parity. Stop bits Select “1”... -
Page 36: Destination Ip
User Manual “Instreamer“ - V3.17 - 25th July 2011 If the active serial gateway is enabled and the "Local port" is set to a value then this will be the source port of the TCP connection. On "0" a random source port is used. -
Page 37: Security Settings
User Manual “Instreamer“ - V3.17 - 25th July 2011 3.7 Security settings These settings can be used to secure the access to the device on different levels. The status is shown next to each password (set or not set). Access is free for levels without a password (default setting). -
Page 38: Save Configuration Password Usage
User Manual “Instreamer“ - V3.17 - 25th July 2011 Save configuration password usage When the password is set the user has to type in the password in the “Save Config Password field” before hitting the “Apply” button. Without a valid password a warning will be displayed and the changes will not be saved. -
Page 39: Control / Command
User Manual “Instreamer“ - V3.17 - 25th July 2011 Only one user can log in at a time. Further connections will be refused while one user is logged To log out click on the “Logout” link next to the “HOME” icon in the menu bar. -
Page 40: Level 4 To 6 (User)
User Manual “Instreamer“ - V3.17 - 25th July 2011 Level 4 to 6 (User) Enter up to 24 characters to secure the access to customized web pages in 3 levels. Intended for advanced users only, for details see the “Instreamer Technical Documentation”. -
Page 41: Additional Features
An example of the resulting XML is as follows: <CiscoIPPhoneExecute> <ExecuteItem URL="RTPMRx:239.1.1.25:20480"/> <ExecuteItem URL="http://192.168.11.170/listen.xml"/> </CiscoIPPhoneExecute> listen.xml The Instreamer Own Name is copied to the Title in the listen.xml file as in the following resulting XML example: <CiscoIPPhoneText> <Title>Instreamer_1</Title> <Prompt>Press Exit to stop listening</Prompt>... -
Page 42: 4Reverting To Factory Defaults
User Manual “Instreamer“ - V3.17 - 25th July 2011 4 Rever ting to factor y defaults Click the button. Click on the button to enter the defaults page. You will see the following screen: Click on “Factory defaults” to revert all settings except “Network configuration”... -
Page 43: Hard Default Settings
“Reset” button has to be pressed for about 5 seconds while the Barix Instreamer is powered. Note: Use this method if a connection to the Barix Instreamer cannot be established. This can happen if you once have set a Static IP address, switched off “SonicIP”... -
Page 44: 5Rebooting The Device
User Manual “Instreamer“ - V3.17 - 25th July 2011 5 Rebooting the device Click the button. Click on the button to enter the reboot page. You will see the following screen: Click “Reboot the device” to restart the Barix Instreamer. -
Page 45: 6Updating The Device
• In the menu on the left side click on “downloads” • In the center column select select the appropriate device (Instreamer or Instreamer 100) and click on the name of the device. • Click in the section “Firmware” on the “Instreamer Update Kit”... -
Page 46: Serial Rescue
User Manual “Instreamer“ - V3.17 - 25th July 2011 6.2 Serial Rescue The “Serial Rescue” procedure loads the entire firmware and resets the device to factory default settings (current configuration is overwritten). It is therefore helpful to note the current setting. - Page 47 User Manual “Instreamer“ - V3.17 - 25th July 2011 STEP 1 Open your web browser STEP 2 Type in the IP address of the Barix device and press Enter • Example: “192.168.0.12” STEP 3 Click the button. STEP 4 Click on the button to enter the update page.
- Page 48 User Manual “Instreamer“ - V3.17 - 25th July 2011 STEP 5 Click on “Please click here to continue” to launch the update process. The device will restart in a special mode called “Boot loader” and the following screen appears showing a number counting down from 4 to Upon start up the following screen appears.
- Page 49 User Manual “Instreamer“ - V3.17 - 25th July 2011 STEP 6 Click on "Browse..." to select the file you want to update. The file is named compound.bin located in the folder “update_rescue”. Select the file and click on the “Open” button.
- Page 50 User Manual “Instreamer“ - V3.17 - 25th July 2011 STEP 7 Attention: If you load the wrong file the device will not work and the “Serial Rescue Procedure” must be applied! Click on “Upload” to start the upload process which will take approximately 2 minutes.
- Page 51 User Manual “Instreamer“ - V3.17 - 25th July 2011 STEP 8 Click on the update link and then click on the "Reboot" button in the following window: If you do not see the “Reboot” button then click the “Browse” button.
- Page 52 User Manual “Instreamer“ - V3.17 - 25th July 2011 STEP 9 After the device has rebooted click on the “here” link to reload the main page. The device is now ready for configuration according to your needs (see chapter 3 Device Configuration).
- Page 53 IP address to identify its location or address on the network. Example: 192.168.2.10 IPzator Barix IPzator™ technology is designed for the purpose that the Barix device can create its own IP address according to the network structure in case it can’t receive one from your network.
- Page 54 User Manual “Instreamer“ - V3.17 - 25th July 2011 Ping Ping is a basic Internet program that lets you verify that a particular IP address exists and can accept requests. Example: ping 192.168.2.10 SonicIP Barix SonicIP ® technology is designed to vocally announce the Barix devices current IP address.
-
Page 55: 8Legal Information
All mentioned trademarks belong to their respective owners and are used for reference only. Barix, Exstreamer, Instreamer, SonicIP and IPzator are trademarks of Barix AG, Switzerland and are registered in certain countries. For information about our devices and the latest version of this manual please visit www.barix.com.
Need help?
Do you have a question about the Instreamer and is the answer not in the manual?
Questions and answers