Table of Contents
Advertisement
Quick Links
Advertisement
Table of Contents

Related Manuals for Baumatic OMBRA6SS


Summary of Contents for Baumatic OMBRA6SS
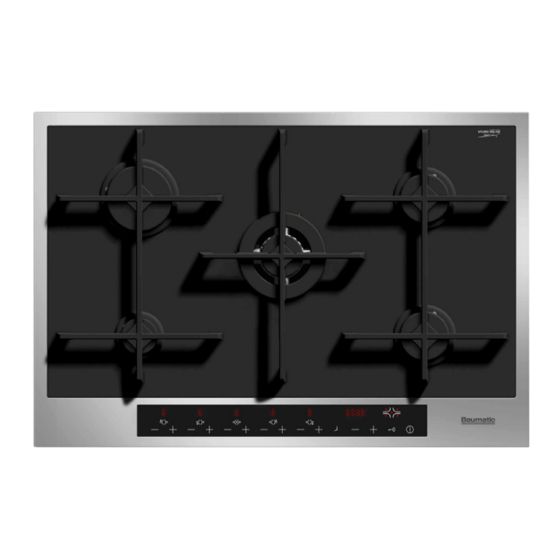
- Page 1 OMBRA6SS/BL/W/R 75 cm Touch control gas 1 el...
- Page 2 User Manual for your Baumatic OMBRA6SS/BL/W/R 75 cm touch control gas hob NOTE : This User Instruction Manual contains important information, including safety & installation points, which will enable you to get the most out of your appliance. Please keep it in a safe place so that it is easily available for future reference;...
-
Page 3: Table Of Contents
Contents Enviro nmental note mportant safety information 5 – 7 pecifications 8 – 10 Product and aperture dimensions Product specifications Standard accessories Electrical details Gas details Control panel Gas hob surface layout sing the gas hob 11 - 17 Before first use Setting the time of day Switching the hob on Automatic ignition with flame failure device... -
Page 4: Enviro Nmental Note
The packaging materials that Baumatic uses are environmentally friendly and can be recycled. o Please discard all packaging material with due regard for the environment. -
Page 5: Important Safety Information
You should not use this appliance to store items on or as a work surface. o No modifications to the appliance are permitted by Baumatic Ltd. o You should not store or place flammable or highly flammable liquids/materials on top of or near the appliance. Items made from aluminium, plastic or plastic film should also be kept away from the appliance, as they may fuse to the surface. - Page 6 Child Safety o Baumatic strongly recommend that babies and young children are prevented from being near to the appliance and not allowed to touch the appliance at any time. During and after use, all surfaces will be hot. o If it is necessary for younger family members to be in the kitchen, please ensure that they are kept under close supervision at all times.
- Page 7 If the appliance is being used in a Leisure Accommodation Vehicle, the requirements of N 721 MUST be followed. o Baumatic Ltd. DO NOT recommend that this appliance is installed on any type of marine vessel. Declaration of conformity This appliance complies with the following European Directives: -73/23/EEC dated 19/02/1973 Low Voltage Directive.
-
Page 8: Specifications
Specifications Product dimensions: Aperture dimensions: Depth: 500 mm Depth: 480 mm Width: 740 mm Width: 560 mm Height: 48 mm Product specifications: o 1 x 3.80 kW triple crown (wok) burner o 1 x 3.00 kW rapid burner o 2 x 1.75 kW semi-rapid burner o 1 x 1.00 kW auxiliary burner o Touch control operation o Electronic timer... -
Page 9: Electrical Details
Electrical details Rated Voltage: 220 – 240 Vac 50 - 60 Hz Supply Connection: 3 A (double pole switched fused outlet with 3mm contact gap) Max Rated Inputs: 0.006 Mains Supply Lead: 3 core x 0.75mm² (Type RR-F <HAR> marked) Gas details Connection: Rp ½... -
Page 10: Control Panel
Control panel 1) ON / OFF button 2) Safety lock button 3) Timer minus button 4) Timer plus button 5) Timer and clock selection button 6) Timer / clock display 7) Cooking zone display 8) Gas control plus button 9) Gas control minus button 10) Cooking zone position indicator 11) Cooking zone timer selection / cooking zone position LED 12) Safety lock activation LED... -
Page 11: Using The Gas Hob
Using the gas hob Before first use IMPORTANT: You should clean the hob surface (see “Cleaning and maintenance” section). Setting the time of day Each time the power supply is cut off, the time displayed by the hob clock must be reset. o After initially powering the hob, the number 0.00 will appear on the timer display (6) with a flashing decimal point. -
Page 12: Switching The Hob On
Switching the hob on o The hob can be switched on by pressing the ON / OFF button (1) and holding it down for at least two seconds. o Once activated, the five displays related to the burners will show level 0, which indicates that the cooking zones are off. -
Page 13: Switching Off A Cooking Zone
o To obtain a continuous variation of the power level simply hold down the plus or minus button of the selected cooking zone and release it once the display shows the desired level. You can choose between 1 – 7 levels. o By selecting level 0, you will switch the burner off. - Page 14 o Once the desired number is reached, press the timer button (5) to confirm and the minute numbers will start to flash. To set the minutes follow the same steps used for the hours. The minutes can be set between a minimum of 01 and a maximum of 59. o Each burner can be programmed for a maximum time of 9 hours and 59 minutes.
-
Page 15: Releasing A Blocked Burner
Otherwise contact the Baumatic Customer Care Department. o The burner can be released by pressing the relevant minus button and the safety lock button (2) simultaneously for at least two seconds. -
Page 16: Deactivating The Safety Lock
Deactivating the safety lock o To unlock the keypad, press the safety lock button (2) and the plus button (8) for burner 1 simultaneously for at least two seconds. o The safety lock is deactivated when the decimal point in the burner power level display turns off. -
Page 17: Pan Stand
Dry the appliance by rubbing the surface with a soft, clean cloth. o We would recommend that an appropriate stainless steel cleaner and polish is regularly used on the stainless steel surfaces of this appliance (OMBRA6SS only). -
Page 18: Cleaning The Hob Burners
Cleaning the hob burners The hob burners should be cleaned once a week or more frequently if they get soiled. o IMPORTANT: Make sure that the hob surface, pan stands and hob burners have cooled before you attempt to touch them. o Remove the hob burners by pulling them upwards and away from the hob top. -
Page 19: Installation
Installation of Domestic Gas Cooking Appliances (if necessary, BS 5482 Installation of Domestic LPG Appliances) o BS 5440 Installation of Flues and Ventilation for Gas Appliances o Baumatic Ltd Installation Instructions Positioning The adjacent furniture must be able to withstand a minimum temperature rise of 85°C above the ambient... -
Page 20: Unpacking The Appliance
50 mm clearance around the appliance and between the hob surface and any combustible materials. Unpacking the appliance When unpacking the appliance please check that the following items are contained within the packaging: 1 x Baumatic hob 5 x Pan stands Burner assemblies Instruction manual Baumatic warranty card... -
Page 21: Installing The Appliance
Installing the appliance o If the hob is installed without an oven below it, place a separating panel made from an appropriate material at a minimum distance of 10 mm below it. o If the hob is installed over an oven, place a separating panel at a minimum distance below... - Page 22 o Cut a hole in the worktop that corresponds with the diagram below: o Carefully turn the hob upside down and place it on a cushioned mat. o Apply the sealing strip (A) provided around the edge of the appliance. o The protective covering must be removed from both sides.
-
Page 23: Gas Connection
Conversion for use on LPG and other gases must only be undertaken by a qualified person. For information on the use of other gases, please contact the Baumatic Advice Line. -
Page 24: Ventilation Requirements
Baumatic’s guarantee and lead to prosecution under the regulations quoted above. o In the UK, GASSAFE registered installers are authorised to undertake the installation and service work, in compliance with the above regulations. Ventilation requirements... -
Page 25: Gas Safety (Installation And Use) Regulations
o Remember that the quantity of air necessary for combustion must never be less than 2m³/h for each kW of power (see total power in kW on the appliance rating plate). Gas Safety (Installation and Use) Regulations IMPORTANT: The appliance MUST be connected to the gas supply by use of a ½”... -
Page 26: Gas Adjustment (Conversion To Lpg)
Gas adjustment (Conversion to LPG) work must carried GASSAFE registered engineer. IMPORTANT: Always isolate the hob from the electricity supply before changing the injectors and/or adjusting the minimum flow of the burners. o Remove the pan-stands, burners and flame spreaders (A). o Unscrew the injector (B) and replace it with the stipulated injector for the new gas supply (see table below). -
Page 27: Minimum Flow Adjustment For Hob Gas Taps
o IMPORTANT: The minimum flow adjustment process must be completed before the appliance is next used. o To activate the procedure for selecting the combustible gas used, turn on the hob but keep the burners off. o Press the minus button for burner 1, minus button for burner 2 and the minus button for the timer all at the same time for at least two seconds. -
Page 28: Displaying The Inner Hob Temperature
o During the regulation procedure, the power level display will indicate if the set minimum corresponds to the factory setting, otherwise a flashing value will be displayed if the gas flow rate is higher or lower than the presetting. o To confirm the desired minimum flow rate, press the timer button. -
Page 29: Electrical Connection
Replacing the mains supply cable If the mains supply cable is damaged, then it must be replaced by an appropriate replacement which can be obtained from the Baumatic Spares Department. The mains supply cable should be replaced in accordance with the following instructions: o Switch the appliance off at your mains supply. -
Page 31: My Appliance Isn't Working Correctly
B so both burners will be ignited. o Detecting the presence of a parasite flame for more than ten seconds in a burner for which ignition is not requested, the electronics will create a general shutdown state. Solution: Contact the Baumatic Ltd customer care helpline. - Page 32 o The burner was shut down more than five times in fifteen minutes or the release procedure was repeated for five consecutive times during a fifteen minute period. Solution: Wait fifteen minutes before carrying out the key release sequence: o The burner can be released by pressing the relevant minus button and the safety lock button (2) simultaneously for at least two seconds.
- Page 33 Or any installation other than the one specified by Baumatic Ltd. has been completed. Please refer to the conditions of guarantee that appear on the warranty card that you receive with the appliance.
-
Page 34: C Ontact Details
Czech Republic Baumatic CR spol s.r.o. United Kingdom Průmyslová zóna Sever 696 Baumatic Ltd., 460 11 Liberec 11 Baumatic Buildings, Czech Republic 6 Bennet Road, Reading, Berkshire +420 483 577 200 RG2 0QX United Kingdom www.baumatic.cz Sales Telephone Slovakia (0118) 933 6900 Baumatic Slovakia, s.r.o.
Need help?
Do you have a question about the OMBRA6SS and is the answer not in the manual?
Questions and answers