Table of Contents
Advertisement
Quick Links
Maintenance
Screen Cleaning
■
Periodically clean the screen surface using ammonia-free cleaning wipes (Marshall Part No. V-HWP-K). A clean micro-fiber cloth
can also be used using only non-abrasive and ammonia-free cleaning agents. Do not use paper towels. Paper towel fibers are
coarse and may scratch the surface of the polycarbonate faceplate or leave streaks on the surface. Antistatic and fingerprint
resistant cleaning agents are recommended. Do not apply excessive pressure to the screen to avoid damaging the LCD.
Faceplate Dusting
■
Dust the unit with a soft, damp cloth or chamois. Dry or abrasive cloths may cause electrostatic charge on the surface, attracting
dust particles. Neutralize static electricity effects by using the recommended cleaning and polishing practice.
Warranty
Marshall Electronics warranties to the first consumer that this V-MD902 LCD monitor will, under normal use, be free from
defects in workmanship and materials, when received in its original container, for a period of one year from the purchase date.
This warranty is extended to the first consumer only, and proof of purchase is necessary to honor the warranty. If there is no
proof of purchase provided with a warranty claim, Marshall Electronics reserves the right not to honor the warranty set forth
above. Therefore, labor and parts may be charged to the consumer. This warranty does not apply to the product exterior or
cosmetics. Misuse, abnormal handling, alterations or modifications in design or construction void this warranty. It is considered
normal for a minimal amount of pixels, not to exceed three, to fail on the periphery of the display active viewing area. Marshall
Electronics reserves the option to refuse service for display pixel failure if deemed unobtrusive to effective use of the monitor by
our technicians. No sales personnel of the seller or any other person is authorized to make any warranties other than those
described above, or to extend the duration of any warranties on behalf of Marshall Electronics, beyond the time period
described above. Due to constant effort to improve products and product features, specifications may change without notice.
Marshall Electronics, Inc.
El Segundo, CA 90245
Tel: (800) 800-6608 / (310) 333-0606 • Fax: 310-333-0688
www.LCDRacks.com
32
1910 East Maple Ave.
•
sales@lcdracks.com
Marshall Electronics
Model No.
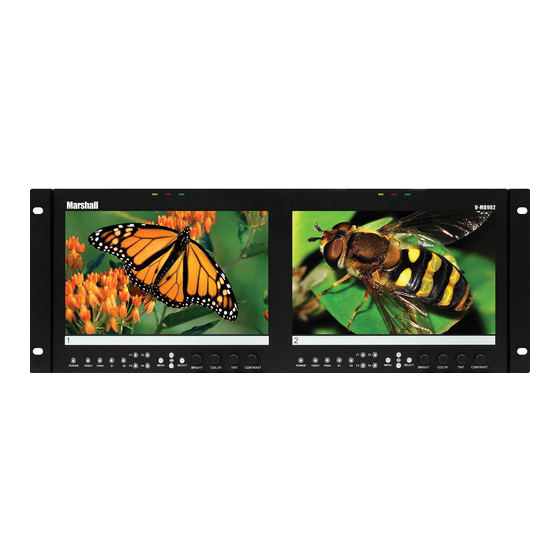
Dual 9" 3RU High Resolution Rack Mount Monitor with Modular Inputs/Outputs
Operating Instructions
V-MD902
Edition 1 Revision 9P
Advertisement
Table of Contents

Related Manuals for Marshall Electronics V-MD902


Summary of Contents for Marshall Electronics V-MD902
-
Page 1: Operating Instructions
Warranty Marshall Electronics warranties to the first consumer that this V-MD902 LCD monitor will, under normal use, be free from defects in workmanship and materials, when received in its original container, for a period of one year from the purchase date. - Page 2 Dimensions...
- Page 3 Table of Contents Specifications PANEL Installation and Initial Setup ------------------------------------------------------------------------------------------------------5 ■ TALLY Hardware Interface (HD-15) Screen Size 9” Diagonal ■ Top and Front Panel Features ----------------------------------------------------------------------------------------------------7 Display Area (h x v) 193.920 x 116.352 mm Activation requires contact closure of pin to ground Rear Panel Features-----------------------------------------------------------------------------------------------------------------8 Pixels 1280 x 768...
- Page 4 4) Click on the POWER, MENU or DISPLAY buttons that you wish to control. Scan Network Use the Scan Network button to scan for any other Marshall Electronics MD monitor connected on your network. The results will show up in the SELECT MONITORS TO CONTROL box.
-
Page 5: Installation And Initial Setup
■ ■ System The V-MD902 can be mounted in any standard EIA 19” equipment rack. The attached rack ears can be angled to provide the user This shows the System firmware version of your monitor. control over the viewing angle. Adequate ventilation is required when installed to prevent possible damage to the monitor’s internal components. - Page 6 The radio buttons allow for customization of tally lights to be used by the monitor. Network Tab Network Configuration ■ Remote Enable Select whether you would like to be able to access a particular monitor’s web page or web functions from another monitor on the same network or only through the current monitor’s web page.
-
Page 7: Top And Front Panel Features
■ Tally Source Top and Front Panel Features Use this row to determine the current source for the LED tally lights on each individual panel. Use the drop down menu to select between the different tally sources. ■ LED Tally Use this to turn the physical LED Tally lights ON or OFF. -
Page 8: Rear Panel Features
Video and YPbPr Inputs / Outputs included power supply, damage may result. Please use the pin out diagram in the Specifications section. The V-MD902 has Video (CVBS) and YPbPr inputs and active ■ Text Color loop-through outputs. See the Compatible Input Formats Tally Input Connector Use this row to change the color of the text in the Text String field. -
Page 9: Compatible Input Formats
Compatible Input Formats ■ Pixel-to-Pixel The following video standards are supported by the V-MD902: Use this row to set the current state of the Pixel-to-Pixel feature of the monitor. Pressing one of the boxes under each Screen type will either turn Pixel-to-Pixel mode OFF or ON. -
Page 10: Input Module Installation
Input Module Installation Network Control Page This MD Series monitor allows you to fully control all settings via a Lan100 Ethernet port on the rear of the monitor. Simply 1. Remove Power From Unit connect the MD Series monitor to your network with an Ethernet patch cable and access the monitor’s Host Name or IP Address ... -
Page 11: Main Menu And Navigation
MAIN MENU AND NAVIGATION ■ Remote Enable Use this setting to allow the monitor to be controlled by other monitors on a V-MD Network. Choose Global to allow access from any monitor or choose Own Webpage Only to only allow the monitor’s web page to control the monitor. ■... -
Page 12: System Information Submenu
• USER (Adjustable Color Bias and Gain) ■ On-Screen Tally • Linear (No processing is applied to the panel) Use the On-Screen Tally option to turn the On-Screen tally ON or OFF. Use this setting to enable monochrome mode. Only the luminance of the image will be displayed as a grayscale picture. ■... -
Page 13: Marker Configuration Submenu
Disable Monochrome mode. IMD & TALLY CONFIGURATION Enable Blue Check Field mode and adjust the Color button so that the outermost bars (white and blue) appear to match in brightness. Composite NTSC only: Adjust the Tint button until the third bar from the left (cyan) and the third bar from the right (magenta) appear to match in brightness. -
Page 14: Function Presets Submenu
■ Contrast / Backlight This feature is not applicable to the V-MD902 monitor. ■ Load Setup Select this menu item to reset all adjustments and menu settings to the factory default configuration or to one of the user configured presets. -
Page 15: System Configuration Submenu
Use this option to change the curtain color on the monitor. This curtain color is what you see when there is no signal input to the monitor. ■ Splash Screen Use this option to enable or disable the Marshall Electronics Inc. splash screen seen when the monitor is first powered on. ■ Freeze 0% Background 100% Background Use the Freeze function to “freeze”... -
Page 16: Filter Configuration Submenu
FILTER CONFIGURATION SUBMENU ■ False Colors This monitor has a false color filter to aid in the setting of camera exposure. As the camera Iris is adjusted, elements of the image will change color based on the luminance or brightness values. This enables proper exposure to be achieved without the use of costly, complicated external equipment.
Need help?
Do you have a question about the V-MD902 and is the answer not in the manual?
Questions and answers