
Related Manuals for Intelix DIGI-44B


Summary of Contents for Intelix DIGI-44B
-
Page 1: Operation Guide
DIGI-44B Installation and Operation Guide Rev 140813 8001 Terrace Ave Phone: 608-831-0880 Suite 201 Toll-Free: 866-462-8649 Middleton, WI 53562 Fax: 608-831-1833... -
Page 2: Important Safety Instructions
Do not block the air ventilation openings. Only mount the equipment per Intelix’s instructions. Use only with the cart, stand, table, or rack specified by Intelix or sold with the equipment. When/if a cart is used, use caution when moving the cart/equipment combination to avoid injury from tip-over. -
Page 3: Table Of Contents
Static IP assignment via TCP/IP ...................... 16 DHCP IP assignment via TCP/IP ...................... 18 Web Control ..............................19 Logging into the DIGI-44B via Web Browser.................. 19 Changing the Password to the Web Control.................. 20 RS232 and TCP/IP Commands ........................21... - Page 4 DIGI-44B Installation Guide TCP/IP Connection ......................... 21 DIGI-44B Command Protocol ......................21 Troubleshooting ............................24 Matrix does not power on ......................24 Cannot view video ......................... 24 Cannot hear surround sound audio ....................24 Cannot view 3D content ........................ 24 Technical Specifications ..........................
-
Page 5: Overview
Intelix HDMI matrix switchers. The DIGI-44B has dual outputs on each output port, allowing the same signal to be routed to the HDMI connector and a remote destination with an HDBaseT receiver. The HDBaseT ports support 1080p HDMI video with audio, bi-directional wide-band IR, matrix control via IR and HDCP compliance. -
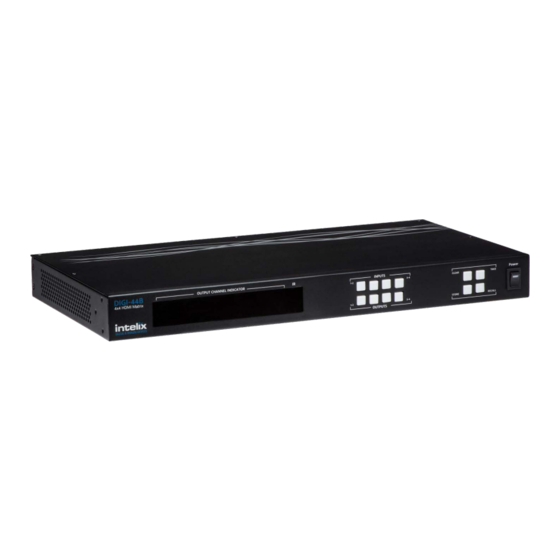
Page 6: Front Panel
4 - Power Switch –Switch to toggle the power to the matrix. 5 - Rack Ears – Optional rack ears for rack mounting the DIGI-44B in an equipment rack. 6 - Chassis Feet –Factory installed feet for shelf top installations. -
Page 7: Rear Panel
8 - EDID DIP switches - select the EDID management mode. 9 - DC Power Input – 12vDC/5a power inlet. 10 - IR Extended Input – input for extending the local IR input. IR Remote The included IR remote performs routing functions available on the front panel of the DIGI-44B. -
Page 8: Installation Instructions
Rack Mounting Instructions The DIGI-44B requires one rack unit (1 RU) of space. At least 2 inches of free air space is required on both sides of the DIGI-44B for proper side ventilation. Avoid mounting the DIGI-44B near a power amplifier or any other source of significant heat. -
Page 9: Edid Management
The matrix also features an EDID copy mode that can be used when other EDID’s do not meet the installation requirements. The default EDID for the DIGI-44B is 1080p with stereo audio. All EDID modes are outlined in the table below:... -
Page 10: Front Panel And Ir Remote Operation
DIGI-44B Installation Guide Front Panel and IR Remote Operation Basic Routing To set a single route using the front panel of the DIGI-44B: 1. Press the desired input button (source). 2. Press the desired output button (display). 3. Front panel will flash the New Input Number. -
Page 11: Ir Remote Operation
DIGI-44B Installation Guide IR Remote Operation The IR remote includes buttons for Next Input, Previous Input, and selection of a specific input. 1. Determine which output you wish to change. 2. On the determined output, select the desired input number. -
Page 12: Ip Address Assignment
DIGI-44B Installation Guide IP Address Assignment The DIGI-44B ships from the factory with a default IP address of 192.168.0.178. You can change this IP address to a different static IP address or to DHCP using the DIGI-44B Docklight configuration file, which can be found on the Intelix website. -
Page 13: Dhcp Ip Assignment Via Rs232
DIGI-44B Installation Guide 6. Turn the power to the DIGI-44B on – after 5 seconds, the DIGI-44B will send some lines of information you can see in the communications window. This confirms that you are communicating properly. 7. In the “Send Sequences” window, press the Set IP (Use Wildcards) button. - Page 14 DIGI-44B Installation Guide...
- Page 15 5. Start Communication. 6. Turn the power to the DIGI-44B on – after 5 seconds, the DIGI-44B will send some lines of information you can see in the communications window. This confirms that you are communicating properly.
-
Page 16: Static Ip Assignment Via Tcp/Ip
2. Connect a network crossover cable (not included) between your computer and the DIGI-44B LAN Port. 3. Change the IP address of your computer to fit in the same subnet as the DIGI-44B current IP address. The unit’s default IP address is 192.168.0.178, so set your IP address to 192.168.0.177 for first time connection. - Page 17 [23] after the IP address you enter to signify the communication port. 8. Start Communication. 9. Turn the power to the DIGI-44B on – after 5 seconds, the DIGI- 44B will send some lines of information you can see in the communications window.
-
Page 18: Dhcp Ip Assignment Via Tcp/Ip
12. Verify that the IP address changed in the communication window. . *Note – it can take 5-10 seconds for the unit to report back the confirmed change. DHCP IP assignment via TCP/IP Setting the DIGI-44B to DHCP while connected via TCP/IP is not recommended. -
Page 19: Web Control
5. Clicking the buttons after each output changes the HDMI routing accordingly. *Note: Do not select “Update Firmware” unless instructed by Intelix Support to do so. This puts the unit into a bootloader mode, which can be cancelled by power cycling the DIGI-44B. -
Page 20: Changing The Password To The Web Control
DIGI-44B Installation Guide Changing the Password to the Web Control 1. Log into the Web Control utility by using the instructions above. 2. Click the “Change Password” link at the bottom of the Web Control screen. The following screen will appear: 3. -
Page 21: Rs232 And Tcp/Ip Commands
DIGI-44B Installation Guide RS232 and TCP/IP Commands RS232 Connection The RS232 control port requires a standard straight-through serial cable for operation. The default settings for the RS232 port are: 9600 baud 8 Data Bits 1 Stop Bit Parity = none... - Page 22 DIGI-44B Installation Guide Output 3 Commands Function Command Response Select Input 1 cir 5E<CR><LF> s30<CR><LF> The updated status for output 3. Represented as an ASCII string in the format of “sXY” where: Select Input 2 cir 06<CR><LF> s31<CR><LF> • X is the output channel Select Input 3 cir 05<CR><LF>...
- Page 23 DIGI-44B Installation Guide Misc. Commands Function Command Response Set IP Mode - DHCP dhc <CR><LF> “DHCP<CR><LF>” Set IP Mode - Static sip www xxx yyy zzz<CR><LF> ASCII string that includes the IP IP 192 168 001 114<CR><LF> address set by the command.
-
Page 24: Troubleshooting
DIGI-44B Installation Guide Troubleshooting Matrix does not power on Verify power outlet is active. Verify continuity in power cable. Cannot view video Copy EDID from output to input. Verify twisted pair cable does not exceed 70 meters. Disable CEC in source and display devices. -
Page 25: Technical Specifications
DIGI-44B Installation Guide Technical Specifications DIGI-44B I/O Connections HDMI Inputs Four (4) HDMI Type A Receptacle (1 per input) HDMI Outputs Four (4) HDMI Type A Receptacle (1 per output) HDBaseT Outputs Four (4) 8P8C port (Shielded RJ45) (1 per output) IR Input Four (4) 3.5 mm jack (TRS) (1 per input) -
Page 26: Digib-Emt
DIGI-44B Installation Guide DIGIB-EMT Signal Characteristics Wide-Band Infrared (IR) 30 KHz to 56 KHz at 5V DC reference Physical Characteristics Material, Emitter Housing Deep red translucent plastic Dimensions, Emitter Housing 6 mm x 9.5 mm x 15 mm (0.24 in. x 0.37 in. x 0.59 in.) Cable Length 2 m (6.56 ft) - Page 27 DIGI-44B Installation Guide This page intentionally left blank.
- Page 28 DIGI-44B Installation Guide Thank you for your purchase. Please contact us with your questions and comments. Intelix 8001 Terrace Ave, Ste 201 Middleton, WI 53562 Phone: 608-831-0880 Toll Free: 866-462-8649 Fax: 608-831-1833 www.intelix.com intelix@intelix.com...
Need help?
Do you have a question about the DIGI-44B and is the answer not in the manual?
Questions and answers