Table of Contents
Advertisement
Quick Links
NOTICE
The instruction manual, warranties and other associated documentation are subject
to change without notice. Hobbico assumes no responsibility for inadvertent errors
in this manual.
Heli-Max products are to be used by ages 14 and over.
Entire Contents © 2012 Hobbico
Instruction Manual
, Inc.
®
®
™
HMXE0820 HMXE0821
Advertisement
Table of Contents

Subscribe to Our Youtube Channel
Related Manuals for Heli-Max AXE100CP


Summary of Contents for Heli-Max AXE100CP
-
Page 1: Instruction Manual
The instruction manual, warranties and other associated documentation are subject to change without notice. Hobbico assumes no responsibility for inadvertent errors in this manual. Heli-Max products are to be used by ages 14 and over. Entire Contents © 2012 Hobbico ®... -
Page 2: Safety Precautions
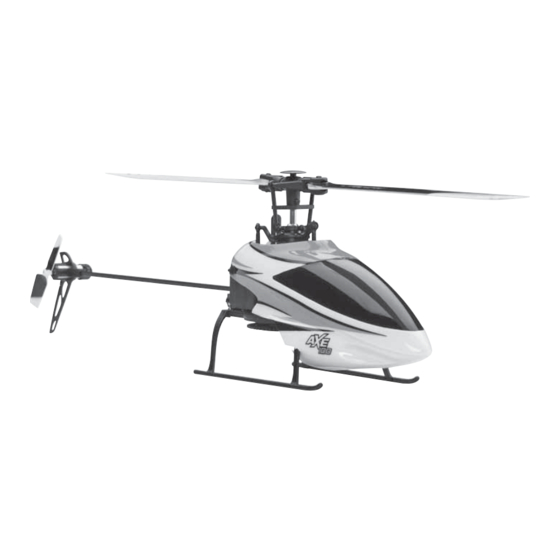
INTRODUCTION INTRODUCTION Thank you for purchasing the Heli-Max AXE 100 CP Helicopter. We are certain you will get many hours of enjoyment out of this model. If you should have any questions or concerns please feel free to contact us at: helihotline@ hobbico.com. - Page 3 Do not attempt to charge a battery if it is swollen or hot. ● It’s best to store your batteries at room temperature ● ALWAYS KEEP OUT OF REACH OF CHILDREN. NOTE: Heli-Max AXE battery packs are not cross compatible with Heli-Max NOVUS brand products.
-
Page 4: Warranty
In no case shall Heli-Max’s liability exceed the original cost of the purchased kit. Further, Heli-Max reserves the right to change or modify this warranty without notice. In that Heli-Max has no control over the final assembly or material used for final assembly, no liability shall be assumed nor accepted for any damage resulting from the use by the user of the final user-assembled product. -
Page 5: Operational Warnings
® OPERATIONAL WARNINGS OPERATIONAL WARNINGS ● Please allow a 10 minute cool down period after each flight so the motor controller and motor can cool down. Failure to do so may cause loss of control due to the controller overheating and shutting down. ●... - Page 6 position. Now you can safely connect the flight battery without having to worry about inadvertently moving the throttle stick. Once you place the model on the ground, verify that the idle up switch is off and the throttle stick has been moved to its lowest position, then simply turn the throttle hold off.
- Page 7 (See how this is done in the TX610 Manual) If you decide to do a system reset, the factory setup numbers to the Heli-Max AXE 100 CP are listed here. Below are the factory setup parameters for your AXE 100 CP Helicopter.
- Page 8 ® GETTING THE MODEL READY TO FLY GETTING THE MODEL READY TO FLY INSTALL BATTERIES IN THE TRANSMITTER Remove the battery cover from the back of the transmitter and install eight “AA” batteries into the transmitter. Double- check the polarity of each battery before replacing the battery cover.
- Page 9 Please turn the HOLD/FLAP and UP-1/GEAR functions off to continue. Now is a good time to make sure the electronic trim buttons on the transmitter are centered. We do not need to use them as the precision Heli-Max TAGS system controls all flight center trims.
-
Page 10: Install The Flight Battery
Slowly add power and observe the model. The AXE100 CP has the incredible Heli-Max TAGS system. The TAGS system takes care of all the center trim function the transmitter might have. Having said this, you do not need or want to move... -
Page 11: Basic Maneuvers
Hovering: Once the helicopter is in the air simply try to keep the helicopter in one spot. This will take some practice, remember, and wind has a big effect on the stability of the helicopter. Please take your time. Landing: Level the helicopter into a steady hover and slowly decrease power until the helicopter settles onto the ground. - Page 12 Here we have listed out the setup of a Futaba T6J transmitter below. It’s also worth noting that even though the AXE 100 CP uses 120 deg CCPM (Cyclic-collective-pitch-mixing) that with the Heli-Max TAGS system you must select always the 90 deg swash arrangement. In a Futaba...
- Page 13 Futaba TJ6 Parameter (PARA) HELI Reverse (REVR) Dual Rates (D/R) 100/80 100/80 140/100 Exponential (EXPO) Normal Throttle (N-TH) Normal Pitch (N-PI) Idle Up Throttle (I-TH) Idle Up Pitch (I-PI) Throttle Hold (HOLD) ON 0% Revolution Mixing (REVO) Gyro Mixing (GYRO) SW A Pos 55 Pos 55...
-
Page 14: Maintenance
® LINKING LINKING 1. Turn on the transmitter, making sure all the switches are in the back position. 2. Remove the canopy from the helicopter and locate the small black button on the corner of the PC board. 3. Place the transmitter in close proximity to the helicopter (1 to 2 feet away). 4. - Page 15 REMOVING THE MAIN BLADES Using the provided screwdriver, remove the main blade screw from the blade grip. Slide the blade out of the grip. REMOVING THE TAIL BLADE Hold the motor firmly and pry the tail blade off using your fingernail or small flat blade screwdriver.
-
Page 16: Removing The Landing Gear
REMOVING THE LANDING GEAR A total of 6 screws hold the battery tray/landing gear in place. Using the supplied screwdriver remove the 6 screws. REMOVING THE MAIN GEAR Using the supplied screwdriver remove the screw that holds the main gear in place. - Page 17 REMOVING THE MAIN SHAFT Remove the main gear. (Page 16) Loosen the two screws on the lock collar. Remove the ball links that attach the servo pushrods to the swashplate. Remove the links from the blade grips. Slide the main shaft and head from the helicopter and remove the screw from the head block and slide the main shaft away.
- Page 18 REMOVING THE FEATHERING SHAFT NOTE: You will have to provide a second small Phillips screwdriver for this step. Remove the blades from the blade grips. (Page 15) Place a screw driver in the end of each blade grip and engage the screws. Unscrew the screws and one of the two will remove.
- Page 19 REPLACING AN AFT SERVO Remove the canopy. Remove the link from the swashplate. Unscrew the screw from the attachment bar. Carefully slide off the servo tabs. Snake the wire out of the loom and unplug the servo. REPLACING THE FORWARD SERVO Remove the canopy.
-
Page 20: Exploded View
® EXPLODED VIEW EXPLOCED VIEW... -
Page 22: Replacement Parts
® REPLACEMENT PARTS REPLACEMENT PARTS KEY NO. NUMBER PART Feathering Shaft HMXE2100 Rotor Head HMXE2101 Rotor Head Rubber Dampers HMXE2102 Rotor Head Blade Grip Spacers HMXE2103 Blade Grips HMXE2104 Rotor Blades Axe 100 CP, Axe 100 FP, MD530 HMXE2105 Rotor Head Linkages HMXE2106 Main Shaft HMXE2107... - Page 23 1588 This product contains a lithium-polymer battery. Must be LiPo recycled or disposed of properly. LiPo Included radio system not fully compliant with French regulations.
Need help?
Do you have a question about the AXE100CP and is the answer not in the manual?
Questions and answers