Table of Contents
Advertisement
Quick Links
NOTICE
The instruction manual, warranties and other associated documentation are subject
to change without notice. Hobbico assumes no responsibility for inadvertent errors
in this manual.
Heli-Max products are to be used by ages 14 and over.
Manual Version 1.1
Entire Contents © 2013 Hobbico
AXE100 SS/SSL
Instruction Manual
HMXE0824 Axe 100
, Inc.
®
HMXE0825 Axe 100
™
SS Brushless RTF
SS Brushless Tx-R
®
™
HMXE0827 Axe 100
SSL W/LEDS RTF
HMXE0828 Axe 100
SSL W/LEDS Tx-R
Advertisement
Table of Contents

Related Manuals for Heli-Max AXE100 SS


Summary of Contents for Heli-Max AXE100 SS
-
Page 1: Instruction Manual
The instruction manual, warranties and other associated documentation are subject to change without notice. Hobbico assumes no responsibility for inadvertent errors in this manual. Heli-Max products are to be used by ages 14 and over. Manual Version 1.1 HMXE0824 Axe 100... -
Page 2: Safety Precautions
For the latest technical updates or manual corrections to the AXE100 SS/SSL visit the Heli-Max web site at www.helimax-rc.com. Open the “Helicopters” link, and then select the AXE100 SS or AXE 100SSL helicopter. If there is any new technical information, changes or important updates to this model a “tech notice”... -
Page 3: Battery Warnings
Hobby Services at 217-398- 0007 to learn the proper way to dispose of your battery. NOTE: Heli-Max AXE battery packs are NOT cross compatible with Heli-Max NOVUS brand products. CHARGE WARNINGS ●... -
Page 4: Warranty
In no case shall Heli-Max’s liability exceed the original cost of the purchased kit. Further, Heli-Max reserves the right to change or modify this warranty without notice. In that Heli-Max has no control over the final assembly or material used for final assembly, no liability shall be assumed nor accepted for any damage resulting from the use by the user of the final user-assembled product. -
Page 5: Controller Specifications
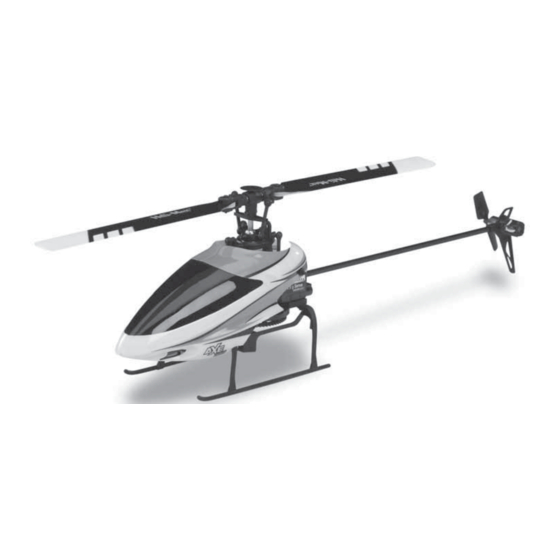
GENERAL HELICOPTER SPECIFICATIONS Management: Collective Pitch, 120 degree CCPM, TAGs control Motors: Brushless main motor, brushed tail motor Empty Weight: 47.8g (1.69oz) Weight RTF: 60.1g (2.12oz) Blade Length: 105mm (4.13”) Tail Rotor Diameter: 38mm (1.5”) Overall Length: 312mm (12.3”) Height: 81mm (3.18”) Width: 52mm (2.04”) Gear Ratio: 8:1 MOTOR SPECIFICATIONS (1412 Brushless Motor) - Page 6 ® TRANSMITTER (RTF Model) TRANSMITTER (RTF Model) Please fully read the transmitter manual included with your helicopter to learn more about how to use and adjust your TX610. IMPORTANT TRANSMITTER FUNCTIONS The Throttle Hold Switch (HOLD/ FLAP) is used to disable the power output of the motor but has no effect on the other controls.
- Page 7 (See how this is done in the TX610 Manual.) If you decide to do a system reset, the factory setup numbers to the Heli-Max AXE100 SS/SSL are listed here. Below are the factory default parameters (Model Memory 8) for your AXE100 SS/SSL Helicopter.
- Page 8 ® GETTING THE MODEL READY TO FLY GETTING THE MODEL READY TO FLY INSTALL BATTERIES IN THE TRANSMITTER Remove the battery cover from the back of the transmitter and install eight “A A” bat ter ies into the transmit ter. Double - check the polarity of each batter y before replacing the battery cover.
-
Page 9: Install The Flight Battery
Now is a good time to make sure the electronic trim buttons on the transmitter are centered. We do not need to use them as the Incredible Heli-Max TAGS™ system controls all flight center trims. - Page 10 LINKING LINKING Your AXE100 SS/SSL RTF comes with the transmitter pre-linked to the helicopter. The Tx-R version requires you to complete this using your transmitter and an Anylink. Also, if you need to link or re-link for any reason, here is the proper procedure to do so.
- Page 11 This includes the Futaba 6EX, 7C, T6J, TJ8 as well as others. We have listed the setup of a Futaba T6J transmitter. It’s also worth noting that even though the AXE100 SS/SSL uses 120 degree CCPM (Cyclic- collective-pitch-mixing), with the Heli-Max TAGS system you must select the 90 degree swash arrangement.
- Page 12 ™ We have also included a basic setup for Spektrum users as well. AXE 100 SS/SSL / Spek DX6i AILE ELEV THRO RUDD GYRO PITC Low 1 5 High Type HELI Reverse Dual Rates (D/R) 100/80 100/80 100/100 Exponential (EXPO) Pos 20 Pos 20 Travel Adjustment...
- Page 13 During “spool up” It is important to note that the torque of the main blades can cause the helicopter to rotate slightly clockwise. This is normal. Your AXE 100 SS/SSL has the incredible Heli-Max TAGS system. The TAGS system takes care of all center trim function the transmitter. Having said this you do not need, or want, to move or adjust the trim buttons during flight.
- Page 14 So you are getting comfortable in fast forward flight? Well, now it’s time to slowly progress into aerobatics. Your AXE100 SS/SSL is more than capable of full aerobatic performance. Once you are in forward flight start using the idle up switch.
-
Page 15: Maintenance
® MAINTENANCE MAINTENANCE TOOLS NEEDED ● Small screwdriver (provided) ● Soldering iron We will describe a few simple repairs that you can do to your helicopter. We will list them as “removing” with the understanding that to reassemble one just follows each step again from the bottom up. - Page 16 REMOVING THE MAIN BLADES AXE SS Using the provided screwdriver remove the main blade screw from the blade grip. Side the blade out of the grip. REMOVING THE MAIN BLADES AXE SSL Using the supplied screwdriver remove the main blade screw from the blade grip.
-
Page 17: Removing The Landing Gear
REMOVING THE TAIL BLADE Hold the motor firmly and pry the tail blade off using your fingernail or small, flat blade screwdriver. Use your finger to press the new blade in place. NOTE: When reinstalling, do not force the blade tight against the motor. REMOVING THE LANDING GEAR A total of 6 screws hold the battery tray/ landing gear in place. - Page 18 REMOVING THE MAIN GEAR AXE SSL After removing the landing gear, scrape away any adhesive holding the wires to the solder lugs. Unsolder the two wires from the gear contact posts. Using the supplied screwdriver, remove the screw that holds the main gear in place. Slide the main gear away, carefully snaking the two wires though the center hole.
- Page 19 REMOVING THE FEATHERING SHAFT NOTE: You will have to provide a second small phillips screwdriver for this step. Remove the blades from the blade grips as described above. Place a screw driver in the end of each blade grip and engage the screws. Unscrew the screws and one of the two will remove.
- Page 20 REPLACING THE FORWARD SERVO Remove the canopy. Remove the link from the swashplate. Unscrew the two screws from each side of the servo mount. Snake the wire out of the loom and then unplug the servo. REMOVING THE TAIL BOOM Remove the canopy.
- Page 21 Notes:...
-
Page 22: Replacement Parts
® REPLACEMENT PARTS REPLACEMENT PARTS... - Page 23 AXE100 CP/SS/SSL AXE100 CP/SS AXE100 CP/SS/SSL HMXE2103 HMXE2201 HMXE2104 Blade Grip Spacers (6) Main Blade (2) Blade Grip (2) AXE100 CP/SS/SSL AXE100 SS AXE100 CP/SS/SSL HMXE2106 HMXE2107 HMXE2116 Head Linkage (4) Main Shaft Bearing Set (6) AXE100 FP/MD AXE100 CP/SS/SSL...
- Page 25 HMXE2118 HMXM2042 HMXE2121 20 21 Servo Arm W / Link (3) TAGS Control Board Double Stick Tape (4) AXE100 CP/SS/SSL AXE100 SS AXE100 CP/SS/SSL HMXM2043 HMXE2204 HMXG8033 10A Control Board Main Gear Tail Boom W / Motor AXE100 SS/SSL AXE100 SS...
- Page 26 AXE100 SSL...
- Page 27 HMXE2197 HMXG8032 HMXM2044 Main Gear W / Contact Plate Tail Boom W / Motor and LED TAGS Control Board AXE100 SSL AXE100 SSL AXE100 SSL HMXE2196 HMXE2193 HMXE2200 LED Plate Contacts Rotor Blades W / LEDs Screw Set AXE100 SSL AXE100 SSL AXE100 SSL HMXE2194...
- Page 28 HMXE2186 Bullet Rotor Blade (2) AXE100 ALL HMXE2054 HMXE2050 HMXE2051 CNC Rotor Head (Assembled) CNC Metal Head Block CNC Metal Blade Grips AXE100 CP/SS/SSL AXE100 CP/SS/SSL AXE100 CP/SS/SSL HMXE2052 HMXE2053 HMXE2123 CNC Metal Swashplate Screw Set CNC Rotor Head Battery Plug Adaptor AXE100 CP/SS/SSL AXE100 CP/SS/SSL...
Need help?
Do you have a question about the AXE100 SS and is the answer not in the manual?
Questions and answers