GREAT PLANES Extra 300S Instruction Manual
Aerobatic .40-size arf
Hide thumbs
Also See for Extra 300S:
- Instruction manual (50 pages) ,
- Instruction manual (48 pages) ,
- Instruction manual (48 pages)
Table of Contents
Advertisement
Quick Links
Great Planes
®
Model Manufacturing Co. guarantees this kit to be free from defects in both material and workmanship at the date of
purchase. This warranty does not cover any component parts damaged by use or modification. In no case shall Great Planes'
liability exceed the original cost of the purchased kit. Further, Great Planes reserves the right to change or modify this warranty
without notice.
In that Great Planes has no control over the final assembly or material used for final assembly, no liability shall be assumed nor
accepted for any damage resulting from the use by the user of the final user-assembled product. By the act of using the user-
assembled product, the user accepts all resulting liability.
If the buyer is not prepared to accept the liability associated with the use of this product, the buyer is advised to return this
kit immediately in new and unused condition to the place of purchase.
While this kit has been flight tested to exceed normal use, if the plane will be used for extremely high stress flying, such as racing, the
modeler is responsible for taking steps to reinforce the high stress points.
READ THROUGH THIS MANUAL BEFORE
STARTING CONSTRUCTION. IT CONTAINS
IMPORTANT WARNINGS AND INSTRUCTIONS
CONCERNING THE ASSEMBLY AND USE OF
THIS MODEL.
© Copyright 1998
INSTRUCTION MANUAL
WARRANTY
P.O. Box 788
Urbana, IL 61803
(217) 398-8970
GPMZ0212 for GPMA1240 V1.0
Advertisement
Table of Contents

Related Manuals for GREAT PLANES Extra 300S


Summary of Contents for GREAT PLANES Extra 300S
-
Page 1: Instruction Manual
In that Great Planes has no control over the final assembly or material used for final assembly, no liability shall be assumed nor accepted for any damage resulting from the use by the user of the final user-assembled product. By the act of using the user- assembled product, the user accepts all resulting liability. -
Page 2: Table Of Contents
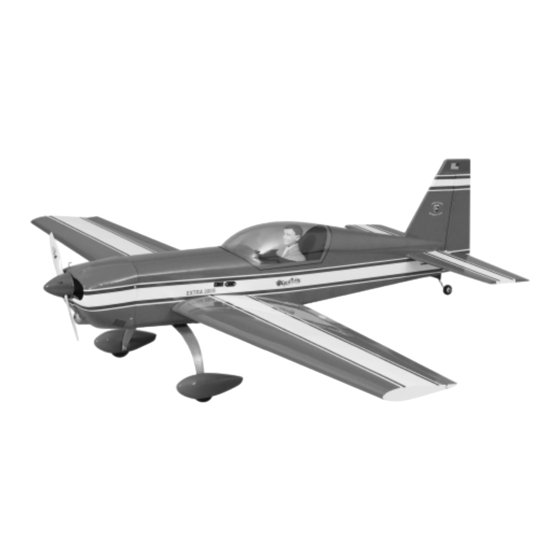
Mount the Canopy ...............17 Mount the Servo Tray ............17 Final Radio Installation ............18 The Great Planes Extra 300 ARF is a high performance Get Your Model Ready To Fly ..........19 sport airplane that closely resembles the full size Extra 300 Balance Your Model.............19... -
Page 3: Decisions You Must Make
3' Medium 3/32" Fuel Tubing (GPMQ4131) and replace them if they show signs of wear or fatigue. 1/4" Latex Foam Rubber Padding (HCAQ1000) Fueling System (Great Planes Top Fueler, GPMQ4160) (2) Flexible Cable Pushrod (GPMQ3702) Note: We, as the kit manufacturer, provide you with a 1/5 Scale Pilot (Williams Bros. -
Page 4: General Inspection
1. Closely inspect the fuselage, wing panels, rudder assembly and stabilizer assembly for damage. If you find any damage, contact the place of purchase, or Hobby Services at Great Planes for a replacement. 2. Eliminate any wrinkles you find in the covering by shrinking them away with a heat gun, then apply pressure to the area with a covering iron and a hot sock. -
Page 5: Parts List
Parts List Key# Description Parts Not Shown In Photo Fuselage Left Wing Panel w/Aileron Description Right Wing Panel w/Aileron Propeller Spinner (Red) Cowl 1" Fiberglass Tape Adjustable Engine Mount CA Hinge Strip (2" x 9") Wing Belly Pan Hardware Bag Canopy Decal Sheet Right Wheel Pant Halves... -
Page 6: Begin Construction
BEGIN CONSTRUCTION Fuelproof the Fuselage 1. Coat the firewall and all other bare wood around the firewall with fuelproof paint or 30-minute epoxy thinned with alcohol. Fuelproof other areas of bare wood in the fuselage that may be exposed to fuel or engine exhaust such as the fuel tank area and the front and back of the wing saddle. -
Page 7: Mount The Engine & Install The Fuel Tank
3. Mark the location of the engine mounting holes on the 7. Position one of the 1/2" x 1/2" x 3/4" hardwood cowl engine mount. We use the Great Planes Dead Center Engine mounting blocks at the aft edge of the left side of the cowl Mount Hole Locator (GPMR8130) shown in the photo. - Page 8 sandpaper. Cut four 1" pieces from the strip of glass cloth and glue them to the inside of the cowl over the mounting holes with 30-minute epoxy as shown in the photo. Set the cowl aside while the epoxy cures. Use a small amount of epoxy to fuelproof the cowl mounting blocks.
-
Page 9: Mount The Stab & Fin
“front end.” 1. Use a fresh #11 blade to trim the covering from the slots in the aft end of the fuse for the stab and fin. 20. Mount your fueling system. We used a Great Planes Easy Fueler ™... - Page 10 3. (Refer to this sketch while you align the stab.) Slide 6. Use a felt-tip pen to mark the sides of the fuselage on the stab into the fuse. Align the centerline you marked with the top and the bottom of the stab. Remove the stab from the slot for the fin.
-
Page 11: Mount The Landing Gear
to the stab. Apply a thin coat of epoxy to the bare wood on the TE of the fin. Do not disturb the fuselage until the epoxy has fully cured. Mount the Landing Gear 9. Now it’s time to glue the stab to the fuse. Position the stab in the fuse so the exposed balsa of the center section is visible. - Page 12 6. Mount a 1" tail wheel to the tail gear wire with a 3/32" wheel collar and set screw on both sides of the wheel. Secure the set screws with a drop of Great Planes Pro Threadlocker (GPMR6060) or similar thread locking compound.
-
Page 13: Join The Control Surfaces
17. Mount both wheel pants to the landing gear with a the hinges. If the hinges are difficult to install or don’t go in drop of Great Planes Threadlocker or similar thread locking far enough, carefully enlarge the hinge slots with a hobby compound and a 8-32 hex nut on both axles. -
Page 14: Hookup The Ailerons
Hookup the Ailerons ASSEMBLE, THEN APPLY 6 DROPS OF THIN CA TO CENTER OF HINGE, ON BOTH SIDES THE CA WICKS 1. If you haven’t already done so, install the rubber ALONG THE "TUNNELS" grommets and eyelets in your aileron servos. Pull the string TO THE ENTIRE out of one of the aileron servo compartments in the wing. -
Page 15: Install The Elevator Pushrod
Install the Elevator Pushrod 7. Mount the control horn to the aileron with two 2-56 x 5/8" screws and the nylon backing plate that was attached to the control horn. Slide a silicone retainer onto 1. Cut one of the pushrod dowels to a length of 19". each clevis. -
Page 16: Install The Rudder Pushrod
7. Cut the covering from the pushrod exit slots nearest the stab on both sides of the fuse. Install two outer guide tubes (from a Great Planes Flexible Cable Pushrod kit, GPMQ3702, not included) through the slots. Route the guide tubes through the fuse into the radio compartment. -
Page 17: Mount The Canopy
5. Turn the model upside down and lift the wing at the true the edges of the canopy for a finished appearance. balance point or place it on a Great Planes C.G. Machine (GPMR2400). If the nose tilts downward, your model is 3. -
Page 18: Final Radio Installation
6. Shift the radio components until you can get the model to balance as closely as possible to the indicated balance point. This isn’t the final C.G. check, but it will enable you to minimize (or altogether eliminate) the amount of lead required to finally balance your model. -
Page 19: Get Your Model Ready To Fly
All components should be in the model and it should be ready-to-fly with an empty fuel tank. Lift your model at the balance point or place it on your Great Planes C.G. Machine. Your balance point should be pretty close since we’ve already pre-balanced it. -
Page 20: Set The Control Throws
Use a No matter if you fly at an AMA sanctioned R/C club site or if ruler or a Great Planes Accu Throw Control Surface you fly somewhere on your own, you should always have Deflection Meter (GPMR2405) to measure the throws. -
Page 21: Balance Your Propellers
We use a Top Flite Precision Magnetic Prop Balancer ™ you complete them (that’s why we call it a check list!) (TOPQ5700) in the workshop and keep a Great Planes Fingertip Prop Balancer (GPMQ5000) in our flight box. 1. Fuelproof all areas exposed to fuel or exhaust residue... -
Page 22: Engine Safety Precautions
Keep loose clothing, shirt sleeves, ties, scarfs, long hair or 12. Fasten all servo horns to the servos with the screws loose objects away from the prop. Be conscious of pencils, included with your radio. screwdrivers or other objects that may fall out of your shirt or jacket pockets. -
Page 23: Radio Control
Insecure servo mounting. when its time to bring ’er in. The Great Planes Extra 300 ARF is a great flying semi- scale sport model that is smooth and predictable, yet is highly aerobatic. Compared to other sport planes its flight characteristics are docile and forgiving. -
Page 24: Flight Log
BUILDING NOTES Kit Purchased Date:________________________ Date Construction Finished: _________________ Where Purchased:_________________________ Finished Weight: __________________________ Date Construction Started: __________________ Date of First Flight: ________________________ FLIGHT LOG...
Need help?
Do you have a question about the Extra 300S and is the answer not in the manual?
Questions and answers