
Related Manuals for Digi Transport WR


Summary of Contents for Digi Transport WR
- Page 1 Cellular Routers Wireless WAN router / switch Installation Guide...
- Page 2 Digi International reserves the right to modify or revise all or part of this document, its contents, and any products described herein at any time without prior notification and shall not be responsible for any loss, cost or damage, including consequential damage, caused by reliance on these materials.
- Page 3 Please read all instructions before installing and powering the unit. You should keep these instructions in a safe place for future reference. The Transport WR uses a 5VDC/3A power supply. If the power supply shows signs of damage or malfunction, you should stop using it immediately, turn off the power and disconnect the power supply before contacting your supplier for a repair or replacement.
- Page 4 However, cellular-based products contain radio devices which require specific consideration. Please take the time to read and understand the following guidance. Digi International assumes no liability for an end user‟s failure to comply with these precautions.
- Page 5 Transport WR Series Installation Guide Preface This guide describes the installation procedure for the Transport WR family of routers. It is intended to provide sufficient information for you to be able to connect the unit to your terminal equipment and power supply. A complete reference guide to the software features that are available on the product is available separately in PDF format and can be downloaded from the Digi International website (www.digi.com).
-
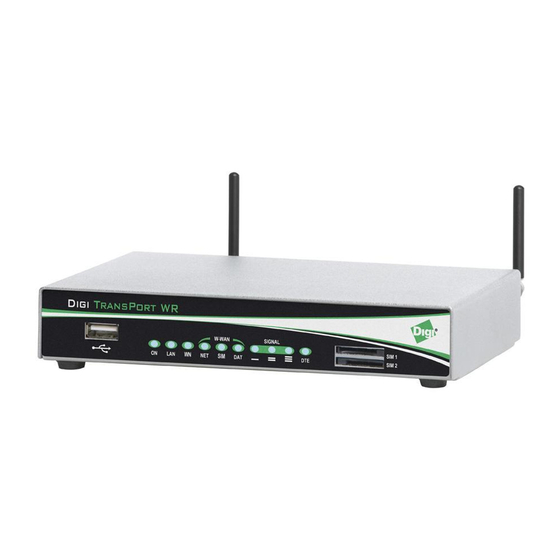
Page 6: Front Panel Features
Web interface. We recommend that you use the Web interface whenever possible. In addition to many standard LAN and Internet protocols such as PPP, the Transport WR series products provide a combination of powerful but easy to use configuration, management and diagnostic tools. - Page 7 Flashes to indicate that data is being transferred over the wireless network. SIGNAL For the Transport WR model, the three indicators labelled SIGNAL illuminate to indicate the GSM signal strength as follows: None illuminated < -113 dBm (effectively no signal) 1 LED illuminated >= -112 dBm and <= -87 dBm (weak)
-
Page 8: Rear Panel Features
W-WAN ANT. This SMA connector is used to fit the wireless antenna. The Transport WR-, E and H models are supplied with a single stub (MAIN) antenna which should be fitted to this connector. -
Page 9: Optional Features
Transport WR Series Installation Guide Reset button This is located on the underside of the unit near the front (just behind the DTE LED), and can be accessed through a 2.5mm hole using pencil tip or similar implement. Holding the reset button down gently for 5 seconds when the unit is powered up and operational (i.e. -
Page 10: Installation
Note: You will not be able to use the router for remote communication until you have subscribed to a suitable wireless network service. Transport WR family products are designed for indoor use (office or home). They should be positioned on a smooth, level surface making sure that there is adequate ventilation. - Page 11 Transport WR Series Installation Guide In both cases, the end of the SIM card with the chamfered corner should be inserted first. For SIM 1 the contacts should be face down. For SIM 2 the contacts should be face up.
- Page 12 Transport WR Series Installation Guide 3 - Configuration Once the router has been installed and powered up, the mobile interface should now be configured to communicate to the Internet or Wireless WAN provided by your wireless carrier. Note: The default IP address for the LAN 0 port is 192.168.1.1, with subnet of 255.255.255.0.
- Page 13 Transport WR Series Installation Guide Enter the APN of your mobile operator and SIM PIN if you have one. Click If the APN you are using does not require a PPP username and password, they you can skip this next step.
- Page 14 Depending on the wireless plan being used, you should be able to perform a test to a remote host or browse the Internet. By default, the Digi Transport should have issued your workstation an IP address of 192.168.1.100 via DHCP. DHCP will pass the proper default gateway and DNS server information.
- Page 15 Step 5 – Finish Device Configuration For greater description on all the features and settings available on the device, there is a comprehensive Reference Guide available on the Digi Support website (www.digi.com). Advanced Configuration: VPN: Configuration > VPN Routing: Configuration >Routing...
-
Page 16: General Specifications
Transport WR Series Installation Guide 3 General Specifications Model numbers Transport WR41-E, H, U, C Power supply 5V DC / 3A Dimensions / Weight W6.77 x D14.33 x H1.26 inches, 1.17 lbs Operating temp. range -4 to +122 degrees Fahrenheit, -20 to +50 degree Celsius... - Page 17 Transport WR Series Installation Guide WR41-C Dual Board 800 MHz Cellular / 1900 MHz PCs CDMA 1 x EV-DO Supports Rx diversity in both 800 MHz and 1900 MHz CDMA 1 x ATT 1 x EV-DO Revision A (IS-856-A) Forward link up to 31 Mbps Reverse link 1.8 Mbps...
Need help?
Do you have a question about the Transport WR and is the answer not in the manual?
Questions and answers