Advertisement
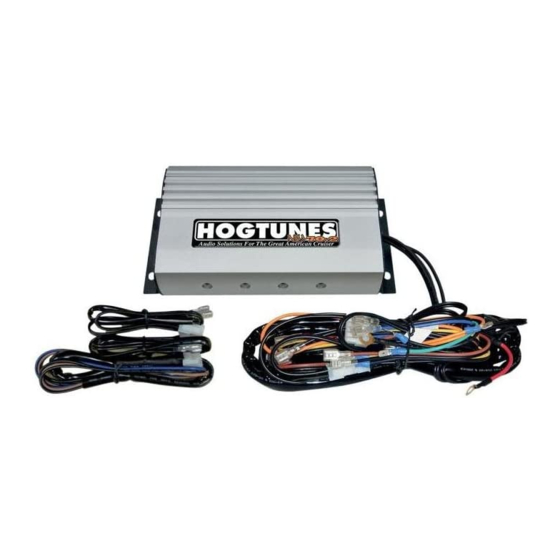
NCA70.2
NCA70.2
REV SERIES 140 WATT 2-CHANNEL AMPLIFIER
REV SERIES 140 WATT 2-CHANNEL AMPLIFIER
INSTALLATION MANUAL
INSTALLATION MANUAL
TABLE OF CONTENTS
Introduction .................................................................................. Page 2
Adjusting Your System ................................................................... Page 3
Mounting Considerations/Required Adaptor Kits .............................. Page 4
Which Speakers You Want to Power with NCA 70.2
• Fronts ............................................................................... Page 6
• Lowers ............................................................................ Page 11
• Rears .............................................................................. Page 16
INTRODUCTION
Thank you for choosing the Hogtunes NCA-70.2 Amplifier. Since positive word of
mouth is the best way to grow our business, we want your new system to work as
well as it was designed to. If you have any questions or concerns, we are here to
help.
All the required harnesses are included for powering front speakers, lowers speak-
ers, or rear speakers. Please note that you WILL have left over harnesses when
done! Do not cut any wires-follow the instructions. Wires left in the bike that are
not currently used will be required if you want to expand your system later on.
The NCA 70.2 is rated for 70 watts per channel using 2 ohm speakers, at
14.4volts at 1% Total Harmonic Distortion (THD). Although this amplifier makes its
highest power with 2 ohm speakers, if Hogtunes 5.75 ohm speakers, or 4 ohm
car speakers are used, there will still be a noticeable improvement in volume and
sound quality.
If you are not using Hogtunes speakers, chances are the speaker connectors are
not the same as stock. If you need to change connectors, please note that on all
Hogtunes products, the smaller connector (black wire) is positive (+).
If you are replacing a Hogtunes USA 24.2 you can use the existing 24.2 power
harness as long as you change the fuse at the battery to a 15 amp. Locate and cut
the "zip tie" that holds the 24.2 power and main audio in/out plug together.
Remove the 24.2 audio in/out harness and continue with the NCA 70.2
installation
2
Advertisement

Subscribe to Our Youtube Channel
Related Manuals for Hogtunes NCA70.2


Summary of Contents for Hogtunes NCA70.2
-
Page 1: Table Of Contents
Hogtunes products, the smaller connector (black wire) is positive (+). If you are replacing a Hogtunes USA 24.2 you can use the existing 24.2 power harness as long as you change the fuse at the battery to a 15 amp. Locate and cut REV SERIES 140 WATT 2-CHANNEL AMPLIFIER the “zip tie”... -
Page 2: Adjusting Your System
1) If this is the only amp in the system, or, if you already have a Hogtunes NCA hear your motorcycle system at speed if left on. Please take a minute and turn as much of these “features”... -
Page 3: Fronts
FRONT SPEAKERS (AND TWEETER POD IF PRESENT) Step #1: Remove the seat, and both wires (+ and -) from the battery. Step #2: Remove the outer fairing/headlamp assembly. Refer to a service manual if you need help with this. Note: A towel on the front fender can help prevent scratches or “dings”... - Page 4 ,and come out just behind the Step #1b: If this is the 2nd amp in the bike and the “1st” amp is a Hogtunes NCA gas tank. You MAY need to undo the back bolt of the gas tank and pivot 40.4.
- Page 5 Step #5: Routing the power harness - For Road Glide or Road Glide Ultra On the brake side of the bike, in front of the gas tank, on the side of the frames backbone, you will see a rectangular opening where a large wire harness, (and throttle/idle cables on 98-07 bikes) pass through from the fairing side of the bike.
-
Page 6: Lowers
1.1 .The amplifier needs to mount as far back on the radio as pos- Step #1b: If this is the 2nd amp in the bike and the “1st” amp is a Hogtunes NCA sible so the fairing can go back on. The 40.4. - Page 7 Step #2: Earlier in the install, you located the black four pin plug as part of the Attach the red wire to the positive (+) battery terminal, and the black wire to the lower harness, and plugged it into the “amplified output” on the amp. negative (-) battery terminal.
-
Page 8: Rears
REAR SPEAKERS Step #1: Remove the seat, and both wires (+ and -) from the battery. Step #2: Remove the outer fairing/headlamp assembly. Refer to a service manual if you need help with this. Note: A towel on the front fender can help prevent scratches or “dings”... - Page 9 Step #3a: Routing the power and rear speaker harness -For Standards, Street Glide, EG Classic, and Ultra Classic. Hogtunes 2CHSP and install in your bike. For 98-06 bikes, the harnesses will pass under the inner fairing where the throttle and idle cables pass through on the brake side of the bike.
- Page 10 8 wire “pigtail” that runs speaker wires add rear speakers to your bike if you’ve added a King Tour-Pak . Hogtunes rear ® into your rear speaker pods. You will see 2 shorter pairs of wires and 2 speaker pods come with a wire harness set-up for quick detach tour paks that will longer pairs.
- Page 11 This system has the incredible power of 2 - NCA 70.2 to your bike! The first amp This system uses a Hogtunes NCA-40.4 160 watt 4 channel amp and a NCA will run the fairing speakers, and HF-1 or HF2-RG Tweeter Pod (if present). The 70.2 for the ultimate in power! As shown below, the typical system would have 2...
-
Page 12: Warranty Information
WARRANTY INFORMATION Hogtunes speakers are warranted for a period of 20 years to the original pur- chaser. Hogtunes Amplifiers are warranted for 1 year from original purchase date. Proof of purchase is required for all warranty claims. All Warranty claims must be made through the dealer this product was originally purchased from.
Need help?
Do you have a question about the NCA70.2 and is the answer not in the manual?
Questions and answers