
Related Manuals for Hogtunes WILD BOAR AUDIO WBA 600.4


Summary of Contents for Hogtunes WILD BOAR AUDIO WBA 600.4
- Page 1 WBA 600.4 in s tA l l A t i o n m A nu A l IMPORTANT! A Radio “Re-Flash” Is Strongly Encouraged Before Proceeding. Please Read Manual For More Information...
- Page 2 Thank you for your purchase of Wild Boar Audio’s WBA 600.4 Amp. We want your new amp to work as well as it was designed to, so if you have any questions or concerns, please email: tech@hogtunes.com or call us during regular business hours at 705-719-6361 (EST). If you still need help, please consider a professional installation by your dealer.
-
Page 3: Before Getting Started
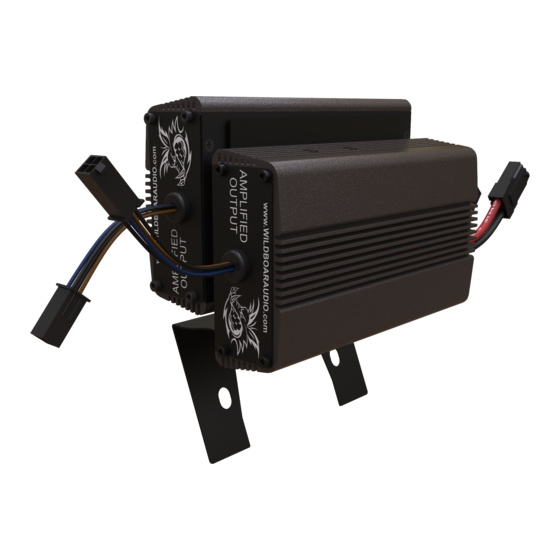
BEFORE gETTINg STARTEd The 2 separate amplifiers come pre-mounted to a plate which is used if you are installing onto FLH (Street Glide/Ultra) model bikes. There is a second plate in the box which is used when installing on a FLTR (Road Glide) model bike. This is a powerful amplifier and is made to work with 4 Ωohm speakers only. - Page 4 sect ion 1 street glide And ultrA instAllAtion...
- Page 5 se ct io n 1 street glide / ultrA instAllAtion Step #1: Remove the seat and both wires (+ and -) from the battery. Step #2: Remove the outer fairing/headlamp assembly and set aside. Refer to a service manual if you need help with this. Placing a towel or something similar can stop “dings”...
- Page 6 IMPORTANT In this install we refer to one amp as the “Master” and the other amp as the “Slave”. The Master always has the main input harness go into it, and is always the amp that powers the front fairing speakers. When installed, the amp on the left (brake side) of the bike is the Master amplifier.
- Page 7 Step #11: The last connection inside the fairing is to connect the second set of speakers in the system to the slave (right side) amplifier. If using Hogtunes lids, the harness included with the lids will work its way up the bike, and plug right into the amplified out “pigtail” on the slave (right side) amplifier.
- Page 8 Step #13: Attach the splitter harness’ brown wire to the negative (-) battery terminal and the amp’s red wire to the positive (+) battery terminal. The factory battery wires are also re-installed at this point. When attaching the power and ground wires, it is always a good practice to do the negative first.
- Page 9 • The “Radio Flash Selector” switch positions have been carefully tailored to “work around” the radio flashes, assuming you have the 4 speaker no amp flash, and assuming the speakers you are using can handle the power of this amp. For clarity, all Wild Boar Audio speakers were tested thoroughly with this amp.
- Page 10 Before re-installing outer fairing, turn front wheel to each extreme side making sure any wiring is not impeding the steering of the motorcycle. Failure to do so can result in serious injury or death! Re-install the fairing and the system is now ready to enjoy! Warranty information is at the back of this manual Please go to page 17 and record your amplifier’s serial numbers...
- Page 11 s e c ti on 2 roAd glide / roAd glide ultrA instAllAtion...
- Page 12 sec tio n 2 r oA d gl i de ins t A l lAt i on As the amplifiers come in the box, they are “stuck” to a mounting plate for use in FLH (Batwing) model bikes. “Peel” the amps off the plate and put that plate aside as it’s not required for FLTR (Road Glide) installations.
- Page 13 Step #1: Locate the “splitter” power harness included in this kit. You will see one end that has “ring terminals”, and the other end that “splits” and has 2 power connectors on it. Using the image on the bottom of Page 10 for reference, run the “ring terminal end”...
- Page 14 IMPORTANT In this install we refer to one amp as the “Master” and the other amp as the “Slave”. The Master always has the main input harness go into it, and is always the amp that powers the front fairing speakers. When installed, the amp on the left BACK SIDE of the plate is the MASTER AMplIFIER.
- Page 15 Step #10: The “Radio Flash Selector” switch positions have been carefully tailored to “work around” the radio flashes, assuming you have the 4 speaker no amp flash, and assuming the speakers you are using can handle the power of this amp. For clarity, all Wild Boar Audio speakers were tested thoroughly with this amp.
- Page 16 Step #11: The last connection to the Slave (front) amplifier is to the second set of speakers in your system. If using Hogtunes lids: the harness that comes with the lids will work its way up the bike, and plug right into the amplified out “pigtail”...
- Page 17 Step #14: Turn the stereo on and, at low volume, test to make sure the speakers are working. With everything working, re-install the seat making sure the amplifier’s “+” and “-” connectors are positioned in such a way that they will not bend or break when the rider’s weight is on the seat. Step #15: If you have not already done so, PLEASE get the radio on the bike flashed to “4 speaker no amp”.
- Page 18 WBA 600.4 Quick Reference Wiring diagram A) Factory Connectors Between Radio and Speaker Cabinets (pink/pink with black stripe) B) Master Amp Brake Side Input (Green Heatshrink) C) Master Amp Clutch Side Input (Yellow Heatshrink) D) Master Amp Brake Side Output (Blue Heatshrink) E) Master Amp Clutch Side Output (Brown Heatshrink) F) Master Amp Amplified Output “Pigtail”...
- Page 19 What Is not Covered: 1) Any expense related to the removal or re-installation of products. 2) Repairs to these products performed by anyone other than Hogtunes, Inc. 3) Subsequent damage to any other components. 4) Any product purchased from a non-authorized Wild Boar Audio dealer.
- Page 20 Original Equipment, which can be a distraction to the rider and/or passenger. Please use caution when adjusting or playing your stereo at high volume, especially in traffic. You are a valued customer so please: Ride Alert Arrive Alive! www.wildboaraudio.com www.hogtunes.com...
Need help?
Do you have a question about the WILD BOAR AUDIO WBA 600.4 and is the answer not in the manual?
Questions and answers