Advertisement
Table of Contents
- 1 Introduction
- 2 Purchaser's Reference Information
- 3 Table of Contents
- 4 Safety Instructions and Warnings
- 5 Assembly Instructions
- 6 Parts List
- 7 Pedal Locking Feature
- 8 How to Transport the Variable Stride Trainer
- 9 Console Operation Instructions
- 10 Monitoring Your Heart Rate
- 11 Heart Rate Monitoring Devices
- 12 Care and Maintenance
- 13 Parts List & Parts Diagram
- 14 Warranty Card
- Download this manual
Advertisement
Table of Contents

Related Manuals for LifeCore Fitness VST-V8


Summary of Contents for LifeCore Fitness VST-V8
- Page 1 User’s Product Manual LifeCORE VST‐V8 Variable Stride Trainer ...
-
Page 2: Introduction
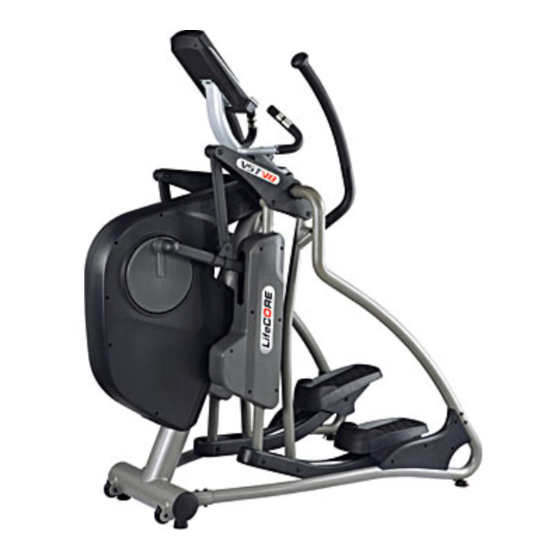
By choosing the VST-V8 Variable Stride Trainer, you have made a wise decision which will improve your health as well as your families. Being fit and healthy will improve your energy level and your quality of life. -
Page 3: Table Of Contents
Table of Contents Introduction……………………………………………………………………………………..... Purchaser’s Reference Information …………………………………………………………………. Table of Contents……………………………………………………………………………………… Safety Instructions and Warnings……………………………………………………………………. Assembly Instructions…………………………………………………………………………………. Parts List…………….. ………………………………………………………………………………… Pedal Locking Feature …..…………………………………………………………………………… How to Transport the Variable Stride Trainer ……………………………………………………… Console Operation Instructions ……………………………………………………………………… Monitoring Your Heart Rate …………………………………………………………………………. Heart Rate Monitoring Devices ………………………………………………………………………... -
Page 4: Safety Instructions And Warnings
Safety Instructions & Warnings The VST-V8 Variable Stride Trainer is designed and manufactured to meet or exceed all domestic and international safety standards. However, certain precautions need to be followed when operating any exercise equipment. General safety instructions: 1. It is important to consult your physician before any exercise program. -
Page 5: Assembly Instructions
Assembly Instructions Assembly Tips The LifeCORE VST-V8 is made from the best materials and has been tested and received a quality control review prior to its packaging to ensure the correct parts and proper fitting of each component. This machine was designed to limit the amount of assembly needed by a consumer. -
Page 6: Parts List
Page | 5 ... - Page 7 Step 1: (R) Side Supporting Tube Assembly Note: Use page 5 as a reference to help distinguish correct bolts for assembly, also add the supplied blue loctite in the owner’s manual bag to the threads of each user installed hardware for added support. A.
- Page 8 Step 3: (L) Side Supporting Tube Assembly and Main Frame Assembly Note: SAFETY REASONS: Additional assistance may be needed to help lift main frame assembly to the upright position. A. After assembling the right side supporting tube assembly, raise the main frame (A) to the upright position.
- Page 9 Step 5: Handlebar Assembly Tools Needed: 5mm Allen wrench Note: Add the supplied blue loctite in the owner’s manual bag to the threads of the (J10) bolts for added support. A. Only remove the two lower preinstalled (J10) screws from the left handle bar (E1). Slightly loosen the top (J10) bolts, but do not remove.
- Page 10 Overload switch will pop-up when the machine is electrically over loaded. Turn off the AC power switch and turn it back on to re- start the machine. Congratulations! Assembly for the VST-V8 Variable Stride Trainer is complete. Page | 9 ...
-
Page 11: Pedal Locking Feature
Pedal Locking Feature NOTE: FOR YOUR SAFETY, this Variable Stride Trainer is equipped with a pedal locking feature. The pedals can be manually disabled so that it cannot be moved accidently. Turn the knob left or right one click until you see the arrow point to the “LOCK OR UNLOCK” symbol. While the machine is in idle; NEVER in motion, turn the knob (A3) to “LOCK”... -
Page 12: Console Operation Instructions
Console Operation Instructions Please read the console operating instruction thoroughly and familiarize yourself with the console layout before choosing a workout. Going through the console first will give you ideas to the type of workout possibilities you can choose from. Below is the console layout and detailed operation instructions. - Page 13 DISPLAYS Speed & RPM Displays: Current speed will be indicated on the speed display. Current revolution per minute will be shown on the RPM scale. Dot Matrix Profile Window: Displays program profile during program setting and executing. The program profile will be different depending on which program is selected.
- Page 14 RESET Key: When program time is not counting, press the RESET key once to reset the computer back to the beginning of a program selection. All previous recorded value such as: time, distance, calories and pulse will be reset to 0, unless a user specifically entered a data value in the data display window prior to starting a program.
- Page 15 Programs When the console is first powered ON or the RESET button is pressed for 2 seconds, the console will enter an idle mode and the LCD display will light up every segment with a 2 second beep sound. It will then display “78.0”...
- Page 16 Program Selection: After user profile is setup, choose a program category that you would like to exercise with. There are 5 categories of programs: Manual, Program, User, H.R.C. & Watt. Rotate the adjustment dial to toggle thru the different program category and press the ENTER key to confirm. To go back to the program category selection mode, simply press the RESET key once;...
- Page 17 Program (Preset Profile Program): During category selection, turn the adjustment dial till program category selection is lit; press the ENTER key to enter preset profile programs. Rotate the adjustment dial to toggle through the 12 different preset programs. The dot matrix profile window will display programs number P01-P12 and then flash its preset profile.
- Page 18 H.R.C. Program: H.R.C. programs are based off of user profile information. Heart rate control programs are designed to keep you training at your chosen heart rate level. The console will adjust the resistance level automatically to ensure the target heart rate is achieved and maintained during the entire program.
- Page 19 Target heart rate program 55% max heart rate program No pulse input for 5 seconds Note: If there is no HR input for 5 seconds, the dot matrix will display (see above figure) until a valid signal is received. Hold on to the pulse hand grips or use a wireless heart rate transmitter. WATT Program (constant power program): Watt (power) is determined by speed &...
-
Page 20: Monitoring Your Heart Rate
Monitoring Your Heart Rate In order to obtain the greatest cardiovascular benefits from your exercise workout, it is important to work within your target heart rate zone. The American Heart Association defines this target as 60%- 85% percent of your maximum heart rate. Your maximum heart rate may be roughly calculated by subtracting your age from 220. -
Page 21: Heart Rate Monitoring Devices
• In some cases dampening your palms may help the sensors register a more stable heart rate. Chest Strap (Optional) The VST-V8 is equipped with a built-in wireless 122k receiver for your heart rate monitoring transmitter. Please contact your dealer to purchase a compatible 122k chest strap transmitter, if you would like to use more wireless heart rate features. -
Page 22: Care And Maintenance
Care and Maintenance The LifeCORE VST-V8 is made from the best materials and has been tested and received a quality control review prior to its packaging to ensure the correct parts and proper fitting of each component. This machine was designed to limit the amount of assembly needed by a customer. The amount of maintenance required is very little and very simple;... -
Page 23: Parts List & Parts Diagram
Parts List & Parts Diagram DESCRIPTION DESCRIPTION BELT WHEEL ∮360(J10) MAIN FRAME BELT 530(1355MM)*J8 SENSOR WIRE CONTROLLER WIRE NUT M8 KNOB OSCILLATING AXLE BASE (R) CONNECTION SLICE 40 (4T) OSCILLATING AXLE BASE (L) INCLINE MOTOR SENSOR WIRE HANDLEBAR SUPPORTING COVER INCLINE MOTOR CONTROLLER BOX BEARING 6905(TPX) END CAP ∮4”... - Page 24 CRANK SIDE DECORATION HOUSING SET(R) CLIP(S25) FRONT SIDE DECORATION COVER SCREW M8*20 A100 SCREW M4*20 AXLE ∮25*160MM A101 END CAP MAGNETIC ∮15*7 A102 SMALL CHAIN COVER (L) DESCRIPTION DESCRIPTION HANDLE PULSE RING ∮31.8*0.9T*19.5MM A103 MAIN CHAIN COVER (L) SPACER RING ∮32*30.4 A104 UPPER DECORATION HOUSING A105...
- Page 25 Page | 24 ...
- Page 26 Page | 25 ...
-
Page 27: Warranty Card
Product out of LifeCORE Fitness distribution or serviceable area. Any evidence of alteration, erasing or forgery of proof-of-purchase documents voids this Limited Warranty. - Page 28 LifeCORE Fitness Inc., and/or a copy of the proof of purchase, and serial number must be presented at time of service. If these items are not presented at the time of requesting parts or service LifeCORE Fitness Inc.
- Page 29 Customer Service Toll Free (888) 815‐5559 Mon‐Friday 7:30 ‐ 5:30 PT Service@LifeCOREfitness.com LifeCORE Fitness Inc. 2575 Pioneer Ave. Suite 101 Vista, CA 92081 Visit our website for assembly videos: www.LifeCOREfitness.com Page | 28 ...
Need help?
Do you have a question about the VST-V8 and is the answer not in the manual?
Questions and answers