Table of Contents
Advertisement
Advertisement
Table of Contents

Related Manuals for LifeCore Fitness LC-CD400


Summary of Contents for LifeCore Fitness LC-CD400
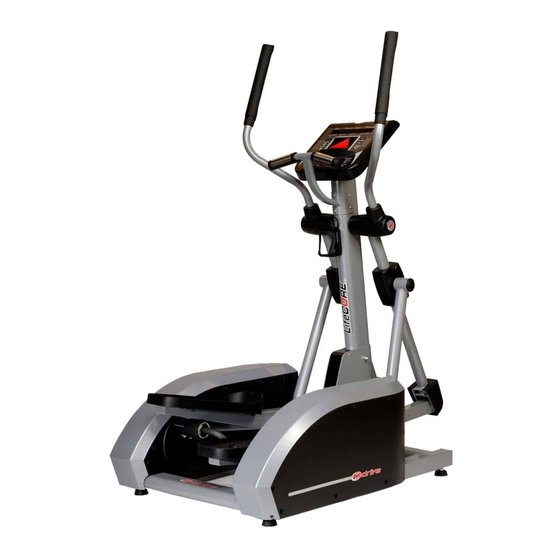
- Page 1 User’s Product Manual LifeCore LC-CD400 Center Drive Elliptical...
-
Page 2: Introduction
Should you have any questions, please contact us. Your feedback and ideas about your experience with LifeCore are also very important to us. Write to us at: LifeCore Fitness Inc. 2575 Pioneer Ave. Suite 101 Vista, CA 92081 We wish you lots of success and fun while training! Purchaser’s Reference Information... -
Page 3: Table Of Contents
Table of Contents Introduction……………………………………………………………………………………..... Purchaser’s Reference Information …………………………………………………………………. Table of Contents……………………………………………………………………………………… Safety instructions and Warnings……………………………………………………………………. Assembly Instructions ………………………………………………………………………………… Console Operation Instructions ……………………………………………………………………… Monitoring Your Heart Rate …………………………………………………………………………. Heart Rate Monitoring Devices ……………………………………………………………………… Care and Maintenance ………………………………………………………………………………. Warranty Card…………………………………………………………………………………………. Page | 2... -
Page 4: Safety Instructions And Warnings
Safety Instructions & Warnings The CD400 Elliptical is designed and manufactured to meet or exceed all domestic and international safety standards. However, certain precautions need to be followed when operating any exercise equipment. General safety instructions: 1. It is important to consult your physician before any exercise program. 2. -
Page 5: Assembly Instructions
Assembly Instructions Assembly Tips The LifeCore CD400 is made from the best materials and has been tested and received a quality control review prior to its packaging to ensure the correct parts and proper fitting of each component. This machine was designed to limit the amount of assembly needed by a consumer. Before assembly of your product, distinguish a proper and appropriate location for the unit where there is easy access to an electrical outlet with a surge protector. - Page 6 Hardware Bags - Locate all hardware bags for assembly. Bags will be labeled Figure 1 through Figure 11. Tools have been provided to assist with product assembly. If you are missing any parts, assembly bags or need assistance with assembly please call LifeCore Fitness at 1-888-815-5559.
- Page 7 Step 2: Tools Needed: Philips Screw driver: 2JAY 1) Locate bag labeled Figure 2. 2) Locate black metal cover. Note: First fasten screws at the bottom of the cover, next top and finally the middle. 3) (See Figure 2) Secure cover to main frame by using Qty.
- Page 8 Step 4: Tools Needed: 6mm Allen wrench: 2JC7 1) Locate bag labeled Figure 4. Note: Additional help may be needed to help align holes on top and bottom. 2) (See Figure 4) Lift and place left linkage handrail assembly onto shaft sleeve. Make sure all four bolts line up.
- Page 9 Step 6: Tools Needed: Philips screw driver: 2JAY Note: Do not over tighten M5X0.8-12 screw, this will damage bracket cover. 1) Locate bag labeled Figure 6. 2) Locate bracket covers. 3) (See Figure 6) Attach bracket cover to the handrail assembly by lining up the hole and using a Philips screw driver to tighten Qty.
- Page 10 Step 8: Tools Needed: Philips screw driver: 2JAY Note: Ensure that all wires are properly connected inside the console. Be careful not to pinch the wires. Wires only connect one way. 1) Locate bag labeled Figure 8. 2) Locate computer console. 3) (See Figure 8-1) Connect the white tip 7 pin computer cable wire into the white 7 pin connector on the board.
- Page 11 Step 9: Tools Needed: 4mm Allen wrench: 0J3P Note: Ensure that all wires are properly connected inside console tube. Be careful to not pinch wires. Addition help maybe needed to help line up holes to frame. 1) Locate bag labeled Figure 9. 2) (See Figure 9) Connect the pulse wires coming from...
- Page 12 Step 11: Tools Needed: Philips screw driver: 2JAY 1) Locate bag labeled Figure 11. 2) (See Figure 11) Secure bottle holder to console tube using Qty. two M5x0.8-12 screws. Use a Philips screw driver to tighten. Plug the AC adaptor into a power outlet and into the machine.
-
Page 13: Console Operation Instructions
Console Operation Instructions Please read the console operation instruction thoroughly and get familiar with the console layout. Practice using this console before you start in order to get a better understanding of the functions. Below is the console layout and detailed operation instructions. Make sure the console is powered-up before you start using this console. - Page 14 DISPLAYS If no key is pressed, no RPM or pulse is detected for 4 minutes; the console will shut down and enter “power save mode” to save power. To resume, simply press a key again. Dot matrix profile window: Displays program profile, heart rate bar (HR programs only), lap progress display and lap counter.
- Page 15 KEYS: There are 6 function keys for program operation. START: Pressing the START key once will execute the programs. Once a program has been selected, pressing the START key will activate the time and all data will start counting. ENTER/CLEAR key: Press ENTER key to confirm the program setting, selection or data entry.
- Page 16 press ENTER/CLEAR key at this time will confirm the age entry and begin workout. The range of age allowed is 10 – 99. Quick Start: When the message window displays “PRESS PROGRAM KEY TO BEGIN”, press the START key once will jump start the manual program with default values. The time will start counting down from 30 minutes and the resistance level will start with L1.
- Page 17 Interval Mountain: This program simulates gradually progressive interval training where the magnetic resistance gradually increases and decreases. Note: Higher intensity levels can provide effective cardiovascular training. Speed Training Interval: This program simulates interval training with more extreme levels of high and low magnetic resistance levels. Note: Higher intensity levels can provide effective cardiovascular training.
- Page 18 window will show “ABORT PROGRAM” for 3 seconds it will then interrupt the Heart Rate Control program and return to Program Mode. The console will check the user’s heart rate every 40 seconds and adjust the resistance level to maintain the heart rate goal. The message display will show messages to indicate your program progress: If your heart rate is within 5bpm to the target heart rate, the resistance will stay the same and message display will show “IN HR TARGET”...
-
Page 19: Monitoring Your Heart Rate
Monitoring Your Heart Rate In order to obtain the greatest cardiovascular benefits from your exercise workout, it is important to work within your target heart rate zone. The American Heart Association defines this target as 60%- 75% percent of your maximum heart rate. Your maximum heart rate may be roughly calculated by subtracting your age from 220. -
Page 20: Heart Rate Monitoring Devices
Fitness Safety: The Heart Rate chart indicates average heart rate zones for different ages. A variety of different factors (including medication, emotional state, temperature and other conditions) can affect the target heart rate zone that is best for you. Your physician or health care professional can help you determine the exercise intensity that is appropriate for your age and condition. -
Page 21: Care And Maintenance
Only use the appropriate power source, never use an adapter that is not certified for the unit, a wrong adapter will cause the electronics to overheat and malfunction. AC Adaptor DC 9V 1000MA In the unlikely event that the CD400 experiences a problem, please contact LifeCore fitness for advice toll free at 888-815-5559. Page | 20... -
Page 22: Warranty Card
If a product is shipped, delivered or transported to an area that is not a LifeCore Fitness Inc’s distribution area or is out of a serviceable area, it is the purchaser’s sole responsibility to find service and pay for any fees associated with servicing of a product out of LifeCore Fitness distribution or serviceable area. - Page 23 ATTACHED WARRANTY CARD WITHIN (10) DAYS OF PURCHASE TO REGISTER YOUR PRODUCT WITH LIFECORE FITNESS. THANK YOU FOR YOUR BUSINESS! PLEASE MAIL WARRANTY CARD TO: LIFECORE FITNESS, INC, 2575 Pioneer Ave. Suite 101. Vista, CA 92081. Phone (760)599-4555, Fax (760) 946-7602 or register online at lifecorefitness.com, Customer...
- Page 24 Customer Service Toll Free (888) 815-5559 Mon-Friday 7:30 - 5:30 PT Service@lifecorefitness.com Lifecore Fitness Inc. 2575 Pioneer Ave. Suite 101 Vista, CA 92081 Visit our website for assembly videos: www.lifecorefitness.com Page | 23...
Need help?
Do you have a question about the LC-CD400 and is the answer not in the manual?
Questions and answers