Table of Contents
Advertisement
Quick Links
Advertisement
Table of Contents

Related Manuals for Comelit 80153


Summary of Contents for Comelit 80153
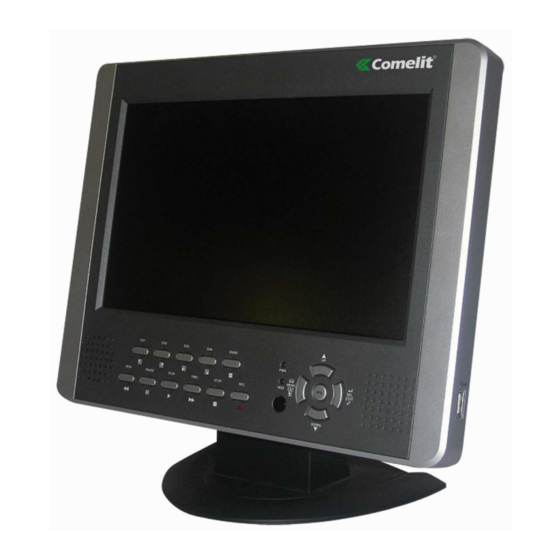
- Page 1 4 INPUTS STANDALONE DUPLEX DIGITAL VIDEO RECORDER WITH DISPLAY ART. 80153 Please read this manual thoroughly before use and keep it for future reference. Via Don Arrigoni, 5 24020 Rovetta S. Lorenzo (Bergamo) http://www.comelit.it – E mail: export.department@comelit.it...
-
Page 2: Explanation Of Graphical Symbols
Operation Manual – Art. 80153 (Version 1.1.6) WARNING TO REDUCE THE RISK OF FIRE OR ELECTRIC SHOCK, DO NOT EXPOSE THIS PRODUCT TO RAIN OR MOISTURE. DO NOT INSERT ANY METALLIC OBJECT THROUGH THE VENTILATION GRILLS OR OTHER OPENINGS ON THE EQUIPMENT. - Page 3 Operation Manual – Art. 80153 (Version 1.1.6) FCC COMPLIANCE STATEMENT FCC INFORMATIONS: THIS EQUIPMENT HAS BEEN TESTED AND FOUND TO COMPLY WITH THE LIMITS FOR CLASS A DIGITAL DEVICE, PURSUANT TO PART 15 OF THE FCC RULES. THESE LIMITS ARE DESIGNED TO PROVIDE REASONABLE PROTECTION AGAINST HARMFUL INTERFERENCE IN A RESIDENTIAL INSTALLATION.
-
Page 4: Important Safeguards
Operation Manual – Art. 80153 (Version 1.1.6) IMPORTANT SAFEGUARDS READ AND KEEP THESE INSTRUCTIONS Please read this manual thoroughly before use and keep it for future reference. CLEANING Unplug this equipment from the wall outlet before cleaning it. Use a mild household detergent, never use strong solvent. Clean the unit with a slightly damp soft cloth. -
Page 5: Table Of Contents
Operation Manual – Art. 80153 (Version 1.1.6) TABLE OF CONTENTS 1. INTRODUCTION ........................ 6 2. PHYSICAL UNIT ........................ 6 2.1. T ........................6 ANEL 2.1.1 Function Of The Top Panel..................6 2.1.2 Menu Interface......................6 2.2 F ......................... 8 RONT ANEL 2.3 R... - Page 6 Operation Manual – Art. 80153 (Version 1.1.6) 5.6.5 TIME SET ......................24 5.6.6 EVENT LIST ......................24 5.6.7 PTZ SETUP......................25 5.6.8 F/W UPGRADE ....................26 5.6.9 USB TEST ......................27 5.7 LANGUAGE ........................ 27 5.8 EXIT ..........................27 6. PLAYBACK WITH TIME SEARCH FUNCTION .............. 27 7.
-
Page 7: Introduction
Operation Manual – Art. 80153 (Version 1.1.6) 1. INTRODUCTION Art. 80153 system provides total video security solution for 4-channel digital surveillance system supporting duplex (simultaneous playback and record) functionality. Either front panel buttons or remote control unit or mouse can operate all DVR menu setting. - Page 8 Operation Manual – Art. 80153 (Version 1.1.6) AUDIO: “VOLUME”: 0~100. FUNCTION: Press the button “UP” or “DOWN” to change the display mode - “NORMAL & ZOOM” - of the LCD monitor. “ZOOM”: 16:9; 4:3. SYSTEM: In this menu interface, users can choose the video format of display.
-
Page 9: Front Panel
Operation Manual – Art. 80153 (Version 1.1.6) 2.2 Front Panel A series of button on DVR front panel make a system to operate its basic functions, such as recording, playback, fast-forward, reverse, etc. For more details about the DVR menu, refer to “... -
Page 10: Rear Panel
Operation Manual – Art. 80153 (Version 1.1.6) ⑦ PAUSE To pause the video playback, press the “PAUSE” button. Then the video displaying will be stopped. To continue playback, push the “PLAY” button. ⑧ MENU/ESC It displays menu option or go back to the previous. -
Page 11: Lateral Panel
Operation Manual – Art. 80153 (Version 1.1.6) ⑤ PS/2 MOUSE PORT Use this port for PS/2 mouse connection. If you have USB port mouse, use USB - PS/2 adapter to connect with this port. ⑥ SENSOR / ALARM / RS485 Sensor input You can use this sensor terminal block to install up to 4 motion sensors into DVR. -
Page 12: Remote Control (Optional)
Operation Manual – Art. 80153 (Version 1.1.6) 2.5 Remote Control (optional) 1. CH1 ↑ Select or enlarge CH1 or Move dome up 2. CH2 ↓ Select or enlarge CH2 or Move dome down 3. CH3 ← Select or enlarge CH3 or Move dome left 4. -
Page 13: Hardware Setup
Operation Manual – Art. 80153 (Version 1.1.6) 4. HARDWARE SETUP 4.1 IDE Hard Disk Drive Installation NOTE: Make sure that HDD jumper setting as “MASTER” Before installing hard drive, set jumper as “MASTER”. The master jumper setting varies depending on the hard drive manufactures. -
Page 14: Monitor Connection
Operation Manual – Art. 80153 (Version 1.1.6) 4.3 Monitor Connection To display video image from cameras on the monitor, the DVR’s video output signal should be transferred to your TV set or monitor. Connect a monitor at “VIDEO OUT” ports on DVR “VIDEO IN”... -
Page 15: Alarm Connection
Operation Manual – Art. 80153 (Version 1.1.6) * Only the corresponding channel will record when a sensor trips, (e.g. sensor one corresponds with channel one). (1) Normal-Close (2) Normal-Open (3) Normal Close & Open 4.6 Alarm Connection The DVR has an internal switch for sounding alarm. The switch is normally open, but when the sensor is triggered, the alarm is activated as well. -
Page 16: Setup
Operation Manual – Art. 80153 (Version 1.1.6) If users install a new hard disk drive, it will ask for HDD formatting before a system starts to run (Below Fig). Choose FORMAT option pressing “PLAY” button. 5. SETUP After installing a new hard drive on the system, user had better to format the hard drive first. - Page 17 Operation Manual – Art. 80153 (Version 1.1.6) The Admin can operate everything, the Operator can operate everything except examining user accounts and modifying its password level and the Guest can operate live video display and image playback. After system boot-up, hold a right mouse click button and there will be login window. Hold a left mouse click button to click the order of “Account”, and input correct account.
-
Page 18: Camera
Operation Manual – Art. 80153 (Version 1.1.6) The DVR Front Panel or Remote Control Press the “UP” or “DOWN” key on the DVR front panel or remote control to move the cursor. Press “SELECT” button on the front panel or remote control in order to change the settings. In the MAIN MENU, the cursor “... - Page 19 Operation Manual – Art. 80153 (Version 1.1.6) Press button 【ENTER】or hold a left mouse click button to click icon “►” to increase the record frame rate for each channel. Press button 【REC】or hold a left mouse click button to click icon “◄” to decrease the record frame rate for each channel.
-
Page 20: Alarm
Operation Manual – Art. 80153 (Version 1.1.6) 5.3 ALARM Using SELECT button or hold a left mouse button to click icon “◄” / “►” adjust parameters of each option. ALARM DURATION It sets the alarm duration time (in seconds) after alarm is activated. -
Page 21: Screen
Operation Manual – Art. 80153 (Version 1.1.6) MOTION AREA Use this option to select the range of motion detection area. Use the keypad button, remote control button or mouse click to assign the area. The keypad and mouse control instructions are below. -
Page 22: Audio
Operation Manual – Art. 80153 (Version 1.1.6) 5.5 AUDIO Make the record “ON” to enable sound recording when a microphone device is attached in AUDIO INPUT port on the system. Adjust volume for speaker and the intensity level of sound recording. To make the sound enabled for speaker, leave the mute “OFF”. -
Page 23: Hard Disk Setup
Operation Manual – Art. 80153 (Version 1.1.6) 5.6.1 HARD DISK SETUP OVERWRITE ENABLED If you choose YES, recording continues and overwrites previous recording when hard disk drive space is full. If you choose NO, the recording stops when the hard disk drive is full. -
Page 24: Account Setup
Operation Manual – Art. 80153 (Version 1.1.6) 5.6.2 ACCOUNT SETUP Only if the user log in the system at Admin level, the Account Setup allows the administrator to add new users, delete existing ones and modify the user’s name / password / level. -
Page 25: Keypad Tone
Operation Manual – Art. 80153 (Version 1.1.6) When password change succeed, user will see the below message blowing. When password change fail, user will see the below message blowing. 5.6.4 KEYPAD TONE Make the keypad tone “ON” or “OFF” to enable or disable keypad tone during operating. -
Page 26: Ptz Setup
Operation Manual – Art. 80153 (Version 1.1.6) To playback by EVENT LIST, using [UP]/[DOWN] or channel number (CH1 for Page Up or CH2 for Page Down) key on the front panel or remote control, select the event that you want to playback and press “PLAY”... -
Page 27: F/W Upgrade
Operation Manual – Art. 80153 (Version 1.1.6) Mouse function: Left Mouse: Click the icon “►” or “◄” to adjust value. Right Mouse: Previous. Preset setup: User must set preset at first. The address, protocol and baud rate of DVR is consistent with Dome’s. You can make use buttons to control dome and save the preset. -
Page 28: Usb Test
Operation Manual – Art. 80153 (Version 1.1.6) 5.6.9 USB TEST This option is testing purpose only. Users can check the compatibility of the USB memory stick for backup. 5.7 LANGUAGE Our system supports multi-language OSD. On the menu of “Language”, you can move the cursor to change it by pushing “SELECT”... -
Page 29: Backup Via Usb Memory Stick
Operation Manual – Art. 80153 (Version 1.1.6) Mouse Control: Hold a right mouse click button and left click the icon “►”. Then press the left mouse button to change the value of the playback start date & time and press the right mouse button. Then hold a left mouse button to click “Search”, the playback will start from the date &... -
Page 30: Recording Length
Operation Manual – Art. 80153 (Version 1.1.6) USB copy: Move the cursor to “USB copy” and press “SELECT” button or hold a left mouse click button to back up a stream of video data on USB memory stick. It will take a few minutes to write the video data on USB memory stick. The file size number is going up until it’s done with the message below. -
Page 31: Specifications
Operation Manual – Art. 80153 (Version 1.1.6) 9. SPECIFICATIONS ITEM DESCRIPTION NOTE Video Format NTSC / PAL Operation System None STAND-ALONE Camera Input Channel 4 channel Composite BNC Video Output Channel 1 channel Composite BNC Max. 30 frames/s NTSC Max 60 fps (Total) -
Page 32: Appendix
Operation Manual – Art. 80153 (Version 1.1.6) 10. APPENDIX 10.1 System connect sketch map 10.2 Fitting come along with art. 80153 Power adapter, power cord, user manual (this manual), USB drive CD. 10.3 Compatible USB stick for art. 80153 (tested). COMPANY MODEL SIZE SONY...
Need help?
Do you have a question about the 80153 and is the answer not in the manual?
Questions and answers