TC-Helicon VoiceLive 3 Reference Manual
Hide thumbs
Also See for VoiceLive 3:
- Quick manual (118 pages) ,
- Quick start manual (65 pages) ,
- Getting started (20 pages)
Table of Contents
Advertisement
Advertisement
Table of Contents

Related Manuals for TC-Helicon VoiceLive 3


Summary of Contents for TC-Helicon VoiceLive 3
- Page 1 English Manual...
-
Page 2: Table Of Contents
Basic Loop concepts and terms Entering and exiting Loop mode Your first loop The Utility menu Loop limits Product VoiceLive 3 Product (firmware) version 1.0 R70 Document Reference manual Document version / date 2014-03-29 VoiceLive 3 – Reference manual (2014-03-29) -
Page 3: Important Safety Instructions
Important safety instructions Important safety instructions VoiceLive 3 – Reference manual (2014-03-29) -
Page 4: Caution
When a cart is used, use caution when moving the cart/apparatus combination to avoid injury from tip-over. 13. Unplug this apparatus during lightning storms or when unused for long periods of time. VoiceLive 3 – Reference manual (2014-03-29) -
Page 5: Emc / Emi
– Connect the equipment into an outlet on a cir- cuit different from that to which the receiver is connected. – Consult the dealer or an experienced ra- dio / TV technician for help. VoiceLive 3 – Reference manual (2014-03-29) -
Page 6: Before You Begin
Before you begin Before you begin VoiceLive 3 – Reference manual (2014-03-29) -
Page 7: About This Manual
This reference manual will help you learn under- If you still have questions about the product af- To register your VoiceLive 3 using the VoiceSup- standing and operating your VoiceLive 3. ter reading this reference manual, please get in port software, launch VoiceSupport and click on touch with TC-Helicon Support: the ACCOUNT button. -
Page 8: Introduction
Introduction Introduction VoiceLive 3 – Reference manual (2014-03-29) -
Page 9: Design Concepts
We VoiceLive 3 is built on the fundamental concept learned how to remap one footswitch, you know recommend you treat your VoiceLive 3 like any of “layers”. From a design perspective, there are how to remap them all. - Page 10 Global setting, thinking you are only editing the current Setting Global to on links an effect to the set- Preset. With great power comes great respon- tings defined in the Global Preset sibility! VoiceLive 3 – Reference manual (2014-03-29)
- Page 11 8 bars long. In the past, and then add to things in real-time during per- you would have to record 8 bars of the “beat formance. box” segment in order for there to be “enough” VoiceLive 3 – Reference manual (2014-03-29)
- Page 12 Imagine your time-based vocal and guitar effects being perfectly in sync, without having to set up complex timing systems or tapping tempo on multiple devices. Everything just lines up! VoiceLive 3 – Reference manual (2014-03-29)
- Page 13 IEM solution. Using our included Guitar/ Headphone cable, you only use one cable to connect your guitar and headphones/IEM’s to the unit! VoiceLive 3 – Reference manual (2014-03-29)
-
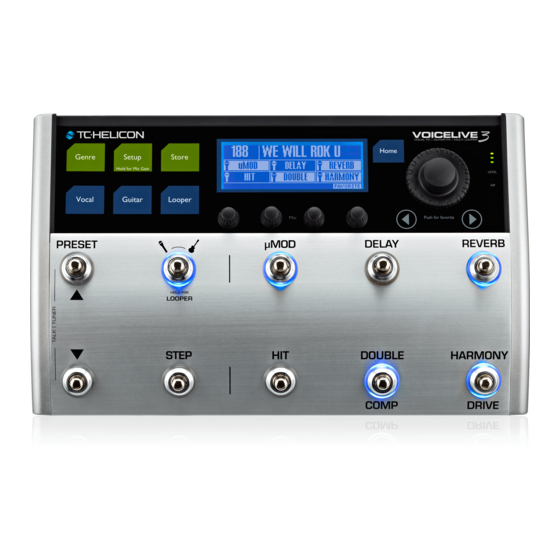
Page 14: Top Panel Overview
Push and hold the Setup button to enter the automated microphone and guitar gain setting mode. 3. Store button Use the Store button to store Presets. Tap once to activate the store procedure. Tap again to confirm. VoiceLive 3 – Reference manual (2014-03-29) - Page 15 (chord) information is where you can make changes received via Guitar, MIDI, Aux to any of the guitar effects for or RoomSense. the current Preset. For more in- formation, see “Editing the Guitar layer”. VoiceLive 3 – Reference manual (2014-03-29)
-
Page 16: Footswitches Overview
This is great for changing presets while addressing the audience to queue sounds for your next song. To exit Talk/Tuner, press any button other than Preset Up or Preset Down. For more information, see “Talk/Tuner Mode”. VoiceLive 3 – Reference manual (2014-03-29) - Page 17 Delay and Drive activated. If you were previously on the Vocal Layer, you would tap the Layer footswitch to move to the Guitar Layer, changing the footswitch LED color from blue to red. VoiceLive 3 – Reference manual (2014-03-29)
-
Page 18: Step/Μmod Footswitch
If you are using the current Preset, make sure and out. that it sounds the way you want it to before you enter Step management. For more information about Steps, see “Using Steps”. Adding a Step to a Preset VoiceLive 3 – Reference manual (2014-03-29) - Page 19 – To access tempo tapping, hold the Delay foot- switch. – Tap the footswitch in time with your song. A few taps are enough. – When you are happy with the tempo, stop tap- ping. VoiceLive 3 – Reference manual (2014-03-29)
- Page 20 Compressor on or off. On the Guitar layer, tap the Harmony/Drive foot- switch to turn the Drive effect on or off. Drive encompasses effects such as Boost, Boost & Drive and Drive. VoiceLive 3 – Reference manual (2014-03-29)
-
Page 21: Back Panel Inputs And Outputs
5. MIDI In 6. Footswitch (for Switch-3) In. You can also connect a second expression pedal here – see “Working with a second ex- pression pedal”. 7. Expression (pedal) In SWITCH-3 VoiceLive 3 inputs overview VoiceLive 3 – Reference manual (2014-03-29) - Page 22 MIDI Control Change messages. If you experience hum from your guitar amp or PA, try pressing the GRND LIFT switch, locat- ed between the Headphone out and the Left XLR output. VoiceLive 3 – Reference manual (2014-03-29)
-
Page 23: Diagram Legend
1/8 inch jack GRND Lift Mini USB USB Type A USB Type B Power Input 1/8 inch jack GRND Lift Mini USB USB Type A USB Type B Monitor Mix TRS and TS cables VoiceLive 3 – Reference manual (2014-03-29) -
Page 24: Diagrams
5. In a lot of cases, “what you hear” will be the same for both VoiceLive 3 headphone output and P.A. – but it can also be different. VoiceLive 3 – Reference manual (2014-03-29) -
Page 25: Voicelive 3 Overview
VoiceLive 3 overview VoiceLive 3 overview VoiceLive 3 – Reference manual (2014-03-29) -
Page 26: Getting Started - Setting Up
VoiceLive 3 fects. – A guitar or MIDI keyboard, if applicable – Watch the Craig’s Corner episode about con- – Headphones necting to a mixer: – The Guitar/Headphone cable that came with youtube.com/watch?v=qq0AOtafIjs your VoiceLive 3. VoiceLive 3 – Reference manual (2014-03-29) - Page 27 Stereo. – Press Home to exit. – When choosing Stereo, ensure the PA is ac- tually outputting a stereo signal. It’s common for a PA to have 2 speakers but still be mono. VoiceLive 3 – Reference manual (2014-03-29)
- Page 28 Output Mode is highlighted (white). – Turn the Mix Knob directly below the Out- put Mode box on the screen until the mode changes to Dual Mono. – Press Home to exit. VoiceLive 3 – Reference manual (2014-03-29)
- Page 29 PA. via a guitar amplifier, follow the diagram above, but connect only the Left XLR output from Voice- Live 3 to your PA and set the output mode to Mono. VoiceLive 3 – Reference manual (2014-03-29)
- Page 30 XLR outputs and Guitar loops will be sent out via the Guitar outputs. The Metronome can be heard in the XLR Main Mix and headphone mix or just the headphone mix, depending on your mix settings. VoiceLive 3 – Reference manual (2014-03-29)
-
Page 31: Quick Troubleshooting Tips
– Check your PA manual for details on how to check input levels. – Turn up channel input trims until you see signal. – (If you have a separate mixer/amplifier) Is the PA turned on? – Are the speakers connected? VoiceLive 3 – Reference manual (2014-03-29) -
Page 32: Getting To Know Voicelive 3
Hit, Double / Comp and Harmony / Drive on the Knob acts as a vertical scroll control. Use it to with us! currently active layer (Guitar or Vocal). navigate up or down through parameters and settings. VoiceLive 3 – Reference manual (2014-03-29) -
Page 33: Using Steps
Steps to that initial preset to cover the other sections of your song, in the or- der that they are needed. So, let’s assume that you have created the three different presets that represent your three song VoiceLive 3 – Reference manual (2014-03-29) -
Page 34: Using Preset Genres And Favorites
As described earlier, the Genre feature allows ply press the Control Knob down while on the along. It’s a much simpler way to manage several you to filter the Presets in VoiceLive 3 based on home screen. presets in a song! the musical genre or primary effect. - Page 35 Global Key/Scale off in order to As you see, NaturalPlay has you covered – no save a different Key/Scale per Preset. matter what your setup is. Setting Key and Scale VoiceLive 3 – Reference manual (2014-03-29)
- Page 36 Even if you play an instrument that could be used for NaturalPlay, you may want to try setting the VoiceLive 3 – Reference manual (2014-03-29)
- Page 37 µMod. Try a few of the effects together and see once for off. what it sounds like. HIT off HIT on. Note the additional (highlighted) effects Practice using HIT to turn the Harmony on and off at interesting points in the song. This skill is VoiceLive 3 – Reference manual (2014-03-29)
- Page 38 – Press the Home button. This will take you back to the main (or home) screen. Now, press the HIT button, just like you did be- fore. Notice how the blue light only comes on VoiceLive 3 – Reference manual (2014-03-29)
- Page 39 If you look at the top left corner of the screen, sounds/effects without leaving the Vocal layer. you should see HardTune there, µMod will be To control multiple Vocal and Guitar effects si- gone. multaneously without having to leave the cur- VoiceLive 3 – Reference manual (2014-03-29)
- Page 40 Change a guitar effect to Momentary mode as described in “Change a button from Latched to Momentary mode”. However, press the Guitar button instead of the Vocal button to begin the process. You are now in Guitar Edit mode, and VoiceLive 3 – Reference manual (2014-03-29)
- Page 41 µMod and Harmony with the single HIT button the next time you use the Preset. Preset 2 – HIT on – Press HIT. Notice that µMod (and Harmony) turns off. VoiceLive 3 – Reference manual (2014-03-29)
- Page 42 There’s also a “wrench” icon instead of a microphone – showing you that you are no longer just controlling Vocal effects. VoiceLive 3 – Reference manual (2014-03-29)
- Page 43 – but Delay comes back on with the Reverb. shot This may not be what you want. Store to (assigned to Mix Knob 34) Use Mix Knob 4 to select the Preset number where the current Preset will be stored. VoiceLive 3 – Reference manual (2014-03-29)
- Page 44 Use tapping to “get close” to the desired tempo and use the Preset – Turn HIT off. footswitches for fine-tuning. – Turn the effects on that you would like to use when HIT is off. VoiceLive 3 – Reference manual (2014-03-29)
- Page 45 HIT is pressed All the effect edit screens that you can access using these tabs have a similar structure. On top of each edit screen, you will find simple and VoiceLive 3 – Reference manual (2014-03-29)
- Page 46 Style you choose and should mony sound pretty darned good as they are. If you have got some audio engineering experience or own one of our other products, like VoiceLive 2, VoiceLive 3 – Reference manual (2014-03-29)
- Page 47 – Use the Control Knob to scroll down to the and switch to another Preset without storing, all (the factory default is 491), but you can make “Global” parameter. It should say “Off”. changes you made will be lost. your own. VoiceLive 3 – Reference manual (2014-03-29)
-
Page 48: Using The Mix Controls
Global Preset to the current Preset. – Set Global for this effect to off again. This “breaks the link” between Global and current Preset, allowing you to modify the set- tings locally. Main Mix controls VoiceLive 3 – Reference manual (2014-03-29) - Page 49 In the Guitar tab of the Setup Headphone Mix allows you to independently set generated by VoiceLive 3. This includes Har- menu, you will find a parameter called Output the signal levels for the headphones or IEM con- mony, Double and Choir.
-
Page 50: Tips And Tricks For Working With Layers And Effects
Guitar button (the blue one on the top panel) to enter and edit the Guitar effects. Editing Guitar effects while on the Vocal layer VoiceLive 3 – Reference manual (2014-03-29) - Page 51 Harmony mapped to both the µMod but- ton and the Harmony button (default). That’s OK – it just shows how remapping works. – Press the Home button to return to the Home screen. VoiceLive 3 – Reference manual (2014-03-29)
-
Page 52: Exp. Pedal Tab
– but not turn them off completely. To achieve this effect, you would If you are connecting an expression pedal, it Preset tab for the Guitar layer set Exp. Minpos to something higher than 0% must be calibrated. VoiceLive 3 – Reference manual (2014-03-29) - Page 53 There’s a De- lay Pan control in the Delay edit parameters too. Try panning the lead vocal to the far right and the Delay Pan to the far left for interesting results. VoiceLive 3 – Reference manual (2014-03-29)
-
Page 54: Editing The Vocal Layer
Editing the Vocal layer Editing the Vocal layer VoiceLive 3 – Reference manual (2014-03-29) -
Page 55: Harmony Block / Tab
Left and Right of the stereo field with “High” being slightly dominant on one side and “Low” on the other. High Lead High Harm. (1) Harm. (2) Voice Harm. (3) Harm. (4) < Left Right > Panning Harmony Voices VoiceLive 3 – Reference manual (2014-03-29) - Page 56 You can mix and match any of the available modes for the four harmony voices. You could have three NaturalPlay voices and a fixed voice, or two scale-based voices, one fixed and one NaturalPlay voice. It’s completely up to you! VoiceLive 3 – Reference manual (2014-03-29)
-
Page 57: Double Block / Tab
Harmony. – Adding some “4 Voices Wide” Double effect when using the Harmony effect can signifi- cantly enhance the “group” sound of the Har- mony voices, especially when using two or more Harmony voices. VoiceLive 3 – Reference manual (2014-03-29) -
Page 58: Vocal Delay Block / Tab
Filter Style parameter – When using Delay on both your guitar and vo- cals, experiment with using the same OR dif- ferent divisions on each Delay to crate inter- esting rhythmic landscapes. VoiceLive 3 – Reference manual (2014-03-29) -
Page 59: Vocal Reverb Block / Tab
“Style” for each, so the listener gets the impression of vocals and guitar being in the same simulated physical space. VoiceLive 3 – Reference manual (2014-03-29) -
Page 60: Hardtune Block / Tab
Tune effect is turned off, any settings from them at the time, just like today’s musicians do! Global Pitch Correction will reactivate. Here is an interesting article about the Beatles and their use of VariSpeed: ofbuckleyandbeatles.wordpress.com/ 2010/12/05/ beatles-production-tricks-part-ii-varispeed/ VoiceLive 3 – Reference manual (2014-03-29) -
Page 61: Synth Block / Tab
We have also included several “carrier” sounds sound. Elongating vowels and/or over-pro- in VoiceLive 3, so you may use the Synth effect nouncing consonants will really make the ef- block without an instrument signal. fect stand out. VoiceLive 3 – Reference manual (2014-03-29) -
Page 62: Transducer Block / Tab
Simply remap one of the Vocal layer footswitches to Transducer and change its Mode to Momentary – see “Buttonmap tab: Remapping footswitches”. µMod footswitch remapped to Transducer VoiceLive 3 – Reference manual (2014-03-29) -
Page 63: Vocal Μmod Block / Tab
– Remember that 0 dB means “high volume” – not “no volume”! – Most level controls max out at 0 dB, but a few – such as Guitar Trim in the Headphone Mix – can go higher. VoiceLive 3 – Reference manual (2014-03-29) -
Page 64: Choir Block / Tab
Hip Hop, Rap, Spoken Word etc. to sound. You can use Choir by itself too, which can add a sense of a group saying something to- give its own unique flavor to the vocal. gether. VoiceLive 3 – Reference manual (2014-03-29) -
Page 65: Vocal Rhythmic Block / Tab
– Rhythmic can benefit from momentary use, applying the effect to brief sections of your vocal. Try remapping the Rhythmic effect to a footswitch and set its mode to Momentary. µMod footswitch remapped to Rhythmic, Mode changed to Momentary VoiceLive 3 – Reference manual (2014-03-29) -
Page 66: Stutter Block / Tab
It can help to mimic the stutter sound with your lead voice while you do this. Phrases like “yeah”, “nah-nah” etc. can work well. VoiceLive 3 – Reference manual (2014-03-29) -
Page 67: Vocal Buttonmap Block / Tab
(Guitar) when they are off to remind you that pressing that footswitch will activate an effect from a different layer. This is a good reminder showing you at a glance which inter- layer remappings you have made. VoiceLive 3 – Reference manual (2014-03-29) - Page 68 µMod footswitch remapped to Loop Slot 3 / Tracks A and C, Delay footswitch remapped to Loop Slot 3 / Track B µMod footswitch remapped to triggering Loop tracks A and C from Loop Slot 3 VoiceLive 3 – Reference manual (2014-03-29)
-
Page 69: Editing The Guitar Layer
Editing the Guitar layer Editing the Guitar layer VoiceLive 3 – Reference manual (2014-03-29) -
Page 70: Amp Block / Tab
Gain controls. If you don’t like one or more of the factory Amp Styles, the EQ options allow you to change it to suit your particular taste and tone requirements. Adjusting Amp EQ settings VoiceLive 3 – Reference manual (2014-03-29) -
Page 71: Drive Block / Tab
Test settings in rehearsal before trying them make sure you give them a try. out at a gig. – Boost can be used when playing acoustic gui- tar, simply to raise the level slightly for a solo etc. VoiceLive 3 – Reference manual (2014-03-29) -
Page 72: Guitar Delay Block / Tab
Moist. In the verses, they use a brief “Ping Pong” type delay to expand a mono guitar to the stereo field. (0:42 into the video) youtube.com/watch?v=6tkY81YGB44 (Sorry for the less-than-awesome video qual- ity on this one.) VoiceLive 3 – Reference manual (2014-03-29) -
Page 73: Guitar Reverb Block / Tab
Reverb used. Try one of the “Cozy Corner” or “Wool” type Reverbs for a very subtle addition of the effect. Guitar Reverb block set to TC Electronic’s Hall of Fame Plate reverb VoiceLive 3 – Reference manual (2014-03-29) -
Page 74: Comp(Ression) Block / Tab
In studio recording, Compression is common on almost every track or group of tracks. Compression can raise the output level of your guitar – so be aware that it can also contribute to feedback. VoiceLive 3 – Reference manual (2014-03-29) -
Page 75: Wah (Wah-Wah) Block / Tab
– Try combining the Wah effect with Octaver for a Wah-Bass sound. VoiceLive 3 – Reference manual (2014-03-29) -
Page 76: Μmod Block / Tab
VoiceLive 3: Vortex Flanger and Corona Chorus. – Chorus sounds great for both acoustic and electric guitar. Guitar µMod block set to Corona Chorus Fast style VoiceLive 3 – Reference manual (2014-03-29) -
Page 77: Octaver Block / Tab
– but there are other imple- with a bass player’s ear. mentations as well. You can blend your original guitar signal with a shifted signal to create some great sounds! VoiceLive 3 – Reference manual (2014-03-29) -
Page 78: Guitar Rhythmic Block / Tab
For the Guitar Rhythmic block, we have included ment with using the same Delay and Rhythmic an improved “tremolo” sound to better replicate divisions for guitar and vocals. Conversely, the classic effect. try different divisions to create more exotic sounds. VoiceLive 3 – Reference manual (2014-03-29) -
Page 79: Guitar Buttonmap Block / Tab
Keep in mind that the Vocal and Guitar Button- map settings are independent of each other, rep- resenting the Vocal and Guitar layers respective- ly. To learn how you can create inter-layer map- pings, see “Remapping a footswitch”. VoiceLive 3 – Reference manual (2014-03-29) -
Page 80: The Looper
The Looper The Looper VoiceLive 3 – Reference manual (2014-03-29) -
Page 81: Basic Loop Concepts And Terms
Looper ever. back repeatedly. mapped to your VoiceLive 3’s footswitches. Overdub: – Something that is recorded while another, previously recorded piece of audio/ music is being played back. -
Page 82: Entering And Exiting Loop Mode
– Move any of the MIX knobs to access the Mix page. – Navigate to the Headphone Mix page using the Arrow buttons. – Turn up the Metronome Level. – Press and hold the Layer button to re-enter the Looper. VoiceLive 3 – Reference manual (2014-03-29) - Page 83 Your new loop will be played back, and you can record additional takes. This is a great feature to use if you have rehearsed your loop performance and want to quickly build up loop components on top of one another VoiceLive 3 – Reference manual (2014-03-29)
- Page 84 – You will see the same Set+Play and Set+ODub options you saw when recording Loop track A. Choose one, and press it when you are fin- ished recording. VoiceLive 3 – Reference manual (2014-03-29)
- Page 85 ( see “Set + Overdub vs. Set + Play”). – Choose one, and press it when you are fin- ished recording. – If you chose Set+ODub, continue to record overdubs until you are finished, then tap End ODub. VoiceLive 3 – Reference manual (2014-03-29)
-
Page 86: The Utility Menu
Once you have entered the UTIL menu, you will see several new menu options. Press ALL STOP to stop recording – Stop loop playback by pressing ALL STOP (HIT footswitch). This completes our tutorial. Utility menu VoiceLive 3 – Reference manual (2014-03-29) - Page 87 – Select the option you want to use by tapping ger guides your recordings, and the Loop may the respective footswitch. fall “off time” with other time based effects like – Press BACK to exit the INPUT menu. Delay or Rhythmic. VoiceLive 3 – Reference manual (2014-03-29)
- Page 88 TAP button. read about! Once you have recorded a Loop with the Metro- nome ON, the tempo will be locked – meaning it cannot be changed later. To change the tempo, VoiceLive 3 – Reference manual (2014-03-29)
- Page 89 Track A. This is a better mode if you would like to re- cord a longer Loop track A (perhaps a chord progression) and a shorter Loop track B (per- haps a beatbox section). VoiceLive 3 – Reference manual (2014-03-29)
-
Page 90: Loop Limits
You can easily delete a single loop without hav- ing to go to the Erase sub-menu. While you are on the main Loop screen, simply press/hold the ODUB button for a Loop track (Reverb or Harmony footswitches respectively). VoiceLive 3 – Reference manual (2014-03-29) -
Page 91: Setup
Setup Setup VoiceLive 3 – Reference manual (2014-03-29) -
Page 92: Input Tab
LEDs of the Level indicator light up. – If you see the red LED light, turn Input Gain down until the red LED no longer lights. This is your optimal Input Gain setting. VoiceLive 3 – Reference manual (2014-03-29) - Page 93 RoomSense microphones built into your compensation between your lead voice and ef- ing microphone signal. This feature is separate VoiceLive 3 to the available NaturalPlay sources. fects. from the HardTune effect block and will be over- ridden when HardTune is active.
- Page 94 – Turn Lead Mute on. – Record the resulting effects-only signal to a new track in your DAW. – Blend the original “dry” vocal track and new “wet” vocal tracks together in the mix. VoiceLive 3 – Reference manual (2014-03-29)
- Page 95 Setup Monitor Level parameter Use the Monitor Level parameter to control the level of the signal received at the Monitor input jack. If your incoming monitor mix is distorting, try turning this parameter down. VoiceLive 3 – Reference manual (2014-03-29)
-
Page 96: Output Tab
– The dry channel does not contain HardTune effect(s). Dual Mono: – – The left XLR output jack carries the summed (with effects) mono vocal channel. – The right XLR output jack carries the summed (with effects) mono guitar channel. VoiceLive 3 – Reference manual (2014-03-29) - Page 97 PA when effects are bypassed. or “limit” the maximum potential headphone out- put. When using in-ear monitors, you may want to set the limiter in order to prevent hearing dam- age by transient loud noises such as feedback. VoiceLive 3 – Reference manual (2014-03-29)
-
Page 98: Guitar Tab
“sound” – If you see the red LED light, turn Input Gain relative to the guitar effects. down until the red LED no longer lights. This is your optimal Input Gain setting. VoiceLive 3 – Reference manual (2014-03-29) - Page 99 XLR outputs. The XLR outputs always allow variations of guitar level via the mix screen, as long as no ¼” guitar outputs are con- nected. VoiceLive 3 – Reference manual (2014-03-29)
-
Page 100: Midi Tab
This is helpful if you would like VoiceLive 3 to re- ing MIDI information. This parameter is useful if MIDI input VoiceLive 3 should use. spond to certain types of information – like pro- you have multiple MIDI devices and want to send gram changes –... - Page 101 Parameter settings: C-1 to G9 the acceptable MIDI note value range, the sys- tem will try the next nearest transposition octave of -3. If -3 is also too low, it will try -2 etc. VoiceLive 3 – Reference manual (2014-03-29)
- Page 102 Har- Below: – Any notes below the Split note are “lis- mony voices. tened to” for MIDI note information. – Manual: The modulation data received via MIDI is directly controlling the Vibrato amount. VoiceLive 3 – Reference manual (2014-03-29)
- Page 103 – Slow: Reduces the data transfer rate. If you are having trouble with failed Preset syncing or firmware updates using VoiceSupport soft- ware, try this setting. VoiceLive 3 – Reference manual (2014-03-29)
-
Page 104: Tone Tab
Tone – Compression settings are static and block manually if you run into specific issues. manually set. Tone parameter Use the Tone parameter to switch the Tone block on or off. VoiceLive 3 – Reference manual (2014-03-29) - Page 105 Threshold. The Ratio is defined as a “1:X” ratio, where “X” is the number of decibels (dB) of reduction in level for every 1 dB over the “Threshold” value. VoiceLive 3 – Reference manual (2014-03-29)
- Page 106 (automatic) and manual compression. Parameter settings: – Off: No Gate is applied. – Adaptive: The Gate is adjusted automatically. – Manual: The Gate threshold can be set by the user. VoiceLive 3 – Reference manual (2014-03-29)
- Page 107 Parameter settings: The default setting is 50. ates the signals as specified by the Atten(uation) Adaptive: parameters. – Automatically adjusts equalization settings as you sing. – Manual: Equalizer settings are static and manually set. VoiceLive 3 – Reference manual (2014-03-29)
- Page 108 On, the equalization will sound warmer. ation that should be applied to the low, mid and high bands of the EQ. high bands of the EQ. Parameter range: 20 to 20480 Hz. Parameter range: -12 to 12 dB. VoiceLive 3 – Reference manual (2014-03-29)
- Page 109 Setup Mid BW parameter (Manual EQ mode only) Use the Mid BW parameters to set the band- width of the EQ’s mid band. Parameter range: Narrow, 0.11 to 8,77, Wide. VoiceLive 3 – Reference manual (2014-03-29)
-
Page 110: System Tab
Global Preset that should be used as a start- fine a global signal source for the NaturalPlay Use the Contrast parameter to set VoiceLive 3’s ing point/reference for all Presets where effect feature. Use this parameter if you want to make display contrast. - Page 111 – the Delay effect edit screen or – Loop Metronome (see “Metronome sub- menu”) will apply across all Presets. The tempo values stored in Presets will be overridden as long as Global Tempo is On. VoiceLive 3 – Reference manual (2014-03-29)
- Page 112 Use the Hit Behavior parameter to define how reference frequency for the built-in tuner. The de- manually switching effect blocks on or off should fault setting is 440 Hz. affect the HIT function. For more information, see “HIT – Dynamic vs. Snapshot”. VoiceLive 3 – Reference manual (2014-03-29)
-
Page 113: Buttonmap Tab
Setup Buttonmap tab Step Button Function parameter – G Drive Every VoiceLive 3 preset has its own Button- Use the Step Button Function parameter to re- – G Amp map tab, allowing you to remap the six effect map the Step footswitch to another function. - Page 114 * Harmony must be active for this to have an ef- fect. ** Tapping the Mic switch will switch to the next or previous Preset. Holding the Mic switch will reverse direction (increment / decrement). VoiceLive 3 – Reference manual (2014-03-29)
- Page 115 – Vocal Reverb Sends – Rhythm Depth – Rhythm Division – Stutter Division – Guitar µMod Level – Guitar Delay Level – Guitar Reverb Level – Guitar Delay + Reverb Level – Guitar Rhythmic Depth VoiceLive 3 – Reference manual (2014-03-29)
- Page 116 – Tap Tempo – Bypass – G µMod – G Delay – G Reverb – G HIT – G Comp – G Drive – G Amp – G Rhythm – G Octaver – G Wah VoiceLive 3 – Reference manual (2014-03-29)
- Page 117 – Momentary: The assigned effect is on only when you hold down the footswitch. For more information, see “Change a button from Latched to Momentary mode”. VoiceLive 3 – Reference manual (2014-03-29)
-
Page 118: Pedal Calibration Tab
Product info tab For more information on pedal calibration, see The Product Info tab contains important informa- “Calibrating your expression pedal”. tion about your VoiceLive 3, including: – Installed Firmware Version – Serial Number – Manufacture Date This information is valuable if you ever need to contact TC-Helicon support. -
Page 119: Appendix
Appendix Appendix VoiceLive 3 – Reference manual (2014-03-29) -
Page 120: Midi Cc List
Vocal – Reverb Vocal – HardTune Step – value represents Step Number, i.e. 1 = Step 1, 2= Step 2 etc. Vocal – µMod Vocal – Delay Vocal – Transducer Harmony Hold ALL NOTES OFF VoiceLive 3 – Reference manual (2014-03-29) -
Page 121: System Maintenance/Factory Reset
Factory Reset using a USB flash drive – Turn off your VoiceLive 3. You can boot VoiceLive 3 in a special System – Unplug headphones (if attached) If you cannot update the firmware of your Voice- Maintenance that will allow you to perform sev- –... -
Page 122: Technical Specifications
Technical Specifications Technical Specifications VoiceLive 3 – Reference manual (2014-03-29) -
Page 123: Features
Capacitive touch edit controls with LED indicators Connections Analog Inputs Voice Connector Combo Balanced XLR/Balanced TRS 1/4“ phone jack Input Impedance Balanced 3.08 kOhm Mic Input Level @ 0 dBFS -52 to +7 dBu Line Input Level @0 dBFS -40 to +19 dBu VoiceLive 3 – Reference manual (2014-03-29) - Page 124 Dynamic Range > 109 dB 20 Hz to 20 kHz Frequency Response 0/-0.3 dB 20 Hz to 20 kHz D to A Conversion 24 Bit 128 x oversampling bitstream 115 dB SNR A-weighted Guitar Connectors 1/4“ TRS phone jack Output Impedance Balanced/Unbalanced 442/221 Ohm VoiceLive 3 – Reference manual (2014-03-29)
-
Page 125: Details
IEC 65, EN 60065, UL6500 and CSA IEC 65, EN 60065, UL6500 and CSA Operating Requirements Operating Temperature 32° F to 122° F / 0° C to 50° C Storage Temperature -22° F to 167° F / -30° C to 70° C Humidity Max. 90 % non-condensing VoiceLive 3 – Reference manual (2014-03-29) -
Page 126: Included With Voicelive 3
Technical Specifications Included with VoiceLive 3 Region specific power supply USB cable Quickstart guide Guitar/Headphone combo cable VoiceLive 3 – Reference manual (2014-03-29) - Page 127 Technical Specifications VoiceLive 3 – Reference manual (2014-03-29)
Need help?
Do you have a question about the VoiceLive 3 and is the answer not in the manual?
Questions and answers