Table of Contents
Advertisement
Instruction
Manual
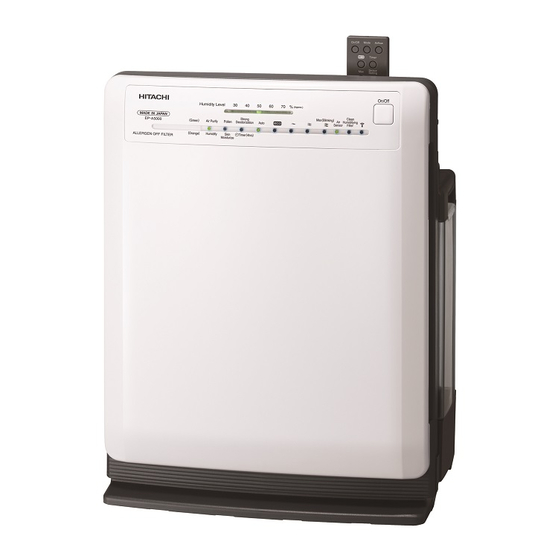
Hitachi Air Purifi er
with Humidifying Function
Model
EP-A5000
Thank you for purchasing a Hitachi air
purifi er.
This air purifi er is for home use only. Do
not use it for any other purpose than air
purifying.
Please read this instruction manual
carefully before use to ensure proper
operation of the unit.
Keep this manual for future reference in
an easily accessible place.
Read the "Safety Precautions"
to ensure proper use.
P.E-4-E-6
Contents
Before Use
Features / Name of Each Component / Operation
Buttons and Indicators / Accessories · · · · · · · · ·
Safety Precautions · · · · · · · · · · · · · · · · · · ·
Cautions on Use · · · · · · · · · · · · · · · · · · · · ·
Preparations for Operation · · · · · · · · · · · · ·
·
·
·
· · · · · · · · · · · · · · · · · · · · ·
Installation · · · · · · · · · · · · · · · · · · · · · · · · · ·
Operating Air Purifi er
Using Remote Controller · · · · · · · · · · · · · ·
·
· · · · · · · · · · · · · · · · · · · ·
·
·
·
· · · · · · · · · · · · · · · · · · · · · ·
·
· · · · · · · · · · · · · · · · · · · · · · · ·
Using the Control on Purifi er · · · · · · · · · · ·
·
·
·
·
·
· · · · · · · · · · · · · · · · · · · · · ·
·
Useful Feature · · · · · · · · · · · · · · · · · · · · · ·
·
· · · · · · · · · · · · · · · · · · · · · · ·
·
· · · · · · · · · · · · · · · · · · · · · ·
Cleaning and Maintenance
Cleaning · · · · · · · · · · · · · · · · · · · · · · · · · ·
·
·
·
·
·
·
· · · · · · · · · · · · · · · · · · · · · · · · · ·
·
· · · · · · · · · · · · · · · · · · · · · · · ·
Purifi er Body
Filter Replacement · · · · · · · · · · · · · · · · · ·
·
·
Replacement Interval
Precautions on Filter Handling
·
Alert Display · · · · · · · · · · · · · · · · · · · · · · ·
Troubleshooting Guide · · · · · · · · · · · · · · ·
Replacement Parts · · · · · · · · · · · · · · · · · ·
Specifi cations · · · · · · · · · · · · · · · · · · · · · ·
· · · · · · · · · · · · · · · · · ·
· · · · · ·
· · · · · · · · · · · · · · ·
· · · · · · · · · · · · · · · · ·
· · · · · · · · · · ·
· · · · · · · · · ·
· · · · · · · · ·
· · · · ·
· · · · · · · · · · ·
· · · · · · · · · · · · ·
· · · · · · · · · · · · · · · · ·
· · · · ·
· · · · · · · · · · · · · · · · · · ·
E-2
E-4
E-7
E-8
E-8
E-8
E-9
E-9
E-10
E-10
E-11
E-12
E-13
E-13
E-13
E-14
E-14
E-14
E-14
E-15
E-16
E-16
E-16
E-17
E-17
E-18
E-19
E-19
E-20
E-21
E-21
E-21
E-22
E-22
E-23
E-26
E-27
Advertisement
Table of Contents

Related Manuals for Hitachi EP-A5000


Summary of Contents for Hitachi EP-A5000
-
Page 1: Table Of Contents
Cleaning · · · · · · · · · · · · · · · · · · · · · · · · · · E-17 Thank you for purchasing a Hitachi air · · · · · ·... - Page 2 Features / Name of Each Component / Accessories Humidity sensor P.E-14 Odor sensor P.E-14 Senses humidity. Senses odor in the air. Filter assembly Remote controller (Allergen-free, catechin deodorizing filter) Handle White surface: Dust filter Humidifying filter Black surface: Deodorizing filter Water tank Purifier Pre-filter...
-
Page 3: Remote Controller
Operation Buttons and Indicators / P.E-OO shows a page with further description. Operation Buttons and Indicators On/Off Button Humidity Level P.E-10, E-14 Airflow Level P.E-12 P.E-13 Indicates approx. humidity level in the Indicates airflow rate during operation. (Indicator: Green) room during operation. Use this button to start : Airflow rate during auto operation or stop operation and to... -
Page 4: Safety Precautions
Safety Precautions Please read the following safety precautions carefully before using the air purifier. To prevent injury to the user or other people and property damage, the following instructions must be followed. Also read the precautions appearing in the text carefully to ensure proper use. Definition of each indication Incorrect operation due to ignoring instruction will cause harm or damage. - Page 5 WARNING Water Tank, Water Tray and Humidifying Filter Do not operate the unit without setting any of the water tank, water tray Handle and humidifying fi lter in place. Otherwise, it may cause injury or unit failure. Do not use any detergent (neither kitchen nor laundry use) when cleaning Water tank the water tank or water tray.
- Page 6 It may cause injury to your eyes. due to deformation or damage. Use a genuine fi lter for the Hitachi Air Purifi er. Other fi lters may cause unit failure. To Prevent Floor Scratches or Wall Stains During Cleaning / Place of Use Do not use the air purifi...
-
Page 7: Cautions On Use
Cautions on Use Do not install in an unstable or sloped Do not directly fan animals and plants. place, or near any obstacles. Air drafts may adversely affect them. The unit may fall or drop, resulting in damage or unit failure. Do not place anything on the air If the space between the unit and purifier body, and do not block the air... -
Page 8: Preparations For Operation
Preparations for Operation Lay a soft cloth or the like beneath the purifier to protect the floor against scratch. CAUTION No cleaning effect is obtainable if the filter is installed with plastic bag. It may also be a cause of malfunction. Do not tip over or tilt the purifier. -
Page 9: Filling Water Tank
Filling Water Tank (for Humidify Mode and Skin Moisturize Modes) Gently remove the water tank. Remove the tank cap and fill fresh tap water of normal temperature. While pressing the upper part of the Rubber packing water tank handle, lift it obliquely Check that the tank cap is equipped upward, and remove the water tank by with a rubber packing. -
Page 10: Using Remote Controller
Using Remote Controller Here we describe how to operate the air purifier using the remote controller. For the operation using the control on the purifier, please refer to page E-13. Starting Operation Remote Controller Air Purifier Indicator Section On/Off Mode Airflow On/Off (Approx.) -
Page 11: Selecting Operation Mode
Selecting Operation Mode (Basics) 5 operation modes are available for your choice. In every operation mode, the fan will not stop during operation. (In the eco operation mode, the fan may stop. P.E-16 ) In every operation mode, air purifying function will work. Upon every switching of operation mode, airflow rate is set to “Auto”. -
Page 12: Switching Airfl Ow Rate
Using Remote Controller (Continued) Airflow rate When “Auto” is lit, the following airflow rate is used according to the selected operation mode. The airflow rate indicators from “Silent” to “Max” are not lit. Mode Airflow Range Air Purify Silent Medium High Pollen Silent... -
Page 13: Max Operation
Max Operation This operation is useful when many people smoke or when you want quick cleaning of room air. The airflow indicator blinks for 5 minutes. Press button. Blink The operation with Max airflow will continue for about 5 minutes. How to cancel On/Off After Max operation, the status... -
Page 14: Memory Function / Sensors / Auto Detection
Memory Function / Sensors / Auto Detection Memory Function When you stop the operation and then restart, the purifi er will resume the operation status before shutdown. If you operate the purifi er for approx. 5 seconds or longer, the operation status will be stored in memory. (If you stop the operation within less than 5 seconds, the operation status will not be stored in memory.) Even if you unplug the power cord, the operation status will be stored in memory. -
Page 15: Adjusting Sensor Sensitivity Setting
Adjusting Sensor Sensitivity Setting Sensor sensitivity can be adjusted in 3-step fashion. Present setting is shown by the airflow In each operation mode, indicator that blinks for 5 seconds. Sensor Setting press button. Blink (Use the tip of a ball-point pen or the like.) Every time you press the button, the setting switches. -
Page 16: Useful Feature
Useful Feature Eco Operation In the eco operation mode, the unit automatically pauses when the air in the room is clean to save money on electricity. Furthermore, if this state continues more than 8 hours, the unit automatically stops operation. (In humidifying operations, the unit will not pause at a certain humidity level.) Normal automatic operation When the air is clean, the unit continuously operates at “Silent”... -
Page 17: Cleaning
Cleaning Before cleaning, be sure to stop operation and unplug the power cord from AC outlet. Do not splash water on the purifier body. Water splash can be a cause of failure. Do not use a volatile solvent, such as gasoline, thinner, benzene, wax, kerosene, alcohol, etc. or polishing powder, or detergent (neither kitchen nor laundry use). -
Page 18: Water Tank · Humidifying Filter
Cleaning (Continued) Water Tank (Guide for cleaning: Daily) Change water daily with fresh tap water. Discard remaining water in the tank if any. Pour small quantity of tap water, tighten the cap firmly and shake to wash. (Change water and repeat the steps 2-3 times.) WARNING Do not use detergents (neither kitchen nor laundry use) for cleaning. -
Page 19: Replacing Humidifying Filter
Replacing Humidifying Filter The humidifying fi lter is a consumable part. Replace it using 24 months of use as a guide (cleaning is needed once in every month). Early replacement of the fi lter is recommended if it exhibits any of the following conditions despite periodical cleaning. Heavy dirt, adhering water scale too hard to remove, harsh odors, damage or deformation Depending on the quality of tap water used, the humidifying fi... -
Page 20: Pre-Fi Lter
Cleaning (Continued) Pre-filter (Guide for cleaning: Once a month) To clean the pre-fi lter, follow the steps below. Remove the water tank, and then pull out the water tray. P.E-9 (This is to prevent water leakage.) When you remove the water tank, water may drip from the tank cap. Lay a dry CAUTION cloth before removing the water tank. -
Page 21: Filter Replacement
Purifier Body (Guide for cleaning: Once a month) Wipe off dirt on the purifi er case using a soft cloth that is moistened with water and fully wrung. For heavy dirt, use a soft cloth moistened with neutral detergent thinned with water. After removing dirt, use a dry Remote infrared soft cloth to wipe off moisture so that no detergent will remain. -
Page 22: Replacing The Filter
(Continued) Replacing the Filter Use the fi lter No. EP-DX40E-902 separately available. Use a genuine fi lter for the Hitachi Air Purifi er. CAUTION Other fi lters may cause unit failure. Before replacing the fi lter, be sure to stop the purifi er and unplug the power cord from AC outlet. -
Page 23: Troubleshooting Guide
Troubleshooting Guide Before asking for repair check the following once again Symptom Check to see Solution Is power plug securely inserted Securely insert the power plug into AC No air blows out into AC outlet? outlet. or power does not turn on Is breaker switched off? Switch on breaker. - Page 24 Troubleshooting Guide (Continued) Symptom Check to see Solution Depending on the place of installation and conditions of use, water may not be consumed. Is the airflow rate set to “Auto”? Set the operation mode to “Skin Moisturize” Humidifying and the airflow rate to “High” or “Max”. P.E-11, E-12 performance is inadequate when...
- Page 25 Pressing the eco button operates the ionization setting / release of the other Hitachi air purifier with ionizing function. The signals from the remote controllers Or, pressing the ionizing button on the remote are the same.
-
Page 26: Replacement Parts
Replacement Parts (Separately Available) Filter Pre-filter Designate the replacement part Designate the replacement part No. EP-DX40E-902 when ordering. No. EP-BX40-002 when ordering. Humidifying Filter Tank Cap Designate the replacement part Designate the replacement part No. EP-DX40E-908 when ordering. No. EP-BV60-017 when ordering. The case is not included. -
Page 27: Specifi Cations
Specifications Model EP-A5000 Power supply AC220-240V 50-60Hz Airflow switching High Medium Silent Power consumption (W) Airflow rate (m /min) Applicable floor space Humidifying performance (mL/h) Approx. 520 (Max operation) External dimensions 537(H) x 430(W) x 242(D) mm Weight 8.5kg Length of power cord Approx.
Need help?
Do you have a question about the EP-A5000 and is the answer not in the manual?
Questions and answers