
Related Manuals for Televes HDTV TRANSMODULATOR - Dual 8PSK to QAM


Summary of Contents for Televes HDTV TRANSMODULATOR - Dual 8PSK to QAM
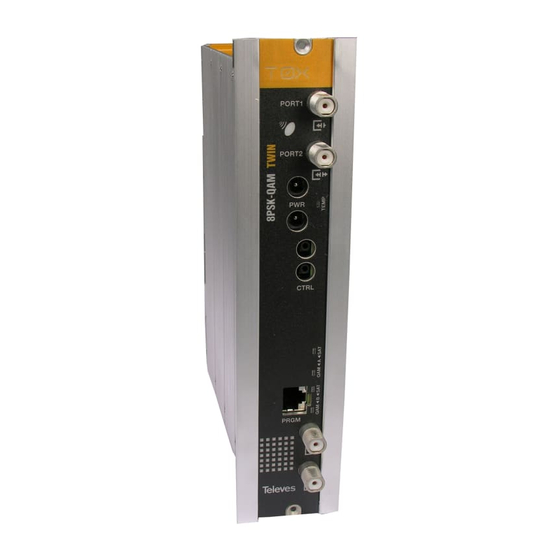
- Page 1 Ref. 563701 User manual HDTV TRANSMODULATOR - Dual 8PSK to QAM w w w . t e l e v e s . c o m...
-
Page 3: Table Of Contents
HDTV TRANSMODULATOR - Dual 8PSK to QAM Contents 1. Safety instructions ..........................2. Description ............................3. Main features ............................ 4. Technical Specifications ........................5. Ordering information ........................6. Quick start guide ..........................7. Product description .......................... 8. Installation ............................9. Instructions for use ........................... 10. Distribution Bandwidth considerations ..................... 11. Firmware Updates ..........................12. TSuite - CDC SOFTWARE ........................ -
Page 5: Safety Instructions
1 - Safety instructions Important Safety Instructions A product and cart combination should be moved with care. Quick stops, excessive force 1. Read and Follow All Instructions - All the Caution statements and uneven surfaces may cause the product and safety and operating instructions should be cart combination to overturn. - Page 6 HDTV TRANSMODULATOR - Dual 8PSK to QAM ensure reliable operation of the product. These dangerous voltage or other hazards. Refer all openings should never be blocked or covered servicing to qualified service personnel. in any way. This product should not be placed...
-
Page 7: Description
ambient temperature is maintained in the controller or from any Internet connection with y Extensive monitoring information for easy manufacturer specified operating range. the use of the CDC headend controller module. troubleshooting (current and lowest input The remote control of the system provides two SNR, current and highest temperature reached, easy to use options with the TSuite computer number of lock loss conditions over a period of... -
Page 8: Technical Specifications
HDTV TRANSMODULATOR - Dual 8PSK to QAM 4. Technical Specifications 4.0 Block diagram QAM Modulator Demodulator PORT 1 Up-converter A Input Output Stage Stage Output Demodulator QAM Modulator PORT 2 Up-converter B 4.1 8PSK to QAM transmodulator Table 1 . Technical specifications... - Page 9 4.2 Satellite input options Table 2 . Satellite input options PORT 1 PORT 2 TUNER A TUNER B Option Simplified diagram Comments Port function Signal from Normal input mode. PORT 1 TUNER The input signal loop-through allows to daisy-chain the whole subrack avoiding the use of an external SWITCHING PORT 1 PORT 1...
- Page 10 HDTV TRANSMODULATOR - Dual 8PSK to QAM 4.3 Broadband Amplifier Table 3 . Technical Specifications Frequency range 54 to 862 Connector type “F” Gain 44 ± 2.5 Powering voltage Amplifier ref 5575 Regulation margin Consumption at 24 Vdc Output level...
-
Page 11: Ordering Information
5. Ordering information When ordering, please, specify reference number as per table below. Ref # Description Ref # Description SMATV 234501 T.0X Optical Splitter, 16 ways 234601 T.0X Optical Splitter, 32 ways 563901 T.0X Power Supply Unit (110 Vac/UL) 563701 T.0X 8PSK/QAM TWIN Transmodulator 233501 T.0X Optical Receiver 555902 T.0X CDC IP Headend Manager 233601 T.0X Optical Receiver / Return Path Transmitter (1310nm / 6dBm) -
Page 12: Quick Start Guide
HDTV TRANSMODULATOR - Dual 8PSK to QAM 6. Quick start guide consumption of the 7 transmodulators in a 7. Be sure that all connections are secured, properly WARNING: subrack (for example: 4+3 or 3+4). terminated and tightened before applying Do not apply power to the headend until all the power to the system. -
Page 13: Product Description
• PORT2 routed to both tuners A and B (PORT1 is not used). 11. SAT B input status LED 12. QAM B output status LED The HDTV TRANSMODULATOR - Dual 8PSK to QAM unit also features two output RF connectors, the Side view Front view... - Page 14 PORT1 HDTV TRANSMODULATOR - Dual 8PSK to QAM PORT2 The unit also features 2 sets of daisy-chain Table 5.- FRONT UNIT LED ALARMS connectors for the power and control buses. TEMPERATURE (LED no. 8) Special care must be taken so as to never connect LED Colour Unit internal temperature (ºF)
-
Page 15: Installation
8. Installation 8.1 - 19” subrack mounting TEST (-30dB) CTRL CTRL CTRL CTRL CTRL CTRL CAM PRGM CAM PRGM CAM PRGM CAM PRGM CAM PRGM CAM PRGM... - Page 16 HDTV TRANSMODULATOR - Dual 8PSK to QAM 8.2 Power Supply Unit M4 nut Star washer M4x10 Connectors to power modules (24V Mains 108 - 132V~ 50/60Hz Grounding connection LEDS 24V: OK 0V: Overload or short circuit NOTE: The two PSU power outputs must be used in order to balance the consumption of the 7 transmodulators in...
- Page 17 8.3 Broadband Amplifier Ref. 5575 TEST (-30dB) RF output Power input Test output Status LED RF input 1 Attenuator adjustment RF input 2 This unit features two RF input connectors (3 & 4), to allow mixing signals coming from two different systems or subracks. When only one of the two inputs is used it is advisable to terminate the unused input port with a 75 ohm load (ref 4061).
- Page 18 HDTV TRANSMODULATOR - Dual 8PSK to QAM 8.4. Programming Unit The handheld programmer has an LCD display, three LED indicators and four buttons: UNIVERSAL Table 8 .- Programmer key functions Keystroke Function description Enable / Disable “Edit mode” short Move Cursor in “Edit mode”...
-
Page 19: Instructions For Use
9. Instructions for use 9.1 - MAIN menu (LED A is ON) The configuration screens are organized in three main sections as shown in the figure (refer to Appendix 4 for a detailed diagram): Transcoder selection The first item displayed after connecting the Programming Unit The first menu allows the selection of one of the UNIVERSAL... - Page 20 HDTV TRANSMODULATOR - Dual 8PSK to QAM Input modulation selection Slot Sat ID - TUNER 61.5º EAST This menu only appears when the user has SELECT INPUT 72.7º EAST selected the manual modulation mode in the SYMBOL RATE 77º EAST corresponding CONFIGURATION menu.
- Page 21 Output modulation selection 9.2 - Configuration menus (LED B is ON) the amount of attenuation applied and therefore balance the system as needed. This menu only appears when the user has selected the manual modulation mode in the - TUNER This section includes a number of less frequently corresponding CONFIGURATION menu, in this case SELECT OUT...
- Page 22 HDTV TRANSMODULATOR - Dual 8PSK to QAM Modulation mode the input frequency for a DISH PRO stacking LNB. The valid address range goes from 1 to 254 (maximum number of devices controllable from a This menu allows the selection of the input single headend controller module).
- Page 23 9.3 - MONITORING menus (LED C is ON) demodulator is not locked. - OUTPUT A - - INPUT A - MOD: 64 OVF This set of menus displays firmware versions and STAT: 6.111Mb monitoring information, and is indicated by LED C UNLOCKED BW: 7.028MHz on the Programming Unit.
- Page 24 HDTV TRANSMODULATOR - Dual 8PSK to QAM The minimum SNR and unlock counters can be ● reset by pressing and holding the button for approximately 2 seconds. These values are stored in nonvolatile memory so they are not erased otherwise, even when the unit loses power or is turned off.
- Page 25 9.4 - Configuration Copy/Paste using the Programming Unit ● and ▼ buttons at the same time from any MAIN menu. Then follow the flowchart below to copy/paste configurations To enter copy/paste mode, press and hold the to/from the handheld Programming Unit.
-
Page 26: Distribution Bandwidth Considerations
HDTV TRANSMODULATOR - Dual 8PSK to QAM 10. Distribution Bandwidth considerations The bandwidth of a transmodulated QAM signal depends on the parameters of the incoming satellite signal (baud rate, modulation and FEC) and on the QAM constellation selected for the output carrier. For the same parameters of Whenever channel bandwidth the satellite signal, the higher the QAM order, the narrower the QAM signal is. -
Page 27: Firmware Updates
11. Firmware Updates Select English as preferred language if needed: Then click on “Update FPGA”: Introduction To update the Firmware of the unit you will need additional hardware and a software package: • USB - Serial Port adapter. • Cable DB-9 to RJ45. •... - Page 28 HDTV TRANSMODULATOR - Dual 8PSK to QAM Select “Update FPGA” and browse for the .rbf file stored in your computer (see the example screenshot on the right). Click Open and the update will begin: When it is finished the following message will...
-
Page 29: Tsuite - Cdc Software
12. TSuite - CDC SOFTWARE Steps to follow This software allows remote or local control of a T.0X headend, via a control module either ref. 5559 (CDC IP) or ref. 555901 CDC IP/GSM). Register a user account on Televés Services. Main features Once an account is created, login to Televés Services to register a T.0X •... - Page 30 HDTV TRANSMODULATOR - Dual 8PSK to QAM Using TSuite software in local mode, programming modules one To set the port used, select Configuration, Serial communications. at a time. Preliminary considerations The connection between the PC and the module to be configured is made via the serial port and a cable RS232 - RJ45.
- Page 31 Activate the Identify Device function by selecting the icon in the menu The program will place a graphic of the module within a headend frame. bar. Double clicking on the module opens its management window. You can now perform all the functions you would with the programmer. To do this, The program will identify the device connected, then select Add to a new activate the Enable / Disable direct communication.
- Page 32 HDTV TRANSMODULATOR - Dual 8PSK to QAM There are 3 tabs, Status, Setup, and Advanced. A sample Status screen is Advanced functions allow you to change the address of the module. shown. Setup function: You can modify all the input and output parameters here.
- Page 33 Steps to follow In Session Control box, select IP Connection, then Start session. Then select the name of the connection made in step 2. Assign the computer an IP address on the network of the CDC. Enter Password for the headend and select Apply. Select New File with the icon or the menu File, New IP Connections, IP Connections management, select Create new connection and select the direct option (LAN) in the Connection Type.
- Page 34 HDTV TRANSMODULATOR - Dual 8PSK to QAM You will see the status screen as the session is started. Double clicking on the CDC module displays the CDC management window. Selecting “Load modules connected to the CDC, ” will load all modules connected to and recorded in the CDC.
- Page 35 Using TSuite software in remote mode, programming modules Once all modules are loaded, a pop up “Headend loaded!” will be displayed. through the CDC connected to the internet. Preliminary considerations The connection between the CDC module and Internet can be accomplished in two ways: through a LAN;...
- Page 36 HDTV TRANSMODULATOR - Dual 8PSK to QAM The rest of the steps are identical to the previous section.
-
Page 37: Example Installation
13. Example installation ADVANCE Dish STB HDTV (NOTE 1) NTSC 563901 5559 5806 12 channels (SEE NOTE 5) Dish STB HDTV SAT 110º ADVANCE 2311 Dish STB HDTV (NOTE 2) Existing MDU Coax 563901 7 X 563701 14 transponders SAT 119º Mixer F.O. -
Page 38: Rackmount Standards
HDTV TRANSMODULATOR - Dual 8PSK to QAM 14. Rackmount Standards (max. 49 - 7 subracks with 5RU height - 8’7”) 14.1. Installation of the rack with ventilation facilities To aid in cooling for proper operation, especially in warm locations (>113ºF ambient), installation of 2 25W or greater fans is recommended at the top of the rack. - Page 39 14.2. Installation of the rack without fans In order to provide adequate cooling, proper airflow must be established. As such, the following If fans are not available and the rack is installed in items must be observed: ambient temperatures near 113ºF, it is advisable to leave the rack sides completely open.
-
Page 40: Appendix 1. Catv Qam Channel Frequencies
HDTV TRANSMODULATOR - Dual 8PSK to QAM Appendix 1.- CATV QAM channel frequencies QAM center QAM center QAM center QAM center QAM center QAM center frequency frequency frequency frequency frequency frequency (MHz) (MHz) (MHz) (MHz) (MHz) (MHz) 57.00 225.00 387.00 549.00... -
Page 41: Appendix 2. Dish Networktm Transmodulator Auto-Detect Code/Symbol Rates
Appendix 2.- DISH Network Transmodulator Auto-Detect Code/Symbol Rates - ver. 1.00 Symbol rate Madulation QAM size Priority Symbol rate Madulation QAM size Priority 21500 T_8PSK_23 QAM_256 21500 T_QPSK_78 QAM_256 20000 QPSK_78 QAM_128 22500 T_QPSK_78 QAM_256 22500 T_QPSK_56 QAM_256 26000 QPSK_12 QAM_64 20000 QPSK_56... -
Page 42: Appendix 3. Dish Networktm Dbs - Anik F3 - Fss 121 _ Fss 105 Tables
HDTV TRANSMODULATOR - Dual 8PSK to QAM Appendix 3.- DISH Network DBS - Anik F3 - FSS 121 _ FSS 105 Tables DBS (61.5º, 72.7º, 77º, 110º, 119º & 129º 118.7 º FSS 121º FSS 105º Name Legacy Stacking Name... -
Page 43: Appendix 4. Programming Unit Menus And Sub-Menus
Appendix 4.- Programming unit Menus and Sub-menus MENUS AND SUBMENUS MAIN MENU CONFIGURATION MENU MONITORING MENU Transcoder selection Satellite selection Input routing mode Input frequency/transponder selection Modulation mode Versions menu Input modulation selection Input frequency mode Input status Input baud rate selection Output frequency mode Input measurements... - Page 44 HDTV TRANSMODULATOR - Dual 8PSK to QAM...
-
Page 45: Appendix 5. Typical Dish Networktm Western Arc System
Appendix 5.- Typical DISH NetworkTM Western Arc System Legend: 110º 17 + 1 tuners 119º 17 + 1 tuners 129º 17 + 1 tuners 118º 13 + 1 tuners Spare tuner 68 transponder system (DISH core 54 transponder system programming and international channels (DISH core programming) - Page 46 HDTV TRANSMODULATOR - Dual 8PSK to QAM Televes Limited Warranty Televés warrants, only to the original Purchaser, all Products be free from any Any refund to the Purchaser, shall be limited to the purchase price of the defect in materials or workmanship for a period of two (2) years from the date of Product(s), excluding any applicable taxes, duties, freight costs, removal costs, original purchase, unless otherwise specified.
- Page 47 The Product(s) shall have been installed in one and only one location and its use shall be in strict compliance with the written instructions and specifications; An approved forced air ventilation system, designed to extend the life of the product, shall be in use during the entire installed life of the Product(s); III.
- Page 48 televes.com...
Need help?
Do you have a question about the HDTV TRANSMODULATOR - Dual 8PSK to QAM and is the answer not in the manual?
Questions and answers