HAMPTON BAY H27 Owners & Installation Manual
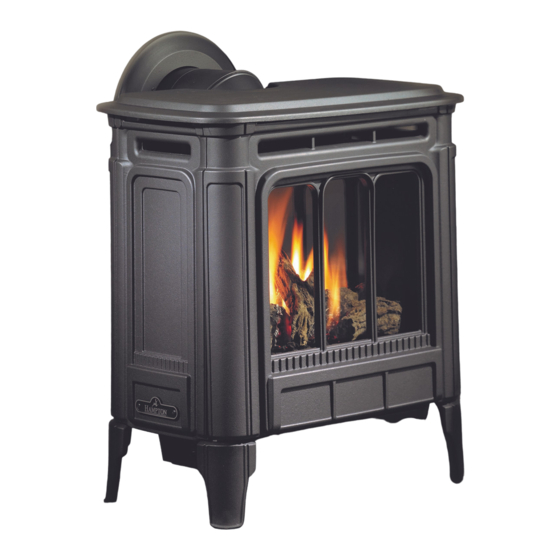
H27 direct vent gas fireplace
Hide thumbs
Also See for H27:
- Owners & installation manual (48 pages) ,
- Owners & installation manual (60 pages)
Table of Contents
Advertisement
Quick Links
H27 Direct Vent Gas Fireplace
WARNING:
If the information in these instructions are not
followed exactly, a fi re or explosion may result
causing property damage, personal injury or loss
of life.
FOR YOUR SAFETY
Do not store or use gasoline or other fl ammable
vapours and liquids in the vicinity of this or any
other appliance.
Installation and service must be performed by
a qualifi ed installer, service agency or the gas
supplier.
Tested by:
918-812
FPI FIREPLACE PRODUCTS INTERNATIONAL LTD. 6988 Venture St., Delta, BC Canada, V4G 1H4
MODELS:
H27-NG Natural Gas
FOR YOUR SAFETY
What to do if you smell gas:
Do not try to light any appliance
Do not touch any electrical switch:
do not use any phone in your
building.
Immediately call your gas supplier
from a neighbour's phone. Follow
the gas supplier's instructions.
If you cannot reach your gas sup-
plier, call the fi re department.
Installer: Please complete the details on the back cover
and leave this manual with the homeowner.
Homeowner: Please keep these instructions for future reference.
www.hampton-fi re.com
H27-LP Propane
This appliance may only be
installed in an aftermarket
permanently located, manu-
factured (USA only) or mobile
home, where not prohibited by
local codes.
This appliance is only for use
with the type of gas indicated
on the rating plate. This ap-
pliance is not convertible for
use with other gases, unless
a certifi ed kit is used.
Owners &
Installation Manual
01/19/10
Advertisement
Table of Contents

Related Manuals for HAMPTON BAY H27


Summary of Contents for HAMPTON BAY H27
- Page 1 Owners & H27 Direct Vent Gas Fireplace Installation Manual www.hampton-fi re.com MODELS: H27-NG Natural Gas H27-LP Propane WARNING: FOR YOUR SAFETY This appliance may only be If the information in these instructions are not installed in an aftermarket followed exactly, a fi re or explosion may result...
- Page 2 fi replace at the fl ick of a switch. The model H27 has been approved by Warnock Hersey for both safety and effi ciency. As it also bears our own mark, it promises to provide you with economy, comfort and security for many trouble free years to follow.
-
Page 3: Table Of Contents
Gas Pipe ..............29 Pressure Testing ............29 Conversion from NG to LP ..........30 Log Set Installation ............33 Optional Side Shelves Installation .......35 Wall Thermostat ............35 Remote Control ............35 Final Check..............36 Wiring Diagrams ............36 ® Hampton H27 Direct Vent Freestanding Gas Stove... -
Page 4: Safety Label
The State of Massachusetts requires the installation of a carbon monoxide alarm in accordance with NFPA 720 and a CO alarm with battery back up in the same room where the gas appliance is installed. ® Hampton H27 Direct Vent Freestanding Gas Stove... - Page 5 (e) A copy of all installation instructions for all Product Approved side wall horizontally vented gas fueled equipment, all venting instructions, all parts lists for venting instructions, and/or all venting design instructions shall remain with the appliance or equipment at the completion of the installation. ® Hampton H27 Direct Vent Freestanding Gas Stove...
-
Page 6: Unit Dimensions
UNIT DIMENSIONS ** Shown with optional side shelves. ® Hampton H27 Direct Vent Freestanding Gas Stove... -
Page 7: Installation
THE APPLIANCE. This appliance is only for use with the type of gas indicated on the rating H27-LP is approved for use with lique- plate. This appliance is not convert- CLOTHING OR OTHER FLAMMA- fi ed petroleum gases (propane). -
Page 8: General Safety Information
9) To prevent injury, do not allow anyone who 1) Clocking the appliance to ensure the correct is unfamiliar with the operation to use the fi ring rate (rate noted on label) after burning fi replace. appliance for 15 minutes. ® Hampton H27 Direct Vent Freestanding Gas Stove... -
Page 9: Locating Your Gas Stove
The combustion air from this appliance is drawn from outside the building through the outer fl ue. Extra provision for combustion air inside the room is not required. 7) Re-attach control panel with 3 screws, reversing step 3. ® Hampton H27 Direct Vent Freestanding Gas Stove... - Page 10 This appliance is equipped with a three pronged (grounding) plug for your protection against shock hazard and should be plugged directly into a properly grounded three-prong receptacle. Do not cut or remove the grounding prong from this plug. ® Hampton H27 Direct Vent Freestanding Gas Stove...
-
Page 11: Venting Introduction
Direct Vent with the H27-NG, and H27-LP. The warranty Freestanding Gas Stoves, H27-NG, and H27- will be voided and serious fi re, health or other... -
Page 12: Exterior Vent Terminal Locations
* Clearance in accordance with local installation codes and the requirements of the gas supplier 3 feet (91cm) within a height of 15 feet (4.5m) above the meter / regulator assembly 3 feet (91cm) above - if within 10 feet (3m) horizontally ® Hampton H27 Direct Vent Freestanding Gas Stove... -
Page 13: 4" X 6-5/8" Rigid Pipe Cross Reference Chart
46DVA-ES (N/A - FPI) 4DT-OS SV4SU Wall Thimble-Black 46DVA-WT 4DT-WT 4DWT 4DWT SV4RSM TE-4DE90 Wall Thimble Support/Ceiling Support 46DVA-DC SV4PF TE-4DE90B Firestop Spacer 46DVA-FS 4DT-FS 4DFSP 4DFS SV4BF Trim Plate-Black 4DT-TP 4DFPB 4DCP SV4LA ® Hampton H27 Direct Vent Freestanding Gas Stove... - Page 14 Note: Horizontal runs of vent must be level, or have a 1/4” rise for every 1 foot of run towards the termination. Never allow the vent to run downward - this could cause high temperatures and may present a possible fi re hazard. ® Hampton H27 Direct Vent Freestanding Gas Stove...
-
Page 15: Rigid Pipe Venting Systems
, Selkirk Direct-Temp and ICC Excel. AstroCap is a proprietary trademark of FPI Fireplace Products International Ltd. Dura-Vent® and Direct Vent Pro are registered and/or proprietary trademarks of Simpson Dura-Vent Co. Inc. ® Hampton H27 Direct Vent Freestanding Gas Stove... -
Page 16: Venting Arrangements
The two diagrams show all allowable com- binations of straight horizontal termination with one 45 elbow off the unit with Snorkels or FPI Riser Vent. Restrictor position "A". Riser Vent Termination Snorkel Termination ® Hampton H27 Direct Vent Freestanding Gas Stove... - Page 17 Please note min. 1 foot between 90 elbows is 5' Max. 8' Min. 8' Max. required. Lengths do not include elbow indicated Vent restrictor position A (fully open), refer to the "Vent Restrictor Position" section. ® Hampton H27 Direct Vent Freestanding Gas Stove...
- Page 18 5' Max. 5' Min. between 90 elbows is 6' Max. 6' Min. required. Lengths do not include elbow indicated Vent restrictor position A (fully open), refer to the "Vent Restrictor Position" section. ® Hampton H27 Direct Vent Freestanding Gas Stove...
-
Page 19: Vertical Termination With Co-Linear Flex System
Straight Vertical Terminations Exhaust Flue Outer Vent Restrictors Pipe set at fully open, with Kit# Posiiton "A" 946-563 Air Intake Co-Linear Flex Adapter with Kit# 946-563 Inner Pipe Adapter with Kit# 946-563 ® Hampton H27 Direct Vent Freestanding Gas Stove... -
Page 20: Dv Stove Horizontal Vent Kit
DV 2 ft. Stove Vent Kit (Part # 946-116) and DV 4 ft. Stove Vent Kit (946-216) includes all the parts needed to install the H27 Direct Vent unit with minimum horizontal and vertical vent dimensions. For installations that require longer vertical and/or horizontal vents use the Dura-Vent system as shown in the "Dura-Vent Termination Kit"... - Page 21 Hint: leave an extra 12" to 16" of length, framing out a square that the cap this will make the fi nal assembly easier to can be mounted on. work with. ® Hampton H27 Direct Vent Freestanding Gas Stove...
-
Page 22: Residential And Manufactured Homes
RESIDENTIAL AND MANUFACTURED HOMES / MOBILE HOMES MINIMUM HORIZONTAL TERMINATION INSTALLATIONS Planning Your venting Installation You will require the following components with your new Hampton ® Rear Vent Direct Vent Free- standing Gas Stove. Please review your product to make sure you have everything you need. In See the "Exterior Vent Terminatal Locations"... -
Page 23: Dura-Vent Termination Kit
Simpson Dura-Vent® and Direct Vent Pro. The FPI AstroCap is the proprietary trademark of FPI Fireplace Products International Ltd. Dura-Vent® and Direct Vent Pro are registered and/or proprietary trademarks of Simpson Dura-Vent Co. Inc. ® Hampton H27 Direct Vent Freestanding Gas Stove... -
Page 24: Horizontal Terminations
9-1/2 round hole in the exte- rior wall where the vent will be terminated. If the wall being penetrated is constructed of non-combustible material, i.e. masonry block or concrete, a 7" diameter hole is acceptable. Diagram 3 ® Hampton H27 Direct Vent Freestanding Gas Stove... -
Page 25: Vertical Terminations
Riser Vent Terminal, around the bead. Ensure that the vent pipe is pushed past the bead for a secure fi t. 10) Seal around the outer edge of the Riser Vent Backing Plate. Diagram 7 ® Hampton H27 Direct Vent Freestanding Gas Stove... - Page 26 16/12 to 18/12 2.13 under the shingles (shingles should overlap over 18/12 to 20/12 2.29 half the fl ashing) as per diagram 10. over 20/12 to 21/12 2.44 6) Continue to assemble pipe lengths. ® Hampton H27 Direct Vent Freestanding Gas Stove...
-
Page 27: Converting Chimney To Direct Vent System
7) The connection between the appliance and appliance until the problem is corrected. the Retro Connector may be completed with Approved for US Installations Only sections of black direct vent pipe, together with an adjustable length. ® Hampton H27 Direct Vent Freestanding Gas Stove... -
Page 28: Cathedral Ceilings
If the support extends above the roof, cut it fl ush with the top of the roof. Nail the support to the frame opening using (8) 3" spiral nails or #8 x 1-1/2" screws. ® Hampton H27 Direct Vent Freestanding Gas Stove... -
Page 29: Aeration Adjustment
NOT covered under warranty. Note: Aeration Adjustment should only be performed by an authorized Hamp- ® Installer at the time of installation or service. ® Hampton H27 Direct Vent Freestanding Gas Stove... -
Page 30: Conversion From Ng To Lp
Lift off the Cast Top and Cast Front, remove the glass front (refer to Glass Replacement section in the H25 / H27 manual) and carefully remove the logs and lava rock (refer to Log Installation section in manual). ® Hampton H27 Direct Vent Freestanding Gas Stove... - Page 31 10) Check that the screw is clean and if necessary remove dirt. 11) Flip the screw (Fig. 3). Fig. 6 WARNING! Also check that the pilot and main burner injectors Fig.3 are appropriate for the gas type. ® Hampton H27 Direct Vent Freestanding Gas Stove...
-
Page 32: Installation Of The Dc Sparker
DC spark heat shield. 15) Tie up the loose wire with the wire clip. 10) Install the plastic bushing over the outside of the hole. ® Hampton H27 Direct Vent Freestanding Gas Stove... -
Page 33: Log Set Installation
The logs are fragile, handle with care - do not force into position. The Front Right Log front edges should be placed parallel against the front NOTE: This is Tabs a rear view. ® Hampton H27 Direct Vent Freestanding Gas Stove... - Page 34 Re-install the Glass door and Cast Front and Cast Top. Platinum Embers Embers Embers Place the center cross log D so it rests in the notch located on the top of the rear log - position as shown below. ® Hampton H27 Direct Vent Freestanding Gas Stove...
-
Page 35: Optional Side Shelves Installation
The remote control is now ready for 20 GA. 12 Ft. operation. 22 GA. 9 Ft. 4) Tighten bolts to secure. 5) Repeat steps 3 & 4 for the other side. 6) Re-install the Cast Top. ® Hampton H27 Direct Vent Freestanding Gas Stove... -
Page 36: Final Check
However, a 120V A.C. power supply is needed for the fan/ blower operation. NATURAL GAS Units and Units Equipped with DC Spark Boxes ® Hampton H27 Direct Vent Freestanding Gas Stove... - Page 37 This appliance is equipped with a three pronged (grounding) plug for your protection against shock hazard and should be plugged directly into a properly grounded three-prong receptacle. Do not cut or remove the grounding prong from this plug. ® Hampton H27 Direct Vent Freestanding Gas Stove...
-
Page 38: Operating Instructions
1) Turn stove OFF using the Burner "ON/OFF" hours. The glass may require cleaning. switch remote or thermostat. Switches are located at the top right hand corner (rear) ® Hampton H27 Direct Vent Freestanding Gas Stove... -
Page 39: Copy Of The Lighting Plate Instructions
3) Turn off all electric power to the appliance if service is to be performed. You may shut off the pilot during prolonged non use periods to conserve fuel. DO NOT REMOVE THIS INSTRUCTION PLATE 918-474b ® Hampton H27 Direct Vent Freestanding Gas Stove... -
Page 40: Maintenance
AND ANY GAS CONTROL WHICH once a year. When cleaning the logs, use a HAS BEEN UNDER WATER. soft clean paint brush as the logs are fragile and easily damaged. Top View of pilot fl ame ® Hampton H27 Direct Vent Freestanding Gas Stove... -
Page 41: Log Replacement
To Remove Fan: purchase your replacement door from an au- thorized Hampton ® dealer only, and follow our step-by-step instructions for replacement. 1) Unplug or disconnect power source to stove. ® Hampton H27 Direct Vent Freestanding Gas Stove... -
Page 42: Removing Valve
1-12. 2) Remove access panel. 2) Check for leaks and manifold pressure. See Gas Pressure Test instructions. 3) To reinstall valve, reverse instructions for removing valve assembly, steps 13-19. ® Hampton H27 Direct Vent Freestanding Gas Stove... -
Page 43: Parts List
Fan Assembly Complete Baffl e Restrictor Assembly -120 V (Option) 350-005 Restrictor 144) 910-157/P Fan Motor 120 V 350-004 Baffl e Plate for Firebox 145) 910-233 Fan Thermodisc Auto On/ 350-022 Casting Mount Bracket ® Hampton H27 Direct Vent Freestanding Gas Stove... - Page 44 PARTS LIST MAIN ASSEMBLY ® Hampton H27 Direct Vent Freestanding Gas Stove...
-
Page 45: Burner & Log Assembly
Air Shutter Gear Assembly - Female 904-565 Hex Key 3/16" 350-019 Burner Box Gasket Air Shutter Gear Assembly - Male Burner Box 434-969 Conversion Kit from Natural Gas to Propane *Note: Not available as a replacement part. ® Hampton H27 Direct Vent Freestanding Gas Stove... - Page 46 NOTES ___________________________________________________ ___________________________________________________ ___________________________________________________ ___________________________________________________ ___________________________________________________ ___________________________________________________ ___________________________________________________ ___________________________________________________ ___________________________________________________ ___________________________________________________ ___________________________________________________ ___________________________________________________ ® Hampton H27 Direct Vent Freestanding Gas Stove...
-
Page 47: Warranty
It is the general practice of FPI to charge for larger, higher priced replacement parts and issue credit once the replaced component has been returned to FPI and evaluated for manufacturer defect. The authorized selling dealer is responsible for all in-fi eld service work carried out on your Hampton product. FPI will not be liable for results or costs of workmanship from unauthorized service persons or dealers. - Page 48 Date Installed: ______________________________________________________ Serial No.: __________________________________________________________ Hampton ® and AstroCap™ are trademarks of FPI Fireplace Products International Ltd. Printed in Canada © Copyright 2010, FPI Fireplace Products International Ltd. All rights reserved. ® Hampton H27 Direct Vent Freestanding Gas Stove...
Need help?
Do you have a question about the H27 and is the answer not in the manual?
Questions and answers