Table of Contents
Advertisement
Quick Links
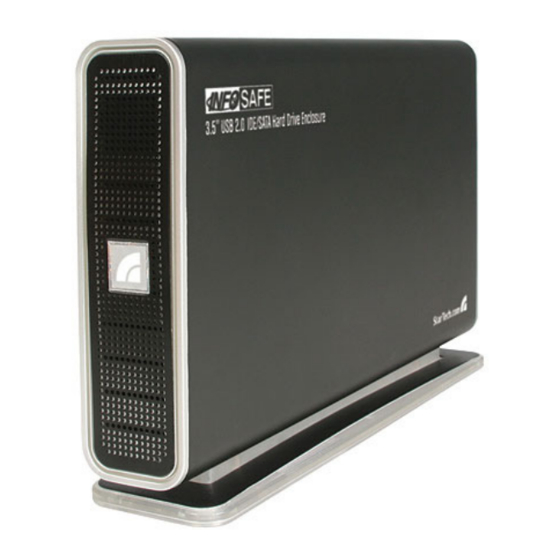
3.5in Black USB 2.0 IDE SATA External Hard
Drive Enclosure
UNI3510U2
UNI3510U2EB
UNI3510U2EB
UNI3510UEBGB
DE: Bedienungsanleitung - de.startech.com
FR: Guide de l'utilisateur - fr.startech.com
ES: Guía del usuario - es.startech.com
IT: Guida per l'uso - it.startech.com
NL: Gebruiksaanwijzing - nl.startech.com
PT: Guia do usuário - pt.startech.com
For the most up-to-date information, please visit: www.startech.com
Manual Revision: 02/03/2012
*actual product may vary from photos
Advertisement
Table of Contents

Subscribe to Our Youtube Channel
Summary of Contents for StarTech.com UNI3510U2
-
Page 1: Drive Enclosure
DE: Bedienungsanleitung - de.startech.com FR: Guide de l'utilisateur - fr.startech.com ES: Guía del usuario - es.startech.com IT: Guida per l'uso - it.startech.com NL: Gebruiksaanwijzing - nl.startech.com PT: Guia do usuário - pt.startech.com For the most up-to-date information, please visit: www.startech.com Manual Revision: 02/03/2012... -
Page 2: Fcc Compliance Statement
StarTech.com. Where they occur these references are for illustrative purposes only and do not represent an endorsement of a product or service by StarTech.com, or an endorsement of the product(s) to which this manual applies by the third-party company in question. Regardless of any direct acknowledgement elsewhere in the body of this document, StarTech.com hereby... -
Page 3: Table Of Contents
Table of Contents Introduction ....................1 Packaging Contents ..........................1 System Requirements ..........................1 Hardware Guide ..................2 Installation and Usage................3 Connecting the Drive Enclosure to a Computer ................5 Disconnecting the Enclosure from the Computer ......6 Windows XP/2000/2003 Server/Vista™/7 ..................6 Mac OS ................................ -
Page 4: Introduction
Introduction Thank you for purchasing a StarTech.com 3.5” USB 2.0 to IDE/SATA Hard Drive Enclosure. Now, you can turn almost any 3.5” hard drive into a portable storage device! This hybrid, 3.5” USB 2.0 to IDE/SATA Hard Drive Enclosure provides broad compatibility... -
Page 5: Hardware Guide
Hardware Guide Disk Mounting Tray SATA Power Cable SATA Data Cable IDE Data Cable IDE Power Cable Instruction Manual... -
Page 6: Installation And Usage
Installation and Usage WARNING: Hard drives require careful handling, especially when being transported. If you are not careful with your hard disk, lost data may result. Always handle your hard drive and storage device with caution. Hard Drive Installation 1. Remove the screws holding the Base Stand to the enclosure, and separate it from the Enclosure, then slide the Disk Mounting Tray out of the Enclosure: 2. - Page 7 3. Fasten the hard drive to the Disk Mounting Tray, using the provided screws. 4. Slide the Disk Mounting Tray (with drive attached) back into the Enclosure, so that the Enclosure is sealed. Instruction Manual...
-
Page 8: Connecting The Drive Enclosure To A Computer
5. Re-fasten the Base Stand to the base of the Enclosure and replace the screw removed in Step #1. Drive installation is now complete. Connecting the Drive Enclosure to a Computer Power Switch Power Port USB Type ‘B’ Port Instruction Manual... -
Page 9: Disconnecting The Enclosure From The Computer
1. Connect the AC Adapter cord to the DC Power Port on the rear panel of the drive enclosure. Connect the remaining end of the adapter to an available electrical outlet. 2. Insert the Type ‘B’ connector provided by the USB cable into the USB Type ‘B’ port on. 3. -
Page 10: Mac Os
Mac OS 1. Locate the Removable Disk icon associated with the drive you wish to disconnect, and drag it to the Trash icon on your desktop. 2. When the disk icon disappears from the desktop, move the Power Switch to the OFF position. -
Page 11: Troubleshooting
USB 2.0, you may consider adding a PCI or PCI Express based add-on card to your computer. For more information regarding add-on cards, please see the section entitled Accessory Products from StarTech.com. Windows won’t allow me to safely remove my drive? Often times, this is because the operating system is still reporting the drive as busy or in use. -
Page 12: Specifications
Specifications Maximum Supported Data Transfer 480Mbps (USB 2.0 and SATA II) Rate 1x SATA Data 7 Pin Female 1x SATA Power 15 Pin Female Connectors 1x 40 Pin IDE ATA Female 1x LP4 Female 1x USB B Female Windows Vista™, Windows 2000, WindowsXP/Windows 7 Supported Operating Systems Mac OS 9.0 or higher... -
Page 13: Technical Support
Limitation of Liability In no event shall the liability of StarTech.com Ltd. and StarTech.com USA LLP (or their officers, directors, employees or agents) for any damages (whether direct or indirect, special, punitive, incidental, consequential, or otherwise), loss of profits, loss of business, or any pecuniary loss, arising out of or related to the use of the product exceed the actual price paid for the product. - Page 14 StarTech.com is an ISO 9001 Registered manufacturer of connectivity and technology parts. StarTech.com was founded in 1985 and has operations in the United States, Canada, the United Kingdom and Taiwan servicing a worldwide market.


Need help?
Do you have a question about the UNI3510U2 and is the answer not in the manual?
Questions and answers