Table of Contents
Advertisement
Quick Links
Advertisement
Table of Contents

Related Manuals for BENDIXKing AV8OR ACE


Summary of Contents for BENDIXKing AV8OR ACE
- Page 3 Olathe, KS 66061 U.S.A CAGE: 22373 Telephone: (800) 601-3099 (U.S.A./Canada) Telephone: (602) 365-3099 (International) AV8OR ACE User’s Guide Revised Mar, 2012 Printed in U.S.A. Pub. No. D200904000003 Jul 2009 © Honeywell International Inc. Do not copy without express permission of Honeywell...
- Page 4 Honeywell Service Center agreement, or an authorized repair facility agreement, Honeywell hereby grants you a limited, non-exclusive license to use these Materials to D200904000003 Page T- 2 Rev 3 Mar 2012 © Honeywell International Inc. Do not copy without express permission of Honeywell...
- Page 5 Honeywell aerospace products only in accordance with that agreement. If you are a direct recipient of these Materials from Honeywell's Aerospace Technical Publication Distribution and are not a party to an agreement related to the operation, maintenance or repair...
- Page 6 This license sets forth the entire agreement between you and Honeywell and may only be modified by a writing duly executed by the duly authorized representatives of the parties. Copyright - Notice Copyright 2009, Honeywell International Inc.
-
Page 7: Honeywell Customer Support
For additional support, contact Honeywell Customer & Product Support: at: US & Canada: 1-877-712-2386 All other countries: 1-913-712-2613 Fax: 1-913-712-5697 D200904000003 Rev 3 Mar 2012 Page T- 5 © Honeywell International Inc. Do not copy without express permission of Honeywell... -
Page 8: Honeywell Aerospace Technical Publications
Honeywell Bendix/King AV8OR Ace User’s Guide Honeywell Aerospace Technical Publications If you have access to the Internet, go to the Honeywell Online Technical Publications Web site at https://portal.honeywell.com/wps/portal/aero • Download or see publications online • Make an order for a publication •... - Page 9 Revision History and Instructions Manual AV8OR ACE User’s Guide Revision 3, Mar 2012 Summary Revision 3 changes • Revised hyperlinks in document D200904000003 Rev 3 Mar 2012 Page RR- 1 © Honeywell International Inc. Do not copy without express permission of Honeywell...
- Page 10 Honeywell Bendix/King AV8OR Ace User’s Guide Record of Revisions REVISION REVISION NUMBER DATE Jul, 2009 Jul, 2009 Jan, 2011 Mar 2012 D200904000003 Page RR- 2 Rev 3 Mar 2012 © Honeywell International Inc. Do not copy without express permission of Honeywell...
-
Page 11: Table Of Contents
Map View ................. 2-32 Smart Profile ..............2-33 Auto Zoom ..............2-34 Change View ............... 2-35 Airports ................2-42 D200904000003 Table of Contents Rev 3 Mar 2012 Page TC-1 © Honeywell International Inc. Do not copy without express permission of Honeywell... - Page 12 Inserting Victor Airways into the Flight Plan ....... 2-84 Smart Airways ..............2-87 Creating New Flight Plan using MAP Selections ....2-89 Table of Contents D200904000003 Page TC- 2 Rev 3 Mar 2012 © Honeywell International Inc. Do not copy without express permission of Honeywell...
- Page 13 Text TAFs (USA and Canada)........2-142 Text PIREPs (USA only) ..........2-143 Text AIRMETs (USA only) ..........2-144 D200904000003 Table of Contents Rev 3 Mar 2012 Page TC-3 © Honeywell International Inc. Do not copy without express permission of Honeywell...
- Page 14 Data Field Setup ............2-194 Flight Plan Data Setup ........... 2-196 Demo Mode Setup ............2-197 Device Setup Page ............2-199 Table of Contents D200904000003 Page TC- 4 Rev 3 Mar 2012 © Honeywell International Inc. Do not copy without express permission of Honeywell...
- Page 15 Saving Road Safety Cameras ......... 3-31 Camera Warning ............. 3-31 Camera Types ..............3-31 Camera Directions ............3-33 Speed limit warning ............3-34 D200904000003 Table of Contents Rev 3 Mar 2012 Page TC-5 © Honeywell International Inc. Do not copy without express permission of Honeywell...
- Page 16 Objects on the map ............3-73 Streets and Roads ............3-73 Elements of the Active Route .......... 3-73 Table of Contents D200904000003 Page TC- 6 Rev 3 Mar 2012 © Honeywell International Inc. Do not copy without express permission of Honeywell...
- Page 17 SYSTEM SETTINGS .............. 5-1 GPS Status ................5-1 Backlight .................. 5-1 Backlight control bar ............. 5-2 Backlight shutdown setting ........... 5-2 D200904000003 Table of Contents Rev 3 Mar 2012 Page TC-7 © Honeywell International Inc. Do not copy without express permission of Honeywell...
- Page 18 FAA Chart Data ............... 6-24 GoFly XM Weather: ............6-24 GoDrive Automotive Maps ..........6-24 Updates: ................6-25 Table of Contents D200904000003 Page TC- 8 Rev 3 Mar 2012 © Honeywell International Inc. Do not copy without express permission of Honeywell...
- Page 19 Figure 2-19: Map – Non-pointer Map mode ........2-21 Figure 2-20: Map – Pointer Map mode ......... 2-21 D200904000003 Table of Contents Rev 3 Mar 2012 Page TC-9 © Honeywell International Inc. Do not copy without express permission of Honeywell...
- Page 20 Figure 2-52: Turn Anticipation ............2-59 Figure 2-53: Map – Navigate to a NAVAID point ......2-60 Table of Contents D200904000003 Page TC- 10 Rev 3 Mar 2012 © Honeywell International Inc. Do not copy without express permission of Honeywell...
- Page 21 Figure 2-84: Stored Flight Plan ............. 2-85 Figure 2-85: Select Airway Segment ..........2-86 Figure 2-86: Select Entry and Exit Points ........2-86 D200904000003 Table of Contents Rev 3 Mar 2012 Page TC-11 © Honeywell International Inc. Do not copy without express permission of Honeywell...
- Page 22 Figure 2-118: WX – Choose Product .......... 2-120 Figure 2-119: WX – NEXRAD – Composite Reflectivity ..... 2-121 Table of Contents D200904000003 Page TC- 12 Rev 3 Mar 2012 © Honeywell International Inc. Do not copy without express permission of Honeywell...
- Page 23 Figure 2-150: WX – Text TAFs ........... 2-142 Figure 2-151: WX –Text PIREPs ..........2-143 Figure 2-152: Text AIRMETs ............2-144 D200904000003 Table of Contents Rev 3 Mar 2012 Page TC-13 © Honeywell International Inc. Do not copy without express permission of Honeywell...
- Page 24 Figure 2-181: W&B - Aircraft Loaded Beyond C.G. Limits ..2-175 Figure 2-182: W&B Layout Page with Profile and Envelope Tabs Filled Out ..................2-176 Table of Contents D200904000003 Page TC- 14 Rev 3 Mar 2012 © Honeywell International Inc. Do not copy without express permission of Honeywell...
- Page 25 Figure 3-2: Simple Mode ..............3-5 Figure 3-3: Advanced Mode ............3-5 Figure 3-4: Map Screen ..............3-13 D200904000003 Table of Contents Rev 3 Mar 2012 Page TC-15 © Honeywell International Inc. Do not copy without express permission of Honeywell...
- Page 26 Figure 5-9: Bluetooth – Service Providers Page ......5-7 Figure 5-10: Bluetooth – DUN Setup Page ........5-8 Table of Contents D200904000003 Page TC- 16 Rev 3 Mar 2012 © Honeywell International Inc. Do not copy without express permission of Honeywell...
- Page 27 Figure 5-12: Initial Setup Menu Page ........... 5-10 Figure 6-1: Connection to USB port..........6-5 Figure 6-2: Configure AV8OR ACE as external drive ..... 6-6 Figure 6-3: External GPS Setup Screen ........6-11 Figure 6-4: Weather Setup – KDR-610 ......... 6-12 Figure 6-5: WxWorx XM Weather Setup ........
- Page 28 Table 6-3 KLN 94 Pinouts ............. 6-11 Table 6-4 GNS 430/430W/530/530W Pinouts ......6-11 Table 6-5 KDR 610 Pinouts ............6-13 Table of Contents D200904000003 Page TC- 18 Rev 3 Mar 2012 © Honeywell International Inc. Do not copy without express permission of Honeywell...
-
Page 29: Getting Started
Honeywell Bendix/King AV8OR Ace User’s Guide GETTING STARTED INTRODUCTION Thank you for choosing the Honeywell AV8OR ACE, a Multi- Function Display (MFD) that integrates a GPS, Navigation Database, Graphical Terrain, Traffic and XM Weather into a single, easy to use, portable aviation device. -
Page 30: Unit Overview
Honeywell Bendix/King AV8OR Ace User’s Guide UNIT OVERVIEW Figure 1-4: AV8OR ACE Controls Getting Started D200904000003 Page 1-2 Rev 3 Mar 2012 © Honeywell International Inc. Do not copy without express permission of Honeywell... -
Page 31: Displays And Controls
Honeywell Bendix/King AV8OR Ace User’s Guide Displays and Controls The table below describes the AV8OR ACE displays and controls that are displayed in Figure 1-1: Table 1-1 Displays and Controls FIG. DISPLAY OR DESCRIPTION CONTROL Touch screen 7 inch TFT Active Matrix LCD screen. - Page 32 Stylus The stylus allows the user to precisely tap the touch screen. Getting Started D200904000003 Page 1-4 Rev 3 Mar 2012 © Honeywell International Inc. Do not copy without express permission of Honeywell...
- Page 33 Aircraft or an automotive DC power source. Microphone The microphone is used for Bluetooth connections to cell phones. D200904000003 Getting Started Rev 3 Mar 2012 Page 1-5 © Honeywell International Inc. Do not copy without express permission of Honeywell...
-
Page 34: Supplied Software And Equipment
Honeywell Bendix/King AV8OR Ace User’s Guide Supplied Software and Equipment The SD card on the AV8OR Ace comes preloaded with a navigation map for the GoFly program and the GoDrive program. Different maps for different regions are available. Please visit the bendixking.com/av8or website to browse the available regions,... -
Page 35: Optional Equipment
Charging the internal battery Before using this unit for the first time or when replacing the internal battery with a new battery, the internal battery in the AV8OR ACE must be charged. Find the power connector (7) on the right side of the unit. Refer to Figure 1-4. -
Page 36: Using Av8Or Ace
In order to highlight a field, just touch the field on the screen. Touch or Tap: Use your finger or the AV8OR ACE stylus to touch the screen on the soft key and remove it quickly Double tap: Use your finger or the stylus to touch the screen twice on a field. -
Page 37: Turning Av8Or Ace On/Off
Turning AV8OR ACE on/off The first time your new AV8OR ACE is turned on, the GPS receiver must collect satellite data and establish its present location. Before you turn on the unit, make sure that it has a clear and unobstructed view of the sky to receive satellite signals. -
Page 38: Av8Or Ace Sleep Mode
Honeywell Bendix/King AV8OR Ace User’s Guide Figure 1-6: AV8OR ACE Power off AV8OR ACE SLEEP MODE AV8OR ACE can be put into sleep mode as shown in the figure below. AV8OR, while in sleep mode, continues to run in a low power mode. -
Page 39: Main Menu
Tap the Go fly icon to start the Go Fly aviation program. • Tap the Go drive icon to start the automotive program. D200904000003 Getting Started Rev 3 Mar 2012 Page 1-11 © Honeywell International Inc. Do not copy without express permission of Honeywell... -
Page 40: Getting Satellite Signals
Tap the Settings icon to display the Settings page. Getting satellite signals When the AV8OR ACE is turned on, it automatically begins to search for satellite signals. This process can take a few minutes. Be sure the device has a clear and unobstructed view of the sky. -
Page 41: Gps Signal Strength
Tapping this soft key displays the longitude, latitude, altitude (ALT) and UTC time information for the current position when the device has acquired a GPS satellite lock. D200904000003 Getting Started Rev 3 Mar 2012 Page 1-13 © Honeywell International Inc. Do not copy without express permission of Honeywell... -
Page 42: Gps Data Flow
Tapping this soft key shows the GPS national marine electronics association (NMEA) data in real-time. Figure 1-12: GPS Data flow Getting Started D200904000003 Page 1-14 Rev 3 Mar 2012 © Honeywell International Inc. Do not copy without express permission of Honeywell... -
Page 43: Satellite Acquisition Reset
GPS reset soft key will clear the GPS engine memory. Figure 1-13: GPS Reset Tap the soft key to return to the Settings page. D200904000003 Getting Started Rev 3 Mar 2012 Page 1-15 © Honeywell International Inc. Do not copy without express permission of Honeywell... - Page 44 Honeywell Bendix/King AV8OR Ace User’s Guide This Page Intentionally Left Blank Getting Started D200904000003 Page 1-16 Rev 3 Mar 2012 © Honeywell International Inc. Do not copy without express permission of Honeywell...
-
Page 45: Aviation Mode Operation
A self-test status window is displayed under the title box. The self- test checks to make sure the internal navigation, cartography and D200904000003 Aviation Mode Operation Rev 3 Mar 2012 Page 2-1 © Honeywell International Inc. Do not copy without express permission of Honeywell... -
Page 46: Figure 2-2: Self Test Failed
If the self-test finishes successfully, the self-test window header changes to SELF TEST COMPLETED in green, as shown in the figure below. Aviation Mode Operation D200904000003 Page 2-2 Rev 3 Mar 2012 © Honeywell International Inc. Do not copy without express permission of Honeywell... -
Page 47: Figure 2-4: Self Test Completed Page
The final title page shows the subscription expiration dates of the present database, installed charts and the data providers in a scrollable window (if needed). Use the AV8OR ACE as an aid to situational awareness only when the database is current. -
Page 48: Demo Mode
If the OK soft key is pushed to acknowledge the Jeppesen database, the Aviation Map page is displayed. If the DEMO MODE soft key is tapped, then AV8OR ACE will enter a simulation mode. Demo Mode Demo Mode lets the user become familiar with handling the AV8OR ACE system on the ground by running in a simulation mode. -
Page 49: Aviation Main Menu Page
Tap on the MAIN MENU soft key on the Map page to display the Aviation Main Menu Page. D200904000003 Aviation Mode Operation Rev 3 Mar 2012 Page 2-5 © Honeywell International Inc. Do not copy without express permission of Honeywell... -
Page 50: Figure 2-8: Main Menu Page
Refer to FLIGHT PLAN FUNCTION on page 2-76 for a detailed explanation of the use of flight plans. Aviation Mode Operation D200904000003 Page 2-6 Rev 3 Mar 2012 © Honeywell International Inc. Do not copy without express permission of Honeywell... -
Page 51: Figure 2-9: Flight Plan - Flight Plan Index Page
Panel page. Refer to the PANEL FUNCTION section on page 2-161 for a detailed explanation of the Panel Page. Figure 2-10: Panel - Panel Page D200904000003 Aviation Mode Operation Rev 3 Mar 2012 Page 2-7 © Honeywell International Inc. Do not copy without express permission of Honeywell... -
Page 52: Figure 2-11: Messages - Messages Info Page
2-117 for a detailed explanation of the Weather function. Refer to the Connection to An External Weather Source section in the Appendix on page 6-12 for a detailed explanation on how to connect the AV8OR ACE to an XM receiver. Aviation Mode Operation D200904000003... -
Page 53: Figure 2-12: Weather - Weather Map Page
2-155 for a detailed explanation of the Traffic function. Refer to the Connection to An External Traffic Source section on page 6-20 in the APPENDIX for a detailed explanation on how to connect the AV8OR ACE to a Traffic receiver. D200904000003... -
Page 54: Figure 2-13: Traffic Main Page
2-181 for a detailed explanation of the system setup function. Figure 2-14: System Setup – System Setup Menu page Aviation Mode Operation D200904000003 Page 2-10 Rev 3 Mar 2012 © Honeywell International Inc. Do not copy without express permission of Honeywell... -
Page 55: Portrait Or Landscape Mode
Refer to Table 1-1 on page 1-3. Figure 2-15: Map Page - Portrait Mode D200904000003 Aviation Mode Operation Rev 3 Mar 2012 Page 2-11 © Honeywell International Inc. Do not copy without express permission of Honeywell... -
Page 56: Vfr Moving Map Function
Honeywell Bendix/King AV8OR Ace User’s Guide VFR MOVING MAP FUNCTION The AV8OR ACE features a real-time moving map that can do much more than just plot your course. The core capability of AV8OR ACE MAP mode function is its intuitive mapping and navigation function, which is capable of displaying highly detailed, vectored (point and line) maps. -
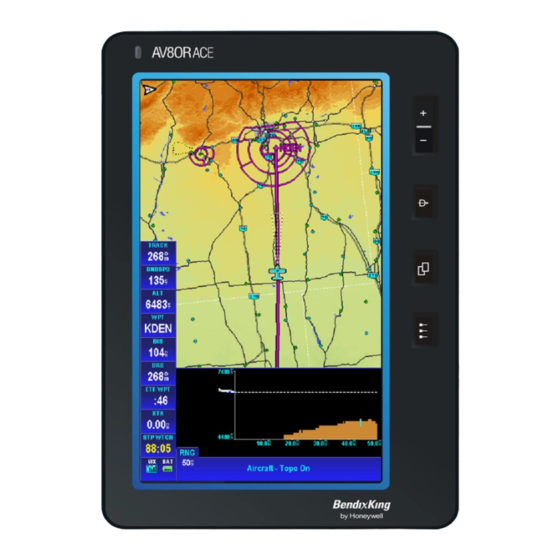
Page 57: Figure 2-16: Map Display
Honeywell Bendix/King AV8OR Ace User’s Guide Figure 2-16: Map Display D200904000003 Aviation Mode Operation Rev 3 Mar 2012 Page 2-13 © Honeywell International Inc. Do not copy without express permission of Honeywell... -
Page 58: Map Page Controls And Indications
The MAIN MENU soft key returns to the Aviation Main Menu page. Aviation Mode Operation D200904000003 Page 2-14 Rev 3 Mar 2012 © Honeywell International Inc. Do not copy without express permission of Honeywell... - Page 59 XM weather receiver (if installed) and traffic information (if installed). Caution: When AV8OR ACE has lost its GPS position fix, a blue “No position data” caution message is displayed across the screen and the aircraft symbol is not displayed.
-
Page 60: Fast Access
Fast Access area to cycle forwards or backwards through the available pages. Aviation Mode Operation D200904000003 Page 2-16 Rev 3 Mar 2012 © Honeywell International Inc. Do not copy without express permission of Honeywell... -
Page 61: Image Overlays
TFR: If a TFR is available, a yellow and black dashed TFR boundary is displayed on the page. D200904000003 Aviation Mode Operation Rev 3 Mar 2012 Page 2-17 © Honeywell International Inc. Do not copy without express permission of Honeywell... -
Page 62: Table 2-1: Image Overlays On Primary Maps
Table 2-1: Image Overlays on Primary Maps OVER- TOPO TOPO NEXRAD METAR, AIRMET, PIREP, SIGMET WINDS MAPS ALOFT MAPS Flight Plan Traffic Flight Trail Aviation Mode Operation D200904000003 Page 2-18 Rev 3 Mar 2012 © Honeywell International Inc. Do not copy without express permission of Honeywell... - Page 63 Overlays are configured in the Map Setup section. The Topo On Map - Overlay Setup page is shown in the figure below. D200904000003 Aviation Mode Operation Rev 3 Mar 2012 Page 2-19 © Honeywell International Inc. Do not copy without express permission of Honeywell...
-
Page 64: Map Page Pointer/Non-Pointer
GPS signals are available. Aviation Mode Operation D200904000003 Page 2-20 Rev 3 Mar 2012 © Honeywell International Inc. Do not copy without express permission of Honeywell... -
Page 65: Figure 2-19: Map - Non-Pointer Map Mode
The title window displays the bearing and distance of the pointer relative to the aircraft’s position. D200904000003 Aviation Mode Operation Rev 3 Mar 2012 Page 2-21 © Honeywell International Inc. Do not copy without express permission of Honeywell... -
Page 66: Data Fields
Data fields are selected in the System Setup Menu, refer to the Data Field Setup section on page 2-194. Aviation Mode Operation D200904000003 Page 2-22 Rev 3 Mar 2012 © Honeywell International Inc. Do not copy without express permission of Honeywell... -
Page 67: Table 2-2 Course Deviation Limits
20 knots or higher. The time is displayed in HH:MM format. The time is dashed if there is no departure time available. D200904000003 Aviation Mode Operation Rev 3 Mar 2012 Page 2-23 © Honeywell International Inc. Do not copy without express permission of Honeywell... - Page 68 “minimum off-route altitude” along the track line between the start and destination waypoints. The ESA is displayed in the currently selected altitude units. Aviation Mode Operation D200904000003 Page 2-24 Rev 3 Mar 2012 © Honeywell International Inc. Do not copy without express permission of Honeywell...
-
Page 69: Table 2-3 Calculated Time En Route
If the ETE is invalid or greater than 24 hours then “--:--“ is displayed. Examples are shown in the following table: Table 2-3 Calculated Time En Route D200904000003 Aviation Mode Operation Rev 3 Mar 2012 Page 2-25 © Honeywell International Inc. Do not copy without express permission of Honeywell... - Page 70 The MSA value is displayed in the currently selected units for altitude. If the position is invalid then the MSA value is displayed as dashes. Aviation Mode Operation D200904000003 Page 2-26 Rev 3 Mar 2012 © Honeywell International Inc. Do not copy without express permission of Honeywell...
-
Page 71: Not Shown Data Field
If the present position is unknown then dashes are displayed. D200904000003 Aviation Mode Operation Rev 3 Mar 2012 Page 2-27 © Honeywell International Inc. Do not copy without express permission of Honeywell... -
Page 72: Table 2-4 Time Zones
– user User configurable offset from defined Universal time 0:00 Greenland Standard Time -3:00 Greenland Daylight Saving -2:00 Aviation Mode Operation D200904000003 Page 2-28 Rev 3 Mar 2012 © Honeywell International Inc. Do not copy without express permission of Honeywell... - Page 73 Saving -9:00 Time Samoa Standard Time -11:00 Samoa Daylight Saving -10:00 Time - Track Angle Error Data Field D200904000003 Aviation Mode Operation Rev 3 Mar 2012 Page 2-29 © Honeywell International Inc. Do not copy without express permission of Honeywell...
- Page 74 “NOT INSTALLED” is displayed in white text in the center of the mini traffic-targets data window and no traffic-targets are displayed. Track To Steer Data Field Aviation Mode Operation D200904000003 Page 2-30 Rev 3 Mar 2012 © Honeywell International Inc. Do not copy without express permission of Honeywell...
- Page 75 An D200904000003 Aviation Mode Operation Rev 3 Mar 2012 Page 2-31 © Honeywell International Inc. Do not copy without express permission of Honeywell...
-
Page 76: Vfr Moving Map Operation
CHANGE VIEW soft key as shown in the figure below. Figure 2-23: Map – Map View Setup Aviation Mode Operation D200904000003 Page 2-32 Rev 3 Mar 2012 © Honeywell International Inc. Do not copy without express permission of Honeywell... -
Page 77: Smart Profile
Smart Profile mode to OFF. Vertical profiles of airspace vertical boundaries and man-made obstructions are also displayed in the Smart Profile window. D200904000003 Aviation Mode Operation Rev 3 Mar 2012 Page 2-33 © Honeywell International Inc. Do not copy without express permission of Honeywell... -
Page 78: Auto Zoom
An “Auto Zoom Suspended” message shows on the top of the MAP page for a few seconds. Aviation Mode Operation D200904000003 Page 2-34 Rev 3 Mar 2012 © Honeywell International Inc. Do not copy without express permission of Honeywell... -
Page 79: Change View
• Tapping the CHANGE VIEW soft key displays the MAP Type Selection Screen that displays the following options. D200904000003 Aviation Mode Operation Rev 3 Mar 2012 Page 2-35 © Honeywell International Inc. Do not copy without express permission of Honeywell... -
Page 80: Figure 2-28: Map Type Selection Screen
Figure 2-28: Map Type Selection Screen: NOTE: The HI IFR Enroute Chart and LO IFR Enroute Chart only show if the chart option is available in the AV8OR ACE unit. Highlight the map view desired and tap the SELECT soft key to change the display to the view that has been selected. -
Page 81: Figure 2-30: Map - Relative Terrain
Table 2-5 Relative Terrain Relative Terrain Relative Color Dither Obstacle Pattern Altitude (feet) Percent D200904000003 Aviation Mode Operation Rev 3 Mar 2012 Page 2-37 © Honeywell International Inc. Do not copy without express permission of Honeywell... - Page 82 If altitude information is not available then a warning message is displayed on the map image with the text “No Altitude Available. Relative Terrain Not Displayed.” Aviation Mode Operation D200904000003 Page 2-38 Rev 3 Mar 2012 © Honeywell International Inc. Do not copy without express permission of Honeywell...
-
Page 83: Figure 2-31: High Altitude Ifr Enroute Chart
The aircraft or helicopter symbol on the chart shows the actual aircraft position (geo-referenced) and will change position as the aircraft changes position. D200904000003 Aviation Mode Operation Rev 3 Mar 2012 Page 2-39 © Honeywell International Inc. Do not copy without express permission of Honeywell... -
Page 84: Figure 2-32: Low Altitude Ifr Enroute Chart
The aircraft or helicopter symbol on the chart shows the actual aircraft position (geo-referenced) and will change position as the aircraft changes position. Aviation Mode Operation D200904000003 Page 2-40 Rev 3 Mar 2012 © Honeywell International Inc. Do not copy without express permission of Honeywell... -
Page 85: Figure 2-33: Map - Vfr Sectional Chart
The VFR Sectional chart shows in north up mode only. The VFR Sectional Chart can be configured with waypoint, obstacle and airspace overlays, similar to HI/LO IFR Enroute Charts. D200904000003 Aviation Mode Operation Rev 3 Mar 2012 Page 2-41 © Honeywell International Inc. Do not copy without express permission of Honeywell... -
Page 86: Airports
Tap on the MORE INFO soft key to display the Airport Information – Runways page as shown below. Aviation Mode Operation D200904000003 Page 2-42 Rev 3 Mar 2012 © Honeywell International Inc. Do not copy without express permission of Honeywell... -
Page 87: Select Runway Soft Key
100 nm. The extended runway centerlines are displayed in a light blue and white line as shown below. D200904000003 Aviation Mode Operation Rev 3 Mar 2012 Page 2-43 © Honeywell International Inc. Do not copy without express permission of Honeywell... -
Page 88: Figure 2-36: Airports - Extended Centerline On Map Page
.On the Airport Information – Runways page, the selected runway background changes to blue with a white outline as shown below. Aviation Mode Operation D200904000003 Page 2-44 Rev 3 Mar 2012 © Honeywell International Inc. Do not copy without express permission of Honeywell... -
Page 89: Charts Soft Key
MORE INFO soft key for an airport is tapped and the selected airport had an available chart or procedure as shown in the figure below. D200904000003 Aviation Mode Operation Rev 3 Mar 2012 Page 2-45 © Honeywell International Inc. Do not copy without express permission of Honeywell... -
Page 90: Airport Information Window
Airport Services Database is installed on the AV8OR. The Airport Services Database is available for download on the internet at bendixking.com/av8or. Aviation Mode Operation D200904000003 Page 2-46 Rev 3 Mar 2012 © Honeywell International Inc. Do not copy without express permission of Honeywell... -
Page 91: Comms Tab
Fuel Tab Tap on the Fuel tab to display the Airport Information – Fuel Pricing page as shown below. D200904000003 Aviation Mode Operation Rev 3 Mar 2012 Page 2-47 © Honeywell International Inc. Do not copy without express permission of Honeywell... -
Page 92: Figure 2-41: Airport - Fuel Page
Tap the SEARCH PRICE soft key to display the Nearby Fuel Price Comparison window as shown below. Aviation Mode Operation D200904000003 Page 2-48 Rev 3 Mar 2012 © Honeywell International Inc. Do not copy without express permission of Honeywell... -
Page 93: Svcs Tab
Tap on the Svcs tab to display the Airport Information – Airport Services page as shown in the figure below. D200904000003 Aviation Mode Operation Rev 3 Mar 2012 Page 2-49 © Honeywell International Inc. Do not copy without express permission of Honeywell... -
Page 94: Local Tab
Tap on the Local tab to display the Airport Information – Local Services page as shown in the figure below. Aviation Mode Operation D200904000003 Page 2-50 Rev 3 Mar 2012 © Honeywell International Inc. Do not copy without express permission of Honeywell... -
Page 95: Nearest - Select Nearest Destination
WPT within the nearest database. D200904000003 Aviation Mode Operation Rev 3 Mar 2012 Page 2-51 © Honeywell International Inc. Do not copy without express permission of Honeywell... -
Page 96: Nearest Airports
Clear soft key on the virtual keyboard and then tap the Enter soft key. Nearest Airports Aviation Mode Operation D200904000003 Page 2-52 Rev 3 Mar 2012 © Honeywell International Inc. Do not copy without express permission of Honeywell... -
Page 97: Figure 2-46: Nearest Airports
The filter will not allow airports below the minimum requirements to be displayed in the list. D200904000003 Aviation Mode Operation Rev 3 Mar 2012 Page 2-53 © Honeywell International Inc. Do not copy without express permission of Honeywell... -
Page 98: Nearest Vors
Direct-To course on the map. Nearest VORs Aviation Mode Operation D200904000003 Page 2-54 Rev 3 Mar 2012 © Honeywell International Inc. Do not copy without express permission of Honeywell... -
Page 99: Nearest User Wpts
Double tap on the Nearest User Wpts selection or tap once on the Nearest User Wpts selection and tap the SELECT soft key to show the Nearest Towns and Cities. D200904000003 Aviation Mode Operation Rev 3 Mar 2012 Page 2-55 © Honeywell International Inc. Do not copy without express permission of Honeywell... -
Page 100: Nearest Towns And Cities
Nearest Towns and Cities selection and tap the SELECT soft key to show the Nearest Towns and Cities. Aviation Mode Operation D200904000003 Page 2-56 Rev 3 Mar 2012 © Honeywell International Inc. Do not copy without express permission of Honeywell... -
Page 101: Waypoint Alert
Turning to establish the NEXT DTK will aid in intercepting the next leg of the flight plan. D200904000003 Aviation Mode Operation Rev 3 Mar 2012 Page 2-57 © Honeywell International Inc. Do not copy without express permission of Honeywell... -
Page 102: Turn Anticipation
When the computed turn point is reached TURN TO is displayed as shown in the figure below. Aviation Mode Operation D200904000003 Page 2-58 Rev 3 Mar 2012 © Honeywell International Inc. Do not copy without express permission of Honeywell... -
Page 103: Direct-To Navigation
If you tap on an existing NAVAID, more detail information about the NAVAID point is shown by tapping the MORE INFO soft D200904000003 Aviation Mode Operation Rev 3 Mar 2012 Page 2-59 © Honeywell International Inc. Do not copy without express permission of Honeywell... -
Page 104: Create A Direct-To Course From The Keyboard Entry (No Flight Plan)
Tap the on the screen as shown in the figure below. Aviation Mode Operation D200904000003 Page 2-60 Rev 3 Mar 2012 © Honeywell International Inc. Do not copy without express permission of Honeywell... -
Page 105: Figure 2-54: Map - Virtual Keyboard
After the Enter key is tapped, a Waypoint Entry screen shows detailed information about the entered location. D200904000003 Aviation Mode Operation Rev 3 Mar 2012 Page 2-61 © Honeywell International Inc. Do not copy without express permission of Honeywell... -
Page 106: Re-Center Aircraft When Direct-To Is Already Enabled
WPT’s position and shows the new Direct-To course on the Map. Re-center aircraft when Direct-To is already enabled Aviation Mode Operation D200904000003 Page 2-62 Rev 3 Mar 2012 © Honeywell International Inc. Do not copy without express permission of Honeywell... -
Page 107: Bypass A Wpt With A Flight Plan Active
1. The active course shows as a magenta line on the Map. 2. Tap on the hard key to display the Active Flight Plan page. D200904000003 Aviation Mode Operation Rev 3 Mar 2012 Page 2-63 © Honeywell International Inc. Do not copy without express permission of Honeywell... -
Page 108: Enter A Direct-To Wpt With A Flight Plan Active
Enter a Direct-To WPT with a flight plan active. 1. The active course shows as a magenta line on the Map. Aviation Mode Operation D200904000003 Page 2-64 Rev 3 Mar 2012 © Honeywell International Inc. Do not copy without express permission of Honeywell... -
Page 109: Figure 2-60: Enter New Wpt - Flight Plan Active - Step 2
5. Tap on the Enter soft key when done and then tap on the OK soft key to activate the Direct-To WPT. This will suspend the D200904000003 Aviation Mode Operation Rev 3 Mar 2012 Page 2-65 © Honeywell International Inc. Do not copy without express permission of Honeywell... -
Page 110: Ptr Menu
PTR MENU soft key is displayed. Use the steps that follow to create a user Waypoint. 1. Tap the PTR MENU soft key to show the pointer menu. Aviation Mode Operation D200904000003 Page 2-66 Rev 3 Mar 2012 © Honeywell International Inc. Do not copy without express permission of Honeywell... -
Page 111: Figure 2-62: Map -Ptr Menu - Save Waypoint
4. The User Waypoint popup window lists the waypoint ID and the date and time the waypoint was created. D200904000003 Aviation Mode Operation Rev 3 Mar 2012 Page 2-67 © Honeywell International Inc. Do not copy without express permission of Honeywell... -
Page 112: Center The Map Around Pointer Position
3. Choose the Center Map option as shown below and tap the SELECT soft key to center the position of the Map page on the pointer position. Aviation Mode Operation D200904000003 Page 2-68 Rev 3 Mar 2012 © Honeywell International Inc. Do not copy without express permission of Honeywell... -
Page 113: Ptr Menu - Direct-To Navigation
MENU soft key, the OBS soft key will be shown. After the OBS soft key is tapped, the OBS window shows the magnetic course to the NAVAID. D200904000003 Aviation Mode Operation Rev 3 Mar 2012 Page 2-69 © Honeywell International Inc. Do not copy without express permission of Honeywell... -
Page 114: To Select A User Defined Point On The Map
To edit the OBS Course Angle, double tap on the OBS Course Window to open a key pad. Figure 2-67: OBS Course Correction Keypad Aviation Mode Operation D200904000003 Page 2-70 Rev 3 Mar 2012 © Honeywell International Inc. Do not copy without express permission of Honeywell... -
Page 115: Center Map
In pointer map mode (User taps on the map and a black pointer is shown and the PTR MENU soft key is tapped), the D200904000003 Aviation Mode Operation Rev 3 Mar 2012 Page 2-71 © Honeywell International Inc. Do not copy without express permission of Honeywell... -
Page 116: Center To Wpt/Center Aircraft
The CENTER TO WPT soft key changes to a CENTER AIRCRAFT soft key after the CENTER TO WPT soft key is tapped. Aviation Mode Operation D200904000003 Page 2-72 Rev 3 Mar 2012 © Honeywell International Inc. Do not copy without express permission of Honeywell... -
Page 117: Selectable Gps Data Source
Figure 2-70: Map – Center to Aircraft Selectable GPS Data Source The AV8OR ACE system can receive data from either the internal or an external GPS Source. When an external source is configured, the unit uses data from it. Switching to the internal GPS source is automatic when data from the external source is no longer valid or available. - Page 118 A warning message shows that needs to be acknowledged by the pilot. • After the OK soft key is tapped, the message window closes. Aviation Mode Operation D200904000003 Page 2-74 Rev 3 Mar 2012 © Honeywell International Inc. Do not copy without express permission of Honeywell...
-
Page 119: Stop Watch
When the stopwatch is active, it continues to count even if the stopwatch data window is not being displayed. D200904000003 Aviation Mode Operation Rev 3 Mar 2012 Page 2-75 © Honeywell International Inc. Do not copy without express permission of Honeywell... -
Page 120: Flight Plan Function
Honeywell Bendix/King AV8OR Ace User’s Guide FLIGHT PLAN FUNCTION VFR flight plans can be created in the AV8OR ACE when configured to use the internal GPS. Flight plans can also be created on a PC with the Jeppesen FliteStar© or Voyager© PC application. Refer to the Chapter 6 APPENDIX section on page 6-1 for more information on how to import a flight plan. -
Page 121: Figure 2-72: Flight Plan - User Waypoint List
WPT, the User Waypoint Edit page is displayed as shown in the figure below. Figure 2-73: Flight Plan – New/Edit User Waypoint The AV8OR ACE system creates a default: Ident name, Icon, Position, Comment 1 and Comment 2 parameters for the new WPT. D200904000003... -
Page 122: User Waypoint Icons
USER WAYPOINT ICONS Double tap on the Icon to display the Select use waypoint icon popup box. Aviation Mode Operation D200904000003 Page 2-78 Rev 3 Mar 2012 © Honeywell International Inc. Do not copy without express permission of Honeywell... -
Page 123: User Airport Entry
If a VFR Airport Icon is selected for the Icon field, a NEXT soft key is displayed on the screen as shown in the figure below. D200904000003 Aviation Mode Operation Rev 3 Mar 2012 Page 2-79 © Honeywell International Inc. Do not copy without express permission of Honeywell... -
Page 124: Figure 2-76: User Airport Entry
The Comm Frequencies section includes data fields for two different frequencies and frequency types. Aviation Mode Operation D200904000003 Page 2-80 Rev 3 Mar 2012 © Honeywell International Inc. Do not copy without express permission of Honeywell... -
Page 125: Creating New Flight Plan Using The Virtual Keyboard
FPLAN soft key to show the New Flight Plan page. In this page, you can enter a WPT using the keyboard. D200904000003 Aviation Mode Operation Rev 3 Mar 2012 Page 2-81 © Honeywell International Inc. Do not copy without express permission of Honeywell... -
Page 126: Figure 2-79: New Flight Plan Page
Tap on the Clear soft key to clear the entry and start over. • Tap the Enter soft key when complete to show the Waypoint Entry window. Aviation Mode Operation D200904000003 Page 2-82 Rev 3 Mar 2012 © Honeywell International Inc. Do not copy without express permission of Honeywell... -
Page 127: Figure 2-81: Waypoint Entry Window
WPT until all the WPTs are entered. D200904000003 Aviation Mode Operation Rev 3 Mar 2012 Page 2-83 © Honeywell International Inc. Do not copy without express permission of Honeywell... -
Page 128: Inserting Victor Airways Into The Flight Plan
1. Victor Airways can be inserted into any flight plan as it is created or into a stored Flight Plan when it is edited. Aviation Mode Operation D200904000003 Page 2-84 Rev 3 Mar 2012 © Honeywell International Inc. Do not copy without express permission of Honeywell... -
Page 129: Figure 2-84: Stored Flight Plan
5. Using the virtual keyboard enter the name of the victor airway and tap the Enter button. 6. Highlight the segment to use and then tap Select Segment. D200904000003 Aviation Mode Operation Rev 3 Mar 2012 Page 2-85 © Honeywell International Inc. Do not copy without express permission of Honeywell... -
Page 130: Figure 2-85: Select Airway Segment
8. The flight plan will be modified with all of the waypoints between the entry and exit points as shown in the figure below. Aviation Mode Operation D200904000003 Page 2-86 Rev 3 Mar 2012 © Honeywell International Inc. Do not copy without express permission of Honeywell... -
Page 131: Smart Airways
Hutchinson Kansas to Tucumcari, New Mexico, U.S.A. The correct entry for this would be “ICT V12 TCC”. D200904000003 Aviation Mode Operation Rev 3 Mar 2012 Page 2-87 © Honeywell International Inc. Do not copy without express permission of Honeywell... -
Page 132: Figure 2-88: Smart Airways Entry Screen
Then tap on the SELECT soft key to accept the new Entry or Exit waypoint. Aviation Mode Operation D200904000003 Page 2-88 Rev 3 Mar 2012 © Honeywell International Inc. Do not copy without express permission of Honeywell... -
Page 133: Creating New Flight Plan Using Map Selections
When you tap a waypoint on the map, the name of the waypoint is shown in a pop-up window. Figure 2-90: Flight Plan – Map Selection of WPTs D200904000003 Aviation Mode Operation Rev 3 Mar 2012 Page 2-89 © Honeywell International Inc. Do not copy without express permission of Honeywell... -
Page 134: Figure 2-91: Flight Plan - Waypoint Detail
Figure 2-92: Flight Plan – Selected Waypoint Detail Information Aviation Mode Operation D200904000003 Page 2-90 Rev 3 Mar 2012 © Honeywell International Inc. Do not copy without express permission of Honeywell... -
Page 135: Figure 2-93: Flight Plan - Stored Flight Plan With A Waypoint
Flight Plan is complete. Tap the CLEAR PTR soft key to show the SAVE&EXIT soft key, as shown in the figure below. Figure 2-94: Flight Plan – Save Waypoint D200904000003 Aviation Mode Operation Rev 3 Mar 2012 Page 2-91 © Honeywell International Inc. Do not copy without express permission of Honeywell... -
Page 136: Stored Flight Plans Processing
Select an existing Flight Plan and EDIT FPLAN, FPLAN ADMIN, USER WPTS and FLY FPLAN soft keys are displayed on the right side of the page. Aviation Mode Operation D200904000003 Page 2-92 Rev 3 Mar 2012 © Honeywell International Inc. Do not copy without express permission of Honeywell... -
Page 137: Edit A Flight Plan
WPT at the end of the flight plan. D200904000003 Aviation Mode Operation Rev 3 Mar 2012 Page 2-93 © Honeywell International Inc. Do not copy without express permission of Honeywell... -
Page 138: Map View Mode
INSERT WPT soft key is shown to allow the user to insert it into the flight plan. Aviation Mode Operation D200904000003 Page 2-94 Rev 3 Mar 2012 © Honeywell International Inc. Do not copy without express permission of Honeywell... -
Page 139: Flight Plan Administration
Flight Plan Index page are shown. Figure 2-99: Flight Plan – FPLAN ADMIN D200904000003 Aviation Mode Operation Rev 3 Mar 2012 Page 2-95 © Honeywell International Inc. Do not copy without express permission of Honeywell... -
Page 140: Copy A Flight Plan
Highlight the flight plan that you wish to invert. Aviation Mode Operation D200904000003 Page 2-96 Rev 3 Mar 2012 © Honeywell International Inc. Do not copy without express permission of Honeywell... - Page 141 Tap the SAVE & EXIT soft key to invert the flight plan. The flight plan now shows on the Flight Plan Index Page with the WPTs inverted. D200904000003 Aviation Mode Operation Rev 3 Mar 2012 Page 2-97 © Honeywell International Inc. Do not copy without express permission of Honeywell...
-
Page 142: Delete A Flight Plan
Figure 2-104: Delete Flight Plan Tap SAVE & EXIT to save all changes and return to the user Waypoints Page. Aviation Mode Operation D200904000003 Page 2-98 Rev 3 Mar 2012 © Honeywell International Inc. Do not copy without express permission of Honeywell... -
Page 143: Fly A Flight Plan
WPTs, as shown in the figure below. The WPT in magenta with the arrow pointing to it is the current WPT. D200904000003 Aviation Mode Operation Rev 3 Mar 2012 Page 2-99 © Honeywell International Inc. Do not copy without express permission of Honeywell... -
Page 144: Active Flight Plan
A visual alert Aviation Mode Operation D200904000003 Page 2-100 Rev 3 Mar 2012 © Honeywell International Inc. Do not copy without express permission of Honeywell... -
Page 145: Descent Profile Entry Window
1000 ft. If the waypoint is not an airport, the target altitude defaults to the D200904000003 Aviation Mode Operation Rev 3 Mar 2012 Page 2-101 © Honeywell International Inc. Do not copy without express permission of Honeywell... -
Page 146: Figure 2-108: Top Of Descent Overhead View
The target altitude is entered any time prior to reaching the target waypoint, including on ground prior to the flight. • The target altitude is entered as MSL. Aviation Mode Operation D200904000003 Page 2-102 Rev 3 Mar 2012 © Honeywell International Inc. Do not copy without express permission of Honeywell... - Page 147 When the aircraft reaches the TOD or if the calculated TOD is behind the aircraft in the flight plan path, then: D200904000003 Aviation Mode Operation Rev 3 Mar 2012 Page 2-103 © Honeywell International Inc. Do not copy without express permission of Honeywell...
-
Page 148: Charts And Procedures
The user can select airport diagrams, SID, STAR and Approach procedures from this page. Aviation Mode Operation D200904000003 Page 2-104 Rev 3 Mar 2012 © Honeywell International Inc. Do not copy without express permission of Honeywell... -
Page 149: Selected Airport
ICAO designator for Origination airport ICAO designator for Destination airport Keyboard Entry D200904000003 Aviation Mode Operation Rev 3 Mar 2012 Page 2-105 © Honeywell International Inc. Do not copy without express permission of Honeywell... -
Page 150: Approach Chart Page
APPROACH CHART PAGE Tap on the Apprch tab to display the approach charts for the selected airport as shown below. Aviation Mode Operation D200904000003 Page 2-106 Rev 3 Mar 2012 © Honeywell International Inc. Do not copy without express permission of Honeywell... -
Page 151: Figure 2-112: Approach Chart Page
Plan [Future Function] SHOW Cause the view selected to CHART be displayed Airport Causes the Airport charts to be displayed D200904000003 Aviation Mode Operation Rev 3 Mar 2012 Page 2-107 © Honeywell International Inc. Do not copy without express permission of Honeywell... -
Page 152: Airport Diagram Page
Tap on the Airport tab to display the airport diagram for the selected airport as shown below. Figure 2-113: Airport Chart Page The soft key configuration and functionality is: Aviation Mode Operation D200904000003 Page 2-108 Rev 3 Mar 2012 © Honeywell International Inc. Do not copy without express permission of Honeywell... -
Page 153: Table 2-7: Airport Chart Page
• Upon entry to this page, the diagram for the selected airport is displayed (7). • D200904000003 Aviation Mode Operation Rev 3 Mar 2012 Page 2-109 © Honeywell International Inc. Do not copy without express permission of Honeywell... -
Page 154: Sid Chart Page
LOAD VIEW Causes the view selected to be loaded into the “VIEW” sequence Loads selected procedure into the Flight Aviation Mode Operation D200904000003 Page 2-110 Rev 3 Mar 2012 © Honeywell International Inc. Do not copy without express permission of Honeywell... -
Page 155: Star Chart Page
STAR CHART PAGE Tap on the STAR tab to display the STAR procedures for the selected airport as shown below. D200904000003 Aviation Mode Operation Rev 3 Mar 2012 Page 2-111 © Honeywell International Inc. Do not copy without express permission of Honeywell... -
Page 156: Figure 2-115: Star Chart Page
Loads selected procedure into the Flight Plan [Future Function] SHOW Causes the view selected to CHART be displayed Aviation Mode Operation D200904000003 Page 2-112 Rev 3 Mar 2012 © Honeywell International Inc. Do not copy without express permission of Honeywell... - Page 157 • Upon entry to this page, the STARs for the selected airport are displayed (7). D200904000003 Aviation Mode Operation Rev 3 Mar 2012 Page 2-113 © Honeywell International Inc. Do not copy without express permission of Honeywell...
-
Page 158: Flight Logging
Example – “Flight – 14.01 UTC on 25 MAR 2009.txt”. The flight log uses the following comma delimited data format: Date Time Latitude Longitude Heading Altitude Aviation Mode Operation D200904000003 Page 2-114 Rev 3 Mar 2012 © Honeywell International Inc. Do not copy without express permission of Honeywell... -
Page 159: Jeppesen Flitestar© Flight Log
Google Earth©. Each file is stored in the directory: GoFly\Data\User\Flight Logs\GoogleEarth. D200904000003 Aviation Mode Operation Rev 3 Mar 2012 Page 2-115 © Honeywell International Inc. Do not copy without express permission of Honeywell... -
Page 160: Memory Map Flight Log
Honeywell Bendix/King AV8OR Ace User’s Guide MEMORY MAP FLIGHT LOG Each file is stored in the directory: GoFly\Data\User\Flight Logs\Memory Map. Aviation Mode Operation D200904000003 Page 2-116 Rev 3 Mar 2012 © Honeywell International Inc. Do not copy without express permission of Honeywell... -
Page 161: Weather Function
Hardware Accessory The AV8OR ACE unit will work with either the WxWorx REWX91D XM receiver or the certified KDR 610 XM receiver. See the Device Setup Page on page 2-199 for more information on how to configure the XM weather receiver. - Page 162 • PIREPs (Pilot Report) – USA • Freezing Level The following XM weather overlays and other services are supported by the AV8OR ACE and are only available for the USA: • Severe Wx Storm Tracking (Storm Cells) • Lightning Overlay •...
-
Page 163: Xm Weather Information Products
Figure 2-117: WX – Initial Page D200904000003 Aviation Mode Operation Rev 3 Mar 2012 Page 2-119 © Honeywell International Inc. Do not copy without express permission of Honeywell... -
Page 164: Figure 2-118: Wx - Choose Product
Tap an available weather product to highlight it and then tap the SELECT soft key to complete the product selection. Figure 2-118: WX – Choose Product The AV8OR ACE shows the selected product on the weather page: The following selections are available from the SELECT WX PRODUCT menu: •... -
Page 165: Nexrad Composite Reflectivity (Usa And Canada)
Tap on the Map to show the LEGEND soft key. Tap the LEGEND soft key to show the NEXRAD Legend window on the page. D200904000003 Aviation Mode Operation Rev 3 Mar 2012 Page 2-121 © Honeywell International Inc. Do not copy without express permission of Honeywell... -
Page 166: Figure 2-120: Wx - Nexrad Legend
Figure 2-121: WX NEXRAD Map – Overlay Setup The following image shows storm cells, lightning, and NEXRAD coverage overlaid on the map. Aviation Mode Operation D200904000003 Page 2-122 Rev 3 Mar 2012 © Honeywell International Inc. Do not copy without express permission of Honeywell... -
Page 167: Graphical Metars (Usa And Canada)
The graphical METAR is derived from the most currently received textual METAR or SPECI data from reporting sites. The METARS D200904000003 Aviation Mode Operation Rev 3 Mar 2012 Page 2-123 © Honeywell International Inc. Do not copy without express permission of Honeywell... -
Page 168: Figure 2-123: Wx - Graphical Metars
Tapping on a METAR icon brings up a data box that shows the airport and age of the METAR. Aviation Mode Operation D200904000003 Page 2-124 Rev 3 Mar 2012 © Honeywell International Inc. Do not copy without express permission of Honeywell... -
Page 169: Figure 2-124: Wx: - Graphical Metars Data Box
See the section Text METARs (USA and Canada) on page 2-141 for more information. Figure 2-125: WX: – Text METARs Page D200904000003 Aviation Mode Operation Rev 3 Mar 2012 Page 2-125 © Honeywell International Inc. Do not copy without express permission of Honeywell... -
Page 170: Graphical Pireps (Usa Only)
The PIREPs popup window contains the PIREP name, type, intensity and age as shown in the figure below. Aviation Mode Operation D200904000003 Page 2-126 Rev 3 Mar 2012 © Honeywell International Inc. Do not copy without express permission of Honeywell... -
Page 171: Figure 2-127: Wx - Graphical Pireps Popup Window
Figure 2-128: WX – Graphical PIREPs Legend Tap on the MORE INFO soft key to display the text PIREP page. D200904000003 Aviation Mode Operation Rev 3 Mar 2012 Page 2-127 © Honeywell International Inc. Do not copy without express permission of Honeywell... -
Page 172: Graphical Airmets (Usa Only)
The boundaries are displayed on a map background to enhance situational awareness as shown in the figure below. Aviation Mode Operation D200904000003 Page 2-128 Rev 3 Mar 2012 © Honeywell International Inc. Do not copy without express permission of Honeywell... -
Page 173: Figure 2-130: Wx - Airmets
Tap on a graphical AIRMET to show the AIRMET popup window. The AIRMET popup window contains the AIRMET name, type and age as shown in the figure below. D200904000003 Aviation Mode Operation Rev 3 Mar 2012 Page 2-129 © Honeywell International Inc. Do not copy without express permission of Honeywell... -
Page 174: Figure 2-131: Wx - Graphical Airmet Popup Window
Figure 2-132: WX: – Graphical AIRMET LEGEND Tap on the MORE INFO soft key to display the text AIRMET page. Aviation Mode Operation D200904000003 Page 2-130 Rev 3 Mar 2012 © Honeywell International Inc. Do not copy without express permission of Honeywell... -
Page 175: Graphical Sigmets (Usa Only)
Figure 2-134: WX – Graphical SIGMETs Tap on a graphical SIGMET to show the SIGMET popup window. D200904000003 Aviation Mode Operation Rev 3 Mar 2012 Page 2-131 © Honeywell International Inc. Do not copy without express permission of Honeywell... -
Page 176: Figure 2-135: Wx - Graphical Sigmet Popup Window
Tap on the MORE INFO soft key to display the text SIGMET page. Figure 2-137: WX – Text SIGMETs Aviation Mode Operation D200904000003 Page 2-132 Rev 3 Mar 2012 © Honeywell International Inc. Do not copy without express permission of Honeywell... -
Page 177: Graphical Conv-Sigmets (Usa Only)
The CONV SIGMET popup window contains the CONV SIGMET name, type and age as shown in the figure below. D200904000003 Aviation Mode Operation Rev 3 Mar 2012 Page 2-133 © Honeywell International Inc. Do not copy without express permission of Honeywell... -
Page 178: Figure 2-139: Wx - Graphical Conv Sigmet Popup
Figure 2-140: WX – Graphical Conv SIGMET Legend Tap on the MORE INFO soft key to display the text SIGMET page. Aviation Mode Operation D200904000003 Page 2-134 Rev 3 Mar 2012 © Honeywell International Inc. Do not copy without express permission of Honeywell... -
Page 179: Graphical Winds Aloft (Usa Only)
Flight Log Trail. Refer to the Map Setup section on page 2-185 for more information on how to configure the overlays. The graphical winds aloft page is shown below: D200904000003 Aviation Mode Operation Rev 3 Mar 2012 Page 2-135 © Honeywell International Inc. Do not copy without express permission of Honeywell... -
Page 180: Figure 2-142: Graphical Winds Aloft
Tap on a wind vector to display a Wind Data popup box that shows the wind speed and direction. Aviation Mode Operation D200904000003 Page 2-136 Rev 3 Mar 2012 © Honeywell International Inc. Do not copy without express permission of Honeywell... -
Page 181: Winds Aloft Legend
Select Flight Level Tap on the FLIGHT LEVEL soft key to display the SELECT FLIGHT LEVEL popup box. D200904000003 Aviation Mode Operation Rev 3 Mar 2012 Page 2-137 © Honeywell International Inc. Do not copy without express permission of Honeywell... -
Page 182: Graphical Freezing Level
Graphical Freezing Level from the SELECT WX PRODUCT box. The Graphical Freezing Level page is show below: Aviation Mode Operation D200904000003 Page 2-138 Rev 3 Mar 2012 © Honeywell International Inc. Do not copy without express permission of Honeywell... -
Page 183: Figure 2-146: Graphical Freezing Level
MAP SETUP - Tap the MAP SETUP soft key to display the Map Setup page. When the pointer touches the screen, the Pointer Tag window is displayed as shown below. D200904000003 Aviation Mode Operation Rev 3 Mar 2012 Page 2-139 © Honeywell International Inc. Do not copy without express permission of Honeywell... -
Page 184: Freezing Level Legend
Tap on the Legend soft key to display the Freezing Level Legend. Figure 2-148: Freezing Level Legend Tap the CLEAR soft key to close the Freezing Level Legend window. Aviation Mode Operation D200904000003 Page 2-140 Rev 3 Mar 2012 © Honeywell International Inc. Do not copy without express permission of Honeywell... -
Page 185: Text Metars (Usa And Canada)
Runway visual range (as required) • Weather phenomena • Sky condition • Temperature/dew point group • Altimeter • Remarks (as required) D200904000003 Aviation Mode Operation Rev 3 Mar 2012 Page 2-141 © Honeywell International Inc. Do not copy without express permission of Honeywell... -
Page 186: Text Tafs (Usa And Canada)
• Visibility • Weather phenomena • Sky conditions • Wind shear (as required) • Forecast weather change indicator Aviation Mode Operation D200904000003 Page 2-142 Rev 3 Mar 2012 © Honeywell International Inc. Do not copy without express permission of Honeywell... -
Page 187: Text Pireps (Usa Only)
Turbulence (may not always be present) • Icing (may not always be present) • Remarks (may not always be present) D200904000003 Aviation Mode Operation Rev 3 Mar 2012 Page 2-143 © Honeywell International Inc. Do not copy without express permission of Honeywell... -
Page 188: Text Airmets (Usa Only)
• Report designation and reason for issuance • Validity period • Area of coverage • Weather phenomenon details. Aviation Mode Operation D200904000003 Page 2-144 Rev 3 Mar 2012 © Honeywell International Inc. Do not copy without express permission of Honeywell... -
Page 189: Text Sigmets (Usa Only)
Report designation and reason for issuance • Validity period • Area of coverage • Location of weather phenomenon D200904000003 Aviation Mode Operation Rev 3 Mar 2012 Page 2-145 © Honeywell International Inc. Do not copy without express permission of Honeywell... -
Page 190: Text Conv-Sigmets (Usa Only)
Region Identifier and issue date and time • Report designator • Validity period • Area of coverage • Location details Aviation Mode Operation D200904000003 Page 2-146 Rev 3 Mar 2012 © Honeywell International Inc. Do not copy without express permission of Honeywell... -
Page 191: Legend
Tap on the Legend soft key to show the legend for the current Weather product displayed on the screen. D200904000003 Aviation Mode Operation Rev 3 Mar 2012 Page 2-147 © Honeywell International Inc. Do not copy without express permission of Honeywell... -
Page 192: Xm Overlays
Tap the CHANGE MAP soft key to configure the overlays for each map or weather layer. Aviation Mode Operation D200904000003 Page 2-148 Rev 3 Mar 2012 © Honeywell International Inc. Do not copy without express permission of Honeywell... -
Page 193: Graphical Metar Overlays
US HI Charts, US LO Charts and Approach Charts if available. The figure below shows graphical Metar overlays on the map page. D200904000003 Aviation Mode Operation Rev 3 Mar 2012 Page 2-149 © Honeywell International Inc. Do not copy without express permission of Honeywell... -
Page 194: Graphical Tfr Overlays
NOTE: Graphical TFR overlays can also be configured to show on US HI Charts, US LO Charts and Approach Charts if available. Aviation Mode Operation D200904000003 Page 2-150 Rev 3 Mar 2012 © Honeywell International Inc. Do not copy without express permission of Honeywell... -
Page 195: Figure 2-159: Tfr Overlay
Figure 2-160: TFR Overlay – Popup Tap on the MORE INFO soft key to show the Temporary Flight Restriction window. D200904000003 Aviation Mode Operation Rev 3 Mar 2012 Page 2-151 © Honeywell International Inc. Do not copy without express permission of Honeywell... -
Page 196: Lightning Overlays
NOTE: Lightning strikes can also be configured to show on US HI Charts, US LO Charts and Approach Charts if available. Figure 2-162: Lightning Strikes on Map Page Aviation Mode Operation D200904000003 Page 2-152 Rev 3 Mar 2012 © Honeywell International Inc. Do not copy without express permission of Honeywell... -
Page 197: Cloud Top Overlay
Tap on a storm cell to display more information including the storm top, direction and speed of the storm. The figure below shows storm cells on the Nexrad Map. D200904000003 Aviation Mode Operation Rev 3 Mar 2012 Page 2-153 © Honeywell International Inc. Do not copy without express permission of Honeywell... -
Page 198: Figure 2-164: Wx -Storm Cells Overlay On Nexrad Page
Honeywell Bendix/King AV8OR Ace User’s Guide Figure 2-164: WX –Storm Cells Overlay on Nexrad Page Aviation Mode Operation D200904000003 Page 2-154 Rev 3 Mar 2012 © Honeywell International Inc. Do not copy without express permission of Honeywell... -
Page 199: Traffic Function
See chapter 7 “Connection to An External Traffic Source” on page 6- 20 for directions on how to connect AV8OR ACE to a traffic receiver. When the Zaon XRX is set up so that the detection envelope is within a 6 nm radius and ±... -
Page 200: Traffic Main Page
Honeywell Bendix/King AV8OR Ace User’s Guide If AV8OR ACE is configured correctly and does not receive traffic information from the Zaon XRX, a caution popup window shows on the Traffic page Traffic Main Page Tap the soft key on the Aviation Main Menu page to display the Traffic page as shown in the figure below. -
Page 201: Fields On The Traffic Page
Tap the TRAFFIC SETUP soft key on the Traffic page to change the setup settings as shown in the figure below. D200904000003 Aviation Mode Operation Rev 3 Mar 2012 Page 2-157 © Honeywell International Inc. Do not copy without express permission of Honeywell... -
Page 202: Flight Level
To enable traffic alerts pop-ups, tap the ENABLE POP_UP soft key to display the following pop up window, as shown in the figure below. Aviation Mode Operation D200904000003 Page 2-158 Rev 3 Mar 2012 © Honeywell International Inc. Do not copy without express permission of Honeywell... -
Page 203: Figure 2-167: Traffic Page - Enable Pop-Up
Tap the CANCEL soft key to cancel the change and return to the Traffic page. When the Traffic Alerts Pop-up is enabled, AV8OR ACE displays the Traffic Page whenever an alert is given. A traffic alert symbol is also displayed in the Status window. -
Page 204: Figure 2-168: Traffic Page - Disable Pop-Up
Tap the OK soft key to accept the change and return to the Traffic page. Tap the CANCEL soft key to cancel the change and return to the Traffic page. Aviation Mode Operation D200904000003 Page 2-160 Rev 3 Mar 2012 © Honeywell International Inc. Do not copy without express permission of Honeywell... -
Page 205: Panel Function
Compass Rose that is aligned with the direct to course to the selected waypoint. Waypoints also show on the screen if they are within the set range (RNG). D200904000003 Aviation Mode Operation Rev 3 Mar 2012 Page 2-161 © Honeywell International Inc. Do not copy without express permission of Honeywell... -
Page 206: Compass Rose
0 and 2 minute turn rates. The symbolic aircraft is oriented to reflect the calculated rate of turn so that the wing tips align with Aviation Mode Operation D200904000003 Page 2-162 Rev 3 Mar 2012 © Honeywell International Inc. Do not copy without express permission of Honeywell... -
Page 207: Panel Page Ace Portrait Orientation
The Vertical Profile function is not available on this page. D200904000003 Aviation Mode Operation Rev 3 Mar 2012 Page 2-163 © Honeywell International Inc. Do not copy without express permission of Honeywell... -
Page 208: Figure 2-171: Panel Page - Portrait Orientation
Honeywell Bendix/King AV8OR Ace User’s Guide Figure 2-171: Panel Page - Portrait Orientation Aviation Mode Operation D200904000003 Page 2-164 Rev 3 Mar 2012 © Honeywell International Inc. Do not copy without express permission of Honeywell... -
Page 209: Auxillary Function
The table that follows lists the different messages that can be displayed. D200904000003 Aviation Mode Operation Rev 3 Mar 2012 Page 2-165 © Honeywell International Inc. Do not copy without express permission of Honeywell... -
Page 210: Table 2-11 Messages
History Data The Volatile settings NVM could not be cleared to Defaults used so default settings were used Aviation Mode Operation D200904000003 Page 2-166 Rev 3 Mar 2012 © Honeywell International Inc. Do not copy without express permission of Honeywell... - Page 211 Flight plan WPT(s) When one or more of the WPT found references in a flight plan file do not D200904000003 Aviation Mode Operation Rev 3 Mar 2012 Page 2-167 © Honeywell International Inc. Do not copy without express permission of Honeywell...
-
Page 212: Messages Soft Keys
The checklists can only be created, edited and deleted on a PC and then transferred to the SD card. In order to create a valid checklist Aviation Mode Operation D200904000003 Page 2-168 Rev 3 Mar 2012 © Honeywell International Inc. Do not copy without express permission of Honeywell... - Page 213 [] Entry 1 [] Entry 2 [] Entry 3 [] Entry 4 [] Entry 5 [] Entry 6 D200904000003 Aviation Mode Operation Rev 3 Mar 2012 Page 2-169 © Honeywell International Inc. Do not copy without express permission of Honeywell...
-
Page 214: Figure 2-173: Checklist Page
Tap the PREV PAGE soft key to return to the Checklist Page. Tap the CHECK BOX soft key to put a check mark in the first checkbox. Aviation Mode Operation D200904000003 Page 2-170 Rev 3 Mar 2012 © Honeywell International Inc. Do not copy without express permission of Honeywell... -
Page 215: Wind Vector Calculator Page
EDIT soft key to display a numeric entry keypad as shown in the figure below. D200904000003 Aviation Mode Operation Rev 3 Mar 2012 Page 2-171 © Honeywell International Inc. Do not copy without express permission of Honeywell... -
Page 216: Weight And Balance Page
Graph and an aircraft layout page. The Layout page is the opening page as shown in the figure below. Figure 2-177: Weight and Balance Opening Page Aviation Mode Operation D200904000003 Page 2-172 Rev 3 Mar 2012 © Honeywell International Inc. Do not copy without express permission of Honeywell... -
Page 217: Data Entry
Figure 2-178: W&B Data Entry Page with Profile and Envelope Tabs Filled Out Tap the PREV PAGE soft key to return to the Messages Page. D200904000003 Aviation Mode Operation Rev 3 Mar 2012 Page 2-173 © Honeywell International Inc. Do not copy without express permission of Honeywell... -
Page 218: Figure 2-179: W&B - File Options Page
“Aircraft Profile” popup window into the current settings. Tap on the DELETE soft key to delete the current weight and balance file. Aviation Mode Operation D200904000003 Page 2-174 Rev 3 Mar 2012 © Honeywell International Inc. Do not copy without express permission of Honeywell... -
Page 219: C.g. Graph
Figure 2-181: W&B - Aircraft Loaded Beyond C.G. Limits D200904000003 Aviation Mode Operation Rev 3 Mar 2012 Page 2-175 © Honeywell International Inc. Do not copy without express permission of Honeywell... -
Page 220: Figure 2-182: W&B Layout Page With Profile And Envelope Tabs Filled Out
This data is entered once for each aircraft profile that you would like to save in the AV8OR. Aviation Mode Operation D200904000003 Page 2-176 Rev 3 Mar 2012 © Honeywell International Inc. Do not copy without express permission of Honeywell... -
Page 221: Figure 2-183: W&B Profile Page
Fuel density – Enter how much the fuel weights for each selected unit. For example, enter “6.00” for the fuel D200904000003 Aviation Mode Operation Rev 3 Mar 2012 Page 2-177 © Honeywell International Inc. Do not copy without express permission of Honeywell... -
Page 222: Figure 2-184: W&B Envelope Page
Tap the FILE soft key to save the displayed Weight and Balance data to a file. Aviation Mode Operation D200904000003 Page 2-178 Rev 3 Mar 2012 © Honeywell International Inc. Do not copy without express permission of Honeywell... -
Page 223: Creating A New Weight And Balance Profile
“Data Entry”, “Profile” or “Envelope” tabs on the Weight and Balance screen to display the “Aircraft Profile” D200904000003 Aviation Mode Operation Rev 3 Mar 2012 Page 2-179 © Honeywell International Inc. Do not copy without express permission of Honeywell... - Page 224 3. All station arms entered on the Data Entry page are preserved. 4. All other station weights and fuel volumes are zeroed (fuel, baggage, other rows, etc.) Aviation Mode Operation D200904000003 Page 2-180 Rev 3 Mar 2012 © Honeywell International Inc. Do not copy without express permission of Honeywell...
-
Page 225: System Setup Function
• Map Setup • Navigation Setup • Data Field Setup • Flight Plan Data Setup • Device Setup D200904000003 Aviation Mode Operation Rev 3 Mar 2012 Page 2-181 © Honeywell International Inc. Do not copy without express permission of Honeywell... -
Page 226: General System Setup
SELECT soft key to select the item. Tap the CANCEL soft key to cancel the selection. Aviation Mode Operation D200904000003 Page 2-182 Rev 3 Mar 2012 © Honeywell International Inc. Do not copy without express permission of Honeywell... -
Page 227: Figure 2-187: System Setup - Setting Values
• Position Coordinate System: Sets the coordinate system to be used for the display and entry of position information. The available options are: D200904000003 Aviation Mode Operation Rev 3 Mar 2012 Page 2-183 © Honeywell International Inc. Do not copy without express permission of Honeywell... - Page 228 Select the length field and use Aviation Mode Operation D200904000003 Page 2-184 Rev 3 Mar 2012 © Honeywell International Inc. Do not copy without express permission of Honeywell...
-
Page 229: Map Setup
Tap on the Common tab to select the Common features that show below: D200904000003 Aviation Mode Operation Rev 3 Mar 2012 Page 2-185 © Honeywell International Inc. Do not copy without express permission of Honeywell... - Page 230 There are four groups of features for each of the map layers. They are: Point Features, Line Features, Airspace and Overlay. Aviation Mode Operation D200904000003 Page 2-186 Rev 3 Mar 2012 © Honeywell International Inc. Do not copy without express permission of Honeywell...
-
Page 231: Figure 2-189: Map System Setup -- Select Map Layer
SELECT soft key to select that layer and return to the Map Features page. Figure 2-189: Map System Setup -- Select Map Layer D200904000003 Aviation Mode Operation Rev 3 Mar 2012 Page 2-187 © Honeywell International Inc. Do not copy without express permission of Honeywell... -
Page 232: Figure 2-190: Map System Setup - Point Feature Setup
Tapping the Line tab displays the Line Feature Setup screen, as shown in the figure below. Figure 2-191: Map System Setup – Line Feature Setup Aviation Mode Operation D200904000003 Page 2-188 Rev 3 Mar 2012 © Honeywell International Inc. Do not copy without express permission of Honeywell... -
Page 233: Figure 2-192: Map System Setup - Airspace Setup
Tapping the Overlay tab displays the Overlay Setup screen, as shown in the figure below. Figure 2-193: Map System Setup – Overlay Setup 1 D200904000003 Aviation Mode Operation Rev 3 Mar 2012 Page 2-189 © Honeywell International Inc. Do not copy without express permission of Honeywell... -
Page 234: Navigation Setup
SELECT soft key to change the item’s values. • AutoNav: Enable the AutoNav function to allow AV8OR ACE to automatically switch between the external and internal GPS sources when there is more than one source. The AutoNav... - Page 235 Setup Options table distance units field. The CDI is configured on the Data Field Setup Page in System Setup. • Time Zone: The AV8OR ACE has an on board clock that ensures the Estimated Time of Arrival (ETA) information presented is accurate. The time is stored in two summed parts as UTC (Universal Coordinated Time or Greenwich Mean Time) and as a Local Offset.
- Page 236 Aviation Mode Operation D200904000003 Page 2-192 Rev 3 Mar 2012 © Honeywell International Inc. Do not copy without express permission of Honeywell...
- Page 237 • Default Ground Speed: 0 to 999 kts, adjustable by 1 (135 kts default). • Default Fuel Flow: 0.1 to 999.9 /hr, adjustable by 0.1 (8.0 default). D200904000003 Aviation Mode Operation Rev 3 Mar 2012 Page 2-193 © Honeywell International Inc. Do not copy without express permission of Honeywell...
-
Page 238: Data Field Setup
4. Repeat 1 through 3 for each data field window to be changed. 5. 25 data field types are available to be selected as follows: • Not Shown Aviation Mode Operation D200904000003 Page 2-194 Rev 3 Mar 2012 © Honeywell International Inc. Do not copy without express permission of Honeywell... - Page 239 Tap the WIDE WINDOWS soft key to expand the width of the data field windows to make long labels in the windows more readable. D200904000003 Aviation Mode Operation Rev 3 Mar 2012 Page 2-195 © Honeywell International Inc. Do not copy without express permission of Honeywell...
-
Page 240: Flight Plan Data Setup
Flight Plan Data Setup page allows the user to set up the headers for the flight plan in the flight planning section. Aviation Mode Operation D200904000003 Page 2-196 Rev 3 Mar 2012 © Honeywell International Inc. Do not copy without express permission of Honeywell... -
Page 241: Demo Mode Setup
You must select DEMO MODE on initial turn on to show this menu selection See the Demo Mode section on page 2-4 for instructions on how to enable Demo Mode. D200904000003 Aviation Mode Operation Rev 3 Mar 2012 Page 2-197 © Honeywell International Inc. Do not copy without express permission of Honeywell... -
Page 242: Figure 2-198: Demo Mode Setup
Ident name. The user can also define a new name for the Ident. Figure 2-199: Demo Mode Ident Settings Aviation Mode Operation D200904000003 Page 2-198 Rev 3 Mar 2012 © Honeywell International Inc. Do not copy without express permission of Honeywell... -
Page 243: Figure 2-200: Demo Mode Setup Ident Details
This page lets the user to configure the external interfaces (GPS Receiver, Flight Plan Device, and WX Receiver) to the unit. D200904000003 Aviation Mode Operation Rev 3 Mar 2012 Page 2-199 © Honeywell International Inc. Do not copy without express permission of Honeywell... -
Page 244: Figure 2-201: Device Setup Menu
N/A (Default value) • NMEA • AR-NAV • ENH AR-NAV (Enhanced) allows arcs to be drawn in flight plan Aviation Mode Operation D200904000003 Page 2-200 Rev 3 Mar 2012 © Honeywell International Inc. Do not copy without express permission of Honeywell... -
Page 245: Status Page
From the System Setup Menu, tap the STATUS PAGE soft key to access the System Status Menu page, as shown in the figure below. D200904000003 Aviation Mode Operation Rev 3 Mar 2012 Page 2-201 © Honeywell International Inc. Do not copy without express permission of Honeywell... -
Page 246: Figure 2-202: System Setup - Status Page
GPS receiver status. The second table shows the GPS satellite status for those that should be in view. Aviation Mode Operation D200904000003 Page 2-202 Rev 3 Mar 2012 © Honeywell International Inc. Do not copy without express permission of Honeywell... -
Page 247: Figure 2-203: Status Page Setup - Internal Gps Status
Map Information: The Map Information Page shows the sources of the map data for the cartography, terrain and aeronautical data bases as shown in the figure below. D200904000003 Aviation Mode Operation Rev 3 Mar 2012 Page 2-203 © Honeywell International Inc. Do not copy without express permission of Honeywell... -
Page 248: Figure 2-205: Status Page Setup - Map Information Page
The Database table shows the Region, the Aeronautical part number, the Expiration date, the Cartography number and the Topography number. Aviation Mode Operation D200904000003 Page 2-204 Rev 3 Mar 2012 © Honeywell International Inc. Do not copy without express permission of Honeywell... -
Page 249: Figure 2-206: Status Page Setup - Software And Db Version
Run Time: The total time of the flight. • Cycles: The number of power cycles. • Event Codes: A list of Events. D200904000003 Aviation Mode Operation Rev 3 Mar 2012 Page 2-205 © Honeywell International Inc. Do not copy without express permission of Honeywell... -
Page 250: Figure 2-207: Status Page Setup - System Information Page
Figure 2-209: Status Page Setup – Weather Status Page The Weather Status column has the following fields: Aviation Mode Operation D200904000003 Page 2-206 Rev 3 Mar 2012 © Honeywell International Inc. Do not copy without express permission of Honeywell... - Page 251 Three bars indicate the strongest signal. All available WX products will be received for the subscription level that has been purchased. D200904000003 Aviation Mode Operation Rev 3 Mar 2012 Page 2-207 © Honeywell International Inc. Do not copy without express permission of Honeywell...
-
Page 252: Refresh Mode
"sentence" from one "talker" to one "listener" at a time. AV8OR ACE outputs a user selectable subset of the most common navigation NMEA sentences through the RS-232 port on the mini- USB/serial port when configured properly. -
Page 253: Figure 2-210: Nmea Output Setup Page
Honeywell Bendix/King AV8OR Ace User’s Guide CAUTION The NMEA sentences supplied by AV8OR ACE may not be the correct sentences for the all equipment that can receive NMEA sentences. Even though NMEA outputs are intended for use with experimental aircraft only, Bendix King is not responsible for the correct operation of equipment that receives the NMEA output from AV8OR. -
Page 254: Device Setup Page
Honeywell Bendix/King AV8OR Ace User’s Guide NMEA Output Setup Options: Output Rate: The Output Rate sets the frequency that AV8OR ACE sends a NMEA sentence per second. The Output Rate has the following options: • 0.5 HZ (Default value) •... - Page 255 • Transmit GPBOD: Bearing and Origin to Destination The sentence has the following options: • OFF (Default value) D200904000003 Aviation Mode Operation Rev 3 Mar 2012 Page 2-211 © Honeywell International Inc. Do not copy without express permission of Honeywell...
-
Page 256: Shut Down
If you tap the YES soft key, the Go Fly program is halted and a “Go Fly is exiting” message is displayed as shown in the figure below. Aviation Mode Operation D200904000003 Page 2-212 Rev 3 Mar 2012 © Honeywell International Inc. Do not copy without express permission of Honeywell... -
Page 257: Figure 2-212: Go Fly Exit Screen
Honeywell Bendix/King AV8OR Ace User’s Guide Figure 2-212: Go Fly Exit Screen D200904000003 Aviation Mode Operation Rev 3 Mar 2012 Page 2-213 © Honeywell International Inc. Do not copy without express permission of Honeywell... - Page 258 Honeywell Bendix/King AV8OR Ace User’s Guide This Page Intentionally Left Blank Aviation Mode Operation D200904000003 Page 2-214 Rev 3 Mar 2012 © Honeywell International Inc. Do not copy without express permission of Honeywell...
-
Page 259: Automotive Mode Operation
Over time, roads and features change. To keep the GoDrive Map database up to date, map subscriptions are available from Nav-n-Go D200904000003 Automotive Mode Operation Rev 3 Mar 2012 Page 3-1 © Honeywell International Inc. Do not copy without express permission of Honeywell... -
Page 260: Glossary
In North-up mode the map is rotated so its top always faces North. This is the orientation in 2D map view mode and in Overview mode. Automotive Mode Operation D200904000003 Page 3-2 Rev 3 Mar 2012 © Honeywell International Inc. Do not copy without express permission of Honeywell... - Page 261 Road Safety Camera on the map. You can configure GoDrive to warn you when you approach one of these cameras. D200904000003 Automotive Mode Operation Rev 3 Mar 2012 Page 3-3 © Honeywell International Inc. Do not copy without express permission of Honeywell...
-
Page 262: Getting Started
After this, the Navigation menu appears and you can start using GoDrive in Simple mode as shown in the figure below. Automotive Mode Operation D200904000003 Page 3-4 Rev 3 Mar 2012 © Honeywell International Inc. Do not copy without express permission of Honeywell... -
Page 263: Figure 3-2: Simple Mode
Use the selected location on the map. • Enter a full address or a part of an address, for example a street D200904000003 Automotive Mode Operation Rev 3 Mar 2012 Page 3-5 © Honeywell International Inc. Do not copy without express permission of Honeywell... -
Page 264: Simple And Advanced Modes
The features and settings available in each mode are as follows: Table 3-1: Simple versus Advanced Mode Available Available in Simple Type of action mode Advanced mode Automotive Mode Operation D200904000003 Page 3-6 Rev 3 Mar 2012 © Honeywell International Inc. Do not copy without express permission of Honeywell... - Page 265 Road Safety Camera Mark a map point with a Saving the active route Saving Track Logs Map Screen settings D200904000003 Automotive Mode Operation Rev 3 Mar 2012 Page 3-7 © Honeywell International Inc. Do not copy without express permission of Honeywell...
-
Page 266: Soft Keys And Controls On The Screen
Icon Shows status Some icons information. also function soft Key. them once. Automotive Mode Operation D200904000003 Page 3-8 Rev 3 Mar 2012 © Honeywell International Inc. Do not copy without express permission of Honeywell... - Page 267 When there are Tap it to turn only switch choices, on or off. checkmark shows whether feature enabled. D200904000003 Automotive Mode Operation Rev 3 Mar 2012 Page 3-9 © Honeywell International Inc. Do not copy without express permission of Honeywell...
-
Page 268: Using Keyboards
Entering symbols to switch to a keyboard of symbol characters. Automotive Mode Operation D200904000003 Page 3-10 Rev 3 Mar 2012 © Honeywell International Inc. Do not copy without express permission of Honeywell... -
Page 269: Additional Controls
• Tap and hold on keyboard screens: you can delete several characters quickly. D200904000003 Automotive Mode Operation Rev 3 Mar 2012 Page 3-11 © Honeywell International Inc. Do not copy without express permission of Honeywell... -
Page 270: Using The Map
USING THE MAP The map screen is the most frequently used screen of GoDrive. It accessed from Navigation menu tapping Automotive Mode Operation D200904000003 Page 3-12 Rev 3 Mar 2012 © Honeywell International Inc. Do not copy without express permission of Honeywell... -
Page 271: Checking The Details Of A Map Location
2. Tap the desired location on the map. The Cursor ( 3. For Further details, tap to open the Cursor menu. D200904000003 Automotive Mode Operation Rev 3 Mar 2012 Page 3-13 © Honeywell International Inc. Do not copy without express permission of Honeywell... -
Page 272: Manipulating The Map
Key appears. Tap this soft Key to return to the GPS position. Automotive Mode Operation D200904000003 Page 3-14 Rev 3 Mar 2012 © Honeywell International Inc. Do not copy without express permission of Honeywell... - Page 273 Track-Up with these soft Keys. If GPS position is available and you have rotated the map, the D200904000003 Automotive Mode Operation Rev 3 Mar 2012 Page 3-15 © Honeywell International Inc. Do not copy without express permission of Honeywell...
-
Page 274: Status Information And Hidden Controls On The Map
Tap this area to valid exists, and there is no open the Route position. valid GPS position, Information Automotive Mode Operation D200904000003 Page 3-16 Rev 3 Mar 2012 © Honeywell International Inc. Do not copy without express permission of Honeywell... - Page 275 The following area appears next to the above described rounded area. When tapping this area, the result depends on the information currently shown. D200904000003 Automotive Mode Operation Rev 3 Mar 2012 Page 3-17 © Honeywell International Inc. Do not copy without express permission of Honeywell...
- Page 276 Safety audible Camera approaching a camera Road Safety warning. Camera, the warning for cameras enabled Settings. Automotive Mode Operation D200904000003 Page 3-18 Rev 3 Mar 2012 © Honeywell International Inc. Do not copy without express permission of Honeywell...
- Page 277 TMC receiver is connected and a radio station with TMC broadcast is received. There are new, unread TMC events. Icon Description D200904000003 Automotive Mode Operation Rev 3 Mar 2012 Page 3-19 © Honeywell International Inc. Do not copy without express permission of Honeywell...
- Page 278 There are speed values that can be shown: • Current speed • Speed limit on the current road Automotive Mode Operation D200904000003 Page 3-20 Rev 3 Mar 2012 © Honeywell International Inc. Do not copy without express permission of Honeywell...
- Page 279 The device is running on external power. battery The battery is being charged. is being charged D200904000003 Automotive Mode Operation Rev 3 Mar 2012 Page 3-21 © Honeywell International Inc. Do not copy without express permission of Honeywell...
-
Page 280: Using The Cursor (The Selected Map Location)
Shows the different routes calculated by the available routing methods. Choose the one that suits your needs the best.(available in Advanced mode only) Automotive Mode Operation D200904000003 Page 3-22 Rev 3 Mar 2012 © Honeywell International Inc. Do not copy without express permission of Honeywell... -
Page 281: Advanced Functions
Smart Zoom. Fine-tuning Smart Zoom Tap the map to let the map control soft Keys appear, and then tap D200904000003 Automotive Mode Operation Rev 3 Mar 2012 Page 3-23 © Honeywell International Inc. Do not copy without express permission of Honeywell... -
Page 282: Position Markers
Key appears. Tap it to move the map back to the GPS position and re-enable Track-up map Automotive Mode Operation D200904000003 Page 3-24 Rev 3 Mar 2012 © Honeywell International Inc. Do not copy without express permission of Honeywell... -
Page 283: Selected Location (Cursor)
To return to the original Cursor position, tap . The map jumps back to the position with which the Cursor menu was opened, and D200904000003 Automotive Mode Operation Rev 3 Mar 2012 Page 3-25 © Honeywell International Inc. Do not copy without express permission of Honeywell... -
Page 284: Daytime And Night Color Schemes
Short • Economical • Easy Vehicle types: • • Taxi • • Emergency vehicles • Bicycle • Pedestrian Automotive Mode Operation D200904000003 Page 3-26 Rev 3 Mar 2012 © Honeywell International Inc. Do not copy without express permission of Honeywell... -
Page 285: Itinerary
• Tap the area between the Turn preview and the Travel data fields where the symbol of the second next maneuver is displayed (for D200904000003 Automotive Mode Operation Rev 3 Mar 2012 Page 3-27 © Honeywell International Inc. Do not copy without express permission of Honeywell... - Page 286 Zooms in the map. Zooms out the map. Moves the map to show the previous or next maneuver. Soft Key Description Automotive Mode Operation D200904000003 Page 3-28 Rev 3 Mar 2012 © Honeywell International Inc. Do not copy without express permission of Honeywell...
-
Page 287: Track Logs
A point of interest (POI) is a location that someone might find useful or interesting. GoDrive is delivered with thousands of POIs and you D200904000003 Automotive Mode Operation Rev 3 Mar 2012 Page 3-29 © Honeywell International Inc. Do not copy without express permission of Honeywell... -
Page 288: Saving Poi
POIs, and there is a special proximity warning only for cameras. QUESTION ANSWER Can Road Safety Camera locations be uploaded in a text file? Automotive Mode Operation D200904000003 Page 3-30 Rev 3 Mar 2012 © Honeywell International Inc. Do not copy without express permission of Honeywell... -
Page 289: Saving Road Safety Cameras
Settings. Tap the following soft keys When you approach a Road Safety Camera with the warning enabled, the following happens: D200904000003 Automotive Mode Operation Rev 3 Mar 2012 Page 3-31 © Honeywell International Inc. Do not copy without express permission of Honeywell... - Page 290 The warning for proximity and speeding is the same as for the fixed speed cameras. Automotive Mode Operation D200904000003 Page 3-32 Rev 3 Mar 2012 © Honeywell International Inc. Do not copy without express permission of Honeywell...
-
Page 291: Camera Directions
The measured direction of the camera appears with the following symbols: Symbol Description D200904000003 Automotive Mode Operation Rev 3 Mar 2012 Page 3-33 © Honeywell International Inc. Do not copy without express permission of Honeywell... -
Page 292: Speed Limit Warning
FM Radio Data System (RDS) used for broadcasting real-time traffic and weather information. TMC is enabled by default in GoDrive. Automotive Mode Operation D200904000003 Page 3-34 Rev 3 Mar 2012 © Honeywell International Inc. Do not copy without express permission of Honeywell... -
Page 293: Advanced Features In Godrive Version 8.3
ADVANCED FEATURES IN GODRIVE VERSION 8.3 Guidance Stripes: Guidance stripes show the direction to follow in case of a maneuver. D200904000003 Automotive Mode Operation Rev 3 Mar 2012 Page 3-35 © Honeywell International Inc. Do not copy without express permission of Honeywell... -
Page 294: Route Navigation
Signposts: When driving on a highway, signposts are displayed. Figure 3-7: Highway Signposts Shutdown: If AV8OR ACE is disconnected from an external power source, AV8OR ACE will automatically shut down after a set number of seconds unless you tap the Cancel soft key. ROUTE NAVIGATION... -
Page 295: Selecting The Cursor As The Destination
(Advanced mode) from the Cursor menu. The route is then automatically calculated, and you can start navigating. D200904000003 Automotive Mode Operation Rev 3 Mar 2012 Page 3-37 © Honeywell International Inc. Do not copy without express permission of Honeywell... -
Page 296: Entering An Address Or Part Of An Address
There are four lines on the screen: Figure 3-8: Enter an Address (Europe) Automotive Mode Operation D200904000003 Page 3-38 Rev 3 Mar 2012 © Honeywell International Inc. Do not copy without express permission of Honeywell... - Page 297 After entering a couple of characters, the names that match the string appear in a list. to open the list of results before D200904000003 Automotive Mode Operation Rev 3 Mar 2012 Page 3-39 © Honeywell International Inc. Do not copy without express permission of Honeywell...
-
Page 298: Entering An Address (North America, Australia)
Figure 3-9: Find an Address – USA The procedure is explained starting from the Navigation menu. Automotive Mode Operation D200904000003 Page 3-40 Rev 3 Mar 2012 © Honeywell International Inc. Do not copy without express permission of Honeywell... - Page 299 Tap b. Start entering the street name on the keyboard. c. Get to the list of results: D200904000003 Automotive Mode Operation Rev 3 Mar 2012 Page 3-41 © Honeywell International Inc. Do not copy without express permission of Honeywell...
-
Page 300: Entering An Address If House Numbering Is Restarted
If needed, tap the soft Key with the name of the country/state, and select a different one from the list. 3. If needed, change the settlement: Automotive Mode Operation D200904000003 Page 3-42 Rev 3 Mar 2012 © Honeywell International Inc. Do not copy without express permission of Honeywell... - Page 301 3. Tap to finish entering the address. 6. A list appears with the matching addresses. Tap the desired one. D200904000003 Automotive Mode Operation Rev 3 Mar 2012 Page 3-43 © Honeywell International Inc. Do not copy without express permission of Honeywell...
-
Page 302: Enter An Address Without Knowing The District/Suburb
After entering a couple of characters, the names that match the string appear in a list. to open the list of results before Automotive Mode Operation D200904000003 Page 3-44 Rev 3 Mar 2012 © Honeywell International Inc. Do not copy without express permission of Honeywell... -
Page 303: Selecting An Intersection As The Destination
The procedure is explained starting from the Navigation menu. 1. Tap the following soft Keys: (Simple mode), or (Advanced mode). D200904000003 Automotive Mode Operation Rev 3 Mar 2012 Page 3-45 © Honeywell International Inc. Do not copy without express permission of Honeywell... - Page 304 4. Pick the street from the list. 5. Tap the • If only a few intersecting streets exist, their list appears immediately. Automotive Mode Operation D200904000003 Page 3-46 Rev 3 Mar 2012 © Honeywell International Inc. Do not copy without express permission of Honeywell...
-
Page 305: Selecting A City Center As The Destination
2. Start entering the settlement name on the keyboard. 3. Get to the list of search results: After entering a couple of characters, the names that D200904000003 Automotive Mode Operation Rev 3 Mar 2012 Page 3-47 © Honeywell International Inc. Do not copy without express permission of Honeywell... -
Page 306: Entering An Address With A Postal Code
3. Pick the settlement from the list. Automotive Mode Operation D200904000003 Page 3-48 Rev 3 Mar 2012 © Honeywell International Inc. Do not copy without express permission of Honeywell... -
Page 307: Tips On Entering Addresses Quickly
You can speed up finding an intersection: Search first for the street with a less common or less usual D200904000003 Automotive Mode Operation Rev 3 Mar 2012 Page 3-49 © Honeywell International Inc. Do not copy without express permission of Honeywell... -
Page 308: Selecting The Destination From Your Favorites
GoDrive or from the ones you have previously created. The procedure is explained starting from the Navigation menu. Automotive Mode Operation D200904000003 Page 3-50 Rev 3 Mar 2012 © Honeywell International Inc. Do not copy without express permission of Honeywell... - Page 309 To find the POI by its name, tap , and use the keyboard to enter a part of the name. • list POIs given group, D200904000003 Automotive Mode Operation Rev 3 Mar 2012 Page 3-51 © Honeywell International Inc. Do not copy without express permission of Honeywell...
-
Page 310: Selecting The Destination With Saved Poi Search Criteria
The procedure is explained starting from the Navigation menu. 1. Tap the following soft Keys: (Simple mode), or (Advanced mode). 2. Tap Automotive Mode Operation D200904000003 Page 3-52 Rev 3 Mar 2012 © Honeywell International Inc. Do not copy without express permission of Honeywell... -
Page 311: Selecting The Destination From The History
COORDINATE This feature is available in Advanced mode only. The procedure is explained starting from the Navigation menu. D200904000003 Automotive Mode Operation Rev 3 Mar 2012 Page 3-53 © Honeywell International Inc. Do not copy without express permission of Honeywell... -
Page 312: Creating A Multi-Point Route (Inserting A Via Point)
If you insert a via point in a route that is already a multi-point route, Automotive Mode Operation D200904000003 Page 3-54 Rev 3 Mar 2012 © Honeywell International Inc. Do not copy without express permission of Honeywell... -
Page 313: Creating A Multi-Point Route (Append A New Destination)
This feature is available in Advanced mode only. 1. Select a new location as you did in the previous sections. This D200904000003 Automotive Mode Operation Rev 3 Mar 2012 Page 3-55 © Honeywell International Inc. Do not copy without express permission of Honeywell... -
Page 314: Editing The Route
Tap this soft Key repeatedly, and the point becomes the start point of the route. Automotive Mode Operation D200904000003 Page 3-56 Rev 3 Mar 2012 © Honeywell International Inc. Do not copy without express permission of Honeywell... -
Page 315: Viewing Whole Route On The Map (Fit To Screen)
Via the Route Information screen using a shortcut: tap In Simple mode the last option is available only. D200904000003 Automotive Mode Operation Rev 3 Mar 2012 Page 3-57 © Honeywell International Inc. Do not copy without express permission of Honeywell... -
Page 316: Watching The Simulation Of The Route
Map screen. The procedure is explained starting from the Map screen. Tap the following soft Keys: Automotive Mode Operation D200904000003 Page 3-58 Rev 3 Mar 2012 © Honeywell International Inc. Do not copy without express permission of Honeywell... -
Page 317: Pausing The Active Route
If via points exist in the active route, you cannot delete the route immediately on the Route Information screen. Tap repeatedly until all via points disappear and the soft D200904000003 Automotive Mode Operation Rev 3 Mar 2012 Page 3-59 © Honeywell International Inc. Do not copy without express permission of Honeywell... -
Page 318: Using Track Logs
1. Tap the following soft Keys: 2. Locate the desired Track Log, and then tap the soft Key Automotive Mode Operation D200904000003 Page 3-60 Rev 3 Mar 2012 © Honeywell International Inc. Do not copy without express permission of Honeywell... -
Page 319: Changing The Color Of A Track Log
• GoDrive deletes from the route the via points that you already D200904000003 Automotive Mode Operation Rev 3 Mar 2012 Page 3-61 © Honeywell International Inc. Do not copy without express permission of Honeywell... -
Page 320: Loading A Saved Route
4. The map appears, and you can start navigating. Automotive Mode Operation D200904000003 Page 3-62 Rev 3 Mar 2012 © Honeywell International Inc. Do not copy without express permission of Honeywell... -
Page 321: Reference Book (Advanced Mode)
Saved Routes, and Track Logs. Settings Managing behavior GoDrive, for example the map layout during navigation, the used languages warnings. D200904000003 Automotive Mode Operation Rev 3 Mar 2012 Page 3-63 © Honeywell International Inc. Do not copy without express permission of Honeywell... -
Page 322: Map Screen
Information screen event Second upcoming Opens the Itinerary route event Trip data Opens Trip Information screen Automotive Mode Operation D200904000003 Page 3-64 Rev 3 Mar 2012 © Honeywell International Inc. Do not copy without express permission of Honeywell... - Page 323 Key to avoid parts of the route Position menu Opens the Position (appears when menu navigating a route) D200904000003 Automotive Mode Operation Rev 3 Mar 2012 Page 3-65 © Honeywell International Inc. Do not copy without express permission of Honeywell...
- Page 324 Tilt up, tilt down Tilts the 3D map Zoom in, zoom out Scales the map Automotive Mode Operation D200904000003 Page 3-66 Rev 3 Mar 2012 © Honeywell International Inc. Do not copy without express permission of Honeywell...
- Page 325 Keys to set its value to the current zoom level or to reset it to its original value., D200904000003 Automotive Mode Operation Rev 3 Mar 2012 Page 3-67 © Honeywell International Inc. Do not copy without express permission of Honeywell...
-
Page 326: Icons On The Map
GPS position quality • Battery status • Vehicle type used for route calculation • Sound status (muted or enabled) Automotive Mode Operation D200904000003 Page 3-68 Rev 3 Mar 2012 © Honeywell International Inc. Do not copy without express permission of Honeywell... -
Page 327: Battery, Gps Position Quality, Vehicle Type Indicator
(altitude) cannot be calculated. GPS navigation is possible, but the position error may be significant. D200904000003 Automotive Mode Operation Rev 3 Mar 2012 Page 3-69 © Honeywell International Inc. Do not copy without express permission of Honeywell... -
Page 328: Status Indicator Strip
This is a complex indicator. In one strip it indicates the following status information: Icon Description The sound output of GoDrive is muted. Automotive Mode Operation D200904000003 Page 3-70 Rev 3 Mar 2012 © Honeywell International Inc. Do not copy without express permission of Honeywell... -
Page 329: Next Two Route Events (Turn Preview Fields)
(turn, roundabout, exiting motorway, etc.) and its distance from the current GPS position is displayed. D200904000003 Automotive Mode Operation Rev 3 Mar 2012 Page 3-71 © Honeywell International Inc. Do not copy without express permission of Honeywell... - Page 330 The same symbols are used in both fields: Icon Description Turn left. Turn right. Turn back. Bear right. Turn sharp left. Automotive Mode Operation D200904000003 Page 3-72 Rev 3 Mar 2012 © Honeywell International Inc. Do not copy without express permission of Honeywell...
-
Page 331: Objects On The Map
If you prefer not to see street names during navigation, turn them off. ELEMENTS OF THE ACTIVE ROUTE GoDrive shows the route in the following way: Symbol Name Description D200904000003 Automotive Mode Operation Rev 3 Mar 2012 Page 3-73 © Honeywell International Inc. Do not copy without express permission of Honeywell... - Page 332 Via point A via point is an intermediate destination. You can place as many via points as you want. Automotive Mode Operation D200904000003 Page 3-74 Rev 3 Mar 2012 © Honeywell International Inc. Do not copy without express permission of Honeywell...
-
Page 333: Streets And Roads
On the main part of the screen you can see the first page of Saved Search Criteria. Select any of the criteria to quickly D200904000003 Automotive Mode Operation Rev 3 Mar 2012 Page 3-75 © Honeywell International Inc. Do not copy without express permission of Honeywell... -
Page 334: Cursor Menu
Description Soft Key Closes the Cursor menu, and returns to the previous screen. Zooms out the map. Automotive Mode Operation D200904000003 Page 3-76 Rev 3 Mar 2012 © Honeywell International Inc. Do not copy without express permission of Honeywell... - Page 335 Key replaces the previous one, and deletes the selected via point from the route. The route is recalculated without D200904000003 Automotive Mode Operation Rev 3 Mar 2012 Page 3-77 © Honeywell International Inc. Do not copy without express permission of Honeywell...
- Page 336 If the Cursor is at or near a Pin, this soft Key replaces the previous one, and deletes the Pin the Cursor is near to. Automotive Mode Operation D200904000003 Page 3-78 Rev 3 Mar 2012 © Honeywell International Inc. Do not copy without express permission of Honeywell...
-
Page 337: Position Menu
It can be opened directly from the Map screen by tapping the Turn Preview field ( • In Advanced mode, from the Navigation menu tap the following soft Keys: D200904000003 Automotive Mode Operation Rev 3 Mar 2012 Page 3-79 © Honeywell International Inc. Do not copy without express permission of Honeywell... -
Page 338: Figure 3-11: Route Information Screen
Automotive Mode Operation D200904000003 Page 3-80 Rev 3 Mar 2012 © Honeywell International Inc. Do not copy without express permission of Honeywell... - Page 339 Tap any of the symbol are displayed in case icons warnings are attached to the explanation. planned Name Description Function D200904000003 Automotive Mode Operation Rev 3 Mar 2012 Page 3-81 © Honeywell International Inc. Do not copy without express permission of Honeywell...
-
Page 340: Trip Information Screen
It can be opened directly from the Map screen by tapping the Trip Data field ( Automotive Mode Operation D200904000003 Page 3-82 Rev 3 Mar 2012 © Honeywell International Inc. Do not copy without express permission of Honeywell... -
Page 341: Figure 3-12: Trip Information Screen
(yellow flag). Field next to the flag Shows the name or number of the D200904000003 Automotive Mode Operation Rev 3 Mar 2012 Page 3-83 © Honeywell International Inc. Do not copy without express permission of Honeywell... - Page 342 Automotive Mode Operation D200904000003 Page 3-84 Rev 3 Mar 2012 © Honeywell International Inc. Do not copy without express permission of Honeywell...
- Page 343 Trip Data fields. Opens screen with three resettable Trip Computers. D200904000003 Automotive Mode Operation Rev 3 Mar 2012 Page 3-85 © Honeywell International Inc. Do not copy without express permission of Honeywell...
-
Page 344: Trip Computer Screen
Data area. This is the value at the bottom. TRIP COMPUTER SCREEN The Trip Computer screen provides collected trip data. It can be Automotive Mode Operation D200904000003 Page 3-86 Rev 3 Mar 2012 © Honeywell International Inc. Do not copy without express permission of Honeywell... -
Page 345: Quick Menu
The Quick menu is a selection of controls that are frequently needed during navigation. It can be opened directly from the Map screen by tapping D200904000003 Automotive Mode Operation Rev 3 Mar 2012 Page 3-87 © Honeywell International Inc. Do not copy without express permission of Honeywell... -
Page 346: Figure 3-13: Quick Menu
Opens Color daytime and night color Profiles settings. schemes manually. This will disable automatic switching between schemes: other Automotive Mode Operation D200904000003 Page 3-88 Rev 3 Mar 2012 © Honeywell International Inc. Do not copy without express permission of Honeywell... - Page 347 GPS receiver, and a shortcut to the GPS Settings screen if needed (GPS receiver detection automatic). D200904000003 Automotive Mode Operation Rev 3 Mar 2012 Page 3-89 © Honeywell International Inc. Do not copy without express permission of Honeywell...
-
Page 348: Gps Data Screen
GPS Data screen and to see the status of the GPS reception. Figure 3-14: GPS Status Icon Color Name Description Automotive Mode Operation D200904000003 Page 3-90 Rev 3 Mar 2012 © Honeywell International Inc. Do not copy without express permission of Honeywell... - Page 349 GoDrive connection to the GPS receiver. Green, blinking GoDrive connection connected to the quality GPS receiver. D200904000003 Automotive Mode Operation Rev 3 Mar 2012 Page 3-91 © Honeywell International Inc. Do not copy without express permission of Honeywell...
- Page 350 GPS to calculate your current location. Coordinates Your current position in WGS84 format. Automotive Mode Operation D200904000003 Page 3-92 Rev 3 Mar 2012 © Honeywell International Inc. Do not copy without express permission of Honeywell...
-
Page 351: Find Menu
You can select as your destination a location that you have already saved as a Favorite. D200904000003 Automotive Mode Operation Rev 3 Mar 2012 Page 3-93 © Honeywell International Inc. Do not copy without express permission of Honeywell... -
Page 352: Route Menu
You can save the active route for later use. You can load a previously saved route for navigation. Automotive Mode Operation D200904000003 Page 3-94 Rev 3 Mar 2012 © Honeywell International Inc. Do not copy without express permission of Honeywell... -
Page 353: Manage Menu
Creating, updating or deleting POIs Creating, updating or deleting POI groups Modifying visibility settings Creating, renaming deleting Saved Search Criteria D200904000003 Automotive Mode Operation Rev 3 Mar 2012 Page 3-95 © Honeywell International Inc. Do not copy without express permission of Honeywell... -
Page 354: Manage Saved Routes
Deletes the selected item in the History. Deletes the entire History. Turns the page for additional list items. Manage Track Logs Automotive Mode Operation D200904000003 Page 3-96 Rev 3 Mar 2012 © Honeywell International Inc. Do not copy without express permission of Honeywell... - Page 355 The map returns with the Track Log. The map is scaled to show the whole Track Log. D200904000003 Automotive Mode Operation Rev 3 Mar 2012 Page 3-97 © Honeywell International Inc. Do not copy without express permission of Honeywell...
-
Page 356: Manage Favorites
Opens the selected POI for editing. Only the name and address of POIs you have created appear in this list. a POI item Automotive Mode Operation D200904000003 Page 3-98 Rev 3 Mar 2012 © Honeywell International Inc. Do not copy without express permission of Honeywell... - Page 357 Soft Key with the icon of Tap this soft Key to select a new icon the POI group for the POI group. D200904000003 Automotive Mode Operation Rev 3 Mar 2012 Page 3-99 © Honeywell International Inc. Do not copy without express permission of Honeywell...
-
Page 358: Manage Saved Search Criteria
Tap to rename the saved query. Saved Search Criteria Deletes the selected item in the list. Deletes the entire list. Automotive Mode Operation D200904000003 Page 3-100 Rev 3 Mar 2012 © Honeywell International Inc. Do not copy without express permission of Honeywell... -
Page 359: User Data Management
Reset Factory All settings will return to their factory defaults, Settings but no user data will be deleted. D200904000003 Automotive Mode Operation Rev 3 Mar 2012 Page 3-101 © Honeywell International Inc. Do not copy without express permission of Honeywell... -
Page 360: Settings Menu
You can control how GoDrive behaves during navigation. Automotive Mode Operation D200904000003 Page 3-102 Rev 3 Mar 2012 © Honeywell International Inc. Do not copy without express permission of Honeywell... - Page 361 The rest of the settings are set to values that are optimal for typical use. D200904000003 Automotive Mode Operation Rev 3 Mar 2012 Page 3-103 © Honeywell International Inc. Do not copy without express permission of Honeywell...
-
Page 362: Map Screen Settings
Sound Settings You can adjust the sounds of GoDrive. Tap the following soft Keys: Automotive Mode Operation D200904000003 Page 3-104 Rev 3 Mar 2012 © Honeywell International Inc. Do not copy without express permission of Honeywell... -
Page 363: Route Planning Options
(e.g. emergency vehicles have only a few restrictions). D200904000003 Automotive Mode Operation Rev 3 Mar 2012 Page 3-105 © Honeywell International Inc. Do not copy without express permission of Honeywell... - Page 364 Vehicle Types: • • Taxi • Automotive Mode Operation D200904000003 Page 3-106 Rev 3 Mar 2012 © Honeywell International Inc. Do not copy without express permission of Honeywell...
- Page 365 You should check whether you are allowed to use carpool lanes before enabling this road type. Route Calculation Method types: Option Description D200904000003 Automotive Mode Operation Rev 3 Mar 2012 Page 3-107 © Honeywell International Inc. Do not copy without express permission of Honeywell...
-
Page 366: Regional Settings
Tap any of these to hear a sample voice prompt. Just tap OK when you have selected the new Automotive Mode Operation D200904000003 Page 3-108 Rev 3 Mar 2012 © Honeywell International Inc. Do not copy without express permission of Honeywell... - Page 367 Please note that the GPS clock is only available with GPS reception. This allows you to check whether D200904000003 Automotive Mode Operation Rev 3 Mar 2012 Page 3-109 © Honeywell International Inc. Do not copy without express permission of Honeywell...
-
Page 368: Navigation Settings
GPS position and re-enables automatic map rotation after the given Automotive Mode Operation D200904000003 Page 3-110 Rev 3 Mar 2012 © Honeywell International Inc. Do not copy without express permission of Honeywell... -
Page 369: Warning Settings
This setting lets you decide whether you wish to receive the warnings. You can set the relative speeding at D200904000003 Automotive Mode Operation Rev 3 Mar 2012 Page 3-111 © Honeywell International Inc. Do not copy without express permission of Honeywell... - Page 370 This way you can be sure you will not be routed via one-way roads in the wrong direction as a pedestrian could, for example. Automotive Mode Operation D200904000003 Page 3-112 Rev 3 Mar 2012 © Honeywell International Inc. Do not copy without express permission of Honeywell...
-
Page 371: Gps Settings
Menu Settings You can modify the look and behavior of the Menu screens. Tap the following soft Keys: D200904000003 Automotive Mode Operation Rev 3 Mar 2012 Page 3-113 © Honeywell International Inc. Do not copy without express permission of Honeywell... -
Page 372: Device Settings
You can change some device settings to control the screen backlight when GoDrive is running. Tap the following soft Keys: Soft Key Description Automotive Mode Operation D200904000003 Page 3-114 Rev 3 Mar 2012 © Honeywell International Inc. Do not copy without express permission of Honeywell... -
Page 373: Track Log Settings
You can set up an automatic Track Log saving, and fine-tune its settings. Tap the following soft Keys: Soft Key Description D200904000003 Automotive Mode Operation Rev 3 Mar 2012 Page 3-115 © Honeywell International Inc. Do not copy without express permission of Honeywell... - Page 374 GPS device. These logs are saved as separate text files on the memory card, and they cannot be shown or replayed in GoDrive. Automotive Mode Operation D200904000003 Page 3-116 Rev 3 Mar 2012 © Honeywell International Inc. Do not copy without express permission of Honeywell...
-
Page 375: Multimedia
SD card as shown in the figure below. The music player supports the following audio formats: • • WMA. D200904000003 Multimedia Rev 3 Mar 2012 Page 4-1 © Honeywell International Inc. Do not copy without express permission of Honeywell... -
Page 376: Photos
Multimedia menu page. PHOTOS To enter the photo browser service, tap the icon on the Multimedia menu. Multimedia D200904000003 Page 4-2 Rev 3 Mar 2012 © Honeywell International Inc. Do not copy without express permission of Honeywell... -
Page 377: Figure 4-4: Photo Browser - Searching For A Photo
• • • Figure 4-4: Photo Browser – Searching for a Photo Double tap on a picture to display it. D200904000003 Multimedia Rev 3 Mar 2012 Page 4-3 © Honeywell International Inc. Do not copy without express permission of Honeywell... -
Page 378: Movie Player
SD card as shown in the figure below. The movie player supports the following video formats: • • • • Multimedia D200904000003 Page 4-4 Rev 3 Mar 2012 © Honeywell International Inc. Do not copy without express permission of Honeywell... -
Page 379: Ebook Reader
Multimedia menu page. EBOOK READER To read an Ebook, tap the icon on the Multimedia menu. D200904000003 Multimedia Rev 3 Mar 2012 Page 4-5 © Honeywell International Inc. Do not copy without express permission of Honeywell... -
Page 380: Figure 4-8: Ebook Reader - Searching For A Book
Double tap on one of the Ebook files to open in the Ebook reader. Figure 4-9: Ebook Reader Tap the icon to return to the Multimedia menu page. Multimedia D200904000003 Page 4-6 Rev 3 Mar 2012 © Honeywell International Inc. Do not copy without express permission of Honeywell... -
Page 381: Xm Tuner
Radio ID for the XM receiver shows to the right of the Serial Number label as shown below. The Radio ID is also on the bottom on the WxWorx XM receiver. D200904000003 Multimedia Rev 3 Mar 2012 Page 4-7 © Honeywell International Inc. Do not copy without express permission of Honeywell... -
Page 382: Figure 4-11: Xm Status Page
Tap the Normal Mode soft key to exit the Activation Mode. To return to the XM Radio page, tap on the OK soft key. Multimedia D200904000003 Page 4-8 Rev 3 Mar 2012 © Honeywell International Inc. Do not copy without express permission of Honeywell... -
Page 383: Xm Radio Tuning
Select Channel soft key to start reception of the channel. D200904000003 Multimedia Rev 3 Mar 2012 Page 4-9 © Honeywell International Inc. Do not copy without express permission of Honeywell... -
Page 384: Downloading Multimedia Files
Refer to the Downloading/Uploading files from/to PC section on page 6-5 in the Appendix for instructions on how to download multimedia files to the AV8OR. Multimedia D200904000003 Page 4-10 Rev 3 Mar 2012 © Honeywell International Inc. Do not copy without express permission of Honeywell... -
Page 385: System Settings
Honeywell Bendix/King AV8OR Ace User’s Guide SYSTEM SETTINGS The user can customize how the AV8OR ACE operates and adjust system settings in the Settings page. Tap the soft key on the Main Menu page to enter the Settings page. Figure 5-1: Settings Page Tap the soft key to return to the Main Menu. -
Page 386: Backlight Control Bar
The settings on the Volume page control the volume of the touch- screen operation and the Menu soft key tapping System Settings D200904000003 Page 5-2 Rev 3 Mar 2012 © Honeywell International Inc. Do not copy without express permission of Honeywell... -
Page 387: Enable/Disable Audio Output
Tap the icon to return to the Settings page. D200904000003 System Settings Rev 3 Mar 2012 Page 5-3 © Honeywell International Inc. Do not copy without express permission of Honeywell... -
Page 388: System Info
Settings page to display the Bluetooth Manager page. Figure 5-5: Bluetooth Manager Page The Bluetooth Manager page has the following functions: System Settings D200904000003 Page 5-4 Rev 3 Mar 2012 © Honeywell International Inc. Do not copy without express permission of Honeywell... -
Page 389: Figure 5-6: Bluetooth - Add Device Page
A search is performed for all available Bluetooth devices. When the search is completed, all devices that have at least one feature that has not been previously paired to the AV8OR ACE are displayed. Tap the Search Again soft key to do the search over. -
Page 390: Figure 5-7: Bluetooth - Pair Device Page
Manager Page. If a passkey Entry is required during the connection, the Passkey Entry Page will display as shown below. System Settings D200904000003 Page 5-6 Rev 3 Mar 2012 © Honeywell International Inc. Do not copy without express permission of Honeywell... -
Page 391: Service Providers Page
This page allows the user to set up the Dial-Up Network (DUN). The page displays all of the available service providers. D200904000003 System Settings Rev 3 Mar 2012 Page 5-7 © Honeywell International Inc. Do not copy without express permission of Honeywell... -
Page 392: Dun Setup Page
The Favorite Service Providers page is entered when the Favorite soft key is tapped on the Service Providers Page as shown below. System Settings D200904000003 Page 5-8 Rev 3 Mar 2012 © Honeywell International Inc. Do not copy without express permission of Honeywell... -
Page 393: Initial Setup
To enter the Initial Setup page, tap the “Initial Setup” soft key on the Settings page. The Initial Setup Menu page is displayed as shown below. D200904000003 System Settings Rev 3 Mar 2012 Page 5-9 © Honeywell International Inc. Do not copy without express permission of Honeywell... -
Page 394: Figure 5-12: Initial Setup Menu Page
Tap on the Back soft key to return to the Initial Setup Menu page. When finished, tap on the Back soft key to return to the main menu. System Settings D200904000003 Page 5-10 Rev 3 Mar 2012 © Honeywell International Inc. Do not copy without express permission of Honeywell... -
Page 395: Appendix
ETT-WPT estimated time to WPT EXT external FPLAN flight plan ft feet GND ground GNDSPD groundspeed GPS global positioning system D200904000003 Appendix Rev 3 Mar 2012 Page 6-1 © Honeywell International Inc. Do not copy without express permission of Honeywell... - Page 396 MSL Mean sea level NAV navigation NAVAID Navigation/al Aid NCD non-computed data NDB non-directional beacon nm nautical miles NMEA national marine electronics association Appendix D200904000003 Page 6-2 Rev 3 Mar 2012 © Honeywell International Inc. Do not copy without express permission of Honeywell...
- Page 397 TRK actual track TST test TTS track to steer USB universal serial bus UTC universal coordinated time (same as Greenwich Mean D200904000003 Appendix Rev 3 Mar 2012 Page 6-3 © Honeywell International Inc. Do not copy without express permission of Honeywell...
- Page 398 VOR very high frequency omni-directional radio range VRP visual reference point VSD vertical situation display (Smart Profile) WPT Waypoint XTK cross track error Appendix D200904000003 Page 6-4 Rev 3 Mar 2012 © Honeywell International Inc. Do not copy without express permission of Honeywell...
-
Page 399: Downloading/Uploading Files From/To Pc
Honeywell Bendix/King AV8OR Ace User’s Guide DOWNLOADING/UPLOADING FILES FROM/TO PC • Turn on the power to the AV8OR ACE and let AV8OR ACE boot up to the main menu. • Use the included PC/USB cable (part number 005-03702-1017) to attach from the AV8OR ACE to a USB port on a P/C. -
Page 400: Figure 6-2: Configure Av8Or Ace As External Drive
Honeywell Bendix/King AV8OR Ace User’s Guide Figure 6-2: Configure AV8OR ACE as external drive NOTE: The SD card can also be removed from the AV8OR ACE and plugged into a compatible SD card slot on a PC to transfer files. - Page 401 Storage location for photos \Multimedia\photos CAUTION Make sure that any multimedia files that are downloaded only go into the correct multimedia subdirectory. D200904000003 Appendix Rev 3 Mar 2012 Page 6-7 © Honeywell International Inc. Do not copy without express permission of Honeywell...
- Page 402 Deleting or changing files in the GoDrive or GoFly directories on the SD card may make the aviation or automotive navigation programs unusable. Appendix D200904000003 Page 6-8 Rev 3 Mar 2012 © Honeywell International Inc. Do not copy without express permission of Honeywell...
-
Page 403: Mini Usb/Serial Port
Honeywell Bendix/King AV8OR Ace User’s Guide MINI USB/SERIAL PORT The mini USB/serial port on the side of the AV8OR ACE has the follow pin-outs: Table 6-2: Mini USB Connections Pin Number Signal Description RS 232 Port #1 TX RS 232 Port #1 TX... -
Page 404: Connection To An External Gps Source
Highlight the Device Setup option and tap the SELECT soft key to show the Device and Port Setup page. The AV8OR ACE must be set up so that the Position Port is configured as “COM 1” or “COM 2” and the Flight Plan Port is configured as “External”. -
Page 405: Figure 6-3: External Gps Setup Screen
GPS RS-232 OUT 1 P5001-56 RS 232 RX DB9-2 GPS RS-232 IN 1 P5001-57 RS 232 TX DB9-3- AIRCRAFT GROUND P5001-77,78 GROUND DB9-5 D200904000003 Appendix Rev 3 Mar 2012 Page 6-11 © Honeywell International Inc. Do not copy without express permission of Honeywell... -
Page 406: Connection To An External Weather Source
Honeywell Bendix/King AV8OR Ace User’s Guide CONNECTION TO AN EXTERNAL WEATHER SOURCE Bendix/King KDR-610 Setup To configure the AV8OR ACE to receive weather data from the KDR-610, perform the following steps: From the Aviation Main Menu, tap the soft key to open the System Setup Menu. -
Page 407: Table 6-5 Kdr 610 Pinouts
Honeywell Bendix/King AV8OR Ace User’s Guide An RS 232 to RS 422 Converter can be purchased from Telebyte, Model 253 (telebyteusa.com). The pinouts for the Bendix/King KDR 610 and the AV8OR ACE are as follows: Table 6-5 KDR 610 Pinouts... -
Page 408: Wxworx Xm Weather Receiver Serial Setup
Honeywell Bendix/King AV8OR Ace User’s Guide WxWorx XM Weather Receiver Serial Setup To configure the AV8OR ACE to receive weather data from the WxWorx XM Weather Receiver, perform the following steps: Attach the cable from the WxWorx XM Weather Receiver (supplied with the WX XM Weather Receiver) to the USB port on the AV8OR. -
Page 409: Wxworx Xm Weather Receiver Bluetooth Setup
Honeywell Bendix/King AV8OR Ace User’s Guide WxWorx XM Weather Receiver Bluetooth Setup To configure the AV8OR ACE to receive weather data from the Bluetooth version of the WxWorx XM Weather Receiver, perform the following steps: Setup the WxWorx receiver in the Device and Port Setup page as follows: 1. -
Page 410: Figure 6-7: Bluetooth Manager Page
2. This page shows the devices that have been previously paired with the AV8OR ACE. If the WxWorx Receiver has not previous been paired with AV8OR ACE, tap on the Add Device soft key to start the connection process. The Bluetooth manager... -
Page 411: Figure 6-8: Add Bluetooth Device
4. Highlight the “Bluetooth Serial Port” option and then tap on the Connect Service soft key to start the connection process and display the Passkey Entry Page. D200904000003 Appendix Rev 3 Mar 2012 Page 6-17 © Honeywell International Inc. Do not copy without express permission of Honeywell... -
Page 412: Figure 6-10: Bluetooth Passkey Required
Figure 6-11: BlueTooth Connecting 6. After the WxWorx Receiver is paired, it is displayed in the Bluetooth Manager page as shown below. Appendix D200904000003 Page 6-18 Rev 3 Mar 2012 © Honeywell International Inc. Do not copy without express permission of Honeywell... -
Page 413: Figure 6-12: Bluetooth Wxworx Connection Established
Honeywell Bendix/King AV8OR Ace User’s Guide Figure 6-12: Bluetooth WxWorx Connection Established D200904000003 Appendix Rev 3 Mar 2012 Page 6-19 © Honeywell International Inc. Do not copy without express permission of Honeywell... -
Page 414: Connection To An External Traffic Source
Highlight the Device Setup option and tap the SELECT soft key to show the Device Setup page. • The AV8OR ACE must be set up so that the Traffic Port is configured as “COM 1” or “COM 2”. The Type must be set as “ZAON Traffic”. -
Page 415: Zaon Xrx - Bluetooth Setup
Zaon XRX - Bluetooth Setup The Zaon XRX requires an optional Bluetooth module to synchronize with other Bluetooth devices. The AV8OR ACE supports a Bluetooth connection to the Zaon XRX after the optional module has been installed on the Zaon XRX. Refer to the User’s manual for the Zaon XRX Bluetooth module for details on how to connect to the Zaon XRX. -
Page 416: External Flight Plans
EXTERNAL FLIGHT PLANS Jeppesen FliteStar© PC Application The AV8OR ACE can use flight plans created by the Jeppesen FliteStar© PC application. Flight plans can be created and modified using the Jeppesen tool. The flight plans need to be saved using the “Export as Text”... -
Page 417: Subscriptions And Updates
Refer to the chart below for the coverage available for each area. Figure 6-14: Navigation Data Subscription Coverage GOFLY FUEL PRICING AND AIRPORT SERVICES All US only D200904000003 Appendix Rev 3 Mar 2012 Page 6-23 © Honeywell International Inc. Do not copy without express permission of Honeywell... -
Page 418: Other Subscriptions
AV8OR system or SD card which includes automotive mapping after 1/1/10. For any GoDrive and automotive mapping support issues, visit Nav-n-Go at naviextras.com. Appendix D200904000003 Page 6-24 Rev 3 Mar 2012 © Honeywell International Inc. Do not copy without express permission of Honeywell... -
Page 419: Updates
GoFly Software Updates • AV8OR Firmware Updates The AV8OR Ace must be connected to the PC with the included USB connector. The PC will automatically detect the AV8OR Ace and display the available updates as shown in the figure below.
Need help?
Do you have a question about the AV8OR ACE and is the answer not in the manual?
Questions and answers