Table of Contents
Advertisement
Advertisement
Table of Contents

Related Manuals for MakerBot Replicator Mini Compact


Summary of Contents for MakerBot Replicator Mini Compact
- Page 1 REFERENCE GUIDE...
- Page 2 The product may differ slightly from the images and instructions in this guide as we continue to improve the MakerBot Replicator Mini. Please see www.makerbot.com/um_rep_mini for the latest version of the guide.
-
Page 3: Table Of Contents
......................About the MakerBot Replicator Mini . -
Page 4: Legal Notices
Guide in its sole discretion and at any time and makes no commitment to provide any such changes, updates, enhancements, or other additions to this Guide in a timely manner or at all. You agree to be bound by any modifications and/or revisions. Contact the MakerBot Support Team for up-to-date information. - Page 5 MakerBot makes no warranties to those defined as “consumer” in the Magnuson-Moss Warranty-Federal Trade Commission Improvement Act. In connection with your use of this Guide, MakerBot shall not be liable to you for any damages whatsoever, be they direct, economic, commercial, special, consequential,...
- Page 6 MakerBot Replicator Mini and the MakerBot Desktop App. For help with setting up your MakerBot Replicator Mini, please refer to the Quick Start Guide that came with it, or...
-
Page 7: Safety And Compliance
Warning: The MakerBot Replicator Mini Compact 3D Printer generates high temperatures. Always allow the MakerBot Replicator Smart Extruder to cool to 50° C before removing it or reaching inside the MakerBot Replicator Mini. Warning: The MakerBot Replicator Mini includes moving parts that can cause injury. - Page 8 Printing Office, Washington, DC 20402. Changes and modifications not expressly approved by the manufacturer or registrant of this equipment can void your authority to operate this equipment under FCC rules. MANUFACTURER MakerBot Industries, LLC One MetroTech Center, 21st Floor Brooklyn, NY 11201 347.334.6800...
-
Page 9: About The Makerbot Replicator Mini
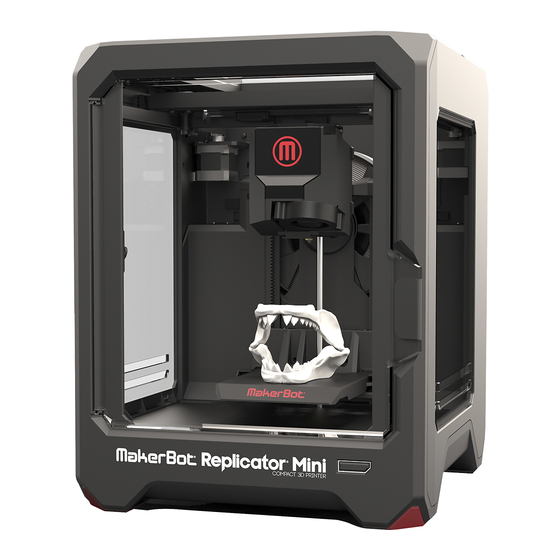
Wi-Fi network. With the touch of a button, the MakerBot Replicator Mini will melt MakerBot PLA Filament and squeeze it out onto the build plate in thin lines to build your object layer by layer. This method of 3D printing is called fused deposition modeling. -
Page 10: Diagrams
DIAGRAMS MAKERBOT REPLICATOR MINI FRONT VIEW 1. Filament Spool Pocket 4. Build Plate 2. Gantry 5. Action Button 3. Filament Guide Tube REFERENCE... -
Page 11: Makerbot Replicator Mini Side View
DIAGRAMS MAKERBOT REPLICATOR MINI SIDE VIEW 6. Power Switch 8. USB Port 9. Extruder Assembly 7. Power Input Port REFERENCE... -
Page 12: About Makerbot Desktop
MakerBot Replicator Desktop 3D Printers. When you buy a model from the MakerBot Digital Store, a print file for your MakerBot Replicator Mini will be added to your MakerBot Cloud Library. - Page 13 MakerBot Desktop. You can also replay the MakerBot Desktop walkthrough in the Learn tab. Use Store and Explore to find 3D models, Library to keep them organized, and Prepare to send them to your MakerBot Replicator Mini for printing. Use Learn to view tutorials. REFERENCE...
- Page 14 ABOUT MAKERBOT DESKTOP THE PREPARE SCREEN 1. +/– • Click the Plus and Minus buttons to zoom in and out. • • • You can also zoom using a track pad or the scroll wheel on your mouse. • 2. Home View • Click the Home View button to return to the default view of the build plate.
- Page 15 ABOUT MAKERBOT DESKTOP 4. Move • • Click the Move button or press the M key to enter Move mode. • • In Move mode, click and drag with your mouse to move your model around on the build plate. • • In Move mode, hold the Shift key and click and drag with your mouse to move your model up and down along the z-axis. • • Click the Move button again to open the Change Position submenu and move your object by a specific distance along the x-, y-, or z-axis.
- Page 16 Thing file without overwriting earlier layouts. 11. Export Print File • Click Export Print File to slice your print and save the .makerbot file to your local • computer or attached USB drive. However, you can only print to the MakerBot Replicator Mini via a USB or Wi-Fi connection.
-
Page 17: Connecting To Makerbot Desktop
1. Locate the included USB cable. 2. Insert the USB-B end of the cable into the port on the side of your MakerBot Replicator Mini and insert the USB-A end of the cable into a USB port on your computer. MakerBot Desktop will automatically detect your MakerBot Replicator Mini. -
Page 18: Printing From Makerbot Desktop
4. Choose which part or version you want to print and click the Prepare button next to the file name. MakerBot Desktop will open the file and take you to the Prepare tab. The file you selected will appear on the build plate. - Page 19 1. In MakerBot Desktop, click on the Library tab. 2. Click one of the folders at the left side of the screen to see items available in your Library. 3. Click on a list item and then click Prepare. MakerBot Desktop will open the file and take you to the Prepare tab. The file you selected will appear on the build plate.
- Page 20 2. Advanced Settings. Some options have been grayed out to make your printing experience with the MakerBot Replicator Mini as simple and as easy as possible. You can still access additional options by clicking on Advanced Options. For...
- Page 21 If you decide not to send the file to the MakerBot Replicator Mini, click Cancel Print. 2. When the print file is sent to the MakerBot Replicator Mini, the Action Button will glow red, indicating that it is heating the MakerBot Replicator Smart Extruder. When the Smart Extruder is fully heated, the MakerBot Replicator Mini will start to print your model.
- Page 22 POST PRINT STEPS REMOVE RAFT When your print finishes, wait for the Smart Extruder to cool, then remove the build plate from the MakerBot Replicator Mini. Remove the print from the build plate, and peel off the raft from the bottom of the print. Every object printed on your MakerBot Replicator Mini will be built on a raft. The raft acts as a base for your print and any support structures, and ensures that everything adheres well to the build plate. The raft will be easily removable once you remove your finished print from the build plate.
-
Page 23: Changing Filament
CHANGING FILAMENT • HOW TO CHANGE FILAMENT You can change filament at any time when the MakerBot Replicator Mini is not heating up or printing. To Load • I n the print monitor panel, click Change. Then click Load. The Smart Extruder will • start to heat up. When the Smart Extruder is fully heated, the extruder motor will start to turn. -
Page 24: Detaching/Attaching The Smart Extruder
Replicator Mini. Open the print monitor panel in MakerBot Desktop, mouse over the camera view, and click Take a Photo. MakerBot Desktop will take a photo and let you save it to your local computer. You must be connected to a Wi-Fi network to use the camera. -
Page 25: Makerbot Printshop
MAKERBOT PRINTSHOP ™ MakerBot PrintShop is a free app that allows you to design and customize prints, explore Thingiverse, and monitor and control your MakerBot Replicator Mini, all from your tablet. MakerBot Printshop has three features: Makers, Explore, and My Stuff. -
Page 26: Makerbot Mobile
MAKERBOT MOBILE MakerBot Mobile is a free app that allows you to monitor and control your MakerBot Replicator Mini from your smartphone. With MakerBot Mobile you can: • • Start, pause, and cancel prints • • Initiate filament changes • • Receive notifications about your prints, such as print completion, any errors that may occur, and more •... -
Page 27: Updating Firmware
UPDATING FIRMWARE Firmware is the software that runs on your MakerBot Replicator Mini. Keeping your firmware up to date will help ensure that your MakerBot Replicator Mini is in the best possible working order. Firmware updates allow MakerBot to add new features to your MakerBot Replicator Mini and improve old ones. If a new firmware version has become available since the last time you connected your MakerBot Replicator Mini to MakerBot Desktop, MakerBot Desktop will alert you. -
Page 28: Troubleshooting
CONNECTIVITY PROBLEMS PROBLEM SOLUTION Can’t access the Library, You may not be logged into your MakerBot Explore, and Store sections account. These features are accessible only when of MakerBot Desktop. you are logged in. If you are logged into your... - Page 29 TROUBLESHOOTING PRINTING PROBLEMS PROBLEM SOLUTION Can’t unload filament from In the print monitor panel of MakerBot Desktop, click Change, and then select Load Filament. the MakerBot Replicator Smart Extruder. Let the filament extrude for a few seconds, then click Done and Unload Filament to try unloading again.
- Page 30 TROUBLESHOOTING PRINTING PROBLEMS PROBLEM SOLUTION Printed object is stuck Remove the build plate from your MakerBot to the build plate. Replicator Mini and wait for the object to cool down. Objects will detach more easily after they have cooled. If the object is still stuck, take a thin metal craft spatula and carefully work the blade under the edge of the object.
- Page 31 The front door is designed to pop off without What do I do? being damaged. Simply snap it back onto its hinges. My MakerBot Replicator Mini After internal product testing on the MakerBot didn’t come with a lid. Replicator Mini, we saw better performance without the top door, so we decided to remove it from the design.
-
Page 32: Specifications
10.0 W x 10.0 D x 12.5 H cm [3.9 W x 3.9 D x 4.9 H in] Layer Resolution: 200 microns Filament: 1.75 mm [0.069 in] MakerBot PLA Filament Nozzle Diameter: 0.4 mm [0.015 in] Print File Type: .makerbot... -
Page 33: Glossary
MakerBot Replicator and password you will use to sign in to the Mini at store.makerbot.com MakerBot Desktop app and to log on to Thingiverse and other MakerBot sites. EXTRUDER ASSEMBLY: The MakerBot MAKERBOT CLOUD LIBRARY: The part of Replicator Smart Extruder installed in the extruder carriage. - Page 34 PRINT PREVIEW: The feature in the Print .THING: A file format used by MakerBot dialog that provides an estimated print time, estimated amount of filament your print will...
-
Page 35: Contact Us
At MakerBot, we take pride in offering expert, responsive, friendly customer support to our customers around the world. If you need help resolving an issue with your MakerBot Replicator Mini, open a case with the MakerBot Support Team at the web address above. - Page 36 NOTES REFERENCE...
- Page 37 NOTES REFERENCE...
- Page 38 WE CAN’T WAIT TO SEE WHAT YOU MAKE! MakerBot One MetroTech Center, 21st Floor, Brooklyn, NY support@makerbot.com makerbot.com...
Need help?
Do you have a question about the Replicator Mini Compact and is the answer not in the manual?
Questions and answers