Table of Contents
Advertisement
Advertisement
Table of Contents

Subscribe to Our Youtube Channel
Related Manuals for Reconyx Hyperfire


Summary of Contents for Reconyx Hyperfire
- Page 1 Security Camera Manual Copyright: June 2012...
-
Page 2: Table Of Contents
Table of Contents Table of Contents ..............1 Camera Overview ..............2 III. HyperFire Specifications ............ 3 HyperFire Controls & Parts Diagram ......... 5 Batteries & Memory Cards ............ 6 Setup & Programming ............11 VII. Mounting Your Camera ............18 VIII. -
Page 3: Camera Overview
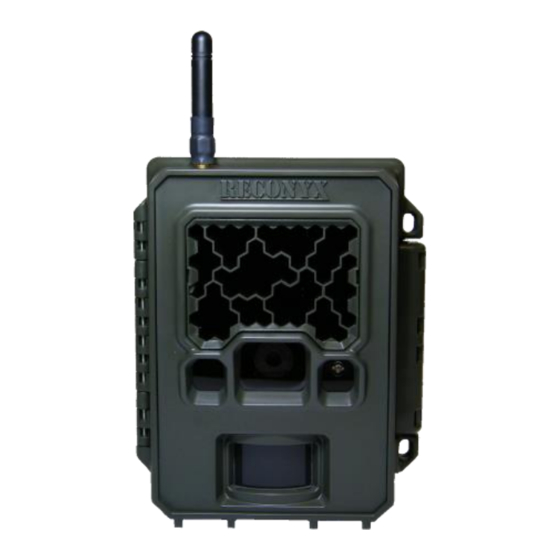
Security camera. RECONYX has been the leader in motion activated digital surveillance cameras since 2002. Your HyperFire™ camera is a state-of-the-art digital camera, Passive Infrared (PIR) motion detector, and a night time infrared illuminator all contained in a secure, rugged, and weather-resistant case. -
Page 4: Hyperfire Tm Specifications
HyperFire Specifications SC950 SM750 Purpose General Surveillance License Plate Capture No-glow Illumination Range No-glow Covert Infrared up to 50 feet Covert Infrared up to 50 feet at night for License Plates 3.1MP or 1080p HD color 1.3MP or 720p HD Images images by day;... - Page 5 Professional requires a personal computer running Windows XP®, Windows Vista®, or Windows 7®. Security Scheduling Also included is the “RECONYX Security Scheduling software” that allows you to schedule the camera on or off, for different times of the day and days of the week.
-
Page 6: Hyperfire Controls & Parts Diagram
HyperFire Controls & Parts Diagram Padlock Loop Handle Infrared IR Mask Illuminator Array Latch Camera Lens WalkTest Light Light Meter Padlock Loop PIR Motion Detector Battery Backlit LCD Bays Status/Menu Panel Weatherproof Gasket - Card In Use (Status Light) - Left/Right Menu Buttons... -
Page 7: Batteries & Memory Cards
Batteries & Memory Cards Accessing Batteries, Memory Card & Camera Controls To install the batteries and memory card, your HyperFire camera is easily opened using the latch on the right side of the camera. Grasp behind the latch and flip it toward the front. The camera will open like a book, allowing access to the batteries, memory card and settings. - Page 8 Battery Specifications and Installation Your RECONYX HyperFire camera runs on twelve AA-cell batteries. We highly recommend using either Energizer Ultimate Lithium batteries or high- quality NiMH Rechargeable batteries in your camera. Alkaline batteries do not provide as much power as Lithium or NiMH batteries and they are adversely affected by both hot and cold weather, so we do not recommend alkaline batteries.
- Page 9 (1.2V, 2600MaH) * High temperatures can reduce run time of NiMH batteries by 50% or more. TIP: You can purchase 1.5V Lithium batteries as well as RECONYX certified NiMH rechargeable batteries and chargers at www.reconyx.com. Your camera will display the status of multiple battery types;...
- Page 10 TIP: Many digital cameras, GPS units, and cell phones can be used to view images taken by your HyperFire™ camera. No need to purchase a special purpose viewer! Keep in mind that many of these devices can only use up to 2GB SD cards.
- Page 11 Memory Card - File System Requirements Secure Digital cards have various speeds and capacities. Larger capacity cards are capable of storing more images. Your HyperFire™ camera can accept cards up to 32GB, but most users will find 4GB and 8GB cards to be more than adequate for normal use.
-
Page 12: Setup & Programming
The camera will automatically arm and start taking pictures (with default settings) in two minutes. Default Settings Your RECONYX™ HyperFire camera comes pre-programmed with factory default settings. By default the SC950 will take 3 pictures per trigger with a 1 second pause between pictures and no delay between triggers. - Page 13 TIP: Use the “Programming Diagram” on the next page for a better understanding of how the options are accessed on your HyperFire™ camera. The backlit LCD includes two lines of information. The top line displays the menu, option, or setting you are currently accessing; after you make a selection, it may also display additional information.
- Page 14 HYPERFIRE™ Security Camera Programming Diagram ©RECONYX, Inc.
- Page 15 Camera Info – When you select this option, your camera displays its firmware version number (V) and serial number (S). You may need this information when contacting RECONYX™ with questions about your camera. www.reconyx.com...
- Page 16 “Yes” it will erase all contents on the memory card. If you select “No” it will disable Loop Recording. (This prompt will appear every time the camera is powered on.) NOTE: 2GB or larger cards are recommended when using loop recording. ©RECONYX, Inc.
- Page 17 You can also view, change, or clear an existing label. Use Defaults – Remove any changes you’ve made to your camera’s settings and restore the factory default settings (shown above in RED CAPITAL letters). Main Menu – Go back to the Main menu. www.reconyx.com...
- Page 18 Scheduling HyperFire Security Series Cameras You can schedule your security camera to be “On” and “Off” during different times of the day on different days of the week. These settings are available through the Scheduling Software that is included on the CD you received with your camera.
-
Page 19: Mounting Your Camera
NOTE: It is highly recommended that you use a theft deterrent device such as a security box and/or a Master Python Lock™ to help secure your camera against possible theft when it is in the field. TIP: You can purchase HyperFire™ compatible theft deterrent cables, locks and security enclosures at www.reconyx.com www.reconyx.com... -
Page 20: Locking & Securing Your Camera
“Padlock Loop” near the latch. For increased security, there are a number of security enclosures available: Including the standard “HyperFire™ Security Enclosure” made from 16 gauge steel; or the “Heavy Duty HyperFire™ Security Enclosure”, made from 1/8” steel. -
Page 21: Aiming Your Camera
Aiming Your Camera PIR Motion Detector The Passive Infrared Motion Detector on your HyperFire™ camera is precisely aligned with the camera lens to give you the best chance of capturing subjects that come into the field of view of the camera, while not capturing pictures of anything that is not in the view of the camera. -
Page 22: For Best Results
As it can adversely affect motion detection as well as night time flash range. NOTE: All RECONYX™ cameras will self-arm from the “Walktest” mode after a two minute period during which it does not detect any motion events. - Page 23 You may find that you need to adjust your aim slightly after testing. TIP: We also offer a modified Cable Box for use in camouflaging your camera in urban/suburban settings when setting up to capture license plates. www.reconyx.com...
-
Page 24: Image Data Information
Image Data Information Your RECONYX™ HyperFire™ camera stores Image Data along with every picture it takes. Some of this information is displayed in Image Data bands above and below the image. An M or T in the top data band indicates a “motion” or “time-lapse” event. -
Page 25: Additional Camera Options
It is not intended to absorb water if the camera is opened in a rain storm, for instance. The desiccant system can be used in any HyperFire™ camera. Additional desiccant pellets are available for purchase at www.reconyx.com... -
Page 26: Troubleshooting
We periodically release firmware updates with new features and/or performance enhancements. Updating firmware on the HyperFire Series cameras takes just a few seconds, and is well worth the effort to ensure your camera is performing at the highest level possible. - Page 27 Also movement directly toward and away from the camera is less likely to trigger the camera than side-to-side movement. And, finally, if a subject is moving very slowly, it will sometimes not produce a strong enough signal within the sensor to trigger the camera. www.reconyx.com...
- Page 28 If you have other issues, you may have to try a different brand of memory card. We have found that some of the cheap memory cards are very slow (even if they say they are fast) and do not always run well. RECONYX™ certified memory cards are available at www.reconyx.com...
-
Page 29: Warranty, Fcc, And Safety Information
RECONYX™ Limited Software Warranty ™ Software products are licensed to Buyer under the terms of the applicable RECONYX software license (contained within installation programs). If Buyer wishes to review the ™... -
Page 30: Safety Precautions
When using desiccant, the following precautions should be followed: Keep desiccant out of reach of children. Desiccant may cause eye or skin irritation; seek medical assistance for further treatment, Check your state/local laws concerning the use of this product. ©RECONYX, Inc. -
Page 31: Your Information And Camera Warranty Registration
Place of Purchase: Camera Model: Camera Serial #: CodeLoc Password: www.reconyx.com Username: www.reconyx.com Password: Register your Camera Save A Stamp! Register Your HyperFire camera RECONYX, Inc. online today at www.reconyx.com/register or by 3828 Creekside Lane sending in the information to:... -
Page 32: Copyright & Trademark Information
Instruction Manual Copyright June 2012 Other trademarks and registered trademarks referred to in this document: HyperFire™, MapView™, CodeLoc™, InstaOn™, NearVideo™, LFT™, RapidFire™, IR Mask™, VersaMount™ and ThunderBolt™ are trademarks of RECONYX™ Google Maps® is a registered trademark of Google, Inc.
Need help?
Do you have a question about the Hyperfire and is the answer not in the manual?
Questions and answers