Brother MFC-7840W Quick Setup Manual
Hide thumbs
Also See for MFC-7840W:
- User manual (192 pages) ,
- Network user's manual (151 pages) ,
- Quick setup manual (52 pages)
Table of Contents
Advertisement
Quick Links
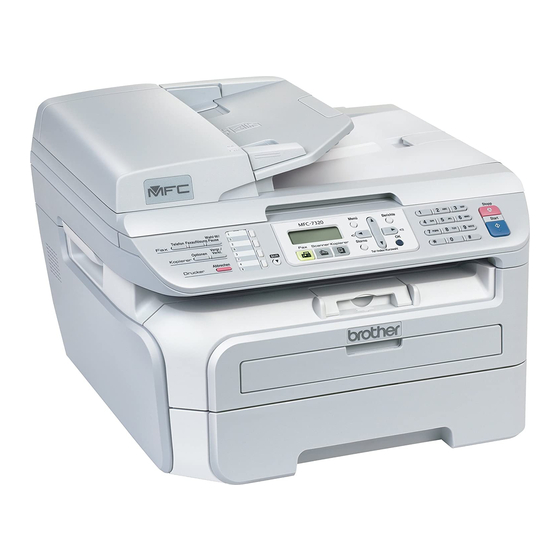
MFC-7840W
Before you can use the machine, you must set up the hardware and install the driver. Please read
this 'Quick Setup Guide' for proper set up and installation instructions.
Installing the Driver & Software
Keep this 'Quick Setup Guide' and the supplied CD-ROM in a convenient place for quick and easy
reference at all times.
STEP 1
Setting Up the Machine
STEP 2
Setup is Complete!
Version 0
EEU-ENG
Advertisement
Table of Contents

Related Manuals for Brother MFC-7840W


Summary of Contents for Brother MFC-7840W
- Page 1 MFC-7840W Before you can use the machine, you must set up the hardware and install the driver. Please read this ‘Quick Setup Guide’ for proper set up and installation instructions. STEP 1 Setting Up the Machine STEP 2 Installing the Driver & Software Setup is Complete! Keep this ‘Quick Setup Guide’...
-
Page 2: Symbols Used In This Guide
Compilation and Publication Under the supervision of Brother Industries Ltd., this manual has been compiled and published, covering the latest product descriptions and specifications. The contents of this manual and the specifications of this product are subject to change without notice. -
Page 3: Table Of Contents
Table of Contents Safety Precautions To use the machine safely ........................... 2 Regulations ..............................3 STEP 1 – Setting Up the Machine Installing the drum unit and toner cartridge assembly.................. 4 Loading paper in the paper tray ........................5 Install the power cord and phone line ......................6 Set Your Country ............................ -
Page 4: Safety Precautions
Safety Precautions To use the machine safely Please keep these instructions for later reference and read them before attempting any maintenance. Warning Before cleaning the inside of the machine, first unplug the DO NOT handle the plug with wet hands. Doing telephone line cord, and then the power cord from the this might cause an electrical shock. -
Page 5: Regulations
Program is to promote the development and Wave length: 780 - 800 nm popularization of energy-efficient office equipment. Output: 10 mW max. ® As an ENERGY STAR Partner, Brother Industries, Laser Class: Class 3B Ltd. has determined that this product meets the Warning ® ENERGY STAR guidelines for energy efficiency. -
Page 6: Step 1 Setting Up The Machine
STEP 1 Setting Up the Machine Installing the drum unit and toner cartridge assembly Improper Setup DO NOT connect the interface cable. Connecting the interface cable is done when installing the driver. -
Page 7: Loading Paper In The Paper Tray
Setting Up the Machine Put paper in the paper tray. Make sure that the Loading paper in the paper paper is flat in the tray and below the maximum tray paper mark (1). Caution Make sure the paper guides touch the sides of the paper so it will feed properly. -
Page 8: Install The Power Cord And Phone Line
STEP 1 Setting Up the Machine Install the power cord and Note phone line If you are sharing one phone line with an external telephone, connect it as shown below. Make sure that the machine’s power switch is off. Connect the AC power cord to the machine. Plug the AC power cord into an AC outlet. -
Page 9: Set Your Country
Setting Up the Machine Set Your Country Setting the date and time You must set your country so that the machine works The machine displays the date and time, and if you correctly on local telecommunication lines in each set up the station ID, it will add it to each fax you send. country. -
Page 10: Setting Your Station Id
STEP 1 Setting Up the Machine Setting your station ID Tone and pulse dialling mode You should store your name and fax number to be added on all fax pages that you send. Your machine comes set for Tone dialling service. If you have Pulse dialling service (rotary), you need to Press Menu. -
Page 11: Selecting A Receive Mode
Setting Up the Machine Press Menu. Selecting a receive mode Press 0. There are four possible receive modes: Fax Only, Press 1. Fax/Tel, External TAD and Manual. Choose the Receive Mode which best suits your needs. Press to select the mode. Do you want to use the telephone features of your Press OK. -
Page 12: Setting The Phone Line Type
STEP 1 Setting Up the Machine Setting the phone line type Setting the LCD contrast If you are connecting the machine to a line that You can change the contrast to help the LCD look features a PABX (PBX) or ISDN to send and receive lighter or darker. -
Page 13: Step 2 Installing The Driver & Software
Follow the instructions on this page for your operating system and interface. For the latest drivers, documentation, and to find the best solution for your problem, access the Brother Solution Center directly from the CD-ROM / Driver or visit http://solutions.brother.com/. -
Page 14: Windows
Plug the AC power cord into an AC outlet. Turn the power switch on. The installation of the Brother drivers will automatically start. The installation screens appear one after another, please wait for a while. -
Page 15: For Wired Network Interface Users (For Windows 2000 Professional/Xp/Xp Professional X64 Edition/Windows Vista )
Plug the AC power cord into an AC outlet. Turn the power switch on. The installation of the Brother drivers will automatically start. The installation screens Turn on your computer. (You must be logged appear one after another, please wait for a on with Administrator rights.) Close any... -
Page 16: For Wireless Network Interface Users (For Windows ® 2000 Professional/Xp/Xp Professional X64 Edition/Windows Vista ® ) In Infrastructure Mode
MFL-Pro Suite. The following steps will guide you through the configuration and installation process. To achieve optimum results with normal every day document printing, place the Brother machine as close to the network access point (router) as possible with minimal obstructions. Large objects and walls between the two devices as well as interference from other electronic devices can affect the data transfer speed of your documents. -
Page 17: Network Configuration
Improper Setup Machine on pages 4 through 10. If you have previously configured the wireless These instructions will install your Brother machine in settings of the machine you must reset the a typical small office or home wireless network network (LAN) settings before you can environment in infrastructure mode, using a wireless configure the wireless settings again. - Page 18 STEP 2 Installing the Driver & Software ® Windows Press to choose Infrastructure, Press to choose TKIP or AES for then press OK. Encryption Type and press OK. Enter the WPA-PSK Password you wrote down Mode Select in step 1 using the dial pad. You can use the Infrastructure to move the cursor.
- Page 19 IP address for your machine that is suitable for your network. The CD-ROM main menu will appear. Click The installation of the Brother drivers will Install MFL-Pro Suite. automatically start. The installation screens appear one after another, please wait for a Choose Wireless Network Connection, and while.
-
Page 20: Macintosh
Macintosh For USB Interface Cable Users ® For Mac OS X 10.2.4 or greater The Brother software will search for the Brother Important device. During this time the following screen will appear. Make sure that you have finished the instructions from step 1 Setting Up the Machine on pages 4 through 10. -
Page 21: For Wired Network Interface Users
Choose Wired Network Connection When this screen appears, click OK. (Ethernet), and then click Next. The installation will continue. The Brother software will search for the Brother device. During this time the following screen will appear. ® For Mac OS X 10.3.x or greater users:... - Page 22 Make the selection shown below. Choose your model name, and then click Add. Click Print Center, then Quit Print Center. The MFL-Pro Suite, Brother printer driver, scanner driver and Brother ControlCenter2 have been installed and the installation is now complete.
-
Page 23: For Wireless Network Interface Users (For Mac Os ® X 10.2.4 Or Greater) In Infrastructure Mode
MFL-Pro Suite. The following steps will guide you through the configuration and installation process. To achieve optimum results with normal every day document printing, place the Brother machine as close to the network access point (router) as possible with minimal obstructions. Large objects and walls between the two devices as well as interference from other electronic devices can affect the data transfer speed of your documents. - Page 24 Machine on pages 4 through 10. to choose your network, then These instructions will install your Brother machine in a typical small office or home wireless network press OK. Go to step 8.
- Page 25 Installing the Driver & Software ® Macintosh Use the and OK keys to choose one Enter the user name and press OK. You can of the options below: If your network is to move the cursor. For configured for Authentication and Encryption example, to enter the letter a, press the 2 key you must match the settings used for your on the dial pad once.
- Page 26 Please wait, it will take a few seconds for the software to install. After the installation, click Restart to finish installing the software. The Brother software will search for the Brother device. During this time the following screen will appear.
Need help?
Do you have a question about the MFC-7840W and is the answer not in the manual?
Questions and answers