Brother MFC-7440N Network User's Manual
Internet fax and fax to server features
Hide thumbs
Also See for MFC-7440N:
- User manual (32 pages) ,
- Specifications (4 pages) ,
- Service manual (315 pages)
Table of Contents
Advertisement
Internet Fax and Fax to Server features
NETWORK
USER'S GUIDE
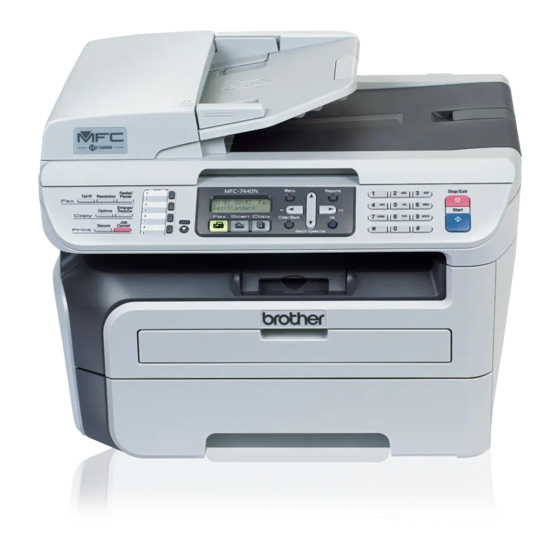
MFC-7440N
MFC-7840N
MFC-7840W
The Brother Solutions Center (http://solutions.brother.com) is
your one stop resource for all your printing needs. Download the
latest drivers and utilities for your machine, read FAQs and
troubleshooting tips or learn about special printing solutions.
Note: Not all models are available in all countries.
Version B
ENG
Advertisement
Table of Contents

Related Manuals for Brother MFC-7440N


Summary of Contents for Brother MFC-7440N
- Page 1 USER’S GUIDE MFC-7440N MFC-7840N MFC-7840W The Brother Solutions Center (http://solutions.brother.com) is your one stop resource for all your printing needs. Download the latest drivers and utilities for your machine, read FAQs and troubleshooting tips or learn about special printing solutions.
-
Page 2: Compilation And Publication Notice
Compilation and publication notice Under the supervision of Brother Industries Ltd., this manual has been compiled and published, covering the latest product’s descriptions and specifications. The contents of this manual and the specifications of this product are subject to change without notice. -
Page 3: Important Note
® Edition and Windows XP Home Edition. ® Windows Server 2003 in this document represents Windows x64 Edition. Go to the Brother Solutions Center (http://solutions.brother.com) for more information on ® Windows Server 2003 x64 Edition support. ® ® XP Professional, Windows XP Professional x64 ®... -
Page 4: For Customer Service
Visit http://www.brother.com for contact information on your local Brother office. Service center locator (USA) For the location of a Brother authorized service center, call 1-877-BROTHER (1-877-276-8437). Service center locations (Canada) For the location of a Brother authorized service center, call 1-877-BROTHER. -
Page 5: Ordering Accessories And Supplies
Internet address Brother Global Web Site: http://www.brother.com For Frequently Asked Questions (FAQs), Product Support, Driver Updates and Utilities: http://solutions.brother.com Ordering accessories and supplies In USA: 1-877-552-MALL (1-877-552-6255) 1-800-947-1445 (fax) http://www.brothermall.com In Canada: 1-877-BROTHER http://www.brother.ca... -
Page 6: Table Of Contents
Table of Contents Internet fax Overview...1 Getting connected ...1 Control panel key functions ...2 Sending an Internet fax ...2 Manually entering text ...3 Receiving E-mail or Internet fax ...3 Receiving an Internet fax to your computer...4 Forwarding received E-mail and fax messages...4 Relay broadcasting...4 TX Verification Mail...7 Setup Mail TX ...7... - Page 7 Appendix Function table and default factory settings ...48 MFC-7440N and MFC-7840N ...48 MFC-7840W ...52 Entering Text ...58 Index...
-
Page 8: Internet Fax
E-mail address for your machine, the mail server(s) IP address, mailbox name and password for your Brother machine. If you are unsure of any of these items, please contact your systems Administrator. For details of how to configure this information, see Setup Internet (from the Setup IFAX menu) on page 30. -
Page 9: Control Panel Key Functions
Control panel key functions Shift + 1 Used to change input mode. You can use dial pad keys as Standard alphabet character keys. Dial Pad Used to enter Standard Alpha characters (26 letters), as well as @. space ! “ # % & ’ () + / : ; < > = ? [ ] ^ - $ , l _ and Numbers. -
Page 10: Manually Entering Text
Manually entering text Press Shift and 1 simultaneously to change into the “alphabet” dialing mode. You can use the Dial Pad to enter the E-mail address. For more information, see Entering Text on page 58. Please note that also you can connect to the machine using a web browser and store the E-mail address information to a Speed Dial or One Touch location through Web Based Management. -
Page 11: Receiving An Internet Fax To Your Computer
Please see the User’s Guide included with the machine to check that this feature is supported. Relay broadcasting This function allows the Brother machine to receive a document over the Internet, and then relay it to other fax machines through conventional telephone lines. - Page 12 Relay broadcast from a machine FAX@brother.com In this example, your machine has an E-mail address of FAX@brother.com, you wish to send a document from this machine to another machine in England with an E-mail address of UKFAX@brother.co.uk, this machine will then forward the document to a standard fax machine using a conventional telephone line. If your E-mail address is FAX@brother.com, you must configure a trusted domain name of brother.com on the...
-
Page 13: Sending To Multiple Phone Numbers
If you want to have the document relayed to more than one standard fax machine the address can be entered using the following method: Enter the phone number of the first Fax machine UKFAX@brother.co.uk(fax#123). Press OK. Enter the phone number of the second Fax machine UKFAX@brother.co.uk(fax#456). -
Page 14: Tx Verification Mail
TX Verification Mail Transmission Verification Mail supports two separate functions. Verification Mail for sending allows you to request notification from the receiving station that the Internet Fax or E-mail was received and processed. Verification Mail for receiving allows you to transmit a default report back to the sending station after successfully receiving and processing an Internet Fax or E-mail. -
Page 15: Important Information On Internet Fax
Important information on Internet fax Internet fax communication on a LAN system is basically the same as communication via E-mail; however, it is different from fax communication using standard phone lines. The following is important information for using Internet fax: Factors such as the receiver’s location, structure of the LAN system, and how busy the circuit (such as the internet) is, may cause the system to take a long time to send back an error mail. -
Page 16: Fax Operation
Fax operation You can follow instructions in the User’s Guide we have provided with the machine for how to use your machine as a fax after installing the internet fax software. This chapter explains some operations which are unique for the internet fax capable machine. Storing numbers You can set up your machine to do the following types of easy dialing: One Touch, Speed-Dial and Groups for Broadcasting faxes. - Page 17 Choose one of the options below: Enter the number (up to 20 characters) if you chose Fax/Tel. Press OK. Enter the E-mail address (up to 60 characters) if you chose E-Mail or IFAX. Use the chart in Entering Text on page 58 to help you enter letters. Press OK.
-
Page 18: Storing Speed Dial Numbers
Storing speed dial numbers You can store your frequently used numbers as Speed Dial numbers, so that when you dial you will only have to press a few keys (Search/Speed Dial, the three-digit number and Start). The machine can store 200 Speed Dial numbers (001-200). -
Page 19: Changing One Touch And Speed Dial Numbers
Choose one of the options below: If you chose Color150dpi, Color300dpi, Color600dpi, Gray100dpi, Gray200dpi or Gray300dpi in f, choose the file format (PDF or JPEG) that will be used to send your PC. If you chose B&W200dpi (B/W200dpi) or B&W200x100 (B/W200x100) in f, choose the file format (TIFF or PDF) that will be used to send to your PC. -
Page 20: Broadcasting
Broadcasting Broadcasting lets you send the same fax message to more than one fax number. You can include Groups, One Touch, Speed Dial numbers and up to 50 manually dialed numbers in the same broadcast. You can broadcast up to 258 different numbers. This will depend on how many groups, access codes or credit card numbers you have stored, and on how many delayed or stored faxes are in memory. -
Page 21: Setting Up Groups For Broadcasting
Setting up groups for broadcasting If you often want to send the same fax message to many fax numbers you can set up a group. Groups are stored on a One Touch key or a Speed Dial number. Each group uses up a One Touch key or a Speed Dial location. - Page 22 You can save a fax/scan resolution along with the number. Do one of the following: If you chose Fax/IFAX in d, press a or b to choose Std, Fine, S.Fine or Photo. Press OK and then go to j. If you chose E-Mail in d, press a or b to choose Color150dpi, Color300dpi, Color600dpi, Gray100dpi, Gray200dpi, Gray300dpi, B&W200dpi (B/W200dpi) or B&W200x100 (B/W200x100).
-
Page 23: Control Panel Setup
The LAN menu selections of the control panel allow you to set up the Brother machine for your network configuration. Press Menu, then press a or b to choose LAN. Proceed to the menu selection you wish to configure. - Page 24 RARP mode The Brother print server’s IP address can be configured using the Reverse ARP (RARP) facility on your host computer. This is done by editing the /etc/ethers file (if this file does not exist, you can create it) with an entry similar to the following: (“BRN” below is “BRW” for a wireless network.)
- Page 25 Note In order to enable BOOTP, simply use an editor to delete the “#” (if there is no “#”, then BOOTP is already enabled). Then edit the BOOTP configuration file (usually /etc/bootptab) and enter the name, network type (1 for Ethernet), Ethernet address and the IP address, subnet mask and gateway of the print server.
-
Page 26: Subnet Mask
IP address for the network the unit will be connected on. Press Menu. Press a or b to choose LAN. Press OK. (MFC-7440N and MFC-7840N) Go to d. (MFC-7840W) Go to c. (MFC-7840W only) (For Wired) Press a or b to choose Wired. - Page 27 Check with your network administrator if you are unsure. Press Menu. Press a or b to choose LAN. Press OK. (MFC-7440N and MFC-7840N) Go to d. (MFC-7840W) Go to c. (MFC-7840W only) (For Wired) Press a or b to choose Wired.
- Page 28 You can register the machine name on the Network. This name is often referred to as a NetBIOS name; it will be the name that is registered by the WINS server on your network. Brother recommends the name “BRNxxxxxxxxxxxx” for a wired network or “BRWxxxxxxxxxxxx” for a wireless network.
-
Page 29: Wins Server
Press Menu. Pressa or b to choose LAN. Press OK. (MFC-7440N and MFC-7840N) Go to d. (MFC-7840W) Go to c. (MFC-7840W only) (For Wired) Press a or b to choose Wired. (For Wireless) Press a or b to choose WLAN. -
Page 30: Dns Server
DNS server, but no secondary DNS server, simply leave this field blank. Press Menu. Press a or b to choose LAN. Press OK. (MFC-7440N and MFC-7840N) Go to d. (MFC-7840W) Go to c. (MFC-7840W only) (For Wired) Press a or b to choose Wired. - Page 31 IP address through the BOOT Method you have set. Press Menu. Press a or b to choose LAN. Press OK. (MFC-7440N and MFC-7840N) Go to d. (MFC-7840W) Go to c. (MFC-7840W only) (For Wired) Press a or b to choose Wired.
-
Page 32: Ethernet (Wired Network Only)
Press a or b to choose IPv6. Press OK. Press a or b to choose On or Off. Press OK. Press Stop/Exit. Note After you choose IPv6 On, this setting will be applied to both the wired and wireless LAN interface. Ethernet (wired network only) Ethernet link mode. -
Page 33: Ses/Wps/Aoss (Mfc-7840W Wireless Network Only)
If your wireless access point supports either SecureEasySetup™, Wi-Fi Protected Setup™ (PBC AOSS™ (one-push method), you can configure the machine easily without a computer. Your Brother machine has the SES/WPS/AOSS menu on the control panel. This feature automatically detects which mode your access point uses, SecureEasySetup™, Wi-Fi Protected Setup™... -
Page 34: Comm.mode
Signal This field displays the current wireless network signal strength; Strong, Medium, Weak or None. Press Menu. Press a or b to choose LAN. Press OK. Press a or b to choose WLAN. Press OK. Press a or b to choose WLAN Status. Press OK. -
Page 35: Set To Default (Mfc-7840W Only)
Press a or b to choose WLAN. Press OK. Press a or b to choose WLAN Status. Press OK. Press a or b to choose Comm. Mode. Press OK. The current wireless network communication mode will be displayed; Ad-hoc or Infrastructure. Press Stop/Exit. -
Page 36: Wired Enable (Mfc-7840W Wired Network Only)
Wired Enable (MFC-7840W wired network only) If you want to use the wired network connection, set Wired Enable to On. Press Menu. Press a or b to choose LAN. Press OK. Press a or b to choose Wired. Press OK. Press a or b to choose Wired Enable. -
Page 37: Setup Internet (From The Setup Ifax Menu)
Setup Internet (from the Setup IFAX menu) This menu has nine selections: Mail Address, SMTP Server, SMTP Port, Auth. for SMTP, POP3 Server, POP3 Port, Mailbox Name, Mailbox Pwd and APOP. As this section requires you to enter a lot of text characters, you may find that it is more convenient to use Web Based Management and your favorite web browser to configure these settings (see the Network User’s Guide on the CD-ROM we have provided with the machine). - Page 38 Press a or b to choose Name or IP Address. Press OK. Enter the SMTP server address (up to 64 characters). Press OK. Press Stop/Exit. SMTP Port This field displays the SMTP port number (for outgoing E-mails) on your network. Press Menu.
- Page 39 POP3 Server This field displays the node name or IP address of the POP3 server (incoming E-mail server) used by the Brother machine. This address is necessary for the Internet fax features to function correctly. (Ex, “mailhost.brothermail.net” or “192.000.000.001”) Press Menu.
-
Page 40: Mailbox Name
Press a or b to choose Setup Internet. Press OK. Press a or b to choose Mailbox Name. Press OK. Enter the user account name assigned to the Brother machine that will login to the POP3 server (up to 32 characters). Press OK. Press Stop/Exit. -
Page 41: Mailbox Pwd
Mailbox Pwd You can specify the password for the POP3 server account where the internet print jobs are to be retrieved. Press Menu. Press a or b to choose LAN. Press OK. Press a or b to choose Setup IFAX. Press OK. -
Page 42: Setup Mail Rx (From The Setup Ifax Menu)
Setup Mail RX (from the Setup IFAX menu) This menu has five selections: Auto Polling, Poll Frequency, Header, Del Error Mail and Notification. Auto Polling When set to On, the machine automatically checks the POP3 server for new messages. Press Menu. Press a or b to choose LAN. -
Page 43: Del Error Mail
Header This selection allows the contents of the mail header to be printed when the received message is printed. Press Menu. Press a or b to choose LAN. Press OK. Press a or b to choose Setup IFAX. Press OK. Press a or b to choose Setup Mail RX. -
Page 44: Setup Mail Tx (From The Setup Ifax Menu)
This menu has three selections: Sender Subject, Size Limit and Notification. Sender Subject This field displays the subject that is attached to the Internet fax data being sent from the Brother machine to a computer (default is “Internet Fax Job”). -
Page 45: Size Limit
Enter the subject information (up to 40 characters). Press OK. Press Stop/Exit. Size Limit Some E-mail servers do not allow you to send large E-mail documents (the System Administrator will often place a limit on the maximum E-mail size). With this function enabled, the machine will display Out of Memory when trying to send E-mail documents over 1 Mbyte in size. -
Page 46: Setup Relay (From The Setup Ifax Menu)
Press a or b to choose On or Off. Press OK. Press Stop/Exit. Setup Relay (from the Setup IFAX menu) This menu has three selections Rly Broadcast, Relay Domain and Relay Report. For more information on Relay Broadcast, see Relay broadcasting on page 4 of this User’s Guide. Rly Broadcast This function allows the machine to receive a document over the Internet, and then relay it to other fax machines through conventional analog landlines. -
Page 47: Relay Domain
Relay Domain You can register the Domain Names (Max. 10) that are allowed to request a Relay Broadcast. Press Menu. Press a or b to choose LAN. Press OK. Press a or b to choose Setup IFAX. Press OK. Press a or b to choose Setup Relay. Press OK. -
Page 48: Scan To E-Mail (E-Mail Server)
Scan to E-mail (E-mail server) You can choose the default color file type for the Scan to E-mail (E-mail server) function. Press Menu. Press a or b to choose LAN. Press OK. Press a or b to choose Scan to E-mail. Press OK. -
Page 49: Using One Touch Or Speed Dial Number
Press a or b to choose Change Setting. Press OK. If you don’t have to change the quality, press a or b to choose Enter Address. Press OK and then go to j. Press a or b to choose Color 150 dpi, Color 300 dpi, Color 600 dpi, Gray 100 dpi, Gray 200 dpi, Gray 300 dpi, B&W 200 dpi or B&W 200x100 dpi. -
Page 50: Scan To Ftp
Scan to FTP You can choose the default color file type for the Scan to FTP function. Press Menu. Press a or b to choose LAN. Press OK. Press a or b to choose Scan to FTP. Press OK. Press a or b to choose Color 150 dpi, Color 300 dpi, Color 600 dpi, Gray 100 dpi, Gray 200 dpi, Gray 300 dpi, B&W 200 dpi or B&W 200x100 dpi. -
Page 51: Fax To Server
Fax to Server The Fax to Server feature allows the machine to scan a document and send it over the network to a separate fax server. The document will then be sent from the server as fax data to the destination fax number over standard phone lines. - Page 52 Press a or b to choose Suffix. Press OK. Enter the suffix using dial pad. Press OK. Press Stop/Exit. Note You can enter the prefix and suffix address using up to a total of 40 characters. How to operate Fax to Server Place the document in the ADF or on the scanner glass.
-
Page 53: Time Zone
Time Zone This field displays your country time zone. The time shown is the time difference between your country and Greenwich Mean Time. For example, the Time Zone for Eastern Time in the USA and Canada is UTC-05:00. Press Menu. Press a or b to choose LAN. -
Page 54: Restoring The Network Settings To Factory Default
Restoring the network settings to factory default If you wish to reset the print server back to its default factory settings (resetting all information such as the password and IP address information), please follow these steps: Note This function restores all wired and wireless network settings to the factory default. Press Menu. -
Page 55: A Appendix
Appendix Function table and default factory settings MFC-7440N and MFC-7840N The factory settings are shown in Bold with an asterisk. Main menu Submenu 4.LAN 1.TCP/IP Menu selections Options 1.BOOT Method Auto* Static RARP BOOTP DHCP (If you choose Auto, RARP, BOOTP or DHCP, you will be asked to enter how many times the machine tries to obtain the IP address.) - Page 56 Main menu Submenu 4.LAN 1.TCP/IP (continued) (continued) 2.Ethernet 3.Setup IFAX Menu selections Options 9.APIPA 0.IPv6 Off* — Auto* 100B-FD 100B-HD 10B-FD 10B-HD 1.Setup 1.Mail Address Internet 2.SMTP Server 3.SMTP Port 4.Auth. for SMTP 5.POP3 Server 6.POP3 Port 7.Mailbox Name 8.Mailbox Pwd 9.APOP 2.Setup Mail RX 1.Auto Polling 2.Poll Frequency...
- Page 57 Main menu Submenu 4.LAN 3.Setup IFAX (continued) (continued) 4.Scan to E-mail 5.Scan to Menu selections Options 2.Setup Mail RX 4.Del Error Mail (continued) 5.Notification 3.Setup Mail TX 1.Sender Subject 2.Size Limit 3.Notification 4.Setup Relay 1.Rly Broadcast 2.Relay Domain 3.Relay Report —...
- Page 58 Main menu Submenu 4.LAN 6.Fax to Server (continued) 7.Time Zone 0.Factory Reset On connection to the network, the machine will automatically set the IP address and Subnet Mask to values appropriate for your network. Menu selections Options — — — —...
-
Page 59: Mfc-7840W
MFC-7840W The factory settings are shown in Bold with an asterisk. Main Menu Submenu Menu Selections 5.LAN 1.Wired 1.TCP/IP Options 1.BOOT Method Auto* Static RARP BOOTP DHCP (If you choose Auto, RARP, BOOTP or DHCP, you will be asked to enter how many times the machine tries to obtain the IP address.) 2.IP Address... - Page 60 Main Menu Submenu Menu Selections 5.LAN 1.Wired 1.TCP/IP (continued) (continued) (continued) 2.Ethernet 3.Set to Default 4.Wired Enable 2.WLAN 1.TCP/IP Options (Primary) 8.DNS Server [000-255].[000-255]. [000-255].[000-255] [000].[000].[000].[000]* (Secondary) [000-255].[000-255]. [000-255].[000-255] [000].[000].[000].[000]* 9.APIPA 0.IPv6 Off* — Auto* 100B-FD 100B-HD 10B-FD 10B-HD — 1.Reset —...
- Page 61 Main Menu Submenu Menu Selections 5.LAN 2.WLAN 1.TCP/IP (continued) (continued) (continued) 2.Setup Wizard 3.SES/WPS/AOSS 4.WPS w/PIN Code 5.WLAN Status Options 4.Gateway [000-255].[000-255]. [000-255].[000-255] [000].[000].[000].[000]* 5.Node Name BRWxxxxxxxxxxxx (up to 15 characters) 6.WINS Config Auto* Static (Primary) 7.WINS Server [000-255].[000-255]. [000-255].[000-255] [000].[000].[000].[000]* (Secondary) [000-255].[000-255].
- Page 62 Main Menu Submenu Menu Selections 5.LAN 2.WLAN 5.WLAN Status (continued) (continued) (continued) 6.Set to Default 7.WLAN Enable 3.Setup 1.Setup Internet IFAX 2.Setup Mail RX Options 2.Signal Strong Medium Weak None — 3.SSID 4.Comm. Mode Ad-hoc Infrastructure — 1.Reset — 2.Exit —...
- Page 63 Main Menu Submenu Menu Selections 5.LAN 3.Setup 2.Setup Mail RX IFAX (continued) (continued) (continued) 3.Setup Mail TX 4.Setup Relay — 4.Scan to E-mail Options 2.Poll Frequency 10Min* (01Min to 60Min) 3.Header Subject+From+To None* 4.Del Error Mail 5.Notification Off* (Up to 40 characters) 1.Sender Subject 2.Size Limit Off*...
- Page 64 Main Menu Submenu Menu Selections — 5.LAN 5.Scan to (continued) — 6.Fax to Server 7.Time Zone — 0.Factory 1.Reset Reset 2.Exit On connection to the network, the machine will automatically set the IP address and Subnet Mask to values appropriate for your network. Options (If you choose Color option) Color 150 dpi*...
-
Page 65: Entering Text
Entering Text When setting certain menu selections, such as the E-mail address, you will need to type text characters. The dial pad keys have letters printed on them. The keys: 0, # and l do not have printed letters because they are used for special characters. -
Page 66: Repeating Letters
Repeating letters To enter a character on the same key as the previous character, press c to move the cursor right before pressing the key again. Special characters and symbols Press l, # or 0, and then press d or c to move the cursor to the symbol or character you want. Press OK to choose it. -
Page 67: Index
Index AOSS ... 26 APIPA ... 24 BOOTP ... 17 Broadcasting ... 13 setting up groups for ... 14 DHCP ... 18 Dialing a pause ... 9 groups (broadcasting) ... 13 DNS server ... 23 Factory default ... 47 Fax, stand-alone sending broadcasting ...
Need help?
Do you have a question about the MFC-7440N and is the answer not in the manual?
Questions and answers