
Related Manuals for Jenn-Air SVD48600


Summary of Contents for Jenn-Air SVD48600
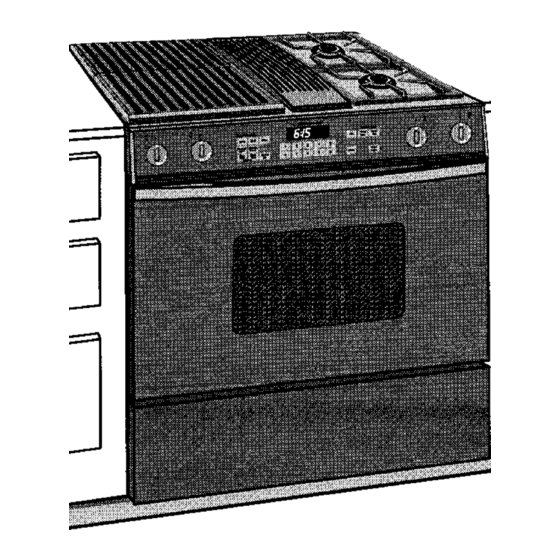
- Page 1 E_mJENN-AIR Use and Care Manual Gas-Electric Grill-Range with Convection Oven Model SVD48600...
- Page 2 WARNING: If the information in this men_;,,._l is not followed exactly, a fire or explosion may result causing propertydamage, personal injury or death. - Do not store or use gasoline or other flam- mable vapors and liquids in the vicinity of this or any other appliance.
- Page 3 By following the instructions carefully, you will be able to fully enjoy and properly maintain you rrange and achieve excellent results with the food you prepare. Should you have any questions about using your Jenn-Air range, write to us. Be sure to provide the model number. Jenn-Air Customer Assistance c/o Maytag Customer Service P.O.
- Page 4 Appliance Usage BeforeYou Call ForService... 50-52 CadngForYourRange AccessPanel ... 4 8 AdjustOvenTemperature...48 Child ProtectionLock...47 CleaningOther Partsof YourRange...45-46 How to Removethe Range ...48 Oven LightBulb...47 RangeComponents ...11 SafetyPrecautions...2, 5-8 Using the Cooktop and Grill Accessories... 4 9 CookwareSelection ...14 Ducting information ... 9 Grilling Cleaning...20-21 GrillingGuide ...19...
- Page 5 Read before operating your range All appliances - regardless of the manufacturer - have the potential throughimproperor carelessuseto createsafety problems. Therefore the followingsafety precautionsshouldbe observed: Be sure your applianceis properlyinstalledand groundedby a qualifiedtechnician. Never use your appliancefor warmingor heatingthe room. This warningis based on safety considerations.
- Page 6 12. HANDLES - Always turn pan handles to the side or back of the rangetop - not out into the room where they are easily hit. COOKWARE HANDLES SHOULD BE TURNED INWARD AND NOT EXTEND OVER ADJACENT SURFACE BURNERS to minimize burns, ignition of flammable materials, and spillage due to unintentional contact with the cookware.
- Page 7 25. Clean only parts listed in this manual and use procedures recommended. 26. Flame size shouldbe adjustedso it does not extend beyondthe edge of the cookware, this instruction is based on safety consideration. 27. This appliance has been tested for safe performance using conventional cookware.
- Page 8 37. Do not use oven for storage space. 38. Do not allow aluminum foil to contact heating element, 39. WARNING: To reduce the risk of tipping the appliance, the appli- ance must be secured by properly installed anti-tip devices. To check if devices are installed properly, remove the access panel and verify that the anti-tip devices are engaged.
- Page 9 • No more than three 90 ° elbows should be used. Distance between elbows should be at least 18". • Recommended Jenn-Air wall cap should be used. Make sure damper moves freely when ventilation system is operating. • There should be a minimum clearance of 6" for cooktop installed near a side wall.
- Page 10 The built-inventilationsystemremovescookingvapors, odorsand smoke fromfoodsprepared on the eooktop, grill and grill accessories. Regular use of this system will insure a more comfortableand lesshumidkitchenwhichisfree of heavycookingodorsandfumes that normally create a frequent need for cleaningand redecorating. The fan positionsare: Hi, Lo, and Off. To turn on the ventilation system,touch the Fan Pad.
- Page 11 Ventilation System Controls • Use to capture smoke and steam. (See p. 10,) • Use to provide flexibility in setting selection when using the cooktop burners or grill burner. (See p, 16.) • Use the electronic touch controls to set Clock or Oven functions. (Clock - see pp. 26-29, Oven Operation - see pp.
- Page 12 Your new cooktop burnershave been presetfor an "average"set of conditions.Regional variancesin gas pressureand atmospheric conditions such as heightabove sea level may affect your initialflame performance. Whenthe controlknob isturned on, gasentem the mixertube and mixeswith air. This air and gas mixtureflowsto the burnerhead and islightedby a sparkfromthe solidstate igniter.
- Page 13 To adjust grill burner air shutters (some models) The left hand air shuttercontrolsthe rear half of the grill burner, or the rear surface burner.The righthandshuttercontrolsthe fronthalfofthe grillburneror thefrontsurface burner. Slide air shutter backward or forward to increase ordecreasethesizeoftheairopening. screwdriverblade may be requiredto make this adjustment, Observe change in flame appearance as the air shutter is moved.
- Page 14 To achieveoptimum cookingperformanceusecookpots withfiat bottoms and tightfitting covers.F/ame size shou/d be adjusted so it does not extend beyond the edge of the cookware. This instruction is based on safetyconsiderations.Adjustingthe size of the flame to fit the size of the cookwarealso helpsto save fuel. Important: Leave a minimumof 1½"...
- Page 15 • Sincethe controlsare a push-tumtype,they mustbe pushedin beforeturning.To set (fromtheOff position), p ush in on controlknoband immediatelyturn counteroiock- wiseto the Lite positionuntilburnerignites. After ignition, t urn knobclock, Mse to desiredsetting. • Igniterwillcontinue to sparkuntilknobisturnedclockwise backto or pastHi position on knob. 1.
- Page 16 The surface burnermoduleconsistsof twosurfaceburnergrates, an aerationtray and a burnerassembly. To Install Burner Module 1. Be sure controlknobsare turned Off. 2. If the grill burnerand grill grates are in place, remove before instarling a surface burnermodule.Clean burner basinof any grease accumulation. ( See page 21 for cleaning recommendations.) 3.
- Page 17 The gfiU consists of two black grill grates and a grill bumer. Only instarl the grill on the left side of your range. To Install Grill Module 1. Before installing grill components, be certain control knobs are in the Off position, 2.
- Page 18 • Before the first use, wash your new grillgrates in hot soapywater, rinseand dry. Then "season"the surface by wiping on a thin coating of cookingoil. Remove excess oil by wipingagain with another paper towel. This procedureshouldbe repeatedwhen: a) cleaningin the dishwashersince the detergent may remove seasoning,or b) anytime a sugar-basedmarinade (for example, barbecue sauce) is going to be used.
- Page 20 With your Jenn-Air grill literallyany food you'veconsidered"at itsbest" when prepared outdoorscan now be prepared indoorswith less fuss and great flavor. The followingsuggestions are good rulesto followand will increaseyourenjoymentof the equipment. • Be sure to followdirectionson page 18 for usingthe grill.
- Page 21 Grill Burner Follow instructions on page 17 for removing the grin burner. The ,grill bumer should be cleaned after each use. it can be cleaned with a soapy S.O.S. pad or in the dishwasher. Rinse and dry thoroughly before using again. For heavy soil, burner should be cleaned first with a soapy S.O.S.
- Page 22 The control panel is designed for ease in programming. Indicator Words which will flash to prompt you for the next step. To program 1, Touch the function pad to give command desired. 2. Touch the appropriate number pads to enter time or temperature. Note: Five seconds after entering the number, the time or temperature automatically be entered.
- Page 23 Number Pads Use to set time or temperature. Oven Light Pad (Control Panel) The oven lightautomatically comeson whenever the ovendooris opened. When doorisclosed, touch the Oven Light Pad toturn oven light on or off. Note: A beep will sound every time the Oven Light Pad istouched.
- Page 24 To set oven on Bake or Convect 1. Place oven racks on proper rack positions.(See p. 25.) 2. Touch Bake Pad or Convect Bake Pad or Convect Roast Pad. IndicatorWords BAKE or CONV BAKE or CONV ROAST will flash and three dashes willbe shown.
- Page 25 The rackpositionsnotedare generallyrecommended for the best browningresultsand mostefficientcookingtimes. For many food items,excellentresultscan be achieved when using one ofsevera/ different rack positions. Referto bakingend roasting sections for recommendationsfor specificfoods. Different Racks Two flat racksand one offsetrackare packagedwithyour oven. The use of the offset rack is denotedin the listbelow and the chartsas an "o"...
- Page 26 When electrical power is supplied or after power interruption, the last clock time displayedbefore powerwas interruptedwill flash. Time wLIIadvance and continueto flash untilclockis reset. To set Time of Day 1. Touch Clock Pad. Indicator wordTIME will flashand time digits willappearinthe Display. (If morethan five secondselapsebetween touchingClock Pad and touchinga numberpad,the Clock Pad mustbe touchedagain in order to set clock.) 2.
- Page 27 Important: This interval Timer can be used to remind you when a period, up to 11 hours and 55 minutes, expires. It can be used independently can be set while another oven function is operating. The Timer does not control the oven. To set Timer 1.
- Page 28 *Omitsteps 5 & 6 if youwant baking tostart immediately. To set oven to start immediately and shut off automatically 1. Touch Bake Pad or Convect Bake Pad or Convect Roast Pad. indicator WordsBAKEorCONV BAKEor CONV ROASTwillflashandthree dashes will be shown. 2.
- Page 29 To set oven to start at future 1.4, FollowprecedingSteps 1-4 on page 28, Touch Stop Time Pad, Indicator Words STOP and T_MEwill flash. Display will show the calculated stop time based on current time of day and cook time. Touch the appropriate number pads to enter desired stop time. A stop time can only be accepted for later inthe day.
- Page 30 • When cookingfoods for the first time in your new oven, use recipe cookingtimes and temperatures as a guide. • Use tested recipes from reliable sources. • Preheat the oven only when necessary. For baked foods that rise and for richer browning, a preheated oven is better.
- Page 31 For Conventional B ake use the Bake Pad. =... ; 'r| icooKSS;, .._;i * An "o" after a rack number impliesthat the offset rack should be used. ** The times givenare based on specificbrandsof mixes or recipestested. Actual times wi_tdepend on the ones you bake.
- Page 32 • Use convectionbakingfor breads, cakes, cookies and pies. • As a general rule, when using recipes or prepared mixes developed for a conventional bake oven, set the oven temperature 25°F lower than the recipe recommendedtemperature. Times will be similarto or a few minutesless than recipereoommendedtimes.
- Page 33 Forbestresults, bake foodson one rackat a time as descdbedinthis manual. However, very good results can be obtained when baking quantities of foods on multiple racks. Quantity cooking provides both time and energy savings. Convect Bake is suggested for most multiple rack cooking, especially three rack cooking, because the oJroulating heated air results in more even browning.
- Page 34 • Preheating is not necessary. • For openpan roasting,place meat or poultryon the slottedportionof the two-piece pan includedwith the oven. Do not add waterto the pan. Use open pan roasting fortendercutsof meat. Lesstender cutsof meat need to be cookedby moistheat in a coveredpan.
- Page 35 Chart time is based on thawed meats only. For ConventionalRoasting use the Bake Pad. ii_il r?g_ ,:; * Whenusing theConvect R oast m ode,thereisnoneedtopreheat t heovenortolower the temperature fromconventional roast t emperatures. ** Notrecommended forconvection cooking. M ostprecooked h ams havetobecovered while roasting, thus therewould benotimesavings when using theconvect mode.
- Page 36 • Tender cuts of meat and poultry can be roasted to a rich golden brown in the convection oven, Follow general recommendations for roasting and use Convect Roast. • Refer to convection meat roasting chart for recommended cooking temperature and time. The chart can serve as a guide to help plan meal serving time. •...
- Page 37 • Use the Convect Roast Pad for best results. • Preheating the oven is not necessary. • Followpackage recommendations for oven temperature, foil coveringand use of cookiesheets. Cooking timeswill be similar, See chartbelowfor someexceptions and examples. • Centerfoodsin the oven. If morethan one fooditemis beingcooked or if foodsare being cookedon multipleracks, staggerfoods for proper air circulation.
- Page 38 1. Place oven rack on the rack position suggestedin the chart on page 39. Distancefrom broilingelement dependson foodsbeing prepared. Rack position 4o (offsetrackin position #4) is usuallyrecommendedunless otherwisestated. 2. Touch Broil Pad. IndicatorWord BROIL will flash and Display will show three dashes. Note;...
- Page 39 • Tender cuts of meat or marinated meats are best for broiling. This includes rib and loin cuts of steak, ground beef, ham steaks, poultry pieces or fish. For best results, steaks should be at least 1" thick. Thinner steaks should be pan-broiled. •...
- Page 40 When the oven controls are set to CLEAN, the oven heats to temperatures that are higher than those used for cooking. The hightemperaturescause food soilto burnoff and substantlaUy disappear. While this occurs, a device (n the oven vent helps to consumenormalamountsof smoke.
- Page 41 • The oven racks can be cleaned in the oven. However, the oven rackswilldiscolor, lose shininess, and become difficult to slide in and out if left in the oven dudng the cleaning process. REMOVE RACKS FROM OVEN IF THIS DISCOLORATION WILL BE OBJECTIONABLE.
- Page 42 Whenthe clean functionhasbeen completed,the IndicatorWordsCLEAN and ON willgo off. The Indicator WordLOCKand thecooling fan willremainon untiltheoven has cooled downand the door has unlocked. To set oven to start cleaning at a later time 1-3. Follow Steps 1-3 in previoussectionon page 41. 4.
- Page 43 • To change cleaning time or stop time before cleaning begins: Repeat the precedingsteps. • When the Clean Pad is touched,a fan comes on. If this fan is not operating,the ovenwill gothroughthe cleaningprocessat a reducedoven temperatureandthe ovenwill notcleaneffectively. Ifthe fan does notoperate, contactyour authorized Jenn-Air Service Contractorfor service.
- Page 44 • A slight odor may be detected, and if an oven is heavilysoiled, some smoke may be visible. Some smoke and odor during the cleaning process is a normal occurrence. Since the oven vent is locatedunder the air grille, vapors, moisture, etc.
- Page 45 • Stubborn food stains may also be removed by spraying with an oven cleaner. Allow to set overnight, then rinse. If stains remain, clean with recommended cleansers such as Zud, Luneta (Jenn-Air Model A912, Part No. 712191), or Scotch-Brite Scour pad.
- Page 46 Control Knobs The knobsonthe controlpanelcan be removedwiththecontrolsinthe Off position.Pull each knobstraightfromthe shaft. Wash knobsin warm soapywater or dishwasher; d o not useabrasivecleansersor materials. To replaceeach knob, matchfiat part of knob openingwiththeflat of theshaft, returning in Off position. Important: Neveruse a metal blade to pry knoboff.
- Page 47 Note: If the bulb does break and you wish to remove it, be certain power supply is disconnected and wear protective gloves. You may contact your authorized Jenn-Air Service Contractor for service. Donot touch a hot oven light bulb with a damp cloth 3.
- Page 48 The access panel iseasily opened or removed. To open panel, grasp upper corners and pull forward and down. To close panel, lift up and insert prongs into catches in the range. To avoid the possibility of accidentally disconnect- ing any part of the ventilation system, do not use the area behind the access panel for storage.
- Page 49 Attractive grill cover protects grill when not in use. Textured steel with molded handles. NOTE: Only these accessories are approved for use with your gas grill-range. NOT USE Jenn-Air e ectric gri -range accessor es on your gas gri -range.
- Page 50 Check the followinglistto be sure a service call is really necessary. A quick reference of this manual may prevent an unneeded service call. If grill or surface burner fails to light: • check 10be sure unitis properlyconnectedto powersupply. • check for a blowncircuitfuse or a trippedmain circuitbreaker. •...
- Page 51 If oven doe• not heat: • the oven controlsmay be set incorrectly. • clock controlsmay be set for delayedstart of oven. If the oven light doe• not work: • the lightbulb is loose or defective. • oven light does not work duringself-cleaningprocess, If oven will not go through self.cleaning •...
- Page 52 • a fault code is beingshown. When a fault code appears and a continuous beep sounds,touch the Cancel Off Pad. If the faultcode reappears,disconnectpower to the range and call an authorizedJenn-AirService Contractor. JENN-AIR 3035 SHADELAND • INDIANAPOLIS, Printed in U.S.A. ©1996 Jenn-Air Company Part No. 210987A IN 46226-0901 Cat. No. RA4860OUC...
Need help?
Do you have a question about the SVD48600 and is the answer not in the manual?
Questions and answers
How do you change the light bulb for the clock, temperature and timer panel?
We don’t see the numbers on the clock control panel
We dont see the numbers anymore