IBM System Storage TS3100 Installation Quick Reference Manual
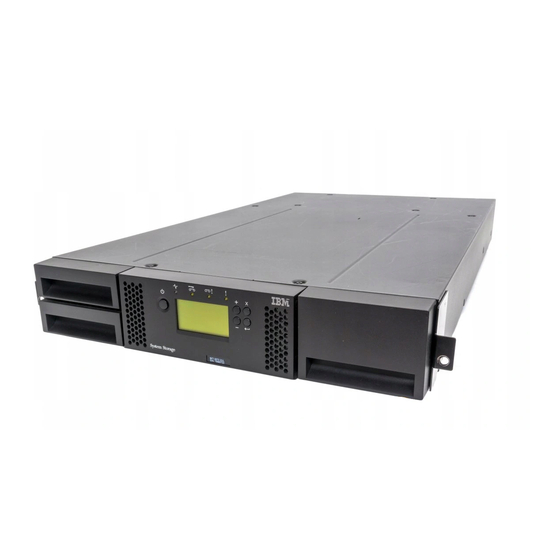
Tape library
Hide thumbs
Also See for System Storage TS3100:
- Setup, operator, and service manual (386 pages) ,
- Quick manual (14 pages) ,
- Technical information (12 pages)
Table of Contents
Advertisement
Quick Links
- 1 Removing and Storing the Shipping Lock
- 2 Accessing the Configure Menu Using the Operator Control Panel
- 3 Configure Your Library Using the Web User Interface
- 4 Configure Your Library Using the Operator Control Panel
- 5 Cartridge Magazines
- 6 Populating the Library with Data Cartridges
- 7 Inserting the Cleaning Cartridge
- Download this manual
Advertisement
Table of Contents

Related Manuals for IBM System Storage TS3100


Summary of Contents for IBM System Storage TS3100
- Page 1 IBM System Storage TS3100 Tape Library and TS3200 Tape Library Installation Quick Reference Machine Type 3573 GA32-0548-00...
- Page 3 IBM System Storage TS3100 Tape Library and TS3200 Tape Library Installation Quick Reference Machine Type 3573 GA32-0548-00...
- Page 4 Note! Before using this information and the product it supports, be sure to read the general information under Notices in the IBM System Storage TS3100 Tape Library and TS3200 Tape Library Setup, Operator, and Service Guide. To ensure that you have the latest publications, visit the web at http://www.ibm.com/storage/lto.
-
Page 5: Table Of Contents
Populating the Library with Data Cartridges ..... 1-28 Inserting the Cleaning Cartridge ......1-29 © Copyright IBM Corp. 2006... - Page 6 TS3100 and TS3200 (3573) Installation Quick Reference...
-
Page 7: Safety And Environmental Notices
A hazardous condition due to the weight of the unit. Weight symbols are accompanied by an approximation of the product’s weight. 32-55 kg (70.5-121.2 lbs) Laser Safety and Compliance Before using the library, review the following laser safety information. © Copyright IBM Corp. 2006... -
Page 8: Class I Laser Product
Class I Laser Product The library may contain a laser assembly that complies with the performance standards set by the U.S. Food and Drug Administration for a Class I laser product. Class I laser products do not emit hazardous laser radiation. The library has the necessary protective housing and scanning safeguards to ensure that laser radiation is inaccessible during operation or is within Class I limits. -
Page 9: Product Recycling And Disposal
(IT) equipment to responsibly recycle their equipment when it is no longer needed. IBM offers a variety of product return programs and services in several countries to assist equipment owners in recycling their IT products. Information on IBM product recycling offerings can be found on IBM’s Internet site at http://www.ibm.com/ibm/environment/products/prp.shtml. -
Page 10: Battery Return Program
In the United States, IBM has established a return process for reuse, recycling, or proper disposal of used IBM sealed lead acid, nickel cadmium, nickel metal hydride, and other battery packs from IBM Equipment. -
Page 11: Installation
4. Lift the library out of the carton and remove the bag from the library. Remove the foam cushion from the back of the library. Save the packaging materials for future use. Important: Do not place the library on the front panel or the rear panel as this may damage the library. © Copyright IBM Corp. 2006... -
Page 12: Verifying The Shipment
– Cleaning cartridge – Foot pads (for desktop installation) – Extra prism fiducials for cartridge magazines – IBM Translated Safety Notices – IBM License Agreement for Machine Code – Installation Quick Reference – Setup, Operator, and Service Guide – Warranty information –... -
Page 13: Removing And Storing The Shipping Lock
Figure 1-1. Installing foot pads on the bottom of the library chassis 4. Carefully return the library to an upright position. Important: Do not stack objects on top of the library. Removing and Storing the Shipping Lock Important: The shipping lock, which prevents the library accessor from moving during shipment, must be removed before the library is powered ON. -
Page 14: Rackmounting The Library (For Rack Installation Only)
Figure 1-2. Shipping lock and label 2. Store the lock ( ) and label ( ) on the rear panel of the library as shown in Figure 1-3. Figure 1-3. Library shipping lock and label storage location Rackmounting the Library (for Rack Installation ONLY) The 2U library and the 4U library are easily installed into a standard 19-inch rack system. - Page 15 Important: A 2U library weighs 15.59 kg (34.37 lbs.) with one drive and without media. A 4U library weighs 21.32 kg (47 lbs.) with one drive and without media. To reduce the risk of personal injury or damage to the library: 1.
- Page 16 2. Determine the location in your rack for your library to be installed and, using a pencil, mark the location on each vertical rail in your rack. Note: A 2U library requires 2U (3.5 in.) of rack space. A 4U library requires 4U (7 in.) of rack space. 3.
- Page 17 Figure 1-7. 2U library rack anchors and mounting brackets 6. Install the library mounting brackets ( 1 ) as shown on the 2U library on each side of the library using the screw that was removed from your library and an additional short, counter-sunk screw included in the rack kit.
- Page 18 Figure 1-9. Sliding the 4U library into the rack 8. Using a #2 Phillips screwdriver, secure the library to the rack (see Figure 1-10 for a 2U library; see Figure 1-11 on page 1-9 for a 4U library) by placing a screw in the center hole of each mounting bracket and tightening them ( Figure 1-10.
-
Page 19: Attaching The Library To A Server
Figure 1-11. Securing the 4U library to the rack Attaching the Library to a Server The 2U library and the 4U library can be attached to servers using the following interfaces: v SCSI v Fibre Channel Connecting the Host Interface Cable To connect the host interface cables to the library: 1. - Page 20 Figure 1-12. Attaching a SCSI host interface cable to the 2U library Figure 1-13. Attaching host interface cables to the 4U library. This 4U library contains one SCSI drive and one Fibre Channel drive. 3. Attach the other end of the host interface cable as follows: v For a SCSI library, connect the host interface cable to the connector on the SCSI host bus adapter or to the connector on the previous device on the SCSI bus.
-
Page 21: Connecting A Power Cord
Installing a Fibre Channel Interposer (Feature Code 5096) For a list of supported adapters and required interposers, go to the Technical Support section on the web at http://www.ibm.com/storage/lto. To install the interposer, refer to Figure 1-14 and the procedure below. -
Page 22: Preparing The Host
Preparing the Host Follow these general guidelines: 1. Make sure that your backup application supports the SCSI or Fibre Channel host bus adapter (HBA). 2. If the host server is connected to a network, check with the system administrator before turning host power OFF. -
Page 23: Accessing The Configure Menu Using The Operator Control Panel
To configure your library, you will be using the Operator Control Panel and/or the Web User Interface. Static library network settings must be entered using the Operator Control Panel before the library can be accessed remotely using the Web User Interface. If your system is serviced by DHCP (Dynamic Host Configuration Protocol) server, the network parameters will be automatically set. -
Page 24: Configure Your Library Using The Web User Interface
c. Press the ENTER button to highlight the digit(s) in your library’s Gateway address. d. After entering the final digits in your Gateway address, press the DOWN button and select one of the following: v Save - to save your network settings. v Cancel - to cancel all of your entries and leave the settings as they were. -
Page 25: Choosing Library Settings
One cartridge magazine cannot be assigned to two logical libraries. If you partition a multi-drive library, each of the magazines must be assigned to a logical library on a magazine boundary. The entire magazine must be part of one logical library only. In a fully populated 4U library with two logical libraries, resource assignments will be as follows: v Logical Library 1 will contain Drive 1 and the left cartridge magazines. - Page 26 – Apply Selections - Click this button to submit the changes made to the screen. Figure 1-17. The 2U library Configure Library: General screen SALES01 Figure 1-18. The 4U library Configure Library: General screen Choosing Drive(s) Interface Identification/Settings 1. Click Drives in the left navigation pane. 2.
- Page 27 Figure 1-19. The Configure Library: Drive screen Configure Library: Network This page shows the current network configuration of the library and allows modification to the configuration. When a change is requested, a pop-up box will ask to confirm the changes. Figure 1-20.
-
Page 28: Entering User Access Information Using The Web User Interface
Entering User Access Information using the Web User Interface This function, other than the Access PIN, is not available on the Operator Control Panel. 1. Click User Access in the left navigation pane. 2. Choose an Access Level. The Access Level Name associated with the Access Level chosen v 1 - User v 2 - Admin v 3 - Service... -
Page 29: Configuring Logs And Traces Using The Web User Interface
4. Click one of the following: v Refresh - to update the current screen v Submit - to apply changes made to the current screen Figure 1-22. The Configure Library: Date and Time screen Entering Control Path Failover License Activation Key 1. -
Page 30: Entering Event Notification Information Using The Web User Interface
Figure 1-25. The Configure Library: Logs and Traces screen Entering Event Notification Information using the Web User Interface This function is not available on the Operator Control Panel. Use this menu item to set up email notification of library errors and warnings. 1. -
Page 31: Configure Your Library Using The Operator Control Panel
Saving Library Configuration using the Web User Interface This function is not available on the Operator Control Panel. If you do not have the capability of accessing your library using the Web User Interface, you should write down all library configuration settings for future reference. - Page 32 5. Select a Port Speed, Port Type, and Loop ID for each Fibre Channel drive. 6. Click Save. Entering Network Settings using the Operator Control Panel If you would like to use DHCP (Dynamic Host Configuration Protocol ) as your library network setting, complete Steps 1, 2, 3, and 7.
-
Page 33: Cartridge Magazines
v Cancel - to delete your settings. Entering Date and Time using the Operator Control Panel 1. Navigate to Configure → Date and Time. 2. Use the UP and DOWN buttons to select Time. 3. Press the ENTER button to highlight the first time field. 4. - Page 34 Figure 1-27. 2U library left magazine Figure 1-28. 2U library right magazine 2U Library I/O Station The I/O (Input/Output) Station (see Figure 1-29 on page 1-25) in a 2U library is part of the left magazine. To open the I/O Station, select Control → Open I/O Station. The I/O Station will pop open. To close the I/O Station, gently push it back into the left magazine.
- Page 35 Figure 1-29. 2U library I/O Station in the left magazine 4U Library Cartridge Magazines The 4U library has four cartridge magazines, two on each side (see Figure 1-30 on page 1-26 and Figure 1-31 on page 1-27). The upper left magazine has twelve storage slots. The lower left magazine has nine storage slots and houses the 3-slot I/O Station ( 1 in Figure 1-30 on page 1-26).
- Page 36 Figure 1-30. 4U library left magazines 1-26 TS3100 and TS3200 (3573) Installation Quick Reference...
- Page 37 Figure 1-31. 4U library right magazines 4U Library I/O Station The I/O Station in a 4U library (see Figure 1-32 on page 1-28) is part of the lower left magazine. To open the I/O Station, select Control → Open I/O Station. The I/O Station will pop open. To close the I/O Station, gently push it back into the lower left magazine.
-
Page 38: Populating The Library With Data Cartridges
Figure 1-32. 4U library I/O Station in the lower left magazine There are finger holes on the back side of the I/O Station (see 1 in Figure 1-33) that allow the user to push the cartridges out of the I/O station. Figure 1-33. -
Page 39: Inserting The Cleaning Cartridge
v Using the Operator Control Panel: Control → Magazines v Using the Web User Interface: Manage Library → Release Magazine 2. Remove all magazines from the library. 3. Insert cartridges in the left magazine(s). Do not store cartridges in the I/O Station or in the dedicated cleaning cartridge slot. - Page 40 1-30 TS3100 and TS3200 (3573) Installation Quick Reference...
- Page 41 No When you send comments to IBM, you grant IBM a nonexclusive right to use or distribute your comments in any way it believes appropriate without incurring any obligation to you. IBM or any other organizations will only use the personal information that you supply to contact you about the issues that you state on this form.
- Page 42 Readers’ Comments — We’d Like to Hear from You Cut or Fold Along Line GA32-0548-00 Fold and Tape Please do not staple Fold and Tape _ _ _ _ _ _ _ _ _ _ _ _ _ _ _ _ _ _ _ _ _ _ _ _ _ _ _ _ _ _ _ _ _ _ _ _ _ _ _ _ _ _ _ _ _ _ _ _ _ _ _ _ _ _ _ _ _ _ _ _ _ _ _ _ _ _ _ _ _ _ _ _ _ _ _ _ _ _ _ _ _ _ _ _ _ _ _ _ _ NO POSTAGE NECESSARY IF MAILED IN THE...
- Page 44 Part Number: 23R7508 Printed in USA GA32-0548-00...