
Related Manuals for Clarke Woodworker CTS14


Summary of Contents for Clarke Woodworker CTS14
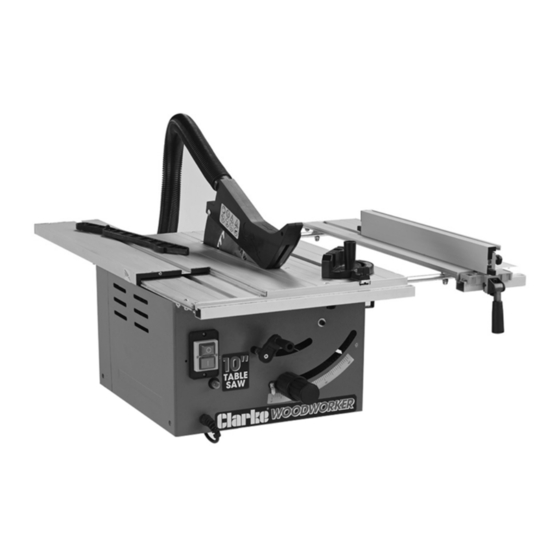
- Page 1 10” TABLE SAW WITH EXTENDABLE TABLE MODEL NO: CTS14 PART NO: 6500745 OPERATION & MAINTENANCE INSTRUCTIONS LS0314...
-
Page 2: Environmental Recycling Policy
INTRODUCTION Thank you for purchasing this CLARKE product. The table saw has been designed to perform the sawing operation of ripping, cross-cutting, bevelling and mitering wood and wood products. This unit is designed for use with a 250 mm carbide tipped blade. -
Page 3: Safety Symbols
CONTENTS The following items should be supplied in the carton. If any parts are missing, do not operate your table saw until the missing parts are obtained. 1 x Table Saw 1 x Fixings Pack 1 x R/H Extension Table Assembly 1 x Push Stick 1 x Parallel Guide Fence 1 x 250 mm TCT Blade (fitted) -
Page 4: Safety Warnings
SAFETY WARNINGS CAUTION: DO NOT LET FAMILIARITY WITH YOUR TABLE SAW MAKE YOU CARELESS. REMEMBER THAT A CARELESS FRACTION OF A SECOND IS SUFFICIENT TO CAUSE SEVERE INJURY. PERMITTED USAGE 3. Keep the work area well lit. The table saw is constructed 4. - Page 5 13. Before use, carefully check the tool 22. Avoid unintentional starting. Make and mains cable for damage or sure the switch is in the OFF position any other condition that may before connecting the machine to affect its operation. Do not use the the power supply.
-
Page 6: Additional Safety Rules For Table Saws
32. NEVER perform any operation 41. Unplug the tool - Switch off and freehand, which means using only wait for the blade to come to a your hands to support or guide the complete standstill before leaving workpiece. Always use either the it unattended. -
Page 7: Saw Blades
• NEVER reach around or over the • Always hold work firmly against the saw blade. NEVER reach for a mitre gauge or rip fence. workpiece until the saw blade has • NEVER stand or have any part of completely stopped. your body in line with the path of •... -
Page 8: Remaining Hazards
3. Only use saw blades d. by not releasing the workpiece recommended by the until you have pushed it all the manufacturer and which are the way past the blade, exact bore and diameter required e. not ripping a workpiece that is for this machine. -
Page 9: Electrical Connections
ELECTRICAL CONNECTIONS WARNING: READ THESE ELECTRICAL SAFETY INSTRUCTIONS THOROUGHLY BEFORE CONNECTING THE PRODUCT TO THE MAINS SUPPLY. Before switching the product on, make sure that the voltage of your electricity supply is the same as that indicated on the rating plate. Connecting it to any other power source may cause damage. -
Page 10: Part Identification
PART IDENTIFICATION Blade Guard Overload Protection Indicator Parallel Fence Push Stick Table Insert Right Side Extension Table Blade Height Adjusting Handle Left Hand Sliding Table Bevel Lock Left Side Table Lock Blade Angle Scale Riving Knife On/Off Switch Extractor Hose Scale For Parallel Fence Hose Adaptor Mitre Fence... -
Page 11: Fit The Right Extension Table
ASSEMBLY • Unpack and check for damage which may have occurred in transit. • Place the saw on a flat and firm surface. FIT THE RIGHT EXTENSION TABLE 1. Remove the screws from the end of the slide bars. 2. Push the slide bars into the holes under the table. -
Page 12: Adjust The Left Hand Sliding Table
ADJUST THE LEFT HAND SLIDING TABLE 1. The left hand sliding table can slide back and forth by pushing the table release inwards to release and adjusting the table as required. FITTING THE BLADE GUARD WARNING: REMOVE THE PLUG FROM THE MAINS SUPPLY BEFORE CARRYING OUT ANY ADJUSTMENT, SERVICING OR MAINTENANCE 1. -
Page 13: Dust Extraction
DUST EXTRACTION Always use an extracting device or vacuum cleaner, or ensure that the workplace is well ventilated. The machine is fitted with a connecting socket for a 30mm diameter extractor hose. 1. Insert the hose adapter with the grooved end into the connection port and lock in place by turning slightly to the right. - Page 14 3. Take off the outer flange and remove the old saw blade. • Replacement blades are available from our parts department (part number NHECTS14115). 4. Clean the blade flanges thoroughly before fitting the new blade. 5. Mount and fasten the new blade in reverse order.
-
Page 15: Before Starting Work
BEFORE STARTING WORK • All covers and safety devices have to be properly fitted before the machine is switched on. • When working with wood that has been used before, remove all foreign bodies such as nails or screws etc before cutting. •... -
Page 16: Mitre Gauge
MITRE GAUGE 1. Insert the guide bar into one end of the groove on the table. 2. Loosen the handle by twisting it counterclockwise. 3. Rotate the gauge until the arrow points to the angle on the scale you want. 4. -
Page 17: Operation
OPERATION CAUTION: BEFORE STARTING UP THE SAW ALWAYS CHECK THE FOLLOWING POINTS: 1. Is the saw blade firmly tightened? 2. Are all the locking levers firmly locked? 3. Is the riving knife aligned with the saw blade? 4. Is the saw blade guard fitted? 5. -
Page 18: Overload Reset Button
OVERLOAD RESET BUTTON This table saw has a thermal overload protection device. If the saw gets too hot, the thermal overload device cuts the power which prevents damage to the motor. If the thermal overload device operates, let the motor cool down for 5 minutes and push the reset button located just below the ON (I) button If you start the saw and the overload cutout operates again, disconnect from... -
Page 19: Cutting Narrow Workpieces
6. Always push the workpiece through to the end of the riving knife using a push stick. 7. Do not remove the offcut piece until the blade has stopped spinning. 8. Secure long workpieces against falling off at the end of the cut (e.g. with a roller stand etc.). -
Page 20: Cross Cuts
CROSS CUTS 1. Slide the mitre gauge into one of the grooves in the table. 2. Adjust the mitre gauge to the required angle. 3. Press the workpiece firmly against the mitre gauge. 4. Switch on the saw. 5. Push the mitre gauge and the workpiece toward the blade to make the cut. -
Page 21: Maintenance
MAINTENANCE WARNING: REMOVE THE PLUG FROM THE MAINS POWER SUPPLY BEFORE CARRYING OUT ANY ADJUSTMENT. SERVICING OR MAINTENANCE • Remove dust and dirt regularly from the machine. Cleaning is best carried out with a fine brush or a cloth. • Never use caustic agents to clean plastic parts. •... -
Page 22: Specifications
SPECIFICATIONS Voltage 230V - 50 Hz Power input 1800 W No-load speed 4700 rpm Overload protection Table size with extension: 660 mm x 690 mm Extractor socket 36 mm (external) Blade size: Outside Diameter 250 mm Bore Diameter 30 mm Thickness 2.8 mm Maximum cut depth @ 90 Degrees 72 mm... -
Page 23: Exploded Diagram
EXPLODED DIAGRAM Parts & Service: 020 8988 7400 / E-mail: Parts@clarkeinternational.com or Service@clarkeinternational.com... - Page 24 Part Name Part Name Box Bottom Cover NHECTS14001 Nut 6 NHECTS14041 Bolt M6x16 NHECTS14042 Washer NHECTS14002 Screw M5x10 NHECTS14044 Screw M4x10 NHECTS14003 Screw M4x14 NHECTS14004 Spring Washer 5 NHECTS14045 Washer?18?1.2?6.5? NHECTS14006 Flat Washer 5 NHECTS14046 Inner Guard NHECTS14047 Screw M6x25 NHECTS14007 Support Board A Bolt NHECTS14048...
- Page 25 Part Name Part Name Ø8 Washer NHECTS14086 Riving Knife NHECTS14121 Adjust Board NHECTS14122 Blade Flange NHECTS14087 Bolt M6x12 NHECTS14123 Lock Pole1 NHECTS14088 Lock Pole2 NHECTS14089 Spring Washer 6 NHECTS14124 Nut M6 NHECTS14090 Flat Washer 6 NHECTS14125 Carbon Brush Cover NHECTS14126 Spring Washer 6 NHECTS14091 Carbon Brush...
- Page 26 Part Name Part Name 156b Middle Table Support NHECTS14156B T Fence NHECTS14F36 Screw St 4x10 NHECTS14F37 156c Bolt M6x12 NHECTS14156C Pointer Base NHECTS14F38 Slide Table Connection NHECTS14157 Nut M6 NHECTS14158 Knob NHECTS14F39 Table Scale NHECTS14159 Hex Key 6mm NHECTS14F41 Fork Spanner NHECTS14F42 Bolt M6x12 NHECTS14160...
-
Page 27: Declaration Of Conformity
DECLARATION OF CONFORMITY Parts & Service: 020 8988 7400 / E-mail: Parts@clarkeinternational.com or Service@clarkeinternational.com...
Need help?
Do you have a question about the Woodworker CTS14 and is the answer not in the manual?
Questions and answers