
Subscribe to Our Youtube Channel
Related Manuals for Clarke CTS16


Summary of Contents for Clarke CTS16
- Page 1 10” TABLE SAW MODEL NO: CTS16 PART NO: 6500748 OPERATION & MAINTENANCE INSTRUCTIONS LS0418 - Iss 1...
-
Page 2: Environmental Recycling Policy
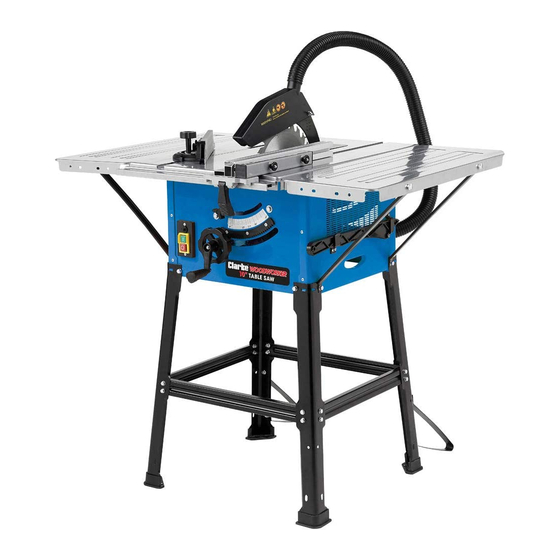
INTRODUCTION Thank you for purchasing this CLARKE product. The table saw has been designed to use a 250 mm blade to perform the sawing operations of ripping, cross-cutting, bevelling and mitering wood and wood products. Before attempting to use this product, please read this manual thoroughly and follow the instructions carefully. -
Page 3: Safety Symbols
CONTENTS The following items should be supplied in the carton. If any parts are missing, do not operate your table saw until the missing parts are obtained. 1 x Table Saw (main unit) 2 x Long Centre Brace 2 x Table Extension 2 x Short Centre Brace 4 x Support Strut 1 x Wrench... -
Page 4: General Safety Instructions
GENERAL SAFETY INSTRUCTIONS WARNING: WHEN USING ELECTRIC TOOLS BASIC SAFETY PRECAUTIONS SHOULD ALWAYS BE FOLLOWED TO REDUCE THE RISK OF FIRE, ELECTRIC SHOCK AND PERSONAL INJURY INCLUDING THE FOLLOWING. READ ALL THESE INSTRUCTIONS BEFORE ATTEMPTING TO OPERATE THIS PRODUCT AND SAVE THESE INSTRUCTIONS". SAFE OPERATION 6. - Page 5 11. Do not abuse the cable 17. Avoid unintentional starting • Never yank the cable to • Ensure switch is in "off' position disconnect it from the socket. when plugging in. Keep the cable away from 18. Use outdoor extension leads heat, oil and sharp edges.
-
Page 6: Saw Blades
22. Have your tool repaired by a blades shall be carried in a holder qualified person whenever practicable. • This electric tool complies with KICKBACK the relevant safety rules. Repairs Kickback is a sudden reaction to a should only be carried out by pinched, bound or misaligned saw qualified persons using original blade, it causes the workpiece to be... - Page 7 • Noise can be a health hazard. The permitted noise level is exceeded when working. Be sure to wear personal protective equipment such as ear protection. • Defective saw blades can cause injuries. Regularly inspect the structural integrity of saw blades.
-
Page 8: Electrical Connections
ELECTRICAL CONNECTIONS WARNING: READ THESE ELECTRICAL SAFETY INSTRUCTIONS THOROUGHLY BEFORE CONNECTING THE PRODUCT TO THE MAINS SUPPLY. Connect the mains lead to a standard, 230 Volt (50Hz) electrical supply through an approved 13 amp BS 1363 plug, or a suitably fused isolator switch. If the plug has to be changed because it is not suitable for your socket, or because of damage, it must be removed and a replacement fitted, following the wiring instructions shown below. - Page 9 ASSEMBLY ATTACH THE EXTENSION TABLES 1. Turn the table saw upside down. 2. Fix the extension table to the table saw using two of the M6 x 12 bolts, washers and nuts supplied. 3. Fit two of the braces to the extension table using two of the the M6 x 12 bolts, washers and nuts supplied.
- Page 10 ATTACH THE LEG KIT TO THE TABLE SAW 1. Attach each leg to a corner of the table saw using two of the M6 x 16 bolts, washers and spring washers supplied. • Note that one of the bolts also passes through the brace.
- Page 11 INSTALL THE HEIGHT ADJUSTING HANDLE 1. Remove the nut and washers from the handle. 2. Place one washer back on the handle. 3. Pass the handle through the arm as shown and secure in place using the remaining washer and nut.
- Page 12 3. Loosen the bolt on the riving knife clamping plate by a few turns. 4. Place riving knife behind the clamp and push it all the way down. 5. Adjust the riving knife until there is a 3-5 mm gap between the riving knife and the saw blade.
- Page 13 40 mm. RECOMMENDED DUST EXTRACTING DEVICE • The Clarke CWVE1 Vacuum Extractor is an ideal companion product for your CTS16 Table saw and is available at your local Clarke dealer (part number 6471168). Parts & Service: 020 8988 7400 / E-mail: Parts@clarkeinternational.com or Service@clarkeinternational.com...
-
Page 14: Parallel Fence
ADJUSTMENTS After every new adjustment we recommend you to make a trial cut in order to check the new settings. PARALLEL FENCE CUTTING WIDTH The parallel fence can be mounted on either side of the saw table. If you change the side, you will need to attach the parallel fence to the other side of the holder. -
Page 15: Mitre Gauge
MITRE GAUGE 1. Insert the guide bar into one end of the groove on the table. 2. Loosen the locking knob by twisting it counterclockwise. 3. Rotate the gauge to the angle you want. 4. Retighten the locking knob. SETTING BLADE HEIGHT Turn the blade height adjusting handle to set the blade to the required height. -
Page 16: Operation
OPERATION CAUTION: BEFORE STARTING THE SAW ALWAYS CHECK THE FOLLOWING POINTS: 1. Is the saw blade firmly tightened? 2. Are all the locking levers firmly locked? 3. Is the riving knife aligned with the saw blade? 4. Is the blade guard fitted? 5. -
Page 17: Overload Reset Button
OVERLOAD RESET BUTTON This table saw has a thermal overload protection device. If the saw gets too hot, the thermal overload device cuts the power which prevents damage to the motor. If the thermal overload device operates, let the motor cool down for 5 minutes and push the reset button located just above the Start (I) button If you start the saw and the overload cutout operates again, disconnect from... -
Page 18: Cutting Narrow Workpieces
6. Always push the workpiece through to the end of the riving knife using a push stick. 7. Do not remove the offcut piece until the blade has stopped spinning. 8. Secure long workpieces against falling off at the end of the cut (e.g. with a roller stand etc.). -
Page 19: Cross Cuts
CROSS CUTS 1. Slide the mitre gauge into one of the grooves in the table. 2. Adjust the mitre gauge to the required angle. 3. Press the workpiece firmly against the mitre gauge. 4. Switch on the saw. 5. Push the mitre gauge and the workpiece toward the blade to make the cut. -
Page 20: Maintenance
MAINTENANCE WARNING: REMOVE THE PLUG FROM THE MAINS POWER SUPPLY BEFORE CARRYING OUT ANY ADJUSTMENT, SERVICING OR MAINTENANCE. CLEANING WARNING: THE TABLE SAW MUST NOT BE SPRAYED WITH WATER OR PLACED IN WATER OTHERWISE THERE IS A RISK OF ELECTRIC SHOCK. •... - Page 21 3. Undo the blade retaining nut using the wrench and spindle key supplied as shown. 4. Take off the nut and outer flange and remove the old saw blade. • Replacement blades are available from our parts department (part number ZLGCTS16114).
-
Page 22: Specifications
SPECIFICATIONS Voltage 230V AC / 50Hz Power input 1600 W No-load speed 4100 rpm Overload protection Table size with extension: 960 mm x 640 mm Dust Extractor socket 36 mm (internal) - 40 mm (external) Blade size: Outside Diameter 250 mm Bore Diameter 30 mm Thickness 2.4 mm Maximum cut depth @ 90 degrees... -
Page 23: Parts Diagram And List
PARTS DIAGRAM AND LIST Parts & Service: 020 8988 7400 / E-mail: Parts@clarkeinternational.com or Service@clarkeinternational.com... - Page 24 Rubber Foot ZLGCTS16001 Motor Adjusting ZLGCTS16039 Shaft Side Table Support ZLGCTS16002 Motor Stop Block ZLGCTS16040 Washer 6 ZLGCTS16003 Roll Pin 3*16 ZLGCTS16041 Spring Washer 6 ZLGCTS16004 Hand Wheel ZLGCTS16042 Bolt 8.8 M6x16 ZLGCTS16005 Roll Pin 4*22 ZLGCTS16043 Bolt 8.8 M6x12 ZLGCTS16006 Adjusting Wheel ZLGCTS16044...
- Page 25 Screw ST3.5*13 ZLGCTS16076 Splash Guard ZLGCTS16118 End Cap ZLGCTS16077 Washer 4 ZLGCTS16119 Cross Stop ZLGCTS16078 Blade Guard ZLGCTS16120 Bolt M6*25 ZLGCTS16079 Housing ZLGCTS16121 Main Scale ZLGCTS16080 Screw ST4.2*9.5 ZLGCTS16123 Front Rail ZLGCTS16081 Push Stick ZLGCTS16125 Table Extension ZLGCTS16082 Saw Blade Spindle ZLGCTS16126 Screw ST2.9*19 ZLGCTS16085...
-
Page 26: Declaration Of Conformity
DECLARATION OF CONFORMITY Parts & Service: 020 8988 7400 / E-mail: Parts@clarkeinternational.com or Service@clarkeinternational.com... - Page 27 Parts & Service: 020 8988 7400 / E-mail: Parts@clarkeinternational.com or Service@clarkeinternational.com...
Need help?
Do you have a question about the CTS16 and is the answer not in the manual?
Questions and answers