Table of Contents
Advertisement
Owners &
Installation
LISTINGS AND CODE APPROVALS
These gas appliances have been tested in
accordance with AS4553, NZS 5262 and
have been certifi ed by the Australian Gas
Association for installation and operation
as described in these Installation and
Operating Instructions.
Your unit should be serviced annually
by an authorised service person.
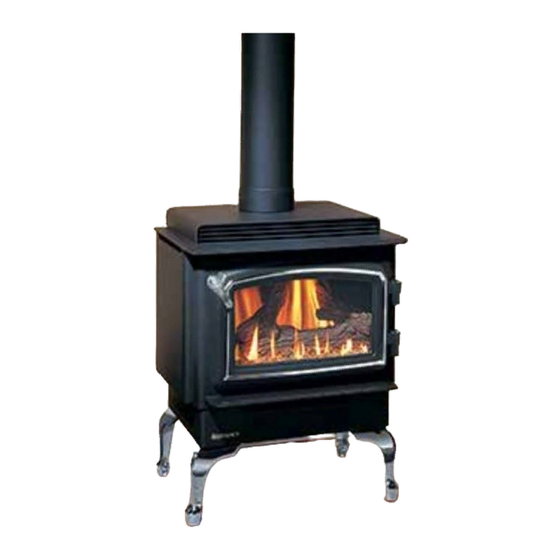
F33 Freestanding Gas Stove
PLEASE KEEP THESE INSTRUCTIONS
FOR FUTURE REFERENCE
WARNING:
Improper installation, adjustment, altera-
tion, service or maintenance can cause
injury or property damage. Refer to this
manual. For assistance or additional in-
formation consult an authorized installer,
service agency or the gas supplier.
FOR YOUR SAFETY
Do not store or use gasoline or other fl am-
mable vapours and liquids in the vicinity of
this or any other appliance.
Installation and service must be performed
by an authorized installer, service agency or
the gas supplier.
918-532c
Models:
F33-NG3
F33-LPG3
FOR YOUR SAFETY
What to do if you smell gas:
Do not try to light any appli-
ance
Do not touch any electri-
cal switch: do not use any
phone in your building.
Immediately call your gas
supplier from a neighbour's
phone. Follow the gas sup-
plier's instructions.
If you cannot reach your
gas supplier, call the fi re
department.
09/12/12
Advertisement
Table of Contents

Related Manuals for Regency Fireplace Products F33


Summary of Contents for Regency Fireplace Products F33
- Page 1 Owners & Installation F33 Freestanding Gas Stove Models: F33-NG3 F33-LPG3 PLEASE KEEP THESE INSTRUCTIONS FOR FUTURE REFERENCE WARNING: FOR YOUR SAFETY Improper installation, adjustment, altera- What to do if you smell gas: tion, service or maintenance can cause Do not try to light any appli- injury or property damage.
- Page 2 Gas Series of hand crafted appliances has been designed to provide you with all the ® warmth and charm of a woodstove, at the fl ick of a switch. The models F33-NG3 and F33-LPG3 have been approved by the Australian Gas Association for both safety and effi ciency. As it also bears our own mark, it promises to provide you with economy, comfort and security for many trouble free years to follow.
-
Page 3: Table Of Contents
Optional Wall Thermostat Installation ....... 12 PARTS LIST Thermostat Wire Table ..........12 Final Check............... 12 Main Assembly ............21 Burner & Log Assembly ..........22 Pedestal & Leg Assembly ......... 23 WARRANTY Warranty ..............27 Regency ® F33-3 Freestanding Gas Stove... -
Page 4: Data Badge
Regency Gas Fireplace Distributed by: Model Western Australia: Gas Type Air Group Australia 28 Division St Model I43-NG I43-LPG F33-NG F33-LPG Welshpool WA 6106 Gas Consumption 40 . 39 . 33 . 33 . Eastern Australia: Fireplace Products Manifold Pressure 2.55... -
Page 5: Installation
LOCATED OUT OF TRAFFIC AND AWAY FROM FURNITURE SAVE THESE INSTRUCTIONS AND DRAPERIES. The F33-3 Freestanding Gas Stove must be installed in accordance WARNING: FAILURE TO INSTALL THIS APPLIANCE COR- with these instructions. Carefully read all the instructions in this manual RECTLY MAY CAUSE A SERIOUS HOUSE FIRE AND WILL fi... -
Page 6: Pedestal Assembly
Do not combine clearances from one type of installation with another in order to achieve closer clearances. Use the minimum clearances shown in the diagrams. F33-3 Clearance to Combustibles A Side Wall to Unit 250 mm... -
Page 7: Leg And Bottom Shield Assembly
10) Connect the orange wire from the spill switch to the Burner ON/OFF switch. 11) Re-connect the fan harness plug. 12) Secure the power cord with the supplied grommet at the back of the Bottom Shield or Pedestal. Regency ® F33-3 Freestanding Gas Stove... -
Page 8: Wiring
610m. we recommend that a minimum fl ue height of 3.6m is used. chimney/fl ue in accordance with installation codes. For your safety this heater is equipped with a fl ue safety switch. This thermally actuated switch is located within the draft hood and will detect Regency ® F33-3 Freestanding Gas Stove... -
Page 9: Gas Connection
1) Make sure the valve is in the "OFF" position. 2) Loosen the "IN" and/or "OUT" pressure tap(s), turning counter- clockwise with a 1/8" wide fl at screwdriver. 3) Attach manometer to "IN" and/or "OUT" pressure tap(s) using a 5/16" ID hose. Regency ® F33-3 Freestanding Gas Stove... -
Page 10: Test For Flue Spillage
6) Place the cross logs on top of the larger logs aligning the holes on the underside of the cross log with the log pins in the larger logs. See diagrams 1 & 2. Carefully push the cross logs onto the pins. Diagram 1 Regency ® F33-3 Freestanding Gas Stove... -
Page 11: Safety Latch
8) If the fl ame hesitates at any point, check the area of hesitation and see if there is an ember or rock wool blocking a burner port or ports. If so, move the obstruction and then check the fl ame fl ow again. Regency ® F33-3 Freestanding Gas Stove... -
Page 12: Optional Remote Wall Switch
3) Check for proper draft. CAUTION: Any alteration to the product that causes sooting or carboning that results in damage to the unit is not the responsibility of the manufacturer and will not be covered by the warranty. Regency ® F33-3 Freestanding Gas Stove... -
Page 13: Operating Instructions
2) Push in the PILOT knob slightly and turn clockwise to off. Do not force. 3) Turn off all electric power to the appliance if service is to be per- formed. Regency ® F33-3 Freestanding Gas Stove... -
Page 14: Copy Of The Lighting Plate Instructions
2) Turn off all electric power to the appliance if clockwise to “OFF”. Do not force. service is to be performed. You may shut off the pilot during prolonged non use periods to conserve fuel. DO NOT REMOVE THIS INSTRUCTION PLATE 908-649c Regency ® F33-3 Freestanding Gas Stove... -
Page 15: Maintenance
4) Make a periodic check of burner for proper position and condition. Visually check the fl ame of the burner periodically, making sure the fl ames are steady; not lifting or fl oating. If there is a problem, call an authorised service person. Regency ® F33-3 Freestanding Gas Stove... -
Page 16: General Flue Maintenance
GLASS REPLACEMENT NOTE: Door Screen only in Australia. Your F33-3 stove is supplied with high temperature, 5 mm Neoceram silica coated ceramic glass that will withstand the highest heat that your unit will produce. In the event that you break your glass by impact,... -
Page 17: Aeration Adjustment
Diagram 1 Incorrect fl ame pattern will have small, probably yellow fl ames, not coming into proper contact with the rear burner or thermopile or thermocouple. Top View of pilot fl ame Diagram 2 Regency ® F33-3 Freestanding Gas Stove... -
Page 18: Installing Valve Assembly
1) To install a new valve assembly, reverse instructions for removing valve. See assembly steps 1-11. 2) Check for leaks and manifold pressure. See Gas Pressure Test instruc- tions. 3) To reinstall valve, reverse instructions for removing valve assembly, steps 12-18. Regency ® F33-3 Freestanding Gas Stove... -
Page 19: Fan Replacement
3. NOTE: Make sure the fan is supported as it may fall when the 4 screws are loosened. Wiring Diagram Diagram 3 View from back of stove Placement of Decal Strain relief “Warning 240 Volts grommet Turn Off Power” Regency ® F33-3 Freestanding Gas Stove... -
Page 20: Troubleshooting The Gas Control System
(Troubleshooting Regency Gas Products) ® ABNORMAL OPERATION If the main burner does not light but pilot stays on shut down heater and contact your dealer If excessive carbon on logs or glass contact your deal- Regency ® F33-3 Freestanding Gas Stove... -
Page 21: Parts List
Hinge Cap - Gold Plated (2/set) Screw #10 - 24 x 3/4" Pan Head Washer 1/4" split lock Screw #10 - 24 x 1/2 Pan Head 471-031 Door Retainer Clip 948-101 Spring Handle - Large Regency ® F33-3 Freestanding Gas Stove... -
Page 22: Burner & Log Assembly
3/8 x 12" Black Mall Nipple 948-294 Burner - NG 948-279 Burner - LPG *Not available as a replacement part. Complete Burner Tray Assy-SIT-NG Complete Burner Tray Assy-SIT-LPG 490-023 Front Log Defl ector - NG/LPG Regency ® F33-3 Freestanding Gas Stove... -
Page 23: Pedestal & Leg Assembly
820-058F Pedestal Cover 140) 850-127 Cast Legs - Gold 125) Rear Cover Plate 850-126 Cast Legs - Black 850-128 Cast Legs - Brush Nickel *Not available as a replacement part. 142) 850-125 Steel Legs Regency ® F33-3 Freestanding Gas Stove... - Page 24 NOTES Regency ® F33-3 Freestanding Gas Stove...
- Page 25 NOTES Regency ® F33-3 Freestanding Gas Stove...
- Page 26 NOTES Regency ® F33-3 Freestanding Gas Stove...
-
Page 27: Warranty
NOTE: PLEASE RETAIN YOUR INVOICE AS PROOF OF PURCHASE FOR WARRANTY VERIFICATION INCORRECT INSTALLATION OR GAS PRESSURE SETTINGS ARE NOT COVERED BY WARRANTY A SERVICE OR CALLOUT FEE WILL BE CHARGED IN THESE CIRCUMSTANCES. Regency ® F33-3 Freestanding Gas Stove... - Page 28 © Copyright 2012, FPI Fireplace Products International Ltd. All rights reserved. PRINTED IN CANADA...