Table of Contents
Advertisement
Quick Links
Advertisement
Table of Contents

Related Manuals for Spagna Vetro SV400


Summary of Contents for Spagna Vetro SV400
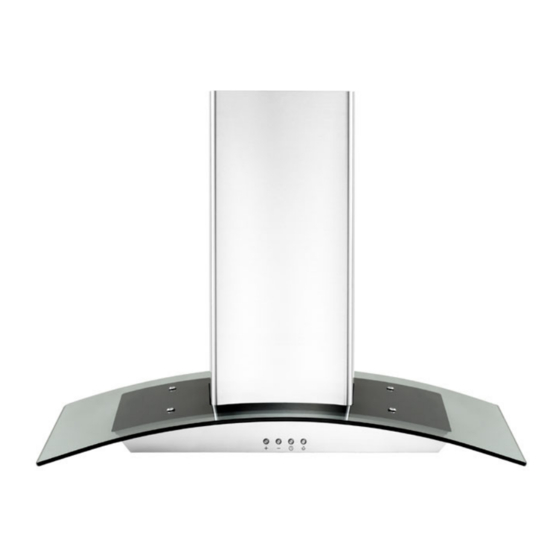
- Page 1 Installation Guide and Users Manual Spagna Vetro Range Hood Model 3388C-IM Model SV400 IMPORTANT: Read and save these instructions. NOTICE: Installer: Leave this guide with the homeowner Homeowner: Keep this guide for future reference Island Type Range Hood...
-
Page 3: Important Safety Notice
Important Safety Notice Read all Instructions before Installing and operating this appliance • The installation in this manual is intended for qualified installers, service technicians or persons with similar qualified background. Installation and electrical wiring must be done by qualified profession- als and in accordance with all applicable codes and standards, including fire-rated construction. - Page 4 Important Safety Notice Read all Instructions before Installing and operating this appliance • Clean ventilating fan frequently. • Always use appropriate cookware and utensils size. • Always use cookware appropriate for the size of the surface element. To reduce the risk of injury to persons in the event of a stove top grease fire: •...
-
Page 5: Table Of Contents
Table of Contents INSTALLATION USE AND CARE Tools needed............3 Troubleshooting...........14 Venting requirements........5 Use and care information.......15 Mount heights & clearance......5-6 Specifications..........15 Calculating vent system length.......6 Measurements & Diagrams......15-17 Venting methods..........7 MAINTENANCE Electrical requirements........8 Cleaning..........16 Preparation............9 Replacing the filter & light bulb.....17 Installation..........10-11 Contact Us............19 Range hood operations......12-13... - Page 6 Page 4...
-
Page 7: Venting Requirements
Venting Requirements Height & Clearance • Vent system must terminate to the outside (roof or side wall). • DO NOT terminate the vent system in an at- tic or other enclosed area. • DO NOT use 4” (10.2 cm) laundry-type wall caps. -
Page 8: Calculating Vent System Length
IMPORTANT: • A minimum of 6” round (standard for this range hood) or 3-1/4 x 10” rectangular duct (purchased separately) must be used to maintain maximum airflow efficiency. • Always use rigid type metal/aluminium ducts if available to maximize airflow when connecting to provided duct. -
Page 9: Venting Methods
Venting Methods • This range hood is factory set for venting through the roof or wall. • Vent work can terminate either through the roof or wall. To vent through a wall, a 90° elbow is needed. IMPORTANT: • NEVER exhaust air or terminate duct work into spaces between walls, crawl spaces, ceiling, attics or garages. -
Page 10: Electrical Requirements
Electrical Requirements IMPORTANT: Observe all governing codes and ordinances. It is the customer’s responsibility: • To contact a qualified electrical installer. • To assure that the electrical installation is adequate and in conformance with National Electrical Code. If codes permit and a separate ground wire is used, it is recommended that a qualified electrician determine that the ground path is adequate. -
Page 11: Preparation
Preparation Advanced Preparations: • Be familiar with the controls of the range hood by reading through Range Hood Operations, Page 12. • Place the range hood on a flat, stable surface. Connect the range hood to a designated standard outlet (120- Volt, 60Hz, AC only) and turn on the range hood. -
Page 12: Installation
Installation a) The setting distance 27” to 30” from the burners. See Pic① b) The ceiling must be able to hold at least 120 kg weight, and the thickness of the ceiling must be ≧30MM, drill one Ø 170 mm hole in the ceiling. See Pic①. c) According to the mounting plate, drill 12 holes in the ceiling, see Pic②, (make sure ceiling does not interfere with electrical outlet box opening in ceiling mounting plate.) Remove cover from electrical outlet box on ceiling mounting plate. -
Page 13: Installation
Installation g) Adjust the 4 screws on the glass panel and make sure the glass panel is well fixed the range hood body, see Pic⑥. h) Hold up the hood carefully, use 16 pieces of M4*10 screws to secure the hood body to angle iron, see Pic⑦. i) Ensure all the things are fixed, remove the hooks which securing the outer duct cover, and pull the outer duct cover down to the range hood body. - Page 14 Installation OTHER: 1. Measure the distance between stove top and the bottom of range hood. A distance of 28” to 32” is recommended*. *Due to different ceiling height configurations, recommended height may not be applicable Using references in Height & Clearance on Page 5 and Measurements and Diagrams on Page 16, center the hood beneath the cabinet and flush with the front of the cabinet.
-
Page 15: Range Hood Operations
Range Hood Operations Turning Fan ON: Always turn fans ON before cooking to establish air flow and allow fans to run for a few minutes after cooking for cleaner air in the kitchen. The Power Control (+) button must be touched before a Speed Control button can be activated. -
Page 16: Troubleshooting
Troubleshooting 1. If the range hood or halogen light does not operate • Check if the range hood has been plugged in, make after installation: sure that all power has been turned back ON, fused not blown and all electrical wiring are properly connected. -
Page 17: Use And Care Information
Use and Care Information Operations: • Read and understand all instructions and warnings in this manual before operating the appliance. Save these instructions for future reference. • Always leave safety grills and filters in place. Without these components, operating blowers could catch on to hair, fingers and loose clothing. -
Page 18: Cleaning
Model shown: • All measurements are in millimetres. SV400D-I30, I36 Overall (3388C-IM): Model SV400D SAFETY WARNING: Never put your hand into area housing the fan while the fan is operating! For optimal operation, clean range hood and all baffle/spacer/filter/grease tunnel/oil container regularly. Regular care will help preserve the appearance of the range hood. -
Page 19: Replacing The Filter & Light Bulb
Maintenance Cleaning/Replacing Filters: The filter mesh is made of high-density stainless steel. Please do not use the corrosive detergent on it. Keeping this filter clean will keep the appliance running correctly. Please strictly follow the guidelines below. METHOD 1: Put the mesh into 40-50°C clean water, add detergent, and soak for 2-3 minutes. Wear gloves and clean with a soft brush. - Page 20 Warranty One Year Parts Warranty: For one year from the date of original purchase , we will provide free of charge, non- consumable replacement parts or components that failed due to manufacturing defects. Subject to the conditions and limitations set forth below, at its option, either repair or replace any part of its products that prove defective by reason of improper workmanship or materials.
-
Page 21: Contact Us
Disclaimer Damages caused during transit are not covered under our warranty. Please contact us to file an insurance claim. Please inspect contents of package(s) carefully upon receiving! We must be notified of any damages and/or missing parts within five (5) days upon your receipt of package(s). Claims will not be accepted after five (5) days.
Need help?
Do you have a question about the SV400 and is the answer not in the manual?
Questions and answers