Table of Contents
Advertisement
Quick Links
Download this manual
See also:
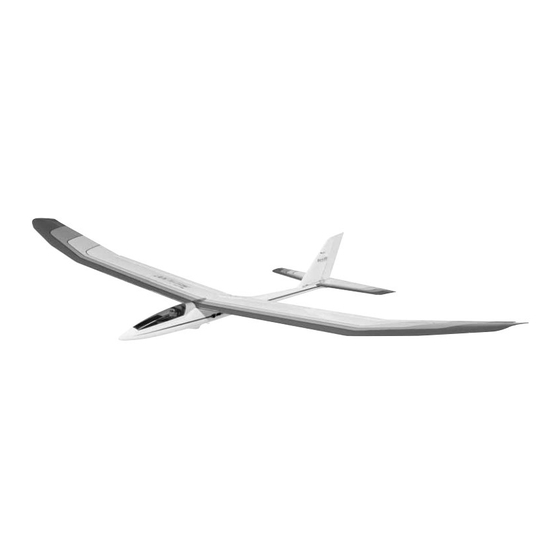
Instruction Book
Wingspan: 100 in [2540mm]
Wing Area: 943 sq in [60.8 sq dm]
Weight: 4-4.5 lb [1800-2000g]
Wing Loading: 9.8-11 oz/sq ft [30-34 g/dm
Length: 54 in [1370 mm]
Radio: 5 Channel minimum, 7-9 channel with
sailplane mixing, 7 servos
Great Planes
Model Manufacturing Co. guarantees this kit to be free from defects in both material and workmanship at the date of
®
purchase. This warranty does not cover any component parts damaged by use or modification. In no case shall Great Planes' liability
exceed the original cost of the purchased kit. Further, Great Planes reserves the right to change or modify this warranty without notice.
In that Great Planes has no control over the final assembly or material used for final assembly, no liability shall be assumed nor
accepted for any damage resulting from the use by the user of the final user-assembled product. By the act of using the user-assembled
product, the user accepts all resulting liability.
If the buyer is not prepared to accept the liability associated with the use of this product, the buyer is advised to return this
kit immediately in new and unused condition to the place of purchase.
To make a warranty claim send the defective part or item to Hobby Services at the address below:
Include a letter stating your name, return shipping address, as much contact information as possible (daytime telephone number, fax
number, e-mail address), a detailed description of the problem and a photocopy of the purchase receipt. Upon receipt of the package
the problem will be evaluated as quickly as possible.
READ THROUGH THIS MANUAL BEFORE STARTING
CONSTRUCTION. IT CONTAINS IMPORTANT WARNINGS
AND INSTRUCTIONS CONCERNING THE ASSEMBLY
AND USE OF THIS MODEL.
© Copyright 2005
INSTRUCTION MANUAL
2
]
WARRANTY
Hobby Services
3002 N. Apollo Dr. Suite 1
Champaign IL 61822 USA
Champaign, Illinois
(217) 398-8970, Ext 5
airsupport@greatplanes.com
GPMZ0204 for GPMA1049 V1.0
™
Advertisement
Table of Contents

Related Manuals for GREAT PLANES Spirit 100


Summary of Contents for GREAT PLANES Spirit 100
-
Page 1: Instruction Manual
Further, Great Planes reserves the right to change or modify this warranty without notice. In that Great Planes has no control over the final assembly or material used for final assembly, no liability shall be assumed nor accepted for any damage resulting from the use by the user of the final user-assembled product. -
Page 2: Table Of Contents
ASSEMBLE THE FUSE ..........11 IMPORTANT SAFETY PRECAUTIONS Attach the Tail ............11 Install the Fuselage Servos........12 1. Your Spirit 100 ARF should not be considered a toy, but Final Radio Installation ..........14 rather a sophisticated, working model that functions very Set the C.G..............14 much like a full-size airplane. -
Page 3: Ama
Never blow into the fuse to remove fiberglass dust, as the dust will blow back into your eyes. Always wear safety This is a partial list of items required to finish the Spirit 100 goggles, a particle mask and rubber gloves when grinding, ARF that may require planning or decision making before drilling and sanding fiberglass parts. -
Page 4: Optional Items
Frequently you can study photos in following steps to get another view of the same parts. • The Spirit 100 ARF is factory-covered with Top Flite MonoKote film. Should repairs ever be required, MonoKote can be patched with additional MonoKote purchased separately. -
Page 5: Kit Inspection
If any parts are missing or are not of acceptable quality, or if you need assistance with assembly, contact Product Support. When reporting defective or missing parts, use the part names exactly as they are written in the Kit Contents list. Great Planes Product Support: 3002 N Apollo Drive, Suite 1 Champaign, IL 61822 Telephone: (217) 398-8970, ext. -
Page 6: Ordering Replacement Parts
List that follows. The fastest, most economical service can be provided by your hobby dealer or mail-order company. To locate a hobby dealer, visit the Great Planes web site at www.greatplanes.com . Choose “Where to Buy” from the menu on the left side of the page. Follow the instructions provided on the page to locate a U.S., Canadian or International dealer. -
Page 7: Assemble The Wing
ASSEMBLE THE WING Spoiler Option Spoilers are optional and can be made functional even after you have flown the plane. ❏ ❏ 1. Use a sealing iron to securely attach the covering to the spoiler and the wood surrounding it. ❏... -
Page 8: Install The Aileron And Flap Servos
❏ ❏ 9. Trim the excess string from the spoiler hook. ❏ 10. Repeat steps 1-9 for the second spoiler. Install the Aileron and Flap Servos ❏ 3. Locate the openings for the flap and aileron servos in the bottom of each wing panel. Trim out the covering and seal the edges using a sealing iron. - Page 9 ❏ ❏ ❏ 6. Attach the servos to the blocks using the hardware that 9. Align the aileron control horn with the servo arm. comes with your radio system. HINT: Drill a 1/16" [1.6mm] Glue the control horn to the aileron with a small drop of CA. pilot hole for the servo screws and strengthen the holes with a drop of thin CA.
-
Page 10: Finish The Wing
❏ ❏ 15. Plug the flap servo to the flap channel on your radio. Make sure the servo arm is in the position shown in the sketch. Align the flap with the wing TE and mark the location the pushrod crosses the servo arm. Bend a right angle in the pushrod at the mark. -
Page 11: Assemble The Fuse
ASSEMBLE THE FUSE Attach the Tail ❏ 1. Trim the covering on the horizontal stabilizer from the LE slot and the bolt hole. Apply thin CA to the exposed wood in the LE slot. ❏ 2. Remove the covering from the top and bottom of the four wing bolt holes on the wing. -
Page 12: Install The Fuselage Servos
❏ 7. Align the rudder control horn with the rudder pushrod. Glue the control horn to the rudder with a small drop of CA. ❏ 8. Drill two 1/16" [1.6mm] holes through the rudder. Secure the control horn with two 2-56 x 3/4" [19mm] SHCS and the nylon control horn back. - Page 13 5/64" [2mm] 5/8" [16mm] ❏ 2. If you will be using the spoiler option make a servo arm that has the outer hole at least 5/8" [16mm] from the servo mounting hole. Enlarge the outer hole with a 5/64" drill bit. Spoiler Rudder Elevator (Optional)
-
Page 14: Final Radio Installation
❏ 3. Drill a 1/16" [1.6mm] hole through the fuse side for the ❏ 10. Attach the Z-bend end of the spoiler activation rod to antenna. Take a cut-off piece of servo arm with at least two the spoiler servo. holes in it, and feed the antenna through two of the holes, making a strain relief which protects the antenna from accidentally being torn out of the receiver. -
Page 15: Mount The Canopy And Tow Hook
Mount the Canopy and Tow Hook ❏ 1. Use needle nose pliers to open up the canopy hook so there is a 1/16" [1.6mm] gap. ❏ 2. Connect the wing servos and, if used, the spoiler hooks to the loop end of the spoiler activation rod. The spoiler cables will need to be pulled slightly to reach the loop on the wire. -
Page 16: Apply The Decals
If, after and reposition them so they are centered. Reinstall the you have become accustomed to the way the Spirit 100 screws that hold on the servo arms. ARF flies, you would like to change the throws to suit your ❏... -
Page 17: Balance The Model Laterally
Balance the Model Laterally AMA SAFETY CODE ( EXCERPTS ❏ 1. With the wing level, have an assistant help you lift the Read and abide by the following excerpts from the Academy model by the tip of the fuse and the bottom of the fin. Do this of Model Aeronautics Safety Code. -
Page 18: Check List
❏ 5. Confirm that all controls operate in the correct direction A hi-start is the most common way to launch your Spirit 100 and the throws are set up according to the manual. ARF. Follow the directions that came with the hi-start and lay ❏... -
Page 19: First Flights
This way of programming the switch is great for good thermal- days or days with a lot of wind where you might need the The Spirit 100 ARF is a very gentle plane that flies well in reflex capability for zooming up wind. The other way we set light to moderate winds. -
Page 20: Thermal Soaring
the air above the darker areas to be warmer than the air over characteristics. Flaps can be very useful during contest the lighter areas and the more buoyant warm air rises as the landings. They allow you to bring the sailplane in for a landing cooler, denser air forces its way underneath the warmer air.
Need help?
Do you have a question about the Spirit 100 and is the answer not in the manual?
Questions and answers