Table of Contents
Advertisement
Quick Links
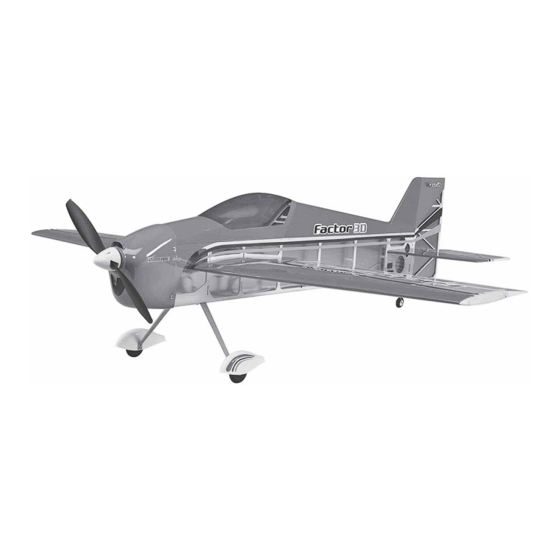
SPECIFICATIONS
Wingspan: 38 in [965mm]
Length: 41.5 in [1055mm]
Weight: 28– 32 oz [795– 905 g]
Wing Area: 375 in
Wing Loading: 10.8– 12.3 oz/ft
WARRANTY
Great Planes
®
Model Manufacturing Co. guarantees this kit to
be free from defects in both material and workmanship at the
date of purchase. This warranty does not cover any component
parts damaged by use or modification. In no case shall Great
Planes' liability exceed the original cost of the purchased kit.
Further, Great Planes reserves the right to change or modify this
warranty without notice.
In that Great Planes has no control over the final assembly or
material used for final assembly, no liability shall be assumed nor
accepted for any damage resulting from the use by the user of
the final user-assembled product. By the act of using the
user-assembled product, the user accepts all resulting liability.
If the buyer is not prepared to accept the liability associated
with the use of this product, the buyer is advised to return
READ THROUGH THIS MANUAL BEFORE STARTING CONSTRUCTION. IT CONTAINS IMPORTANT
INSTRUCTIONS AND WARNINGS CONCERNING THE ASSEMBLY AND USE OF THIS MODEL.
®
Entire Contents © 2013 Hobbico,
Inc. All rights reserved.
INSTRUCTION MANUAL
Radio: Four channel (minimum)
2
2
[24.2 dm
]
2
2
[33– 38 g /dm
Five channel computer radio
with mixing capabilities
(for separate ailerons)
]
this kit immediately in new and unused condition to the
place of purchase.
To make a warranty claim send the defective part or item to
Hobby Services at the address below:
Include a letter stating your name, return shipping address, as
much contact information as possible (daytime telephone
number, fax number, e-mail address), a detailed description of
the problem and a photocopy of the purchase receipt. Upon
receipt of the package the problem will be evaluated as quickly
as possible.
Motor: RimFire .10 (35-30-1250)
Hobby Services
3002 N. Apollo Dr. Suite 1
Champaign IL 61822 USA
Champaign, Illinois
(217) 398-8970, Ext 5
airsupport@greatplanes.com
GPMA1552 Mnl
Advertisement
Table of Contents

Related Manuals for GREAT PLANES FACTOR 3D


Summary of Contents for GREAT PLANES FACTOR 3D
-
Page 1: Instruction Manual
3002 N. Apollo Dr. Suite 1 Champaign IL 61822 USA In that Great Planes has no control over the final assembly or material used for final assembly, no liability shall be assumed nor Include a letter stating your name, return shipping address, as... -
Page 2: Table Of Contents
AMA chartered clubs across the country. Contact the AMA at the address or toll-free phone number below: The Factor 3D EP ARF was designed from the ground up to provide one of the best fl ying 3D airplanes available today. -
Page 3: Decisions You Must Make
4.5 SF propeller. (GPMQ6660) ❍ APC 10 4.7 SF propeller. (APCQ5015) This is a partial list of items required to fi nish the Factor 3D EP ARF that may require planning or decision making before starting to build. Flight Battery... -
Page 4: Additional Items Required
This is the list of adhesives and building supplies required to your experience to decide what type of glue to use. When fi nish the Factor 3D EP ARF. Order numbers are provided in a specifi c type of adhesive works best for that step, the parentheses. -
Page 5: Kit Contents
Be certain to specify the order number exactly as listed in the REPLACEMENT PARTS LIST Replacement Parts List. Payment by credit card or personal Order No. Description check only; no C.O.D. GPMA2100 Fuselage If additional assistance is required for any reason contact GPMA2101 Wing Set Product Support by e-mail at productsupport@greatplanes. -
Page 6: Preparations
Apply pressure over sheeted areas to thoroughly bond the covering to the wood. Caution: The Factor 3D EP ARF was designed to be strong where needed, but light weight for excellent fl... -
Page 7: Assemble The Fuselage
❏ ❏ 6. Install and then remove a #2 3/8" [10 mm] screw into each of the holes you have drilled. Apply a drop of thin CA into the holes to harden the threads. Once the glue has cured, secure the control horn to the aileron with the screws. ❏... -
Page 8: Install The Stab And Elevator
in the back of the fuselage. Take the string from the back of the fuselage and pull it through the lower servo opening on the left side of the fuselage. From the right side of the fuselage install the elevator servo lead through the servo opening and out of the fuselage through the rudder servo opening on the left side of the fuselage. - Page 9 ❏ 3. Once properly positioned mark the sides of the fuselage onto the top and bottom of the stab with a fi ne tip felt tip marker. Remove the stab from the fuselage and cut the covering from the center of the stab as shown. When cutting the covering DO NOT CUT INTO THE HORIZONTAL STAB! THIS WILL WEAKEN THE STRUCTURE.
- Page 10 ❏ 6. Locate six hinges. Insert a T-pin through the center of each hinge. ❏ ❏ 9. Cut the mounting plate from the control horn. Place the control horn in line with the elevator servo arm. Position the horn on the elevator the same as was done with the ailerons. Mark the location of the mounting holes onto the aileron.
-
Page 11: Install The Motor, Speed Control And Receiver
pushrod where it crosses the aileron servo arm. Make a 90° bend at the mark. Cut the pushrod 3/8" [9.5 mm] past the bend. Attach the pushrod to the elevator servo arm with a nylon Faslink. ❏ 12. Repeat steps 9-11 for the rudder pushrod installation. Install the Motor, Speed Control and Receiver ❏... -
Page 12: Install The Cowl
❏ ❏ 3. Slide the cowl onto the fuselage. Slide the spinner back 3. Cut the remaining adhesive-backed hook and loop plate onto the motor shaft. Depending on your brand of motor fastener to fi t the receiver. Apply the receiver inside the fuselage. you may need to enlarge the hole in the back plate. -
Page 13: Install The Wheel And Wheel Pants
Install the Wheel and Wheel Pants ❏ ❏ 1. Secure the wheel pant to the landing gear with a 2-56 1" [2 25 mm] screw and 2-56 nylon stop nut. ❏ 3. Locate the parts shown. Install the set screw into the wheel collar. -
Page 14: Apply The Decals
placement of the decals. The following tips may be useful for applying them. ❏ 1. Be certain the model is clean and free from oily fi ngerprints and dust. Prepare a dishpan or small bucket with a mixture of liquid dish soap and warm water—about one teaspoon of soap per gallon of water. -
Page 15: Finish The Model
fi rst fl ights. If, after you have become improve the smoothness and stability, but the model may accustomed to the way Factor 3D EP fl ies, you would like to then require more speed for takeoff and make it more diffi cult change the throws to suit your taste, that is fi... -
Page 16: Balance The Model Laterally
If additional weight assistant holding the model, using hand signals to show you is required, use Great Planes (GPMQ4485) “stick-on” lead. A what is happening. If the control surfaces do not respond good place to add stick-on nose weight is to the motor box correctly, do not fl... -
Page 17: Radio Control
● Follow the charging instructions included with your charger CHECK LIST for charging LiPo batteries. LiPo batteries can cause serious damage if misused. During the last few moments of preparation your mind may ● Never charge LiPo batteries unattended. be elsewhere anticipating the excitement of the fi rst fl ight. Because of this, you may be more likely to overlook certain checks and procedures that should be performed before the AMA SAFETY CODE EXCERPTS... -
Page 18: Takeoff
CAUTION (THIS APPLIES TO ALL R/C AIRPLANES): If, while fl ying, you notice an alarming or unusual sound such Take it easy with the Factor 3D EP ARF for the fi rst fl ight, as a low-pitched “buzz,” this may indicate control surface gradually getting acquainted with it as you gain confi... - Page 19 and the model is a foot or so off the deck, smoothly increase out of time, altitude or airspeed. Every maneuver should be up elevator until it gently touches down. Once the model is deliberate, not impulsive. For example, if you’re going to do a on the runway and has lost fl...
- Page 20 ® Entire Contents © 2013 Hobbico, Inc. All rights reserved. GPMA1552 Mnl...
Need help?
Do you have a question about the FACTOR 3D and is the answer not in the manual?
Questions and answers