Table of Contents
Advertisement
Quick Links
TM
INSTRUCTION MANUAL
WARRANTY
Great Planes
®
Model Manufacturing Co. guarantees this kit to be free from defects in both material and workmanship at the date of
purchase. This warranty does not cover any component parts damaged by use or modification. In no case shall Great Planes'
liability exceed the original cost of the purchased kit. Further, Great Planes reserves the right to change or modify this warranty
without notice.
In that Great Planes has no control over the final assembly or material used for final assembly, no liability shall be assumed nor accepted
for any damage resulting from the use by the user of the final user-assembled product. By the act of using the user-assembled product,
the user accepts all resulting liability.
If the buyer is not prepared to accept the liability associated with the use of this product, the buyer is advised to return this
kit immediately in new and unused condition to the place of purchase.
READ THROUGH THIS MANUAL BEFORE
STARTING CONSTRUCTION. IT CONTAINS
IMPORTANT WARNINGS AND INSTRUCTIONS
CONCERNING THE ASSEMBLY AND USE OF
P.O. Box 788
Urbana, IL 61803
(217) 398-8970
THIS MODEL.
www.greatplanes.com
© Copyright 1999
SPELP02 for Kit GPMA0535 V1.0
Advertisement
Table of Contents

Related Manuals for GREAT PLANES Spirit Elite


Summary of Contents for GREAT PLANES Spirit Elite
-
Page 1: Instruction Manual
In that Great Planes has no control over the final assembly or material used for final assembly, no liability shall be assumed nor accepted for any damage resulting from the use by the user of the final user-assembled product. By the act of using the user-assembled product, the user accepts all resulting liability. -
Page 2: Types Of Wood
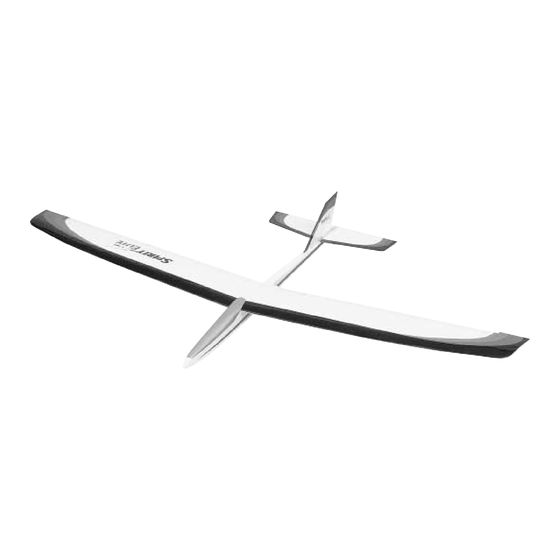
The SPIRIT ELITE’S wing uses the SA7035 airfoil at the root blending to the SA7036 airfoil at the tip. This combination gives the aircraft a superior Lift to Drag (L/D) ratio with... - Page 3 DIE-CUT PATTERNS...
- Page 4 ASSEMBLE THE TAIL Cover the stabilizer and elevator plan with Great Planes Plan Protector or wax paper. Medium (When you see this symbol use the suggested CA.) Step 2 Step 1 Thin (When you see this symbol use the suggested CA.)
- Page 5 (LE) and tips. Thin Step 11 Step 12 BEVEL THE LEADING EDGE (LE) SAND THE ELEVATOR Step 13 Step 14 Cover the fin and rudder plan with Great Planes Plan Protector or wax paper. Thin Step 15 Step 16...
-
Page 6: Table Of Contents
Thin Thin Step 17 Step 18 Thin Step 19 Step 20 Sand the fin and rudder smooth. Round the LE of the fin. Thin Step 21 Step 22 SAND THE RUDDER TO A TAPER Step 23... -
Page 7: Step
ASSEMBLE THE FUSELAGE Medium Cover the fuselage plan with Great Planes Plan Protector or wax paper. Thin Make sure the fuselage lines up straight. Step 1 Step 2 Medium Medium Step 3 Step 4 Thin Thin Step 5 Step 6... - Page 8 Make sure the three punch Use rubber bands to hold the marks on F9, face the inside fuselage together. Make sure of the fuselage. the fuselage is straight and then glue. Make sure the fuselage is straight before gluing. Thin Step 9 Step 10 Medium...
- Page 9 WING JOINERS 1/16" [1.6mm] PLY JOINER CAPS Glue and clamp the wing joiner together using 30-minute epoxy. Wipe off any excess epoxy before it cures. Step 1 Cover the wing plan with Great Planes Plan Protector or wax paper. Step 2...
- Page 10 Cut the 1/8" x 3/4" x 12-1/2" [3.2mm x 19mm x 317mm] plywood to make the joiner box parts 1/8" [3.2mm ] PLY JOINER BOX Step 3 Position the 1/8" x 5/16" x 40" [3.2mm x 8mm x 1016mm] spars over the plan. Cut the spars at rib 9.
-
Page 11: Step
BUILD THE INBOARD PANEL SPAR Shim the spar up from the table using 1/16" [1.6mm] balsa. (Use leftover pieces Step 6 from the rib die sheets.) Thin 3/16" [4.8mm] SQUARE Use pieces of the 3/16" x 3/16" balsa sticks as rib jigs to hold BALSA RIB JIGS the ribs in place for the steps that follow. -
Page 12: Step
Line up the LE. 1/16" X 3/8" X 42" [1.6mm X 9.5mm X 1067mm] 1/8" X 1/2" X 42" SUB LE [3.2mm X 12.7mm X 1067mm] BALSA WING TE Center the TE on the ribs. Step 9 Thin Use 30-minute epoxy to glue the joiner box to the spars. -
Page 13: Step
POLYHEDRAL WING Cut the fiberglass cloth into four 4” [100mm] pieces. Use the polyhedral gauge Attach part of the fiberglass cloth to the spars only if you are building using thin CA. You will finish this Thin the polyhedral wing. step after you remove the panel from the table. -
Page 14: Step
1/16" X 3" X 24" [1.6mm X 76mm X 610mm] BALSA SHEET Use the ply hatch as a template for cutting the hole for the flap servo. Cut from 1/16" X 3" X 24" [1.6mm X 76mm X 610mm] W20 1/16" [1.6mm] BALSA SHEET PLY HATCH Step 17... -
Page 15: Step
1/16" X 3" X 24" [1.6mm X 76mm X 610mm] BALSA SHEET Install the top center sheeting. Step 22 Medium Trim off and sand the leading edge smooth. Sand the root and the outer ribs smooth. Cut 2-1/2" [63.5mm] from one of the 1-3/4" x 24" [44.4mm x 610mm] balsa triangles and glue in place at the wing root. -
Page 16: Step
Position the 1/8" [3.2mm] BUILD THE 1/8" [3.2mm] spars over the plan. OUTER PANEL Cut the spars straight with rib 9. Step 26 1/16" [1.6mm] SHIMS Step 27 Thin 1/16" X 3/8" X 42" [1.6mm X 9.5mm X 1067mm] BALSA LE (Left over from the inner panel.) Make rib jigs from the 3/16"... -
Page 17: Step
1/16" X 3" X 24" [1.6mm X 76mm X 610mm] BALSA SHEETING 1/16" X 3/8" X 42" [1.6mm X 9.5mm X 1067mm] Medium BALSA TE SHEETING aliphatic wood glue Step 30 Install 1/16" [1.6mm] balsa sheeting Install the servo rails. around the servo hatch. -
Page 18: Step
Trim excess sheeting. Step 34 Step 35 Thin 1/16" X 3" X 24" [1.6mm X 76mm X 610mm] BALSA SHEETING 1/16" X 3/8" X 42" [1.6mm X 9.5mm X 1067mm] BALSA TE SHEETING Step 36 Trim off the excess sheeting and sand smooth. -
Page 19: Step
STRAIGHT WING Join the tip panel to the root panel using epoxy and the straight W19 1/16" [1.6mm] ply joiner. Sand the root and tip ribs smooth. Step 38 Join the tip panel to the root POLYHEDRAL WING panel using epoxy and the W18 1/16"... -
Page 20: Step
Cut 2-1/2" [63.5mm] from a 1-3/4" x 24" [44.4mm x 610mm] balsa triangle. Glue and shape the balsa Bevel the LE so the balsa will wing tip to the tip panel. follow the shape of the rib. Step 41 Step 42 Medium Medium Make an aileron and a flap from the leftover... -
Page 21: Step
Carefully tap the two holes. Reinforce the threads with thin CA and retap. Enlarge the holes 10-24 TAP in the wing. Step 47 Step 48 Thin FINISHING Build the canopy. Glue the canopy parts together. Be carful not to glue them to the fuselage. Glue the plywood C2 doubler Trim and sand C1 and to C1 balsa canopy base. -
Page 22: Step
Trim the plastic canopy to fit the canopy Sand the nose block to shape. frame and fuselage. (See plan) Step 5 Step 6 Medium 1/8" [3mm] DRILL BIT Drill 3 holes in F9 - 1/16" # 2 X 3/8" [9.5mm] SCREW [1.6mm] ply tow hook mount. -
Page 23: Step
Bevel the leading edge of the rudder as shown Hold the flaps and ailerons on the plan. in place and mark the locations for the control horn plate (W22). Step 11 Step 12 Cut out the balsa and glue in the W22 ply control horn plate. -
Page 24: Step
Installing CA Hinges for the Rudder The Rudder in this kit is attached using two CA hinges where shown on the plans. TEMPORARY PIN TO KEEP HINGE CENTERED DRILL A 3/32" HOLE 1/2" DEEP, IN CENTER OF HINGE SLOT ASSEMBLE, THEN APPLY 6 DROPS OF THIN CA TO CENTER OF HINGE, ON BOTH SIDES It is best to leave a very slight hinge gap, rather than closing it up tight. -
Page 25: Step
Align the stabilizer so that it is parallel with the wing. When satisfied with the fit, glue in place with epoxy. Step 18 Position the fin so it is straight with the MONOKOTE OR fuselage. Remove the covering where STRONG TAPE HINGE the fin rests on the fuselage. - Page 26 Wrap the receiver and battery in foam. Install the switch inside the fuselage, next to the receiver. Step 23 1" [25.4mm] THREADED WIRE INNER PUSHROD TUBE NYLON CLEVIS AND CLEVIS RETAINER Step 24 METAL CLEVIS 1" [25.4mm] NYLON BACKPLATE THREADED WIRE Line up the control horns with the pushrods.
- Page 27 Add BB’s or lead to the nose. CONTROL SURFACE THROWS Hold the SPIRIT ELITE under the wing with the nose pointed slightly down and directly into the wind. Launch the Use these control throws for your first flights.
- Page 28 The other way we set this switch is to have the “back” position for neutral camber, the middle position for a slight amount of positive The SPIRIT ELITE is a very gentle plane that flys well in camber (1/32”(1mm) - 1/16”(2mm)), and the forward position for light to moderate winds.
- Page 29 FACTS ABOUT THERMALS THERMAL SOARING Thermals are a natural phenomenon that happen outside, As the glider approaches a thermal, the wing tip that by the millions, every single day of the year. Thermals are reaches the rising air first will be lifted before the opposite responsible for many things including forming several types wing tip.
- Page 30 control your skid. Flaps will stop the plane from sliding a have a lot of thermal activity. Center the weight directly on little quicker. You can also “steer” the plane while it is sliding the center of gravity of the plane so you can add ballast along the ground.
- Page 31 Extend your airtime indefinitely with a Great Planes sailplane...there's always more as close as the next thermal! Like the Spirit Elite, the Spirit 100 and Spectra both offer fast, easy assembly, made even more enjoyable by Great Planes' perfectly interlocking wood parts, photo-illustrated instruction manuals and premium quality hardware. Both include canopy and molded cockpit.
- Page 32 BUILDING NOTES Kit Purchased Date: _______________________ Date Construction Finished: _________________ Where Purchased:_________________________ Finished Weight: __________________________ Date Construction Started: __________________ Date of First Flight: ________________________ FLIGHT LOG PRINTED IN USA...
Need help?
Do you have a question about the Spirit Elite and is the answer not in the manual?
Questions and answers