AGA Little Wenlock Classic Installation And Operating Instructions Manual
Solid fuel stove
Hide thumbs
Also See for Little Wenlock Classic:
Table of Contents
Advertisement
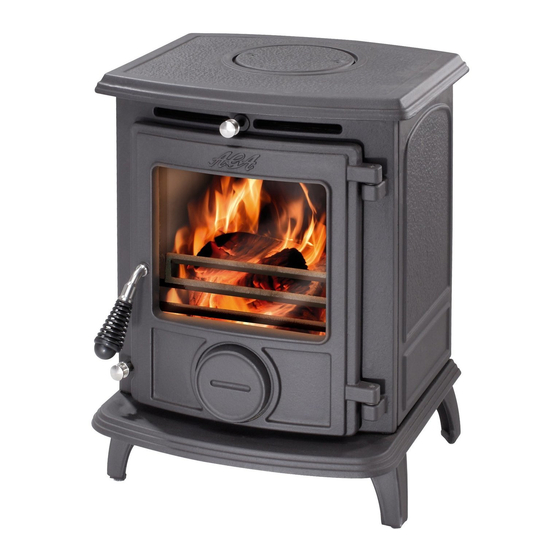
Little Wenlock Classic
Solid Fuel Stove
This appliance is hot while in operation and retains its heat for a long period of time after use.
Children, aged or infirm persons should be supervised at all times and should not be allowed
to touch the hot working surfaces while in use or until the appliance has thoroughly cooled.
When using the stove in situations where children, aged and/or infirm persons are
present a fireguard must be used to prevent accidental contact with the stove. The fireguard
should be manufactured in accordance with BS 6539.
INSTALLATION AND OPERATING INSTRUCTIONS
Advertisement
Table of Contents

Subscribe to Our Youtube Channel
Related Manuals for AGA Little Wenlock Classic


Summary of Contents for AGA Little Wenlock Classic
- Page 1 Little Wenlock Classic Solid Fuel Stove This appliance is hot while in operation and retains its heat for a long period of time after use. Children, aged or infirm persons should be supervised at all times and should not be allowed to touch the hot working surfaces while in use or until the appliance has thoroughly cooled.
-
Page 2: Table Of Contents
TABLE OF CONTENTS PAGE NO. General ............. . Handling . -
Page 3: General
LITTLE WENLOCK CLASSIC SOLID FUEL NON-BOILER STOVE INSTALLATION & OPERATING INSTRUCTIONS IMPORTANT WARNING: This stove must not be NOTE: Please note that it is a legal requirement installed into a chimney that serves any other under England & Wales Building Regulations that heating appliance. -
Page 4: Chimney
suitable stainless steel flue liner. Where a masonry 2300 Fig.1 chimney is not available a proprietary type 150mm twin wall, fully insulated pipe may be used. The pipe must terminate at a point not lower than the main ridge of adjacent outside obstructions. With such installation, access to the chimney must be provided for cleaning purposes. -
Page 5: Down Draughts
Fig.3 VENTILATION AND COMBUSTION AIR REQUIREMENTS This appliance is rated less than 5kW. There is no additional air requirement unless a flue draught sta- biliser is fitted then the air requirement is 15cm When calculating combustion air requirements for this appliance use the following equation: 550mm per each kW of rated output above 5 kW should be provided, where a flue draught stabiliser is used the total free area shall be increased by 300mm... -
Page 6: Permanent Air Vent
If spillage occurs following the above operation, an LOCATION additional air vent of sufficient size to prevent this occurrence should be installed. There are several conditions to be considered in selecting a location for your stove. PERMANENT AIR VENT A. Position in the area to be heated - central loca- The stove requires an adequate air supply in order tions are usually best. -
Page 7: Lighting
DO NOT BURN MANUFACTURED SMOKELESS LIGHTING FUELS WITH THIS SUPPLEMENTARY GRATE IN PLACE AS DAMAGE AND POOR PERFOR- Check that all controls and catches are operating MANCE WILL RESULT. correctly and ensure that all flue connections are thoroughly sealed. Open the spin valve fully and pull Fig.6 the secondary air slide to fully open. -
Page 8: Recommended Fuels
RE-FUELLING Fig.9 When refuelling with manufactured smokeless fuel riddle the fire by connecting the grate operating tool onto the rocker connection located at the bottom front of the stove, then gently pull and push the rock- er arm until all dead ash has fallen through into the ashpan. -
Page 9: Slow Burning
SLOW BURNING CHIMNEY CLEANING To achieve slow burning when burning wood close Chimney and connector should be cleaned at least the secondary air slide and open a few millimetres twice a year. Once before heating season and once using the tool provided. Slow burning will cause the after. -
Page 10: Important Notes
IMPORTANT NOTES Now that your Solid Fuel stove is installed and no doubt you are looking forward to many comforts it will pro- vide, we would like to give you some tips on how to get the best results from your stove. 1. -
Page 11: Lighting
Before lighting the stove check with the installer that the installation work and commissioning checks described in the installation instructions have been carried out correctly and that the chimney has been swept clean, is sound and free from any obstructions. As part of the stoves commission- ing and handover the installer should demonstrate how to operate the stove correctly. -
Page 12: Glass - Cleaning & Replacement
GLASS 1. How to clean: The glass will clean itself when there is sufficient heat generated by burning fuel. If a build-up of cre- osote occurs on the glass it may be due to draft con- ditions, poor quality fuel or very slow burning for along time. -
Page 13: Exploded View
WOOD BURNING PLATE GRATE SIDE BRICK SPIN VALVE BACK BRICK HANDLE ASSEMBLY DOOR ASSEMBLY HINGE PIN AIR WASH ASSEMBLY WINDOW GLASS CLIP DATA PLAQUE GLASS GRATE SUPPORT PLATE Aga, Station Road, Ketley, Telford, Shropshire, TF1 5AQ, Rev: 002 DP 120904...
Need help?
Do you have a question about the Little Wenlock Classic and is the answer not in the manual?
Questions and answers