
Related Manuals for Community R.15COAX


Summary of Contents for Community R.15COAX
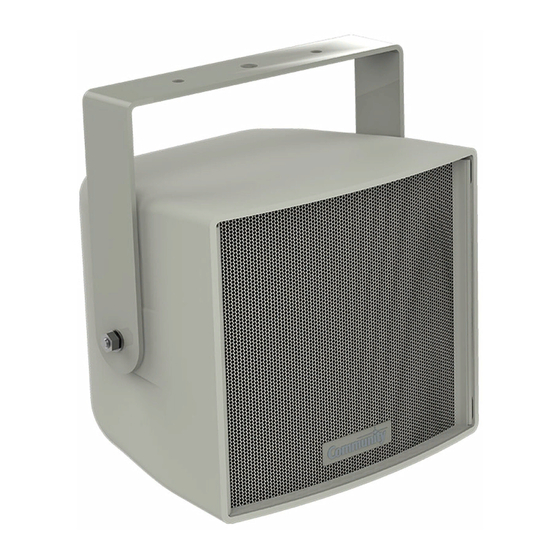
- Page 1 R-Series Installation and Operation Manual Models: R.15COAX, R.35COAX, R.35-3896 WEATHER-RESISTANT • R-SERIES...
-
Page 2: Important Safety Instructions
CAUTION: Installation of R-Series loudspeakers should only be performed by trained and qualified personnel. It is strongly recommended that a licensed and certified professional structural engineer approve the mounting. Severe injury and/or loss of life may occur if this product is improperly installed. Page 2 Installation and Operation Manual R.15COAX, R.35COAX, R.35-3896... -
Page 3: Unpacking And Inspection
Community R-Series loudspeakers are engineered and PHYSICAL FEATURES / GENERAL DESCRIPTION manufactured to be rugged and they are carefully packed The R.15COAX and R.35COAX are two-way, full-range in sturdy cartons. Make sure that the number of cartons loudspeaker systems, and the R.35-3896 is a three-way shown on the freight documents have actually been full-range loudspeaker. -
Page 4: Product Features Identification
Safety Attachment Point (user must supply appropriate fastener and safety cable) 8mm Rigging Points Internal Transformer Mounting Bolts (2 sides) 3.5 x 19mm Pan (Do not adjust) Head Screws (x6) FRONT REAR Page 4 Installation and Operation Manual R.15COAX, R.35COAX, R.35-3896... -
Page 5: Rigging / Suspension And Safety
NON-COMMUNITY RIGGING HARDWARE: Non-Community hardware used for rigging an R-Series loudspeaker must be certified by the supplier for such use and must be properly rated for safety. Enclosure Figure 1. Mounting point load R.15COAX, R.35COAX, R.35-3896 Installation and Operation Manual Page 5... -
Page 6: Installation
Orient angled R.35 Yoke side to the rear of the loudspeaker Figure 2b. Orient the R.35 yoke correctly Page 6 Installation and Operation Manual R.15COAX, R.35COAX, R.35-3896... - Page 7 R-Series mounting were to fail. R.15 Attach safety cable here R.35 Figure 4. Attach the safety cable R.15COAX, R.35COAX, R.35-3896 Installation and Operation Manual Page 7...
-
Page 8: Wiring And Electrical Safety
Important Note: If the NL4 connection is used then the weatherproof cover cannot be attached. Direct connection to the terminal strips is the preferred connection method for all permanent or outdoor applications. Page 8 Installation and Operation Manual R.15COAX, R.35COAX, R.35-3896... -
Page 9: Input Panel Connections
Power and test the system. Pan Head Screws Wire Gland Nut (Nut) Input panel Figure 6. Weather cover attachment (R.15 shown) R.15COAX, R.35COAX, R.35-3896 Installation and Operation Manual Page 9... -
Page 10: Field Service
Unhook grille tether to fully remove grille Insert thin blade of screwdriver between frame and enclosure and move down seam while twisting to pop grille loose Figure 7. Remove grille (R.15 shown) Page 10 Installation and Operation Manual R.15COAX, R.35COAX, R.35-3896... -
Page 11: Maintaining Weather Resistance
The grille is not designed to withstand such things as being directly sprayed from a hose; therefore this should be avoided. • If you use any hardware in place of hardware provided with your R-Series loudspeaker, it should also be made of stainless steel. NOTES: R.15COAX, R.35COAX, R.35-3896 Installation and Operation Manual Page 11... -
Page 12: Specifications
However, due to ongoing technical advances, changes or modifications may have occurred that are not covered in this manual. Visit Community at http://www.communitypro.com for the latest version of this manual and the most recent product information. Page 12 Installation and Operation Manual R.15COAX, R.35COAX, R.35-3896... -
Page 13: Technical Drawings
Sides 10.38" (263.7 mm) 5.2" (131.8 mm) Ø 0.51" (Ø 13 mm) Ø 0.35" (Ø 9 mm) Ø 0.35" (Ø 9 mm) 2.6" (66 mm) 2.6" (66 mm) Yoke Hole Dimensions R.15COAX, R.35COAX, R.35-3896 Installation and Operation Manual Page 13... - Page 14 6.06" (153.9 mm) 1.58" (40 mm) 0.98" (25 mm) Ø 0.35" (Ø 9 mm) 8 places 2.6" (66 mm) 2.6" (66 mm) 4.65" (118.1 mm) 4.65" (118.1 mm) Yoke Hole Dimensions Page 14 Installation and Operation Manual R.15COAX, R.35COAX, R.35-3896...
-
Page 15: Warranty Information
EC STATEMENT OF CONFORMITY This document confirms that the range of products of Community Professional Loudspeakers bearing the CE label meets all of the requirements in the EMC directive 89/336/EEC laid down by the Member States Council for adjustment of legal requirements. - Page 16 R-Series ©2013 Community Professional Loudspeakers v: 27AUG2013 Community Professional Loudspeakers 333 East Fifth Street, Chester, PA 19013-4511 USA Phone: (610) 876-3400 • Fax: (610) 874-0190 www.communitypro.com...
Need help?
Do you have a question about the R.15COAX and is the answer not in the manual?
Questions and answers