Victron energy Quattro 12/5000/200 User's Manual & Installation Manual
Extremely powerful sine inverter, battery charger and automatic switch
Hide thumbs
Also See for Quattro 12/5000/200:
Table of Contents

Related Manuals for Victron energy Quattro 12/5000/200


Summary of Contents for Victron energy Quattro 12/5000/200
-
Page 1: User Manual
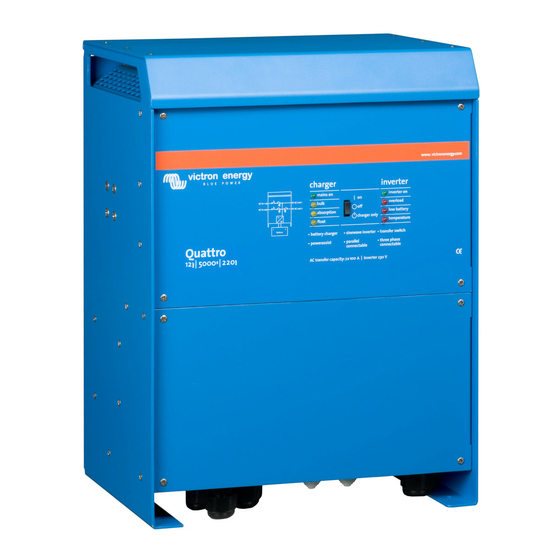
USER MANUAL INSTALLATION MANUAL Quattro 12/5000/200 Quattro 24/5000/120 Quattro 48/5000/70 Remark: DIP switch functionality has changed with respect to the MultiPlus product. Parallel and 3-phase systems can be now configured with DIP switches. -
Page 2: Safety Instructions
1. SAFETY INSTRUCTIONS In general Please read the documentation supplied with this product first, so that you are familiar with the safety signs en directions before using the product. This product is designed and tested in accordance with international standards. The equipment should be used for the designated application only. - Page 3 2. DESCRIPTION 2.1 In general The basis of the Quattro is an extremely powerful sine inverter, battery charger and automatic switch in a compact casing. The Quattro features the following additional, often unique characteristics: Two AC inputs; integrated switch-over system between shore voltage and generating set The Quattro features two AC inputs (AC-in-1 and AC-in-2) for connecting two independent voltage sources.
- Page 4 More on batteries and charging Our book ‘Elektriciteit aan boord’ [Electricity on board] offers further information on batteries and battery charging, and is available free of charge at Victron Energy (see www.victronenergy.com ). For more information on adaptive charging characteristics, please refer to...
-
Page 5: Operation
3. Operation 3.1 “On / stand by / charger only” switch When the switch is switched to “on”, full device operation is initiated. The inverter will turn on, and the “inverter on” LED will light. If voltage is applied to the AC-in-1 or AC-in-1 connection, these will be switched through to the AC-out-1 and AC-out-2 connections after checking and approval. - Page 6 3.4 LED indications and their meaning LED off LED flashes LED lights Inverter charger inverter mains on inverter on The inverter is on, and supplies bulk overload power to the load. absorption low battery charger only float temperature charger inverter mains on inverter on The nominal power of the inverter is...
- Page 7 absorption low battery charger only float temperature charger inverter mains on inverter on The inverter is switched off due to bulk overload excessively high internal temperature. absorption low battery charger only float temperature...
-
Page 8: Battery Charger
charger inverter – If the LEDs flash alternately, the mains on inverter on battery almost empty and nominal power is exceeded. bulk overload – If “overload” and “low battery” flash simultaneously, there is an absorption low battery excessively high ripple voltage at charger the battery connection. - Page 9 charger inverter mains on inverter on The AC voltage on AC-in-1 or AC-in-2 is switched through, and bulk overload the charger operates in equalisation mode. absorption low battery charger only float temperature...
-
Page 10: Special Indications
Special indications Set with limited input current charger inverter mains on inverter on The AC voltage on AC1-in-1 or AC-in-2 is switched through. The bulk overload AC-input current is equal to the load current. The charger is down- absorption low battery controlled to 0A. -
Page 11: Installation
4. Installation This product may only be installed by a qualified electrical engineer. 4.1 Contents of the box The Quattro box contains the following: Quattro inverter/battery charger • User manual • Installation manual • Suspension bracket • Temperature sensor • Warning sticker for battery charging •... - Page 12 4.4 Connecting the battery leads In order to use the full potential of the Quattro, batteries of sufficient capacity and battery leads with the correct cross-section should be used. See table: 12/5000/200 24/5000/120 48/5000/70 Recommended battery capacity 800–2400 400–1400 200–800 (Ah) Recommended DC fuse 750A...
-
Page 13: Connection Options
AC-out-1 (see appendix A) The load is connected to these terminals. If AC voltage is available on AC-in-1 or AC-in-2, AC-out-1 will be connected through with AC- in-1 (priority input) or AC-in-2. If no AC voltage is available, AC-out-1 will be supplied by the inverter. An earth leakage circuit breaker and an automatic fuse for a maximum of 63A must be included in series with AC-out-1. - Page 14 4.6.6 Connecting Quattros in parallel (see appendix C) The Quattro can be connected in parallel with several identical devices. To this end, a connection is established between the devices by means of standard RJ45 UTP cables. The system (one or more Quattro’s plus optional control panel) will require subsequent configuration (see Section 5).
- Page 15 5. Configuration Settings may only be changed by a qualified electrical engineer. • Read the instructions thoroughly before implementing changes. • During setting of the charger, the DC fuse in the battery connections must • be removed. 5.1 Standard settings: ready for use On delivery, the Quattro is set to standard factory values.
- Page 16 Inverter voltage Output voltage of the Quattro in battery operation. Adjustability: 210 – 245V Stand-alone / parallel operation / 2-3 phase setting Using several devices, it is possible to: increase total inverter power (several devices in parallel) • create a split-phase system (only for Quattro units with 120V output voltage) •...
- Page 17 Not adjustable with DIP switches. BoostFactor Change this setting only after consulting with Victron Energy or with an engineer trained by Victron Energy! Not adjustable with DIP switches. Multi-functional relay By default, the multi-functional relay is set as an alarm relay, i.e.
-
Page 18: Configuration By Computer
A RJ45 UTP cable and the MK2.2b RS485-to-RS232 interface. If your computer has no RS232 connection, but does have USB, you will also need a RS232-to-USB interface cable. Both are available from Victron Energy. 5.3.1 VE.Bus Quick Configure Setup VE.Bus Quick Configure Setup is a software program with which one Quattro unit or systems with a maximum of three Quattro units... - Page 19 5.5 Configuration with DIP switches A number of settings can be changed using DIP switches (see appendix A, position M). This is done as follows: Turn the Quattro on, preferably unloaded en without AC voltage on the inputs. The Quattro will then operate in inverter mode. Step 1: Setting the DIP switches for: - the required current limitation of the AC inputs.
- Page 20 5.5.1.3 Charging current limitation (default setting 75%) For maximum battery life, a charging current of 10% to 20% of the capacity in Ah should be applied. Example: optimal charging current of a 24V/500Ah battery bank: 50A to 100A. The temperature sensor supplied automatically adjusts the charging voltage to the battery temperature. If faster charging –...
- Page 21 DIP switches ds2 and ds1 are reserved for the selection of stand-alone, parallel or 3-phase operation Step 1: Setting ds2 and ds1 for stand-alone operation DS-8 AC-in-1 Set as desired DS-7 AC-in-1 Set as desired DS-6 AC-in-1 Set as desired DS-5 AC-in-2 Set as desired DS-4 Charging current Set as desired...
- Page 22 Step 1: Setting ds2 and ds1 for parallel operation Master Slave 1 Slave 2 (optional) DS-8 AC-in-1 Set as desired DS-8 Not relevant DS-8 Not relevant DS-7 AC-in-1 Set as desired DS-7 Not relevant DS-7 Not relevant DS-6 AC-in-1 Set as desired DS-6 Not relevant DS-6 Not relevant DS-5 AC-in-2...
- Page 23 Step 1: Setting ds2 and ds1 for 3-phase operation Leader (L1) Follower (L2) Follower (L3) DS-8 AC-in-1 Set as desired DS-8 Set as desired DS-8 Set as desired DS-7 AC-in-1 Set as desired DS-7 Set as desired DS-7 Set as desired DS-6 AC-in-1 Set as desired DS-6 Set as desired...
- Page 24 5.5.2 Step 2: Other settings The remaining settings are not relevant for slaves. Some of the remaining settings are not relevant for followers (L2, L3). These settings are imposed on the whole system by the leader L1. If a setting is irrelevant for L2, L3 devices, this is mentioned explicitly. ds8-ds7: Setting charging voltages (not relevant for L2, L3) ds8-ds7 Absorption voltage...
-
Page 25: Maintenance
Step 2: Exemplary setting for parallel mode In this example, the master is configured according to factory settings. The slaves do not require setting! Master Slave 1 Slave 2 DS-8 Charging voltage(GEL 14,4V) DS-8 Not relevant DS-8 Not relevant DS-7 Charging voltage(GEL 14,4V) DS-7 Not relevant DS-7 Not relevant DS-6 Absorption time (8 hours) -
Page 26: Error Indications
7 Error indications With the procedures below, most errors can be quickly identified. If an error cannot be resolved, please refer to your Victron Energy supplier. 7.1 General error indications Problem Cause Solution No output voltage on Quattro in inverter mode Remove overload or short circuit on AC-out-2 and AC-out-2. - Page 27 The battery is overcharged. The absorption voltage is set to an Set the absorption voltage to the correct level. incorrect level (too high). The float voltage is set to an incorrect level Set the float voltage to the correct level. (too high).
- Page 28 3) Switch on all other devices one by one until the error message reoccurs. 4) Update the firmware in the last device that was switched on. Internal error. Should not occur. Switch all equipment off, and then on again. Contact Victron Energy if the problem persists.
-
Page 29: Technical Specifications
8. Technical specifications Quattro 12/5000/200 24/5000/120 48/5000/70 PowerControl / PowerAssist Integrated Transfer switch AC inputs (2x) Input voltage range: 187-265 VAC Input frequency: 45 – 55 Hz Power factor: 1 Maximum feed through current (A) INVERTER Input voltage range (V DC) 9,5 –... -
Page 30: Appendix A: Connection Overview
APPENDIX A: Connection overview... - Page 31 APPENDIX A: Connection overview English: A AC input (generator input) AC-in-1. Left to right: L (phase), N (neutral), PE (ground). B 2x RJ45 connector for remote panel and/or parallel and 3-phase operation. C AC output AC-out-1. Left to right: L (phase), N (neutral), PE (ground). D AC output AC-out-2.
-
Page 32: Appendix B: Block Diagram
APPENDIX B: Block diagram... -
Page 33: Appendix C: Parallel Connection
APPENDIX C: Parallel connection... -
Page 34: Appendix D: Three-Phase Connection
APPENDIX D: Three-phase connection... -
Page 35: Appendix E: Charge Characteristics
APPENDIX E: Charge characteristics C h a rg e c u rre n t 1 2 0 % 1 0 0 % 8 0 % A m p s 6 0 % 4 0 % 2 0 % T im e V o l ts C h a r g e v o lta g e T i m e... -
Page 36: Appendix F: Temperature Compensation
APPENDIX F: Temperature compensation 15.0 14.5 14.0 13.5 13.0 Volts Volts 12.5 12.0 11.5 11.0 10.5 10.0 10 15 20 25 30 35 40 45 50 55 60 Battery temperature Default output voltages for Float and Absorption are at 25° C. Reduced Float voltage follows Float voltage and Raised Absorption voltage follows Absorption voltage. -
Page 37: Appendix G: Dimensions
APPENDIX G: Dimensions... - Page 38 Serial number: Distributor: Victron Energy B.V. Phone:+31 (0)36 535 97 00 The Netherlands Fax: +31 (0)36 535 97 40 E-mail:sales@victronenergy.com Web site: http://www.victronenergy.com Article number: ISMQUATTRO5000_GB Version: Date: 20-09-2007...
Need help?
Do you have a question about the Quattro 12/5000/200 and is the answer not in the manual?
Questions and answers