Table of Contents
Advertisement
Advertisement
Chapters
Table of Contents

Related Manuals for SMART Podium 500 Series


Summary of Contents for SMART Podium 500 Series
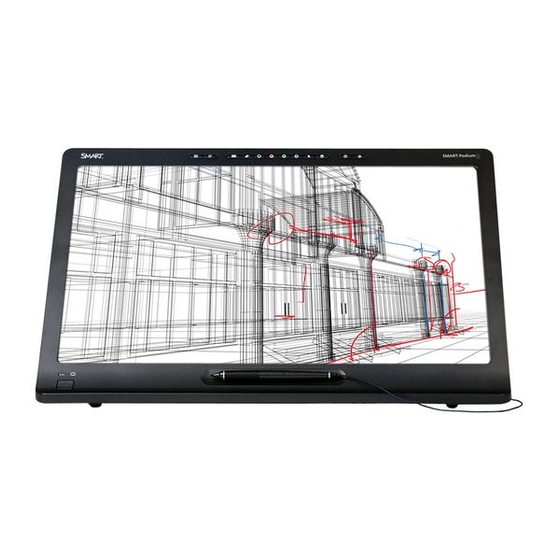
- Page 1 SMART Podium™ 500 Series Interactive pen display User’s guide...
-
Page 2: Product Registration
© 2011 SMART Technologies ULC. All rights reserved. No part of this publication may be reproduced, transmitted, transcribed, stored in a retrieval system or translated into any language in any form by any means without the prior written consent of SMART Technologies ULC. Information in this manual is subject to change without notice and does not represent a commitment on the part of SMART. -
Page 3: Important Information
Important information Before you install and use your interactive pen display, read and understand the safety warnings and precautions in this user’s guide. These safety warnings and precautions describe the safe and correct operation of your interactive pen display and its accessories, helping you to prevent injuries and equipment damage. - Page 4 SMART does not accept any liability for direct or consequential damages. If you transport the interactive pen display over a distance, we strongly urge you to completely repackage it using the original carton.
- Page 5 I M P O R T A N T I N F O R M A T I O N Do not connect or disconnect the video or power cable if the interactive pen display or your computer is on. If you do, you can damage the screen and/or the computer video card. If you move the interactive pen display, adjust the stand to its full upright position, and then use both hands to hold the display unit and the stand separately.
- Page 6 Disconnect the interactive pen display if you will not use it for an extended period. If the interactive pen display requires replacement parts, use parts that are specified by SMART Technologies. Do not expose the interactive pen display to rain or moisture.
-
Page 7: Table Of Contents
Contents Important information Safety warnings and cautions Chapter 1: About your SMART Podium interactive pen display Your interactive pen display features Feature highlights Your SMART Podium interactive pen display Illuminated buttons Control panel Connection panel Chapter 2: Installing your SMART Podium interactive pen display... - Page 8 C O N T E N T S Preventing condensation Chapter 6: Troubleshooting your SMART Podium interactive pen display Checking the power on your interactive pen display Power button indicator issues Checking the status on your interactive pen display Status indicator issues...
-
Page 9: Chapter 1: About Your Smart Podium Interactive Pen Display
Durable surface Cables Security USB disable HDCP Optional accessories Your SMART Podium interactive pen display Illuminated buttons Control panel Connection panel This chapter describes the features of your SMART Podium 500 series interactive pen display and provides information about product parts and accessories. -
Page 10: Your Interactive Pen Display Features
SMART Podium 500 series interactive pen display includes illuminated buttons, a magnetic pen rest, a Smooth Tilt Stand and HDCP compliancy. Your interactive pen display works with your computer and SMART Product Drivers to provide a reliable interactive experience with the content from your computer. -
Page 11: Feature Highlights
You can rest your hand naturally on the interactive display as you write in SMART Ink since the tethered pen is your interactive point of contact on the screen. The tethered pen is battery-free so you never incur additional costs for replacement batteries. -
Page 12: Interactive Surface
Cables Connect your interactive pen display to your computer with the included cables. See the SMART Podium quick connect guide (smarttech.com/kb/170009) for more information. Security Your interactive pen display features a Kensington® security slot on the back of the display. Lock... -
Page 13: Your Smart Podium Interactive Pen Display
Only do this if you want to permanently disable the USB A receptacles. Once the USB receptacles are disabled, you cannot enable them again. HDCP Your SMART Podium 500 series interactive pen display is HDCP 1.3 compliant. Optional accessories For more information on optional accessories, contact your authorized SMART reseller. - Page 14 C H A P T E R 1 About your SMART Podium interactive pen display Component Description Illuminated buttons Press the illuminated buttons for quick access to pen colors and other functions. See Using the illuminated buttons on page 31 for more information.
-
Page 15: Illuminated Buttons
C H A P T E R 1 About your SMART Podium interactive pen display Illuminated buttons Use the following illustration to familiarize yourself with the buttons on the top of your interactive pen display. See Using the illuminated buttons on page 31 for more information. -
Page 16: Control Panel
C H A P T E R 1 About your SMART Podium interactive pen display Control panel Use the illustration below to locate the on-screen display (OSD) control buttons and connectors on the left side of your interactive pen display. -
Page 17: Connection Panel
C H A P T E R 1 About your SMART Podium interactive pen display Connection panel Use the illustration below to locate the connectors on the right side of your interactive pen display. Connector Description Power cable receptacle Connects the power cable from your interactive pen display to a DC adapter. -
Page 19: Chapter 2: Installing Your Smart Podium Interactive Pen Display
Integrating other devices This chapter provides additional considerations and details for installing your interactive pen display. System requirements Before installing your SMART Podium 500 series interactive pen display, make sure your computer meets the following requirements. For Windows® operating systems Windows Vista®, Windows Vista 64-bit, Windows XP or Windows XP 64-bit operating system... -
Page 20: For Mac Operating System Software
N O T E S You need a suitable video adapter to connect the VGA to DVI-A cable or the DVI-D to DVI-D cable. For specific system requirements, see the release notes for your SMART Notebook software or SMART Meeting Pro software at smarttech.com/downloads. Video cards Your interactive pen display supports both digital (DVI) and analog (VGA) video signals. -
Page 21: Installing Your Interactive Pen Display
To install your interactive pen display, refer to the Quick Connect guide that came with your product. You can also find this document on the SMART Support website at smarttech.com/kb/170009. Orient your interactive pen display after you install it. See Orienting your interactive pen display on page 16 for more information. -
Page 22: Setting Up Your Work Area
Make sure there is adequate airflow around the unit. Use your computer's mouse and keyboard to install SMART Product Drivers before you install your interactive pen display. Your interactive pen display cannot provide keyboard or tethered pen functionality until you install SMART Product Drivers. -
Page 23: Removing And Installing The Smooth Tilt Stand
C H A P T E R 2 Installing your SMART Podium interactive pen display Removing and installing the Smooth Tilt Stand You can remove the interactive pen display from its stand. C A U T I O N Carefully set down the interactive pen display to ensure you do not damage the buttons. -
Page 24: Orienting Your Interactive Pen Display
C H A P T E R 2 Installing your SMART Podium interactive pen display 4. Insert and tighten the four screws to the VESA mount. Orienting your interactive pen display When the location of your pen touch is misinterpreted (ink appears a distance from the actual pen contact), orient your interactive pen display. - Page 25 C H A P T E R 2 Installing your SMART Podium interactive pen display 2. If the below tracking screen appears, press the tethered pen to the screen at the start of the track, and then use the tethered pen to draw a path to the end of the track.
-
Page 26: Integrating Other Devices
The orientation window closes. Integrating other devices You can connect another device, such as a projector, a monitor or a SMART Board™ interactive whiteboard, directly to the interactive pen display. With this setup, whatever you view on the interactive pen display also appears on the other display. When you connect a projector or a monitor, the video signal from the computer is automatically sent to the projector or monitor. - Page 27 C H A P T E R 2 Installing your SMART Podium interactive pen display To connect a projector or monitor For DVI operation, connect a second DVI to DVI video cable (not included) to the Video out receptacle located on the interactive pen display and the DVI-D or DVI-I Video Input connector on your other device.
-
Page 29: Chapter 3: Installing Smart Software
Installing SMART software Installing SMART Notebook software Installing SMART Meeting Pro software You need to install SMART software on the computer that’s connected to your interactive pen display in order to use your interactive pen display. SMART software includes the following: SMART Product Drivers, which enables digital ink SMART Notebook software... -
Page 30: Installing Smart Meeting Pro Software
Installing SMART software I M P O R T A N T Connect to the Internet before you install SMART software so that you can obtain a software activation key and download software updates. Register your software to obtain a product key for activation. If you do not obtain a product key, you can use SMART Notebook software for 30 days. - Page 31 SMART Meeting Pro software at smarttech.com/downloads. I M P O R T A N T If you do not activate your software, you can use SMART Meeting Pro software for 30 days. To download SMART Meeting Pro software and SMART Product Drivers 1. Go to www.smarttech.com/downloads.
-
Page 33: Chapter 4: Using Your Smart Podium Interactive Pen Display
Closing the transparent layer Customizing the transparent layer Using a SMART GoWire auto-launch cable This chapter describes the basic operation of your interactive pen display such as how to write and erase digital notes and how to work with Ink Aware applications. -
Page 34: Turning Your Interactive Pen Display On And Off
I M P O R T A N T You can write notes over applications and your desktop only if SMART Product Drivers are running on your computer. If you see the icon in the Windows notification area or Mac Dock, SMART Product Drivers is not running on your computer or your product is not properly connected. -
Page 35: Tethered Pen Components
When the tethered pen isn’t in use, place it in the magnetic pen rest on the front of your interactive pen display. You can use SMART Notebook software or SMART Meeting Pro software to make your presentations interactive and dynamic. For more details on what you can accomplish with SMART Notebook software or SMART Meeting Pro software, see your SMART software’s... -
Page 36: Writing Or Drawing Digital Ink
C H A P T E R 4 Using your SMART Podium interactive pen display Writing or drawing digital ink You can use the tethered pen to write or draw in digital ink over SMART Notebook software, SMART Meeting Pro software and other programs. To write or draw digital ink 1. -
Page 37: Changing Eraser Settings
C H A P T E R 4 Using your SMART Podium interactive pen display Changing eraser settings You can change the default eraser size to either a larger or smaller eraser area. To change eraser settings 1. Press the SMART software icon in the notification area (Windows computers) or the Dock (Mac computers), and then select Control Panel. -
Page 38: Entering Text On The Interactive Pen Display
C H A P T E R 4 Using your SMART Podium interactive pen display N O T E S This pen gesture performs a standard mouse click. This pen gesture starts programs if your operating system is set to start applications on a single click. -
Page 39: Using The Illuminated Buttons
Press this button to use the tethered pen to perform a right-click or control-click on the screen. Help Press this button to launch the online Help for SMART Notebook software or SMART Meeting Pro software. Orient Press this button to start the orientation procedure. -
Page 40: Working With Ink Aware Applications
In some Windows applications, such as Word and Excel, you can select additional options from the Ink Aware toolbar. You can use this toolbar to save your notes to a .notebook file or to save your notes as text. Refer to your SMART software's online Help for more information on the Ink Aware toolbar. -
Page 41: Working With Non-Aware Applications
C H A P T E R 4 Using your SMART Podium interactive pen display Disabling Ink Aware You can disable the Ink Aware features for a specific application or for all applications. N O T E When you disable Ink Aware, the application becomes non-Aware. You can still write over your screen using the transparent layer, but the application won't recognize your notes or integrate them into your file. -
Page 42: Capturing And Saving Your Notes
1. Press Capture in the upper right corner of the transparent layer. Your screen capture appears as an image on a page in SMART Notebook software or SMART Meeting Pro software. 2. Select File > Save to save your screen capture in a .notebook file. -
Page 43: Restoring Cleared Notes
Toolbar (SMART Meeting Pro software). N O T E For more information on tools available, refer to your SMART software's online Help. To restore cleared notes after you close the transparent layer Press the Click here to restore ink thumbnail image that appears in the bottom-right of your screen. -
Page 44: Using A Smart Gowire Auto-Launch Cable
Using a SMART GoWire auto-launch cable Any computer connected to your interactive pen display requires SMART software. You install this software on your room computer so that it’s always ready for use (see Installing SMART software on page 21 for more information). - Page 45 1. Ensure your computer or laptop is properly connected to your interactive pen display (see Installing your SMART Podium interactive pen display on page 11 for more information). 2. Connect the USB A connector on the SMART GoWire auto-launch cable to a USB receptacle on your computer or laptop.
-
Page 47: Chapter 5: Maintaining Your Smart Podium Interactive Pen Display
Chapter 5 Maintaining your SMART Podium interactive pen display Cleaning the screen Cleaning the camera windows and reflective tape Maintaining ventilation Preventing condensation If you properly maintain your interactive pen display, it will provide years of use. Cleaning the screen Follow these instructions to clean the interactive pen display screen without damaging it or other product components. -
Page 48: Cleaning The Camera Windows And Reflective Tape
C H A P T E R 5 Maintaining your SMART Podium interactive pen display To clean the screen 1. Shut down your computer, and then disconnect the power sources for your computer and your interactive pen display. 2. Wipe the screen with a lint-free, non-abrasive, anti-static cloth. -
Page 49: Maintaining Ventilation
C H A P T E R 5 Maintaining your SMART Podium interactive pen display Maintaining ventilation Your interactive pen display requires ventilation to enable the fans to cool the unit. Dust buildup in the ventilation holes compromises cooling and leads to product failure. -
Page 51: Chapter 6: Troubleshooting Your Smart Podium Interactive Pen Display
Chapter 6 Troubleshooting your SMART Podium interactive pen display Checking the power on your interactive pen display Power button indicator issues Checking the status on your interactive pen display Status indicator issues Tethered pen issues Image issues VGA display issues Control and writing issues... -
Page 52: Checking The Power On Your Interactive Pen Display
C H A P T E R 6 Troubleshooting your SMART Podium interactive pen display Checking the power on your interactive pen display The Power button lights up to indicate whether power is reaching the interactive pen display. If the power button The interactive pen display is... - Page 53 C H A P T E R 6 Troubleshooting your SMART Podium interactive pen display Symptom Solution The Power button indicator Make sure the length of the video cable doesn’t exceed turns amber after being 50' (15 m). green for a time with no Turn off your computer and make sure: video output.
-
Page 54: Checking The Status On Your Interactive Pen Display
C H A P T E R 6 Troubleshooting your SMART Podium interactive pen display Checking the status on your interactive pen display The Status indicator shows whether the pen is interacting with the display. If the Status indicator is... The interactive pen display is... -
Page 55: Status Indicator Issues
(see Installing SMART software on page 21. Make sure SMART Board service is running on your computer. a. Open the SMART control panel, and then select About Software and Product Support > Tools > Diagnostics. b. If the Status field contains a "SMART Board service is not running"... -
Page 56: Image Issues
Adjust the Double-click Zone setting. a. Open the SMART Control panel, and then select SMART Hardware Settings > Mouse and Gesture Settings. b. Adjust the Double-click Zone setting, and then select Okay. - Page 57 Make sure the video card’s resolution is 1366 × 768 or lower if message. you’re using a SMART Podium 518 interactive pen display. Make sure the video card’s resolution is 1920 × 1080 or lower if you’re using a SMART Podium 524 interactive pen display.
-
Page 58: Vga Display Issues
C H A P T E R 6 Troubleshooting your SMART Podium interactive pen display Symptoms Solution Use the OSD options to return the current display parameters to the Color quality is inaccurate factory default settings. N O T E... -
Page 59: Control And Writing Issues
Make sure SMART Board tools is running. I M P O R T A N T You can write notes over applications and your desktop only if SMART Product Drivers are running on your computer. If you see the icon in the Windows notification area or Mac Dock, SMART Product Drivers is not running on your... -
Page 60: Mac-Specific Issues
Troubleshooting your SMART Podium interactive pen display Symptom Solution Digital ink doesn’t appear as Check the customized pen settings in SMART Notebook software or you expect. SMART Meeting Pro software. For more information on setting digital ink properties, for example, color, line thickness, line style and transparency, refer to your SMART software’s online Help. -
Page 61: Removing Ink Preference Files On Mac Computers
C H A P T E R 6 Troubleshooting your SMART Podium interactive pen display Removing ink preference files on Mac computers You can remove damaged ink preference files from your Mac computer to resolve some issues with handwriting recognition and digital ink. -
Page 63: Appendix A: Adjusting Video Settings With The On-Screen Display (Osd) Menu
Appendix A Adjusting video settings with the on-screen display (OSD) menu Changing settings in the OSD menu OSD menu settings Display settings Display Alignment settings System settings Your screen settings adjust automatically when you turn on your interactive pen display. This feature adjusts the vertical position, horizontal position and phase settings. -
Page 64: Osd Menu Settings
A P P E N D I X Adjusting video settings with the on-screen display menu To change settings in the OSD menu 1. Press Menu on the control panel. The OSD menu appears. 2. Press to browse to the sub-menu that contains the setting you want to change. 3. -
Page 65: Display Settings
A P P E N D I X Adjusting video settings with the on-screen display menu Display settings Menu item Function Contrast Adjusts the difference between the lightest and darkest areas of the image Brightness Adjusts the overall brightness of the image and background Sharpness Adjusts the sharpness of the image Color Mode... -
Page 67: Appendix B: Hardware Environmental Compliance
Consequently, this product also complies with other regulations that have arisen in various geographical areas, and that reference the European Union’s RoHS directive. Packaging Many countries have regulations restricting the use of certain heavy metals in product packaging. The packaging used by SMART Technologies to ship products complies with applicable packaging laws. -
Page 68: Covered Electronic Devices
Applicable SMART Technologies products meet the requirements of the covered electronic devices regulations. China’s Electronic Information Products regulations China regulates products that are classified as EIP (Electronic Information Products). SMART Technologies products fall under this classification and meet the requirements for China’s EIP regulations. - Page 70 SMART Technologies smarttech.com/support smarttech.com/contactsupport...
Need help?
Do you have a question about the Podium 500 Series and is the answer not in the manual?
Questions and answers