
Subscribe to Our Youtube Channel
Related Manuals for Xterra 1640255


Summary of Contents for Xterra 1640255
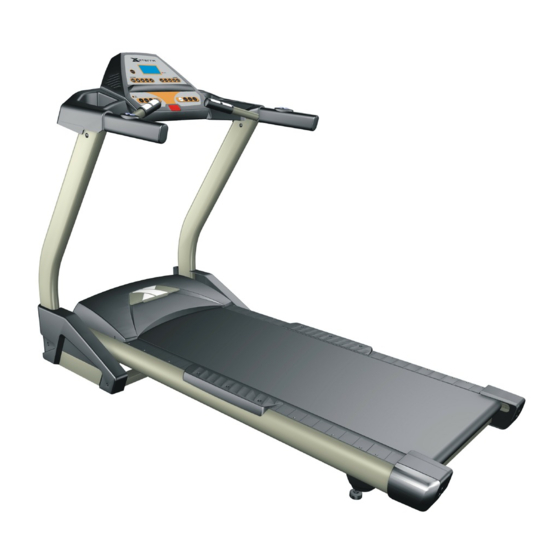
- Page 1 Owner’s Manual Model No. 1640255 - Assembly - Operation - Adjustments - Parts - Warranty CAUTION: Read and understand this manual before operating unit Retain For Future Reference...
-
Page 2: Table Of Contents
TABLE OF CONTENTS Important Safety Instructions…………………………………………………………….. 2 Before you begin …………………….………………………………………………….. 4 Hardware list …………………………………………………………………………….. 5 Assembly instructions…………….……………………………………………………… 6 Treadmill operation ……………………………………………………………………… 10 Operation of the monitor ……………………………………….………………..………. 11 Folding Instructions ………………………………………………………………………..15 Part list ………………………………………………………………………………………16 Parts diagram ………………………………………………………………………………19 Belt adjustment ……………………………………………………………………………. 21 General Maintenance.……………….………………………………………….…………... -
Page 3: Important Safety Instructions
IMPORTANT SAFETY INFORMATION THIS UNIT IS INTENDED FOR HOUSEHOLD USE ONLY READ ALL INSTRUCTIONS BEFORE USING THIS TREADMILL ▲CAUTION: Before starting any exercise program, it is recommended that you consult your physician. ▲WARNING: Connect this unit to a properly grounded outlet only. ▲DANGER: To reduce the risk of electric shock, always unplug the treadmill from the electrical outlet immediately after using and before cleaning. -
Page 4: Step
14. Handicapped individuals should have medical approval and close supervision when using this treadmill. 15. Do not place hands or feet under the treadmill. Always keep hands and legs off of the treadmill when others are using it. 16. Never turn on treadmill while standing on treadbelt. Always hold the handrails while using the treadmill. -
Page 5: Before You Begin
Before you begin. Thank you for purchasing our product. Even though we go to great efforts to ensure the quality of each product we produce, occasional errors and /or omissions do occur. In any event should you find this product to have either a defective or a missing part please contact us for a replacement. -
Page 6: Hardware List
HARDWARE LIST #111 - M5 x 15mm #95 - 5/16” x 19mm Phillips Head Screw (8pcs) Curved Washer (4pcs) #94 - 5/16” x 15mm #110 - 5/16” x 19mm Button Head Socket Bolt (14pcs) Flat Washer (10pcs) #102 - Safety Key (1pc) #93 - Lubricant (1pc) #97 - Combination M5 Allen Wrench #98 - M6 Allen Wrench (1pc) -
Page 7: Assembly Instructions
ASSEMBLY INSTRUCTIONS ■ STEP 1 Remove all the parts from the carton and lay the main base frame on a flat level surface. ■ STEP 2 Feed the lower computer cable from the base frame (38) through the right upright (5) and insert the upright (5) into the frame base tube (38). - Page 8 ■ STEP 3 It will take two people for this step. Connect the lower computer cable (38) to the upper computer cable (36). ■ STEP 4 Attach the console support (6) to the right and left uprights (4 / 5). Secure the console support (6) using six 5/16”...
-
Page 9: Maurice Pincoffs Canada
■ STEP 5 Connect the speed adjustment cable (25) to the back of the console (39). Connect the incline adjustment cable (26) to the back of the console (39). Connect the upper computer cable (36) to the back of the console (39). Secure the console (39) to the console support (6) using four M5 X 15mm screws (111). - Page 10 ■ STEP 6 Attach the left and right covers (43 / 44) to the frame base (2). Secure using four M5 X 15mm screws (111). CUSTOMER SERVICE 1-888-707-1880 Maurice Pincoffs Canada© 2011...
-
Page 11: Treadmill Operation
TREADMILL OPERATION Your treadmill features a walking belt coated with a lubricant. IMPORTANT: Never apply silicone spray or other substances to the walking belt or walking board. Such substancs will deteriorate the walking belt and cause excessive wear. How to plug in the power cord. GROUNDING INSTRUCTIONS. -
Page 12: Operation Of The Monitor
Operation of the monitor GETTING STARTED: ▲CAUTION: Before operating the console, read the following precautions: • Do not stand on the walking belt when turning on the treadmill • Always wear the safety key. Pulling the safety key will stop tread-belt movement. •... - Page 13 TO OPERATE TREADMILL ▲CAUTION: To avoid injury, hold onto the handrails while mounting and dismounting the treadmill. Hold onto the handrails and place feet on siderails before starting. Step onto the walking belt only a slowest speed. Always hold on to a handrail or hand bar while making control changes (incline, speed, etc.).
- Page 14 RAPID SPEED KEYS: 5 preset buttons for rapid speed: 2Mph, 4Mph, 6Mph, 8Mph, 10Mph. You can press the 5 buttons, mentioned above, at any time during a program and the treadmill will automatically adjust to the preset speed. RAPID INCLINE KEYS: 5 preset buttons for rapid incline: 2, 4, 6, 8, 10.
- Page 15 XTERRA TREADMILL PROFILES CUSTOMER SERVICE 1-888-707-1880 Maurice Pincoffs Canada© 2011...
-
Page 16: Folding Instructions
FOLDING AND MOVING YOUR TREADMILL Before folding the treadmill, ensure that the treadmill is at its lowest incline position. Turn the power switch off, located on the front of the motor cover and unplug the power cord. CAUTION: You must be able to safely lift 20 kg (45lbs) in order to raise and lower the treadmill. To decrease the possibility of injury, bend your legs and keep your back straight while you are raising or lowering your treadmill. -
Page 17: Part List
PARTS LIST DESCRIPTION Q'TY 025501 Main Frame 025502 Frame Base 025503 Incline Bracket 025504 Left Upright 025505 Right Upright 025506 Console Support 025507 Outer Slide 025508 Inner Slide 025509 Locking Knob 025510 Frame Cover 025511 Belt Guide 025512 Running Deck 025513 Running Belt 025514... - Page 18 DESCRIPTION Q'TY 025546 Frame Base Rear Wheel 025547 Motor Cover Anchor 025548 Motor Top Cover 025549 Motor Cover Plate 025550 Front Motor Cover 025551 Footrest (L) 025552 Footrest (R) 025553 Foot Rail 398m/m 025554 Rear Foot Rail 145m/m 025555 Rear Adjustment Base (L) 025556 Rear Adjustment Base (R ) 025557...
- Page 19 DESCRIPTION Q'TY 025593 Lubricant 025594 5/16" × 15m/m _Button Head Bolt 025595 Ø5/16" × 19 × 1.5T_Curved Washer 025596 M5 × 10m/m_Phillips Head Screw 025597 Combination M5 Allen Wrench & Phillips Head Screw Driver 025598 M6_L Allen Wrench 025599 3/8" × 2"_Hex Head Bolt 0255100 3 ×...
-
Page 20: Parts Diagram
PARTS DIAGRAM CUSTOMER SERVICE 1-888-707-1880 Maurice Pincoffs Canada© 2011... - Page 21 CUSTOMER SERVICE 1-888-707-1880 Maurice Pincoffs Canada© 2011...
-
Page 22: Belt Adjustment
BELT ADJUSTMENTS: Treadbelt Tension Adjustment - Belt tension is not critical for most users. It is very important for joggers and runners in order to provide a smooth, steady running surface. Adjustment must be made from the right side of the rear roller in order to adjust tension with the 6 mm Allen wrench provided in the parts package. - Page 23 TRACKING / TENSION ADJUSTMENTS IS NOT COVERED UNDER THE WARRANTY. BELT / DECK LUBRICATION: Do not lubricate with other than Xterra approved lubricant. Your treadmill comes with one tube of lubricant and extra tubes can be ordered directly from Xterra. There are commercially available lube kits, but the only one currently approved by Xterra is Lube-N-Walk.
-
Page 24: General Maintenance
Once the lubricant is applied, tighten the rear roller bolts the same amount of turns as when you loosened them. Run the treadmill at about 6 mph without walking on it for about a minute or two to make sure the belt stays in the middle of the deck. If the belt tracks to one side then follow the belt tracking instructions to remedy. -
Page 25: Reset Switch Resetting
RESET SWITCH RESETTING If your treadmill looses power or will not start, check the reset switch located on the front of the motor cover. If the white tab of the reset switch is not showing then the reset switch has not been tripped. If the white tab of the reset switch is showing, the reset switch has tripped. - Page 26 MAINTENANCE MODE: DO NOT STAND ON TREADMILL If you want to set the Speed and Distance to Metric or if there is a problem with the speed and you would like to perform the calibration procedure, use the Maintenance Mode. To enter Maintenance Mode press, and hold for 5 seconds, the Start and Fast keys while installing the safety key.
-
Page 27: Service Check List
If an extension cord is required it should be as short as possible and heavy duty 16 gauge minimum. Low household voltage. Contact an electrician or your Xterra dealer. A minimum of 110 volt AC current is required. High belt/deck friction. See General Maintenance Treadmill belt stops quickly/suddenly when section on lubrication. -
Page 28: Manufacturer's Limited Warranty
All of the parts for the Xterra Treadmill, shown in figure can be ordered from: MAURICE PINCOFFS CANADA INC., 6050 Don Murie Street, Niagara Falls, Ontario L2E 6X8. When ordering parts, the parts will be sent and billed at the current prices.
Need help?
Do you have a question about the 1640255 and is the answer not in the manual?
Questions and answers