Table of Contents
Advertisement
Quick Links
Owner's Manual
Model No.
16004000980
- Assembly
- Operation
- Adjustments
- Parts
- Warranty
CAUTION:
You must read and
understand this
owner's manual
before operating
unit.
Keep this manual for
future reference.
Serial number
Write the serial
number in the space
above for reference.
Serial number can be
found at the front
bottom section of
the Treadmill.
PLEASE CAREFULLY READ THIS ENTIRE MANUAL BEFORE
OPERATING YOUR NEW TREADMILL!
Advertisement
Table of Contents

Related Manuals for Xterra 16004000980


Summary of Contents for Xterra 16004000980
- Page 1 Owner’s Manual Model No. 16004000980 - Assembly - Operation - Adjustments - Parts - Warranty CAUTION: You must read and understand this owner’s manual before operating unit. Keep this manual for future reference. Serial number Write the serial number in the space above for reference.
-
Page 2: Table Of Contents
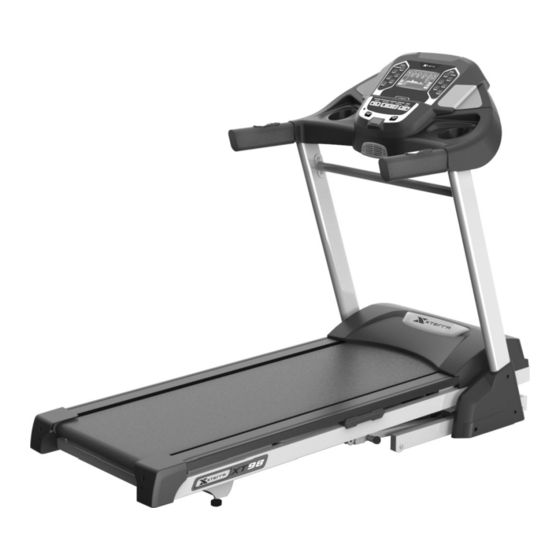
TABLE OF CONTENTS Important Safety Instructions ................. 3 Important Electrical Instructions ..............5 Assembly Instructions ................... 6 Folding/Transport Instructions ..............11 Operation of Your Treadmill................12 General Maintenance ................. 19 Service Checklist - Diagnosis Guide ............22 Exploded View Diagram ................23 Parts List ...................... - Page 3 If you have any questions or problems with the parts included with your XTERRA XT98 Treadmill, please do not return the product. Contact us FIRST! If a part is missing or defective call us toll free at 1-888-707-1880.
-
Page 4: Important Safety Instructions
IMPORTANT SAFETY INSTRUCTIONS THIS UNIT IS INTENDED FOR HOUSEHOLD USE ONLY READ ALL INSTRUCTIONS BEFORE USING THIS TREADMILL CAUTION: Before starting any exercise program, it is recommended that you consult your physician. WARNING: Connect this unit to a properly grounded outlet only. DANGER: To reduce the risk of electric shock, always unplug the treadmill from the electrical outlet immediately after using and before cleaning. - Page 5 8. Do not operate the treadmill where aerosol products are used or where oxygen is being administered. 9. Read, understand, and test the emergency stop procedure before using the treadmill. Do not insert any objects into any openings. 10. Inspect and properly tighten all parts of the treadmill regularly. 11.
-
Page 6: Important Electrical Instructions
IMPORTANT ELECTRICAL INSTRUCTIONS WARNING! ●NEVER use a ground fault circuit interrupt (GFCI) wall outlet with this treadmill. Route the power cord away from any moving part of the treadmill including the elevation mechanism and transport wheels. ●NEVER remove any cover without first disconnecting AC power. ●If voltage varies by ten percent (10%) or more, the performance of your treadmill may be affected. -
Page 7: Assembly Instructions
ASSEMBLY INSTRUCTIONS !!ATTENTION: IMPORTANT UNPACKING INSTRUCTIONS. PLEASE READ BEFORE UNPACKING YOUR FOLDING TREADMILL!! Serious injury could occur if this folding treadmill is not unpacked properly. There is a Velcro strap installed around the treadmill base that prevents the treadmill from unfolding accidentally during shipping. - Page 8 XT98 ASSEMBLY PACK CHECKLIST HARDWARE STEP 2 # 99. 5/16” x 1/2” # 100. Ø 8 x1.5T #104. Lubricant (1pc) Hex Head Bolt (8 pcs) Flat Washer (8 pcs) HARDWARE STEP 3 #125. 5/16” x 3/4” #80. Ø 8 x1.5T_Split Washer Button Head Socket Bolt (4 pcs) #44.
- Page 9 XT98 ASSEMBLY INSTRUCTIONS MAIN BASE FRAME 1. Remove the treadmill from the carton and lay it on flat, level ground. UPRIGHTS & CABLES Hardware Step 2 #99. 5/16” x1/2” Hex Head Bolt (8 pcs) #100. Ø 8x1.5T Flat Wash (8 pcs) NOTE: This step may work better with a second person assisting.
- Page 10 CONSOLE Hardware Step 3 #80. Ø 8x1.5T_ Split Washer (4 pcs) #125. 5/16” x 3/4” Button Head Socket Bolt (4 pcs) NOTE: This step may work better with a second person assisting. Connect the Middle Computer Cable (54) and Upper Computer Cable (53).
- Page 11 SUPPORT Hardware Step 4 #125. 5/16” x 3/4” Button Head Socket Bolt (4 pcs) 1. Install Handrail Support (9) between Left and Right Uprights (5) and (4). Use the combination M5 Allen Wrench and Phillips Head Screwdriver (102) to tighten four Button Head Socket Bolts (125).
-
Page 12: Folding/Transport Instructions
FOLDING INSTRUCTIONS TO FOLD THE TREADMILL Make certain the treadmill is at minimum incline. Lift the treadmill running deck until it is se- cured by the locking telescoping tube assembly on the right side of the base. You will hear it pop into place when secure. TO UNFOLD THE TREADMILL Apply slight forward pressure* on the treadmill running deck with your left hand. -
Page 13: Operation Of Your Treadmill
OPERATION OF YOUR TREADMILL ■Console Audio Input Large LCD Convenient water Jack for Integrated with feedback bottle holder and customized Speakers for and scrolling cargo compartment Turbo Fan to listening MP3 player message center for phone or MP3 player keep you cool GETTING STARTED: Power the treadmill on by plugging it into an appropriate wall outlet, then turn on the power switch located at the front of the treadmill... - Page 14 CONSOLE OPERATION START OPERATION Attach the Safety key to enable the display (if not already on). ▲/▼ Press the START key to begin belt movement. Adjust to the desired speed using the SPEED keys (console or handgrip). You may also use the SPEED keys 1,2,4,6,8,10 to adjust the speed. ▼...
- Page 15 PROGRAMMABLE FEATURES The Treadmill has a total of 24 pre-set programs. Fourteen of them (P1-P14) have only speed changes with no incline changes, while the last 10 (P15-24) have speed and incline changes programmed. TO SELECT AND START A PRESET PROGRAM Press the Program key to choose desired program (P1, P2, …..P24).
- Page 16 PROGRAM CHART FOR SPEED AND INCLINE Customer Service 1-888-707-1880 Dyaco Canada Inc. 2021 Email: customerservice@dyaco.ca...
- Page 17 How to wear your wireless chest strap transmitter: Attach the transmitter to the elastic strap using the locking parts. Adjust the strap as tightly as possible as long as the strap is not too tight to remain comfortable. Position the transmitter with the logo centered in the middle of your body facing away from your chest (some people must position the transmitter slightly left of center).
- Page 18 The heart rate grips are located on the left and right handlebars that are positioned parallel to the walking deck. You can periodically grasp both of these (palms over the steel sensors) until you see your current heart rate. This readout is for reference only and should not be used medically in any way. It is not recommended to use the heart rate grips if the treadmill belt is moving faster than 4 mph.
- Page 19 RATE OF PERCEIVED EXERTION Heart rate is important but listening to your body also has a lot of advantages. There are more variables involved in how hard you should workout than just heart rate. Your stress level, physical health, emotional health, temperature, humidity, the time of day, the last time you ate and what you ate, all contribute to the intensity at which you should workout.
-
Page 20: General Maintenance
GENERAL MAINTENANCE WARNING: Always unplug your treadmill prior to cleaning in order to avoid electrical hazard or shock. BELT & DECK Your treadmill uses a very high-efficient low-friction deck. Performance is maximized when the deck is kept as clean as possible. Use a soft, damp cloth, or paper towel to wipe the edge of the belt and the area between the belt edge and the frame. - Page 21 TREAD-BELT TRACKING ADJUSTMENT The performance of your treadmill is dependent on the frame running on a reasonably level surface. If the frame is not level, the front and back roller cannot run parallel, and constant belt adjustment may be necessary. The treadmill is designed so that the tread-belt remains reasonably centered while in use.
- Page 22 BELT/DECK LUBRICATION PROCEDURE Customer Service 1-888-707-1880 Dyaco Canada Inc. 2021 Email: customerservice@dyaco.ca...
-
Page 23: Service Checklist - Diagnosis Guide
Plug is disconnected.Make sure plug is firmly pushed into 120 VAC wall outlet. Breaker panel circuit breaker may be tripped. Treadmill defect. Contact Xterra Fitness. Tread-belt does not stay centered The user may be walking while favoring or putting more weight on Treadmill belt hesitates when either the left or right foot. -
Page 24: Exploded View Diagram
EXPLODED VIEW DIAGRAM Customer Service 1-888-707-1880 Dyaco Canada Inc. 2021 Email: customerservice@dyaco.ca... -
Page 25: Parts List
PARTS LIST Part Part Description Q’ty Main Frame AA010204-T23 Frame Base AA020090-T23 Incline Bracket AA030049-T23 Right Upright CRAA040104-T2 Left Upright CRAA040069-T2 Console Support AA050032-T23 007&008 Inner & Outer Slide Assembly CRAA060114-T2 Handrail Support AA060098-T23 Incline Motor G110072 Drive Belt N010001 012&013 Drive Motor w/motor bracket CRG080602C... - Page 26 Part Part Description Q’ty 300m/m_Connecting Wire (White) E010754 300m/m_Connecting Wire (Black) E010755 100m/m_Connecting Wire (Black) E010747 Motor Controller CRD090044 1200m/m_Computer Cable (Upper) E020729 1150m/m_Computer Cable (Middle) E020725-01 1200m/m_Computer Cable (Lower) E020729-01 Sensor W/Cable F030185 1/2" × 60m/m_Hex Head Bolt J011523C1-Y3 5/16"...
- Page 27 Part Part Description Q’ty 5/16" × UNC18 × 1/2"_Hex Head Bolt J010501-Y3 30 × 30m/m_Square End Cap P040134-A1 M5_Allen Wrench Head Screw Wrench J330051-Y3 M6_L Allen Wrench J330002-Y3 Lubricant N020007A Adjustment Foot Pad P060018-A1 21.8m/m × 21.8m/m_Square End Cap P040041-A1 25.4m/m ×...
- Page 28 TROUBLESHOOTING ERROR MESSAGES E0: Safety switch is open. The safety switch has malfunctioned or is intermittent. E2: Treadmill is overloaded, and the protection device of the controller is activated. Check if the tread belt has shifted and movement is obstructed. Check if lubrication is sufficient, the friction is high. The bearings in the belt rollers could be worn.
- Page 29 TRAINING GUIDELINES Exercise Exercise is one of the most important factors in the overall health of an individual. Listed among its benefits are: Increased capacity for physical work (strength endurance) Increased cardiovascular (heart and arteries/veins) and respiratory efficiency ...
- Page 30 Specificity Different forms of exercise produce different results. The type of exercise that is carried out is specific both to the muscle groups being used and to the energy source involved. There is little transfer of the effects of exercise, i.e. from strength training to cardiovascular fitness. That is why it is important to have an exercise program tailored to your specific needs.
- Page 31 The target is not a magic number, but a general guide. If you’re above average fitness, you may work quite comfortably a little above that suggested for your age group. The following table is a guide to those who are keeping fit. Here we are working at about 80% of maximum.
- Page 32 What to Wear Wear clothing that will not restrict your movement in any way while exercising. Clothes should be light enough to allow the body to cool. Excessive clothing that causes you to perspire more than you normally would while exercising, gives you no advantage. The extra weight you lose is body fluid and will be replaced with the next glass of water you drink.
- Page 33 STRETCHING Stretching should be included in both your warm-up and cool down and should be performed after 3-5 minutes of low intensity aerobic activity or callisthenic type exercise. Movements should be performed slowly and smoothly, with no bouncing or jerking. Move into the stretch until slight tension, not pain, is felt in the muscle and hold for 20-30 seconds.
- Page 34 INNER THIGH STRETCH TOUCHES Sit with the soles of your feet together with your Slowly bend forward from your waist, letting knees pointing outward. Pull your feet as close your back and shoulders relax as you stretch Into your groin as possible. Gently push your toward your toes.
-
Page 35: Manufacturer's Limited Warranty
MANUFACTURER’S LIMITED WARRANTY Dyaco Canada Inc. warrants all its treadmill parts for a period of time listed below from the date of retail sale, as determined by sale receipt. Dyaco Canada Inc.’s responsibilities include providing new or remanufactured parts, at Dyaco Canada Inc.’s option, and technical support to our independent dealers and servicing organizations. - Page 36 Please visit us online for information about our other brands and products manufactured and distributed by Dyaco Canada Inc. spiritfitness.ca solefitness.ca xterrafitness.ca dyaco.ca/products/everlast.html dyaco.ca/UFC/UFC-home.html spiritfitness.ca/johnnyg.html trainorsports.ca For more information, please contact Dyaco Canada Inc. T: 1-888-707-1880 ⏐ 5955 Don Murie St., Niagara Falls, Ontario L2G 0A9 ⏐ sales@dyaco.ca Customer Service 1-888-707-1880 Dyaco Canada Inc.
Need help?
Do you have a question about the 16004000980 and is the answer not in the manual?
Questions and answers