
Related Manuals for Xterra TR6.3


Summary of Contents for Xterra TR6.3
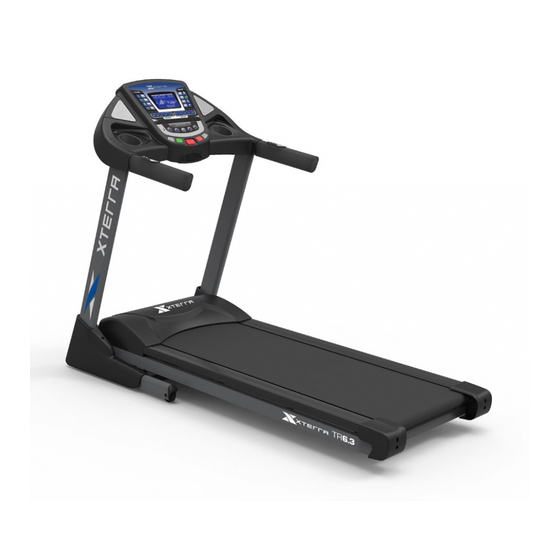
- Page 1 TR6.3 TREADMILL OWNER’S MANUAL PLEASE CAREFULLY READ THIS ENTIRE MANUAL BEFORE OPERATING YOUR NEW TREADMILL...
-
Page 2: Table Of Contents
Table Of Contents Product Registration Important Safety Instructions Important Electrical Instructions Important Operation Instructions TR6.3 Assembly Instructions Operation of Your Console Programmable Features Heart Rate General Maintenance Manufacturer’s Limited Warranty ATTENTION THIS TREADMILL IS INTENDED FOR RESIDENTIAL USE ONLY AND IS WARRANTED FOR THE APPLICATION. -
Page 3: Product Registration
We appreciate your confidence in XTERRA Fitness and we will always remember that you are the reason that we are in business. Please complete and mail your registration card today and enjoy your new recumbent treadmill. -
Page 4: Important Safety Instructions
Quality athletic shoes are recommended to avoid leg fatigue. Failure to follow all guidelines may compromise the effectiveness of the exercise experience, expose yourself (and possibly others) to injury, and reduce the longevity of the equipment. SAVE THESE INSTRUCTIONS - THINK SAFETY! TR6.3 Treadmill... -
Page 5: Important Electrical Instructions
Whenever the adapter is used, it must be held in place by a metal screw. TR6.3 Treadmill... -
Page 6: Important Operation Instructions
• NEVER mount or dismount the treadmill while the belt is moving. XTERRA Fitness treadmills start with at a very low speed and it is unnecessary to straddle the belt during start up. Simply standing on the belt during slow acceleration is proper after you have learned to operate the unit. - Page 7 TR6.3 Assembly Pack Checklist Hardware Steps 3 #93. 5/16” x 15mm #94. 5/16” #132. M5 Button Head Socket Curved Washer Speed Nut Clips Bolt (8 pcs) (2 pcs) (4 pcs) Hardware Steps 5 #93. 5/16” x 15mm #94. 5/16” Button Head Socket...
- Page 8 Assembly Tools #58. Lubricant #96. Combination M5 Allen Wrench & Phillips Head Screw Driver #97. M6 L Allen Wrench TR6.3 Treadmill...
-
Page 9: Tr6.3 Assembly Instructions
TR6.3 Assembly Instructions Main Base Frame 1. Remove all the parts from the carton and lay the Main Base Frame on a flat level surface. Covers & Cables 1. Slide the plastic covers (R-42 & L-43) over the Left and Right Console Mast Upright Tube. - Page 10 1. Attach the right and left Handlebars to the Console Mast Uprights with four Button Head Bolts (93) from the inside and two Curved Washers (94) and two Button Head Bolts (93) from the top. Tighten using the Combination Allen Wrench & Phillips Head Screw Driver (96). TR6.3 Treadmill...
-
Page 11: Console Assembly
#90. 3/8” x 3/4” Button Head Socket Bolt (4 pcs) 1. To attach the console, Insert four Washers (82) and four Button Head Socket Bolts (90) underneath the console. Tighten using the Combination Allen Wrench & Phillips Head Screw Driver (96). TR6.3 Treadmill... - Page 12 Combination Allen Wrench & Phillips Head Screwdriver (96). 2. Attach the Console Mast Covers to the Console Mast Upright Tubes (42 & 43) with four Screws (88) & two Screws (95). Tighten using the Combination Allen Wrench & Phillips Head Screw Driver (96). TR6.3 Treadmill...
-
Page 13: Folding Instructions
*At the rear roller area to relieve pressure on the ƒ locking system. Transportation Instructions The treadmill is equipped with four transport wheels that are engaged when the treadmill is folded. After folding simply roll the treadmill away. TR6.3 Treadmill... -
Page 14: Operation Of Your Console
Operation of Your Console TR6.3 Console Getting Started Power the treadmill on by plugging it into an appropriate wall outlet, then turn on the power switch located at the front of the treadmill below the motor hood. Ensure that the safety key is installed, as the treadmill will not operate without it. -
Page 15: Incline Feature
You may change the Dot Matrix profile view that you desire by pressing the DISPLAY button. After scrolling through the three profiles which include incline, speed and incline + speed profile, by pressing the DISPLAY button, the Dot matrix will automatically scroll through the three displays showing each one for five seconds. TR6.3 Treadmill... -
Page 16: Pulse Grip Feature
Stop, Enter and Display keys for 5 seconds; the display will show: Display mode - On. Use the Incline 5/6key or the Speed 5/6key to change the setting to Off then press Enter. TR6.3 Treadmill... - Page 17 Preset Program Profiles Ascent - Work Ascent - Incline Glute Blast - Work Glute Blast - Incline Adventure - Work Adventure - Incline Xtreme - Work Xtreme - Incline Interval - Work Interval - Incline TR6.3 Treadmill...
-
Page 18: Programmable Features
Programmable Features The TR6.3 Treadmill has five factory preset programs, two user defined programs and one manual program. To Select and Start a Preset Program 1. Press the desired Program key to select desired program. Press Enter to select the program. -
Page 19: Heart Rate
With all XTERRA Fitness Heart Rate programs treadmills you may use the heart rate monitor feature without us- ing Heart Rate. This function can be used during manual mode or during any of the eleven different programs. -
Page 20: Rate Of Perceived Exertion
RPE will support this. If you are feeling tired and sluggish, it is because your body needs a break. In this condition, your pace will feel harder. Again, this will show up in your RPE and you will train at the proper level for that day. TR6.3 Treadmill... - Page 21 Normally the transmitter will be oriented so the XTERRA Fitness logo is right side up. 6. The antenna that picks up your heart rate is very sensitive. If there is an outside noise source, turning the whole machine 90 degrees may de-tune the interference.
-
Page 22: General Maintenance
- located under the motor cover - that connects the motor to the front roller. If that belt is loose it feels similar to the walking belt being loose. Tightening the motor belt should be done by a trained service person. TR6.3 Treadmill... -
Page 23: Treadbelt Tracking Adjustment
Proper belt tracking is an owner responsibility common with all treadmills. ATTENTION Damage to the running belt resulting from improper tracking / tension adjustments is not covered under the XTERRA Fitness warranty. TR6.3 Treadmill... -
Page 24: Belt/Deck Lubrication Procedure
Do not lubricate with anything other than XTERRA Fitness approved lubricant. Your treadmill comes with one tube of “Lube” and extra tubes can be ordered directly from XTERRA Fitness or your authorized XTERRA Fitness dealer. You may also use a Lube-n-Walk kit that can be purchased through both aforementioned sellers. - Page 25 If an extension cord is required it should be speed on display as short as possible and heavy duty 16 gauge minimum. Low voltage. Contact an electrician or your XTERRA Fitness dealer. A minimum of 110 volt AC current is required. Tread-belt stops quickly/suddenly High belt/deck friction.
-
Page 26: Error Messages
• Press Start to begin calibration. This is an automatic process, the belt will move and change speeds without warning, Be Careful! When calibration is done, the console will return to the start-up screen TR6.3 Treadmill... -
Page 27: Manufacturer's Limited Warranty
Effective August 1, 2012 - TREADMILL LIMITED WARRANTY XTERRA Fitness Inc. warrants all its home use treadmill parts for a period of time listed below, from the date of retail sale, as determined by a sales receipt or in the absence of a sales receipt, eighteen (18) months from the original factory shipping date. XTERRA Fitness’s responsibilities include providing new or remanufactured parts, at XTERRA Fitness’s option, and technical support to our independent... - Page 28 2940 Nestle Road Jonesboro, AR 72401 - Phone:870-336-4286 - Fax:870-935-7611 www.xterrafitness.com ©2012 All RIghts Reserved. TR6.3 Owner’s Manual...
Need help?
Do you have a question about the TR6.3 and is the answer not in the manual?
Questions and answers