
Subscribe to Our Youtube Channel
Related Manuals for Xterra 1640755US


Summary of Contents for Xterra 1640755US
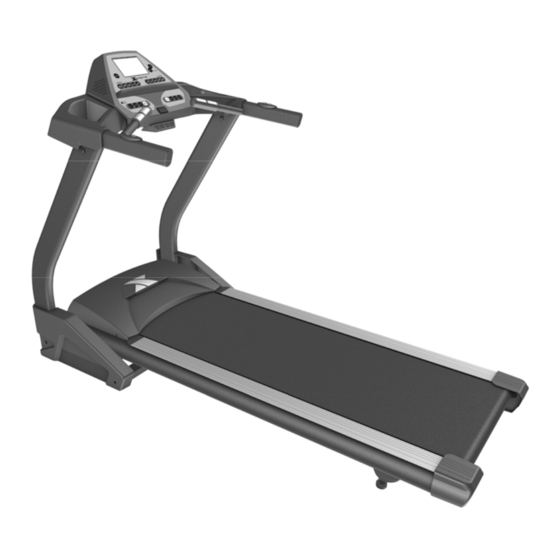
- Page 1 Owner’s Manual Model No. 1640755US - Assembly - Operation - Adjustments - Parts - Warranty CAUTION: Read and understand this manual before operating unit Retain For Future Reference...
-
Page 2: Table Of Contents
TABLE OF CONTENTS Important Safety Instructions…………………………………………………………….. 2 Important Electrical Information………………………………………………………….. 4 Assembly instructions…………….……………………………………………………….. 6 Operation of Your Treadmill…………………………………….………………..……….11 Folding Instructions ………………………………………………………………………..18 Part list ………………………………………………………………………………………19 Parts diagram ………………………………………………………………………………22 General Maintenance.……………….………………………………………….…………24 Manufacturer’s Limited Warranty…………………………………………………………28 CUSTOMER SERVICE 1-888-707-1880 © 2012... -
Page 3: Important Safety Instructions
IMPORTANT SAFETY INFORMATION THIS UNIT IS INTENDED FOR HOUSEHOLD USE ONLY READ ALL INSTRUCTIONS BEFORE USING THIS TREADMILL ▲CAUTION: Before starting any exercise program, it is recommended that you consult your physician. ▲WARNING: Connect this unit to a properly grounded outlet only. ▲DANGER: To reduce the risk of electric shock, always unplug the treadmill from the electrical outlet immediately after using and before cleaning. - Page 4 16. Never turn on treadmill while standing on treadbelt. Always hold the handrails while using the treadmill. Always return the treadmill to the slowest speed to provide for safe dismount and low speed restart. 17. To disconnect, turn all controls to the off position, then remove plug from outlet. 18.
-
Page 5: Important Electrical Information
Important Electrical Information WARNING! NEVER use a ground fault circuit interrupt (GFCI) wall outlet with this treadmill. ● Route the power cord away from any moving part of the treadmill including the elevation mechanism and transport wheels. NEVER remove any cover without first disconnecting AC power. ●... - Page 6 NEVER operate this treadmill without reading and completely understanding the ● results of any operational change you request from the computer. Understand that changes in speed and incline do not occur immediately. Set your ● desired speed on the computer console and release the adjustment key. The computer will obey the command gradually.
-
Page 7: Assembly Instructions
Assembly Instructions ASSEMBLY PACK CHECK LIST #111 - M5 x 15mm #95 - 5/16” x 19mm Phillips Head Screw (12pcs) Curved Washer (4pcs) #94 - 5/16” x 15mm #110 - 5/16” x 19mm Button Head Socket Bolt (14pcs) Flat Washer (10pcs) #102 - Safety Key (1pc) #93 - Lubricant (1pc) #97 - Combination M5 Allen Wrench... - Page 8 ■ STEP 1 Remove all the parts from the carton and lay the main base frame on a flat level surface. ■ STEP 2 Feed the lower computer cable from the base frame (38) through the right upright (5) and insert the upright (5) into the frame base tube (38).
- Page 9 ■ STEP 3 It will take two people for this step. Connect the lower computer cable (38) to the upper computer cable (36). ■ STEP 4 1. Attach the console support (6) to the right and left uprights (4 / 5). Secure the console support (6) using six 5/16”...
- Page 10 ■ STEP 5 Connect the speed adjustment cable (25) to the back of the console (39). Connect the incline adjustment cable (26) to the back of the console (39). Connect the two handpulse wires (27) to the back of the console (39). Connect the fan wire (112-3) to the back of the console (39).
- Page 11 ■ STEP 6 Attach the left and right covers (43 / 44) to the frame base (2). Secure using four M5 X 15mm screws (111). CUSTOMER SERVICE 1-888-707-1880 © 2012...
-
Page 12: Operation Of Your Treadmill
Operation of the monitor GETTING STARTED: ▲CAUTION: Before operating the console, read the following precautions: • Do not stand on the walking belt when turning on the treadmill • Always wear the safety key • Adjust the speed in small increments to avoid sudden jumps in speed •... - Page 13 Getting started: Power the treadmill on by plugging it into an appropriate wall outlet, then turn on the power switch located at the front of the treadmill below the motor hood. Ensure that the safety key is installed, as the treadmill will not operate without it. When the power is turned on, a message will scroll across the dot matrix showing the current software version.
- Page 14 Incline Feature: Incline may be adjusted anytime after belt movement. Press and hold the Adjust UP/DOWN keys (console or handgrip) to achieve desired level of effort. You may also choose a more rapid increase / decrease by selecting desired key, 2 through 10, on left hand side of console (incline). The display will indicate incline position as adjustments are made.
- Page 15 To Turn Treadmill Off: (1) Display will automatically turn off (go to sleep) after 30 minutes (no key operations). The treadmill will draw very little current in sleep mode (about as much as your television when it is turned off). (2) Remove tether cord.
- Page 16 XTERRA TREADMILL PROFILES CUSTOMER SERVICE 1-888-707-1880 © 2012...
- Page 17 User Programs: STEP 1: Select User 1 or User 2 via the PROGRAM key then press Enter. Note that the dot matrix display portion will have a single row of dots at the bottom (Unless there is a previously stored program). STEP 2: Note the Time window is flashing.
- Page 18 Heart Rate Control Operation How the Heart Rate Control Program Works: Heart Rate Control uses your treadmill’s incline system to adjust your heart rate. Increases and decreases in elevation affect heart rate much more efficiently than changes in speed. Additionally, changes in incline keep you in control of the machine’s speed instead of the machine controlling you.
-
Page 19: Folding Instructions
Folding Instructions Do not attempt to move the unit unless it is in the folded and locked position. Be sure the power cord is secured to avoid possible damage. Use both handrails to maneuver the unit to the desired position. ■... -
Page 20: Part List
PARTS LIST DESCRIPTION Q'TY 075501 Main Frame 075502 Frame Base 075503 Incline Bracket 075504 Left Upright 075505 Right Upright 075506 Console Support 075507 Outer Slide 075508 Inner Slide 075509 Locking Knob 075510 Bottom Frame Cover 075511 Belt Guide 075512 Running Deck 075513 Running Belt 075514... - Page 21 DESCRIPTION Q'TY 075539~5 39~5 300m/m_Safety Switch Module W/Cable 075539~8 39~8 3 × 10m/m_Sheet Metal Screw 075539~9 39~9 250m/m_Amplifier Cable 075539~10 39~10 0.5W Amplifier Controller 075539~11 39~11 250m/m_Speaker W/Cable 075539~12 39~12 700m/m_Speaker W/Cable 075539~13 39~13 Earphone socket with cable and securing metal 075539~21 39~21 Speaker Grill Anchor...
- Page 22 DESCRIPTION Q'TY 075579 3/8" × 7T_Nut 075580 Ø35 × 5/16" × 1.5T_Flat Washer 075581 Ø25 × 10 × 2.0T_Flat Washer 075582 Ø19 × 10 × 1.5T_Flat Washer 075583 3/8" × 2.0T_Split Washer 075585 M5_Star Washer 075586 4 × 12m/m_Sheet Metal Screw 075587 5 ×...
-
Page 23: Parts Diagram
PARTS DIAGRAM CUSTOMER SERVICE 1-888-707-1880 © 2012... - Page 24 CUSTOMER SERVICE 1-888-707-1880 © 2012...
-
Page 25: General Maintenance
General Maintenance Belt and Bed - Your treadmill uses a very high-efficient low-friction bed. Performance is maximized when the bed is kept as clean as possible. Use a soft, damp cloth or paper towel to wipe the edge of the belt and the area between the belt edge and frame. Also reach as far as practical directly under the belt edge. - Page 26 TREADBELT TRACKING ADJUSTMENT: The performance of your treadmill is dependent on the frame running on a reasonably level surface. If the frame is not level, the front and back roller cannot run parallel, and constant belt adjustment may be necessary. The treadmill is designed to keep the treadbelt reasonably centered while in use.
- Page 27 BELT / DECK LUBRICATION: Do not lubricate with other than Xterra approved lubricant. Your treadmill comes with one tube of lubricant and extra tubes can be ordered directly from Xterra. There are commercially available lube kits, but the only one currently approved by Xterra is Lube-N-Walk.
- Page 28 If an extension cord is required it should be as short as possible and heavy duty 16 gauge minimum. Low household voltage. Contact an electrician or your Xterra dealer. A minimum of 110 volt AC current is required. High belt/deck friction. See General Maintenance Treadmill belt stops quickly/suddenly when section on lubrication.
-
Page 29: Manufacturer's Limited Warranty
All of the parts for the Xterra Treadmill, shown in figure can be ordered from: MAURICE PINCOFFS CANADA INC., 6050 Don Murie Street, Niagara Falls, Ontario L2E 6X8. When ordering parts, the parts will be sent and billed at the current prices.
Need help?
Do you have a question about the 1640755US and is the answer not in the manual?
Questions and answers