Table of Contents
Advertisement
Quick Links
NTI
NETWORK
R
TECHNOLOGIES
INCORPORATED
RACKMUX-V15-N-PRIMUX
RACKMUX-V17-N-PRIMUX
RACKMUX KVM DRAWER WITH PRIMUX
Installation and Operation Manual
1275 Danner Dr
Tel:330-562-7070
Aurora, OH 44202
Fax:330-562-1999
www.networktechinc.com
RACKMUX
KVM SWITCH VIA CAT5
®
Series
(Host Adapter sold separately)
®
MAN103 Rev 9/2/08
Advertisement
Table of Contents

Related Manuals for NTI RACKMUX-V15-N-PRIMUX


Summary of Contents for NTI RACKMUX-V15-N-PRIMUX
- Page 1 NETWORK 1275 Danner Dr Tel:330-562-7070 TECHNOLOGIES Aurora, OH 44202 Fax:330-562-1999 INCORPORATED www.networktechinc.com ® RACKMUX Series RACKMUX-V15-N-PRIMUX RACKMUX-V17-N-PRIMUX ® RACKMUX KVM DRAWER WITH PRIMUX KVM SWITCH VIA CAT5 Installation and Operation Manual (Host Adapter sold separately) MAN103 Rev 9/2/08...
- Page 2 Network Technologies Inc, 1275 Danner Drive, Aurora, Ohio 44202. CHANGES The material in this guide is for information only and is subject to change without notice. Network Technologies Inc reserves the right to make changes in the product design without reservation and without notification to its users.
-
Page 3: Table Of Contents
TABLE OF CONTENTS INTRODUCTION................................1 RACKMUX Features..............................1 Materials ..................................2 FEATURES AND FUNCTIONS............................3 PREPARATION FOR INSTALLATION ........................... 4 Definitions ..................................4 INSTALLATION................................5 Rack Mounting Instructions ............................5 Optional Telco 2-Post Mounting ..........................6 The Host Adapter................................. 7 Installation of a PS/2 CPU ............................ - Page 4 Edit User Station ..............................32 Select Autologon User ............................33 Idle Timeout ................................34 Alternate OSD Key..............................34 Update Firmware/Bootloader Menu........................35 Acquire/Send DDC Info ............................36 Configure MAC Host Adapters ..........................36 Select Keyboard Language ............................ 37 DISPLAY FUNCTIONS ..............................38 Standard Controls..............................
- Page 5 Figure 28- User Info screen ................................29 Figure 29- Edit User menu................................29 Figure 30- Submenu of the Edit User menu............................. 30 Figure 31- User Password screen ..............................31 Figure 32- Allow/Deny Access to Hosts screen ..........................31 Figure 33- Administrator Password screen ............................32 Figure 34- Edit User Station screen ..............................
-
Page 6: Introduction
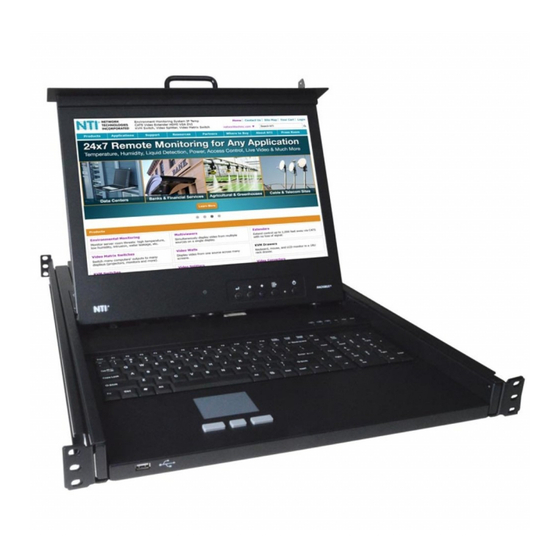
INTRODUCTION The RACKMUX-V15/17-N-PRIMUX is a KVM Drawer with KVM Switch via CAT5 (RACKMUX) that combines a rackmount 15" or 17” TFT/ LCD monitor, keyboard, touch pad, and KVM Switch via CAT5 (PRIMUX) in a space-saving 1RU industrial strength drawer. The RACKMUX is equipped with a built-in switch function, which allows control of up to 64 SUN, PS/2, or USB-enabled computers with a single keyboard, touchpad and monitor. -
Page 7: Materials
A null modem cable will be required for future software updates (see specification on page 45). • Cables can be purchased from Network Technologies Inc by calling 800-RGB-TECH (800-742-8324) or (330)-562-7070 or by visiting our website at www.networktechinc.com. Server Rack... -
Page 8: Features And Functions
Front View RACKMUX-V15-N-PRIMUX Rear View RACKMUX-V15-N-PRIMUX FEATURES AND FUNCTIONS Power Button- press to turn the LCD monitor ON and OFF Power LED- Indicates operation status Green = Power-ON, Video Input Signal OK Red = Suspend / Stand-by, or no Video Input Signal... -
Page 9: Preparation For Installation
PREPARATION FOR INSTALLATION The CAT5 cables must be run between the locations where the Host Adapter will be connected and RACKMUX is positioned. • Be careful to route the cables away from any sources of magnetic fields or electrical interference that might reduce the quality of the signal (i.e. -
Page 10: Installation
INSTALLATION Rack Mounting Instructions The RACKMUX was designed to be mounted to a rack and includes mounting flanges to make attachment easy. 1. Determine the mounting height in the rack for the drawer. It should be a height comfortable to use the keyboard and see the LCD display. -
Page 11: Optional Telco 2-Post Mounting
Optional Telco 2-Post Mounting If the Telco 2-post mounting bracket kit (RL-T15-TEL) is to be used, secure the short and long brackets to each side of the drawer as shown in Fig. 3. Apply 2 nuts (supplied) per bracket to secure the brackets to the drawer. Apply two #10-32x3/4” screws (supplied) per bracket to the post at the desired height. -
Page 12: The Host Adapter
The Host Adapter The PRIMUX HA Host Adapter is designed to support PS/2, SUN, and USB CPUs. For PS/2 CPUs use HA-PS2, for SUN CPUs use HA-SUN, and for USB CPUs use HA-USB. Host Adapters may be connected to or removed from a CPU without powering down the CPU, provided the CPU and operating system supports device hot plugging. -
Page 13: Installation Of A Usb Cpu
Installation of a USB CPU Plug the cables of the HA-USB Host Adapter into the back of the CPU after disconnecting the power cord from the CPU. (See Figure 5.) Connect the cable with the USB Type A male cable end on it to a USB Type A female port on the back of the CPU. -
Page 14: Connecting The Cat5 Cable To The Host Adapter
WARNING: Never connect the PRIMUX User Station to an Ethernet card, Ethernet router, hub or switch or other Ethernet RJ45 connector of an Ethernet device. Damage to devices connected to the Ethernet may result. REAR VIEW OF RACKMUX-V15-N-PRIMUX NETWORK CAT5... -
Page 15: Power Up For The First Time
Power Up for the first time Note: The CAT5 cable should already be connected before powering up the RACKMUX Connect the IEC power cord to the IEC connector on the RACKMUX (see Figure 9). REAR VIEW OF RACKMUX-V15-N-PRIMUX NETWORK CAT5... -
Page 16: Figure 10- Connect A Terminal (Pc) To Perform Firmware Update
REAR VIEW OF RACKMUX-V15-N-PRIMUX NETWORK CAT5 TECHNOLOGIES RS232 INCORPORATED 1275 Danner Dr Tel:330-562-7070 Aurora, OH 44202 Fax:330-562-1999 www.networktechinc.com Null modem cable Multi-Scan Monitor Terminal Figure 10- Connect a Terminal (PC) to perform firmware update... -
Page 17: Daisy-Chained Host Adapters
Daisy-Chained Host Adapters Up to 64 Host Adapters can be connected in a daisy-chain to create a segment of CPUs that are controlled by a single user from a User Station. The first Host Adapter is connected to the User Station via the "OUT" port. The additional Host Adapters in the segment will have CAT5 cable going from their "OUT"... -
Page 18: Using The Primux Cat5 Kvm Switch
USING THE PRIMUX CAT5 KVM SWITCH The PRIMUX CAT5 KVM System is designed to enable a user to control as many as 64 PS/2, USB, and SUN CPUs (any mixture of each) from a single User Station as much as 1000 feet from the farthest CPU. Control is achieved through the use of On Screen Display (OSD) Menus. -
Page 19: Setup Host Adapter(S)
With a successful login, the administrator can setup additional users (see page 28). FYI: The User Station can be configured to Autologon a specific user (page 33) with each User Station power up or have a Login splash screen appear for the user to login to the User Station. The administrator can also configure the User Station to autoconnect a user to a specific Host Adapter at logon by configuring the Logon Host and Action on Logon in the Edit User menu (page 29). -
Page 20: Standards Of Operation
Standards of Operation Throughout this manual, various standards of operation apply to the menus used to control and operate the PRIMUX. OSD menus can be navigated using the mouse, the up and down arrows on the keyboard, and the <Page Up>, <Page •... -
Page 21: Security
Security The PRIMUX CAT5 KVM System is designed with security to prevent unauthorized use of the CPUs connected as determined by the administrator. Up to 16 users may be given access to the system, each with individual limitations of use. Only the administrator or user with administrative privileges can activate or deactivate the security features on each user port. -
Page 22: User Access Functions
User Access Functions Command Mode In order to control the User Station with the keyboard, Command Mode must be enabled. To enable Command Mode from the keyboard: (ACCENT/TILDE Ctrl Press KEY) All the status lights on the keyboard will illuminate to indicate that Command Mode is enabled. At this point, the Command Mode menu will be displayed. -
Page 23: Scan Mode
Function Keystroke Enter Settings Menu Search- locate a Host Adapter (using name, comment, unique ID, index number) Enter Administration Mode (Administrator only- see page 25) Display info for the selected Host Adapter/User Station Display Command Mode Help Menu Go to - select Host Adapter by index number Find- select Host Adapter by name Connect to the highlighted Host Adapter Enter... -
Page 24: Settings Menu
Settings Menu To enter the Settings Menu, press <T> from the Command Mode Menu. Figure 14- Settings menu Settings Menu Function Description Keystroke OSD Settings Enables the user to reposition or resize the OSD menu on the monitor Numeric Host List Toggle between listing Host Adapters by Alphabetic Host List reference number vs alphabetically by name... -
Page 25: Search Host Adapter
Search Host Adapter When the user presses <R> from the Command Mode menu, the Search Host Adapter screen will appear, with the following search criteria to choose from: N- Name- to search by name I - Index- to search by index number U- Unique ID- to search by the unique identification number C- Comment- to search by words in the... -
Page 26: User Station Info
Function Keystroke Display User Station info screen Display logged-in user info screen Return to Command Mode X or Esc User Station Info To display the user station information screen, press <S> from the Host Adapter Info screen (page 20). (From Command Mode press <I>... -
Page 27: Osd Settings Menu
OSD Settings Menu To enter the OSD Settings Menu, press <O> from the Settings Menu. (From the Command Mode menu press <T> - <O>.) Using the OSD Settings, the user can resize and reposition the OSD window on the monitor as desired. Figure 19- OSD Settings Menu OSD Settings Menu Function... -
Page 28: Change Scan Dwell Time
Scan Mode enables the user to scan through selected ports and to have full device control of the connected port. From this menu the user can edit the list of ports that can be scanned. Only the selected ports will be scanned in Scan Mode when the respective user is logged in. Each user can have their own scan list (except for the "ROOT"... -
Page 29: Video Quality Adjustment
Video Quality Adjustment Video quality adjustment is done automatically to assure the image is as clear as possible. However, due to the different twisting rates of each pair of wires in the CAT5 cable, variations in the signal delays between the red, green, and blue channels will occur when the cable is longer than 300 feet. -
Page 30: Administration
Administration Administration Menu Note: The Administration menu will only be accessible if the administrator is logged in or if the user has administration rights. Press <A> from the Command Mode menu to display the Administration menu. Figure 23- Administration Menu The table below describes the functions of the Administration menu. -
Page 31: Edit Hosts, Users, And User Station Info
Edit Hosts, Users, and User Station Info From the Administration menu, press <E> to display the Edit Menu . Function Keystroke Display Host Adapter List w/options for editing Display User List w/options for editing Edit User Station Parameters Return to the Administration menu X or Esc Figure 24- Edit Menu Host Adapter List... -
Page 32: Edit Host Adapter
Edit Host Adapter With a Host Adapter selected from the Host Adapter List, press <E> to bring up the Edit Host Adapter menu. (From Command Mode type <A> - <E> - <H> -<E>.) Figure 26- Edit Host Adapters menu To edit the Host Adapter enter the desired parameter values as defined in the chart below: Suggestion: Use the <TAB>... -
Page 33: User List
User List From the Edit Menu, press <U> to display the User List from which the adminstrator can edit or view selected User parameters, (From Command Mode type <A> - <E> - <U>.) Figure 27- User List Function Description Keystroke Info Display info about the selected User Add a new user- a confirmation of Yes or No will be required (see page 26) -
Page 34: User Info
User Info To display User Info, press <I> from the User Name List. (From Command Mode type <A> - <E> - <U> - <I>.) The User Info screen provides all of the current information about the selected user. Item Description Name The name of the User Comment... -
Page 35: Add New User
To edit User parameters enter the desired parameter values as defined in the chart below: Function Keystroke Parameter Value Modify the name (of the selected User) String, 16 characters max., case sensitive Delete this user (Confirmation required) Y or N Press <Y>... -
Page 36: Edit User Password
Edit User Password The administrator can edit the user password by pressing <P> from the Edit User menu. . (From Command Mode type <A> - <E> - <U> - <E> - <P>.) To setup the password: Enter a password- 16 characters maximum, alphabetical or numeric, ( passwords are case sensitive) Press <Enter>... -
Page 37: Change Administrator's Password
Change Administrator's Password To change the Administrator's Password, press <P> from the User List. (From Command Mode type <A> - <E> - <U> - <P>.) A screen will appear prompting the administrator for a new password. Enter the current password (case sensitive, maximum 16 characters, alphanumeric) Press <Enter>... -
Page 38: Select Autologon User
To edit the User Station Info use the commands and enter the desired parameter values as defined in the chart below: Suggestion: Use the <TAB> key to quickly jump between editable fields for easy configuration management. Confirmation Keystroke Parameter Value Function Required Modify the name... -
Page 39: Idle Timeout
Idle Timeout Selects the idle time in minutes. xxx= time in minutes from 2 to 255. (From Command Mode press <A>-<I>.) Use 0 to disable this feature. When the user is idle (no keyboard or mouse activity) for the selected number of minutes, the user will be logged out and have to log back in. -
Page 40: Update Firmware/Bootloader Menu
Update Firmware/Bootloader Menu From the Administration Menu press <B> to get to the Update/Bootloader Menu. (From Command Mode press <A> - <B>.) The Update/Bootloader Menu is provided to enable the administrator to update the firmware inside the PRIMUX User Station and Host Adapters if needed. -
Page 41: Acquire/Send Ddc Info
Acquire/Send DDC Info DDC information allows the CPU to automatically select the optimal resolution for the monitor by receiving, at power up, information from the monitor concerning its resolution specifications. The DDC information is acquired from the monitor by the PRIMUX . A monitor with DDC support must be connected to the connector "MONITOR"... -
Page 42: Select Keyboard Language
Select Keyboard Language To enter the Select Keyboard Language menu press <L> from the Administration menu (from Command Mode press <A> - <L>). Figure 40- Select Keyboard Language menu The Select Keyboard Language menu enables the user to select a specific language (country code) to be used. Typically only SUN CPUs require a specific country code to be registered at boot up. -
Page 43: Display Functions
DISPLAY FUNCTIONS An NTI RACKMUX with a 17” monitor supports resolutions up to SXGA (1280 x 1024) with a refresh rate at between 55 and 76Hz. When a 15” monitor is present, support for resolutions up to XGA (1024 x 768) apply with a refresh rate at between 55 and 76Hz. The quality of the image on the LCD monitor is adjustable using an On Screen Display (OSD) menu using the control buttons on the RACKMUX. -
Page 44: Brightness/Contrast Menu
Brightness/Contrast Menu Selecting the Brightness/Contrast menu will bring up a screen in which the user can adjust the brightness and contrast levels of the LCD display. Using the Up or Down arrows to navigate the menu, highlight either the BRIGHTNESS or CONTRAST sections and press the Select button to choose the option to adjust. -
Page 45: Setup Menu
Setup Menu Selecting the Setup menu will bring up a screen in which the user can adjust OSD POSITION-the position of the OSD menus on the LCD display OSD TIME-the length of time the user can be idle before the OSD menu automatically exits (adjustable from 10 to 60 seconds) LANGUAGE-the language that the OSD menus will be presented in With the item highlighted, (use the Up or Down arrow to move between them), press the Select button to choose the option to... -
Page 46: Keyboard Functions
KEYBOARD FUNCTIONS The RACKMUX-V15/17-N-PRIMUX has a standard Windows keyboard with 17-key numeric keypad. Note: The “Fn” key is not an active key on this keyboard. Scroll PrtSc Pause Delete SysRq Lock Break & Backspace Home Lock Page Home Pg Up "... -
Page 47: Keyboard Mapping
KEYBOARD MAPPING Key Equivalents Using the chart below, find the character needed to be typed on the CPU being accessed, then follow the row across for the equivalent on the keyboard (Windows). (See Fig. 41 on page 41 for reference.) PS/2 USB 101 (Windows) -
Page 48: Rackmux-Kvm Drawer Standard Specifications
RACKMUX-KVM DRAWER STANDARD SPECIFICATIONS General Specs Case Material..........Electro-galvanized steel black powdercoated Dimensions WxDxH (in.).......19 x 21.9 x 1.75 Supported Rack Depths………………………..Adjustable 22” – 39” Input Power............AC 100-240V, 50 – 60 Hz Operating Temperature........0-40˚C Storage Temperature…………………………..-20-60˚C Relative Humidity………………………………. 20-90%, non-condensing Approvals............CE, RoHS LCD –... -
Page 49: Keyboard
Keyboard No. Of Keys ...........83 Keys (US), 84 keys (German, French, Italian, Spanish) Key Switch Type ..........Membrane switch Keytop Style...........Rectangular Cylindrical Operating Force ..........50gf +/- 25gf Stroke ............3.0mm +/- .5mm Tactile ............20 gf typ. Height ............8.5 mm Operating Life ..........10M operations, minimum Interface ............Row and column matrix Key Switch Bounce ........10 ms, maximum Supported Platforms ........USB, PS/2... -
Page 50: Interconnection Cable Wiring Method
INTERCONNECTION CABLE WIRING METHOD The CAT5 connection cable between the remote and local is terminated with RJ45 connectors and must be wired according to the EIA/TIA 568 B industry standard. Wiring is as per the table and drawing below. Pair 3 Wire Color Pair Function... -
Page 51: Menu Quick-Find Keystroke Table
MENU QUICK-FIND KEYSTROKE TABLE Function Source Page Keystroke Sequence Command Mode <Ctrl> + < > <Ctrl> + <`>-<<Gxx>-<Enter>-<Enter> Connect to specific Host Adapter by number where xx is the index number of the specific Host Adapter Activate Scan Mode <Ctrl> + < >... -
Page 52: Index
INDEX add a new user, 30 master authority, 4, 12 adding a Host Adapter, 12 materials supplied, 2 A dministration menu, 25 null modem cable pinout, 45 administrator login, 16 numeric keypad, 41 Administrator rights, 13 OSD Controls, 38 Alternate OSD key, 34 OSD settings menu, 22 autologin, 16 power-up sequence, 10...
Need help?
Do you have a question about the RACKMUX-V15-N-PRIMUX and is the answer not in the manual?
Questions and answers