Page 1
USE & CARE GUIDE 
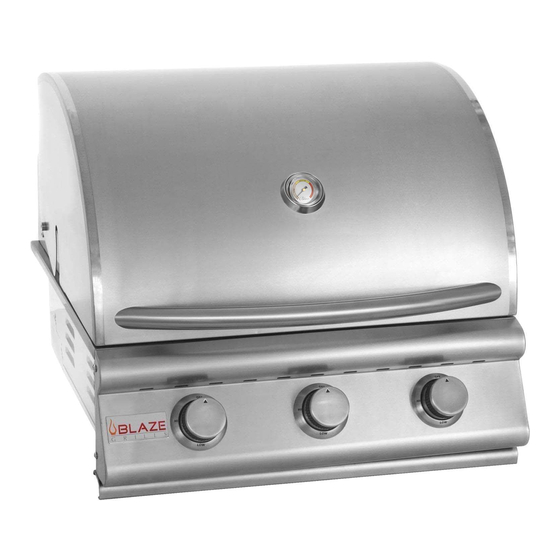
GAS GRILLS BLZ-3(NG/LP), BLZ-4(NG/LP), BLZ-5(NG/LP), SIDE BURNERS BLZ-SB1 (NG/LP), BLZ-SB2 (NG/LP) DANGER - IF YOU SMELL GAS: WARNING I) Shut off the gas supply to the appliance at its source. I) Do not store or use gasoline or other flammable 2) Extinguish any open flames.
Page 2
THIS MANUAL APPLIES TO THE FOLLOWING BLAZE GRILLS & SIDE BURNERS: Model: BLZ-3LP / BLZ-3NG 3 BURNER Model: BLZ-4LP / BLZ-4NG 4 BURNER 23 1/4”W x 21 1/4”D x 8 1/2”H 30 5/8”W x 21 1/4”D x 8 1/2”H Cutout Dimensions...
Page 3
Model: BLZ-5LP / BLZ-5NG 5 BURNER 38 5/8”W x 21 1/4"D x 8 1/2”H Cutout Dimensions BTU Output 12,000 BTU per Burner x5 Infrared Back Burner 12,000 BTU Total BTU 72,000 Push N’ Turn Flame Thrower Primary Ignition Secondary Ignition Flash Tube Cooking Grid 37 1/4"...
Page 4
Model: BLZ-SB1-LP / BLZ-SB1-NG 1 BURNER Model: BLZ-SB2-LP / BLZ-SB2-NG2 BURNER Cutout 11”W x 17 3/4"D x 4 1/2"H Cutout Dimensions 10 3/4"W x 20 3/4"D x 8 1/2"H Dimensions Total BTU Output 12,000BTU(1Bnr) Total BTU Output 24,000BTU(2Bnr) Number of Number of Burners Burners Burner...
Page 5
Safety and Installation Instructions When using your Blaze grill, please read and follow these basic precautions: GRILL INSTALLATION This gas grill must be installed in accordance with all local codes. If installation is planned in an area with no local codes, the gas grill must be installed in accord with the National Fuel Gas Code ANSI Z223.1 and storage and handling of liquefied petroleum gases, ANSI/NFPA 58 or CSA B149.1 natural gas and propane installation code.
Page 6
Safety and Installation Instructions Location of your Barbecue Most importantly, this is an outdoor appliance. Ensure your barbecue is positioned safely away from anything that can catch fire. Under no circumstance is this barbecue to be used indoors. This includes garages or any other enclosed area.
Page 7
Partial Enclosures: Many backyards have areas that are partially closed off, such as balconies and pergolas. In some cases, it is hard to decide whether these partially enclosed areas should be classified as indoor areas, particularly in terms of permanent (non-closable) ventilation.
Page 8
edges and dripping grease. Be certain your appliance is properly installed and grounded by a qualified technician in accordance with applicable codes. To guarantee the electrical safety of this appliance, continuity must exist between the appliance and an effective grounding system. It is imperative that this basic safety requirement be met.
operation without a gas regulator will void warranty of the grill. Grills operated with NG (natural gas) gas must be installed with the NG regulator supplied with the unit and set to 4.0" water column pressure. Grills operated with LP (liquid propane) gas must be installed with an LP regulator not supplied with the unit and set to 11"...
The grill and its individual shutoff valve must be disconnected from the gas supply piping system during any pressure testing of that system at test pressure in excess of 0.5 psi (3.5 kPa). Connection Slide the grill forward to gain access to the regulator and gas connection point in the rear. Connect a suitable natural gas flex connector to the grill regulator.
Page 11
Turn on the gas On Natural Gas systems, turn the main feed valve to the grill. On LP systems, turn the cylinder valve knob counter clockwise one turn to open. Apply the leak-testing solution by spraying it on joints of the gas delivery system. Blowing bubbles in the soap solution indicates that a leak is present.
Page 12
Liquid Propane (LP) Gas Requirements LP TANK REQUIREMENTS: A collar to protect the cylinder threads on the customer supplied tank. An arrangement for gas vapor withdrawal. A safety relief device having direct communication with the vapor space of the cylinder. A method of mounting.
Page 13
Transporting and Storing LP Gas Transport only one cylinder at a time. Ensure the cylinder is secured in an upright position with the control valve turned off and the dust cap in place. Store cylinders outdoors and out of the reach of children. Do not store cylinders in a building, garage, or any other enclosed area. Leak Testing All gas piping and connections must be tested for leaks after installation or service.
Page 14
Installing the Grill in a BBQ Island You will need a second person to help you avoid damaging the grill or your barbecue island. Before installing a grill in any island or cut out, make sure that the opening is not bigger than the outside frame of the grill unit.
Page 15
BUILDING BBQ SPECIFICATIONS ALL BBQ ISLANDS MUST BE MANUFACTURED FROM “NON-COMBUSTIBLE” MATERIAL. Minimum clearance to adjacent combustible construction at 14” from sides & 16” from back MODEL DESCRIPTION WIDTH DEPTH HEIGHT BLZ-3 25” 3 Burner 23 1/4” 21 1/4” 8 1/2” BLZ-4 32”...
Page 16
Installation Method for Propane Installation Method for Natural Gas Connection Method for Dual Side Burner When connecting your Side Burner to LP or NG No Regulator is required on the Side Burner. Blaze Outdoor Products Instructional Book Page | 16 Version 1.0...
Page 17
BBQ SPECIFICATIONS NOTE: “ALWAYS” have equipment measured by Contractor before building. NOTE: Check with City and Fire department for Local Building Codes. A Permit may be required for outdoor Kitchen Construction. Blaze Outdoor Products Instructional Book Page | 17 Version 1.0...
Page 18
ELECTRICAL PRECAUTIONS Extension cords are available and may be used if care is exercised in their use. If an extension cord is used: the marked electrical rating of the cord set or extension cord should be at least as great as the electrical rating of the appliance, and, ...
Page 19
General Safety and Care NOTE: The manufacturer cannot be held responsible for damage or injury caused by improper use of this appliance. Gasoline, lighter fluid or other flammable liquids and vapors should never be stored in the area of this grill or any other appliance. ...
Page 20
Safety and Installation Instructions UNIT INSTALLATION: Your Blaze Series Grill comes pre-assembled and requires very little setup. We do however; recommend the use of professional help during the installation of your unit as improper installation may affect your warranty. Remove the unit from the box along with all accessories and check that no damage has occurred to the unit or any parts.
Lighting Instructions Caution: Never operate the grill unattended. Prior to using your grill, verify that all of the following is correct: The burner tube is free of any debris or obstruction. Installation of the proper gas type and regulator settings. ...
Lighting the Grill 1. Open the hood. 2. Use caution when lighting burners by standing as far away from the burners as possible. 3. To ignite burners, push the burner knob in and slowly rotate counter-clockwise to the high position. 4.
Page 23
5. Push in and turn the control knob to HIGH. 6. If the burner does not light after five seconds, turn the control knobs to the OFF position. 7. Wait five minutes until the gas clears before attempting to light it again. 8.
Page 24
Blaze Outdoor Products Instructional Book Page | 24 Version 1.0...
Page 25
Fuel (Gas) Conversion Instructions for BLAZE Gas grills. CAUTION: This should only by performed by a licensed gas professional. FUEL CONVERSION - Main Burners: 1. You must remove all cooking grids and flame tamers to expose the main burners in the grill.
Page 26
adjustments to the flame's appearance. To adjust, remove the burner from the grill and loosen the phillips head screw holding the air shutter to the burner. If the flame is yellow, open the air shutter to make the flame bluer. If the flame is lifting off of the burner surface, slightly close the air shutter.
HIGH for 5-7 minutes with the hood open. This allows any food particles or grease drippings to burn away. Once your grill has cooled completely, use a soft brush or vacuum to remove any ash accumulation on the burner if necessary. Cleaning Your Grill NOTE: You should clean your grill after each use to maintain the overall appearance over the life of your grill.
out any debris through the air shutter and inspect the burner inlet to ensure it is free of any obstructions. Use a rod or pipe cleaner to remove any debris within the burner if necessary. NOTE: Make sure each burner is properly placed after cleaning. It is very important to ensure the end of the burner is installed appropriately onto the gas valve to ensure gas flows safely into the burner.
Page 29
WARRANTY ON PARTS: Burners - Lifetime Cooking Grills - Lifetime Valves - 15 years Exterior Construction - Lifetime All other parts - 1 year Contact Blaze Outdoor Products directly for all warranty parts and questions. Consumers are responsible for all labor and shipping cost associated with warranty parts.
Page 31
BLAZE 3 Burner BLAZE 4 & 5 Burner Note: Add one burner, one flame tamer, one heat separator and one grid for the Blaze 5 Burner. Blaze Outdoor Products Instructional Book Page | 31 Version 1.0...
Page 32
Blaze Side Burner – 1 Burner Blaze Side Burner – 2 Burners Blaze Outdoor Products Instructional Book Page | 32 Version 1.0...
Page 33
Locating the Product Serial Number: The serial number for your BLAZE appliance is located on the left hand side of the Firebox. You will need this number to properly register your grill and activate coverage. Write this information in the space provided below for your records Barbecue model: Barbecue serial number: □...
Page 34
Blaze Product Registration Please take a minute to let us know what you bought. This makes sure we keep you up to date and have your info ready if you ever need warranty help! Name First Last Email Phone Street Address Address Line 2 City State / Province / Region...
Need help?
Do you have a question about the BLZ-3NG and is the answer not in the manual?
Questions and answers