Blaze BLZ-3NG Use & Care Manual
Hide thumbs
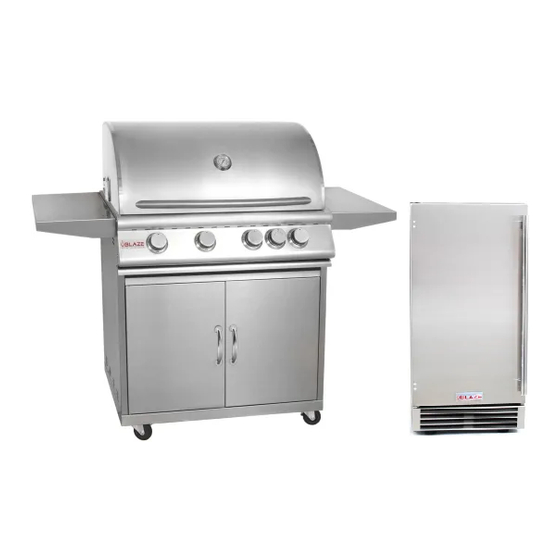
Also See for BLZ-3NG:
- Use & care manual (41 pages) ,
- Owner's manual (9 pages) ,
- Use & care manual (32 pages)
Table of Contents
Advertisement
GAS GRILLS BLZ-3(NG/LP), BLZ-4(NG/LP), BLZ-5(NG/LP)
DANGER
- IF YOU SMELL GAS:
I) Shut off the gas supply to the appliance at its source.
2) Extinguish any open flames.
3) Open grill hood to release any accumulation of gas
vapor.
4) If a gas odor persists, Keep away from your
appliance and contact your gas supplier or fire
department immediately.
ATTENTION INSTALLER:
PLEASE LEAVE THESE INSTRUCTIONS WITH THE CONSUMER.
ATTENTION CONSUMER:
PLEASE READ & RETAIN THESE INSTRUCTIONS FOR FUTURE REFERENCE AND BEFORE INSTALLING
OR OPERATING.
Blaze Outdoor Products: 10920 Coursey Blvd, Baton Rouge, LA 70816 USA
Phone: 866-976-9510 email: CustomerService@BlazeGrills.com
Version 1.4
USE & CARE GUIDE
- CONTACT INFORMATION -
BLAZEGRILLS.COM
Blaze Outdoor Products Instructional Book
Page | 1
WARNING
I) Do not store or use gasoline or other flammable
liquids or vapor in the vicinity of this or any other
appliance
2) A LP cylinder not connected for use shall not be
stored in the vicinity of this or any other appliances.
Advertisement
Table of Contents

Related Manuals for Blaze BLZ-3NG


Summary of Contents for Blaze BLZ-3NG
- Page 1 USE & CARE GUIDE GAS GRILLS BLZ-3(NG/LP), BLZ-4(NG/LP), BLZ-5(NG/LP) DANGER - IF YOU SMELL GAS: WARNING I) Shut off the gas supply to the appliance at its source. I) Do not store or use gasoline or other flammable 2) Extinguish any open flames. liquids or vapor in the vicinity of this or any other 3) Open grill hood to release any accumulation of gas appliance...
-
Page 2: Table Of Contents
Table of Contents BBQ Specifications General Safety and Installation Warnings i. Location of Appliance III. Electrical Safety and Installation Warnings IV. Gas Safety and Installation Warnings i. Checking for Gas Leaks 12-13 Gas Connection i. Unpacking Unit ii. Natural Gas Requirements iii. - Page 3 VIII. Cleaning your Appliance IX. Optional Infrared Sear Burner i. How to Replace Conventional Burner with Infrared Sear Burner ii. Preheating the Infrared Burner iii. Infrared Burner Cleaning Fuel Conversion i. Gas Regulator ii. NG – LP Regulator Conversion iii. Main Burner iv.
- Page 4 THIS MANUAL APPLIES TO THE FOLLOWING BLAZE GRILLS: Model: BLZ-4LP / BLZ-4NG 4 BURNER Model: BLZ-3LP / BLZ-3NG 3 BURNER 30 5/8”W x 21 1/4”D x 8 1/2”H 23 1/4”W x 21 1/4”D x 8 1/2”H Cutout Dimensions Cutout Dimensions...
- Page 5 Model: BLZ-5LP / BLZ-5NG 5 BURNER 38 3/8”W x 21 1/4"D x 8 1/2”H Cutout Dimensions BTU Output 14,000 BTU per Burner x5 Infrared Back Burner 10,000 BTU Total BTU 82,000 Push N’ Turn Flame Thrower Primary Ignition Secondary Ignition Flash Tube Cooking Grid 37"...
-
Page 6: Bbq Specifications
BBQ SPECIFICATIONS NOTE: “ALWAYS” have equipment measured by Contractor before building. Blaze Outdoor Products Instructional Book Page | 6 Version 1.4... -
Page 7: General Safety And Installation Warnings
General Safety and Installation Warnings NOTE: The manufacturer cannot be held responsible for damage or injury caused by improper use of this appliance. When using your Blaze appliance, please read and follow these basic precautions: To reduce the risk of fire, electric shock, or injury, read and follow these basic precautions before installing/operating your appliance. -
Page 8: For Your Safety
IMPORTANT: Consult the AHJ (Authority Having Jurisdiction) or local contractor of any uncertainty. This unit is for outdoor use only! Do not operate in a building, garage or any other enclosed areas. This could result in carbon monoxide buildup which could result in injury or death. For proper operation, burners must be aligned with the valve orifice and seated in the bracket slot. -
Page 9: Location Of Appliance
Location of Appliance Most importantly, this is an outdoor appliance. Ensure your appliance is positioned safely away from anything that can catch fire. Under no circumstance is this appliance to be used indoors. This includes garages or any other enclosed area. ... -
Page 10: Electrical Safety And Installation Warnings
Use cooking utensils with wood handles and insulated oven mitts when operating the appliance. Do not store anything in the appliance. Make sure food is not forgotten in the appliance; forgotten items could melt or catch fire when the appliance is turned on. ... -
Page 11: Gas Safety And Installation Warnings
Keep any electrical supply cord and fuel supply hose away from any heated surfaces, sharp edges and dripping grease. Be certain your appliance is properly installed and grounded by a qualified technician in accordance with applicable codes. To guarantee the electrical safety of this appliance, continuity must exist between the appliance and an effective grounding system. -
Page 12: Checking For Gas Leaks
purchased. A Natural Gas appliance requires natural gas to operate; an LP appliance requires liquid propane gas to operate. Never connect the appliance to an unregulated gas supply line. Appliances operated without a regulator are unsafe and will not be serviced until installed properly and safely. Unsafe operation without a gas regulator will void the warranty of the appliance. - Page 13 As a safety precaution, remember to always leak test your appliance outdoors in a well-ventilated area. Never smoke or permit sources of ignition in the area while doing a leak test. Do not use a flame, such as a lighted match to test for leaks.
-
Page 14: Leak Testing
Leak Testing All gas piping and connections must be tested for leaks after installation or service. All leaks must be corrected immediately. Remember-before exchanging an empty bottle for a new one; make sure all control valves are in the “off” position. Open the valve (shut-off or ‘ON’... -
Page 15: Natural Gas Requirements
Natural Gas Requirements Connect a suitable natural gas flex connector to the grill regulator located on the rear right corner of the appliance. It is recommended to use a flex connector with a minimum of a ½” diameter or larger. ... -
Page 16: Transporting And Storing Lp Gas
If one is not already available, it is recommended that an ON-OFF shutoff valve be installed at the gas supply source, and that the gas supply be turned off when either Natural Gas or LP Gas appliances are not in use. Transporting and Storing LP Gas Transport only one cylinder at a time. - Page 17 the cut out. If the gas line connection is accessible when the appliance installed, slide the appliance into the cut out and then attach the gas line. Be very careful not to kink the gas line when lowering the appliance into the cut out. Keep your fingers away from where the appliance will be supported on counter.
-
Page 18: Building Bbq Specifications
BUILDING BBQ SPECIFICATIONS ALL BBQ ISLANDS MUST BE MANUFACTURED FROM “NON-COMBUSTIBLE” MATERIAL. Minimum clearance to adjacent combustible construction at 14” from sides & 16” from back MODEL DESCRIPTION WIDTH (A) DEPTH (B) HEIGHT (C) BLZ-3 25” 3 Burner 23 1/4” 21 1/4”... -
Page 19: Installation Method For Propane
Installation Method for Propane Installation Method for Natural Gas FIRST TIME OPERATION Before lighting the burners inspect the gas supply piping or hose. If there is evidence of cuts, wear, or abrasion, it must be replaced prior to use. Always keep your face and body as far away from the grill as possible when lighting. -
Page 20: Lighting The Appliance
Check for gas leaks. Minimum clearances are maintained. All packaging has been removed. All parts and components are properly in place. An installer-supplied manual gas shut-off valve is fully accessible. LP hose is clean and inspected for cuts, wear, abrasion, or leaks. Replace if necessary with a suitable UL, ETL or CSA Listed part with internally threaded connector. -
Page 21: Flame Adjustment
Push in and turn the control knob to HIGH. If the burner does not light after five seconds, turn the control knobs to the OFF position. Wait five minutes until the gas clears before attempting to light it again. If the burner does not light after several attempts, immediately close all gas valves and consult an authorized service technician. -
Page 22: Cleaning Your Appliance
of the burner surface, slightly close the air shutter. Re-tighten the phillips head screw and re-install the burner to recheck the flame appearance. Repeat if necessary. Turn burners to low flame setting and test for proper flame height. Flame should stand between ¼” – ½”... -
Page 23: Optional Infrared Sear Burner
completely, remove the tray by pulling it all the way out until it comes free. Clean the tray with hot soapy water and re-install. If using an oven cleaning agent, be sure to carefully follow the manufacturer’s instructions to avoid damage to the stainless steel. Heat Separators, Flame Tamers, Grilling and Warming Racks To clean after each use, turn the appliance on HIGH for 10-15 minutes with the hood closed. -
Page 24: Infrared Burner Cleaning
Preheating the Infrared Burner Always preheat the entire appliance before cooking. If the appliance is already hot from cooking, you should still preheat the infrared burner for 3 minutes. Never place food over the burner until it is fully preheated to avoid clogging the tiny ports and damaging the burner from grease drippings and food particles. -
Page 25: Ng - Lp Regulator Conversion
Blaze Outdoor Products Instructional Book Page | 25 Version 1.4... -
Page 26: Main Burner
Fuel (Gas) Conversion Instructions for BLAZE Gas grills. CAUTION: This should only by performed by a licensed gas professional. Main Burners: You must remove all cooking grids and flame tamers to expose the main burners in the appliance. On the bottom rear of each burner is a cotter pin. Remove cotter pin. To remove burner, pull rod upwards and slide burner toward the rear of the appliance. -
Page 27: Warranty Registration
Warranty Registration If you have purchased a Blaze Series Grill you must register your product within 30 days of purchase to validate the warranty and maintain your original receipt to get parts for the appliance. You may register your appliance at blazegrills.com by selecting Contact Us, and then selecting Register your Product. -
Page 28: Grill Parts
GRILL PARTS Assemble Back Panel BLZ-32-026 3 Burner Hood Handle BLZ-26-001 Cast Stainless Steel Burner BLZ-32-030 4 Burner Hood Handle BLZ-32-001 Control Knob BLZ-32-037 5 Burner Hood Handle BLZ-40-001 3 Burner Control Panel BLZ-26-005 Hood Roller Bearing BLZ-32-048 4 Burner Control Panel BLZ-32-005 Hood Rubber Pad BLZ-32-012... - Page 29 BLAZE 3 Burner BLAZE 4 & 5 Burner Note: Add one burner, one flame tamer, one heat separator and one grid for the Blaze 5 Burner. Blaze Outdoor Products Instructional Book Page | 29 Version 1.4...
-
Page 30: Locating The Product Serial Number
Locating the Product Serial Number: The serial number for your BLAZE appliance is located on the left hand side of the Firebox. You will need this number to properly register your appliance and activate coverage. Write this information in the space provided below for your records Appliance model: Appliance serial number:... -
Page 31: Blaze Product Registration
Blaze Product Registration Please take a minute to let us know what you bought. This makes sure we keep you up to date and have your info ready if you ever need warranty help! Name First Last Email Phone Street Address Address Line 2 City State / Province / Region...
Need help?
Do you have a question about the BLZ-3NG and is the answer not in the manual?
Questions and answers