Table of Contents
Advertisement
Quick Links
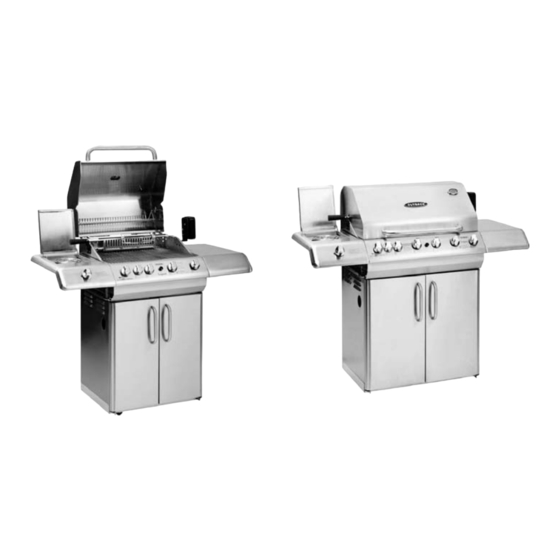
Assembly and Operating Instructions for Outback®
Professional Range Pro 4 & 6 Burner Gas Barbecues
Photographs are not to scale.
Specifications subject to change
without prior notice.
•
•
•
•
•
•
WARNING
•
•
FOR YOUR SAFETY
If you smell gas:
1. Shut off gas to the appliance.
2. Extinguish any open flame.
3. Open barbecue lid or hood.
4. If odour continues, discontinue use and
contact your local dealer.
Gas Barbecues
For outdoor use only.
Read instructions before using the appliance. Failure to follow instructions could
result in death, serious bodily injury, and/or property loss.
Warning: accessible parts may be very hot. Keep young children away.
Do not move the appliance during use.
Turn off the gas supply at the gas cylinder after use.
Any modification of the appliance, misuse, or failure to follow the instructions
may be dangerous and will invalidate your warranty. This does not affect your
statutory rights.
Retain these instructions for future reference.
Leak test your barbecue annually. Check the hose connections are tight and leak
test the m each time you reconnect the gas bottle.
FOR YOUR SAFETY
1. Do not store or use petrol or other flammable
vapours or liquids in the vicinity of this or any
other appliance.
2. A gas cylinder not connected for use shall not
be stored in the vicinity of this or any other
appliance.
0359
Advertisement
Table of Contents

Related Manuals for Outback Professional Range Pro 4


Summary of Contents for Outback Professional Range Pro 4
- Page 1 Gas Barbecues Assembly and Operating Instructions for Outback® Professional Range Pro 4 & 6 Burner Gas Barbecues Photographs are not to scale. Specifications subject to change 0359 without prior notice. • For outdoor use only. • Read instructions before using the appliance. Failure to follow instructions could result in death, serious bodily injury, and/or property loss.
-
Page 2: Table Of Contents
Parts List Quantities vary according to model purchased. Specifications subject to change without prior notice. For more details on hardware, please see ‘Hardware Reference Diagram’. CODE PART QTY Professional Range Pro 4 Professional Range Pro 6 Hood Handle Hood HOOD... -
Page 3: Parts Diagrams
Parts Diagrams Quantities vary according to model purchased. Specifications subject to change without prior notice. For more details on hardware, please see ‘Hardware Reference Diagram’. Back Burner Knob... - Page 4 Hardware Reference Diagram Specifications subject to change without prior notice. E5, E6 E1, E2...
-
Page 5: Warming Basket
Assembly IMPORTANT! • Tools Required: Medium size flat blade or Phillips/Crosspoint screwdriver, adjustable spanner or metric spanner set • The assembly of this barbecue requires 2 people. • Carefully unpack the parts from the box and remove all internal packaging before commencing assembly. - Page 6 Ignition Assembly Attach the Body Support (C11) to the L/H (C7) and R/H (C8) Panels using the Screws (E1). Attach the Cabinet Support (C12) between the Body Support and Bottom Panel using the Screws (E1).
- Page 7 Attach the Back Panel (C9) to the assembled portion of the cabinet using the Screws (E1,E4). Turn over the cabinet. Attached the Casters (C15) and the Lockable Casters (C16) to the Bottom Panel (C10) using the Screws(E1).
-
Page 8: Burner 4
Lay the Barbecue Body (B1) onto the supports of the cabinet Carefully . WARNING: DO NOT RELEASE THE BARBECUE BODY WHILE THE BARBECUE HAS NOT BEEN PROPERLY SEATED. THIS MAY RESULT IN INJURY OR DAMAGE TO YOUR BARBECUE. Open Hood(A2), Connect the Body to the cabinet using the Screws(E1). Attach the Side Burner Shelf (C4) and side Shelf (C5) to side panel of Body using the Screws(E1,E3). - Page 9 Side Burner knob Valve Attach the Valve (C3) to the Side Burner Shelf (C4) using the Screws(E3). Then push the Side Burner Knob (C20) onto the Valve stem. Valve Venturi tube of the side burner side burner bracket Feed the venturi tube of the side burner (C1) through the hole in the side burner shelf, and slide the end of the venturi tube over the tip of the valve, then connect the burner to side burner bracket using the Screws (E3).
- Page 10 Open L/H side burner lid and place the Grid (C2) onto the burner. Connect the wires to the Ignition Assembly (C19) as shown on the next page. Attach the Electronic Ignition Battery in to the Ignition. Note: The Ignition Assembly were Assembled on the L/H Panel.
- Page 11 Outback® Professional Range Pro 4 Electronic Side Burner Ignition Assembly Diagram Black Blue Blue Back Burner Black 9V Battery (Included) Connect the wires as shown in the Ignition diagram. Pushbutton Yellow Orange Orange Outback® Professional Range Pro 6 Electronic Ignition Assembly Diagram...
- Page 12 Connect to the valve of Body Connect to the side burner valve Connect the gas hose to the BBQ Body and L/H Side Burner Shelf. Ensure the mating faces of the connection are clean and not damaged. Do not use any sealing tape, paste, or liquid on the joint.
- Page 13 Remove the plastic wrap from the Flame Tamers (B9) and lay them into the body ensuring that they lie level within the body. Lay the Grills (B10) into place. Attach the L/H and R/H Rotisserie Brackets (D5, D6) to the Barbecue Body using the Screws (E5) and Nuts (E6).
-
Page 14: Drip Tray
Hang the Rotisserie Motor (D4) to the R/H Bracket. Place the Forks (D2) onto the Spit Rod (D3) and insert the Spit Rod into the Slot in the Motor. Slide the Drip Tray (B6) into place underneath the barbecue body. Place the Foil Liner (B8) into the Drip Pan (B7) and slide into place. - Page 15 Appearance, size, and construction may differ according to model purchased, Number of gas valves to be tested may vary according to model of barbecue. Assembly is now complete. All joints and connections must now be leak tested before using the barbecue. For details of leak testing, please refer to instructions on Page 19.
-
Page 16: Grill
Rotisserie Kit Assembly Specifications subject to change without prior notice. NOTE: The rotisserie motor should never be used in the event of rain. We recommend the motor is detached from the mounting bracket when not in use. OPERATION: 1. Carefully remove the cooking surfaces and the warming basket from the barbecue. -
Page 17: Hose
ESSENTIAL INFORMATION Please read instructions before using your barbecue. BEFORE YOU USE YOUR BARBECUE (also see installation) • Perform a leak test. This is the only safe and sure way to detect any gas leaking from joints and connections of the barbecue after assembly. Follow the leak test instructions on page 19. Check that the gas hose is free of any tension, twisting, cuts, or cracks. -
Page 18: Important Information
• If you intend to leave your barbecue outside, make sure it is protected from the elements with a heavy duty cover. These are available from most Outback® stockists. • Store your barbecue in a cool dry place. It must be inspected on a regular basis as damp or condensation can form which may result in damage to the barbecue. -
Page 19: Caster
Hose • Check that the gas hose does not touch any part of the barbecue that may become hot during operation. • If the hose shows any sign of damage it must be replaced with a hose that is suitable for use with LPG (liquid petroleum gas) and meets British Standards. - Page 20 gauge on the lid. If the internal heat becomes too high, turn the burners to the ‘low’ position. It is not necessary or advisable to have all of the burners on high when the hood is closed. If the hood is opened during cooking to check on the progress of the food, please allow extra cooking time for the barbecue to regain its temperature.
-
Page 21: Care And Maintenance
Do not leave the barbecue uncovered and exposed to the elements when not in use. Heavy duty covers are available from your Outback® stockist. Even when your barbecue is covered for its protection, it must be inspected on a regular basis as damp or condensation can form which may result in damage to the barbecue. -
Page 22: Ignition Assembly
Troubleshooting Problem Possible Cause Solution Burners will not light LP gas cylinder is empty Replace with full gas cylinder using the ignition Faulty regulator Have regulator checked or replace system Obstructions in burners Clean burners Obstructions in gas jets or Clean jets and gas hose gas hose Electrode or pushbutton... -
Page 23: Technical Specifications
Cleaning Material Where used Cleaning Method Recommended Chromium Warming basket Wash with hot soapy water. A chrome cleaner may be used if plated required. To prevent rusting, wipe with cooking oil after rinsing and drying. Do not use abrasives. Stainless Hood Wipe with a cloth wrung out in hot soapy water. - Page 24 OUTBACK UK LTD LIMITED 10 YEAR WARRANTY OUTBACK barbecues are warranted to the original purchaser against defects in materials and workmanship. Porcelain coated barbecue bodies, porcelain coated roasting hoods and stainless steel roasting hoods are warranted for a period of ten (10) years from the date of purchase.
Need help?
Do you have a question about the Professional Range Pro 4 and is the answer not in the manual?
Questions and answers