Table of Contents
Advertisement
Quick Links
Advertisement
Table of Contents

Related Manuals for Advantech PCI-1752USO


Summary of Contents for Advantech PCI-1752USO
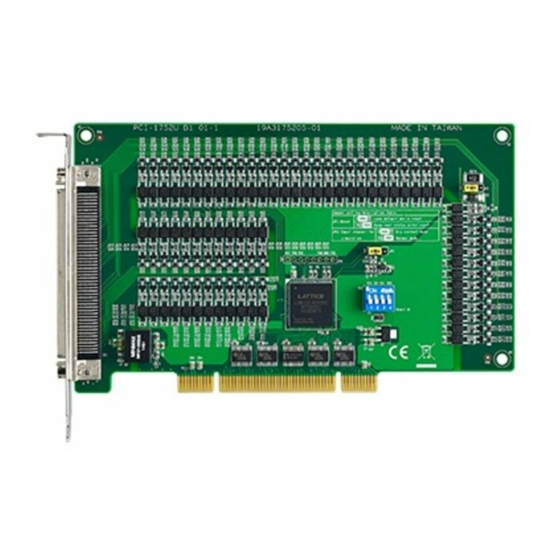
- Page 1 PCI-1752U/ PCI-1752USO 64-Channel Isolated Digital Output PCI Card User Manual...
- Page 2 No part of this man- ual may be reproduced, copied, translated or transmitted in any form or by any means without the prior written permission of Advantech Co., Ltd. Information provided in this manual is intended to be accurate and reli- able.
- Page 3 Product Warranty (2 years) Advantech warrants to you, the original purchaser, that each of its prod- ucts will be free from defects in materials and workmanship for two years from the date of purchase. This warranty does not apply to any products which have been repaired or...
-
Page 4: Declaration Of Conformity
This product has passed the CE test for environmental specifications when shielded cables are used for external wiring. We recommend the use of shielded cables. This kind of cable is available from Advantech. Please contact your local supplier for ordering information. - Page 5 Step 1. Visit the Advantech web site at www.advantech.com/support where you can find the latest information about the product. Step 2. Contact your distributor, sales representative, or Advantech's cus- tomer service center for technical support if you need additional assistance. Please have the following information ready before...
- Page 6 Safety Instructions Read these safety instructions carefully. Keep this User's Manual for later reference. Disconnect this equipment from any AC outlet before cleaning. Use a damp cloth. Do not use liquid or spray detergents for clean- ing. For plug-in equipment, the power outlet socket must be located near the equipment and must be easily accessible.
- Page 7 The sound pressure level at the operator's position according to IEC 704- 1:1982 is no more than 70 dB (A). DISCLAIMER: This set of instructions is given according to IEC 704-1. Advantech disclaims all responsibility for the accuracy of any statements contained herein. Safety Precaution - Static Electricity Follow these simple precautions to protect yourself from harm and the products from damage.
- Page 8 PCI-1752 User Manual viii...
-
Page 9: Table Of Contents
Isolated Digital Output Connections ....... 20 Table 3.2:Power on configuration after hot reset ..20 Figure 3.3:Isolated DO: PCI-1752U (sink type) ..21 Figure 3.4:Isolated DO: PCI-1752USO (source type) . 21 Field Wiring Considerations ........... 22 Chapter 4 Operation ............24 Board ID................ - Page 10 Overview ................. 34 I/O Port Address Map ............. 34 PCI-1752 Register Format ..........35 Appendix D ADAM-3951/3951B Pin Assignments ..38 PCI-1752 User Manual...
- Page 11 Introduction Sections include: • Features • Installation Guide • Accessories...
-
Page 12: Chapter 1 Introduction
Board ID Output status read-back Digital output value retained after hot system reset Channel-Freeze function The PCI-1752U/PCI-1752USO DAS cards offer the following main fea- tures: Robust Protection The PCI-1752U/PCI-1752USO features a robust isolation protection for applications in industrial, lab and machinery automation. The PCI-... - Page 13 Wide Output Range The PCI-1752U/PCI-1752USO also features a wide output voltage range from 5 to 40 V , suitable for most industrial applications with 12 V 24 V output voltage. In the mean time, we are also ready to serve your special needs for specific output voltage range.
-
Page 14: Figure 1.1:Installation Flow Chart
Install Driver from CD-ROM, then power-off PC Install Hardware and power-on PC Use driver utility to configure hardware Use test utility to test hardware Read examples & driver manual Start to write your own application Figure 1.1: Installation Flow Chart PCI-1752 User Manual... -
Page 15: Installation Guide
Figure 1-1 on the next page provides a concise flow chart to give users a broad picture of the software and hardware installa- tion procedures: 1.3 Accessories Advantech offers a complete set of accessory products to support the PCI- 1752U/PCI-1752USO cards. These accessories include: Wiring Cable PCL-10250 The PCL-10250 shielded cable is specially designed for PCI-1752U/PCI-1752USO card to provide high resistance to noise. - Page 16 PCI-1752 User Manual...
- Page 17 Installation Sections include: • Unpacking • Driver Installation • Hardware Installation • Device Setup and Configuration • Device Testing...
-
Page 18: Chapter 2 Installation
This chapter gives users a package item checklist, proper instructions about unpacking and step-by-step procedures for both driver and card installation. 2.1 Unpacking After receiving your PCI-1752U/PCI-1752USO package, please inspect its contents first. The package should contain the following items: PCI-1752U/PCI-1752USO card Companion CD-ROM (DLL driver included) -
Page 19: Driver Installation
2.2 Driver Installation We recommend you to install the driver before you install the PCI- 1752U/PCI-1752USO card into your system, since this will guarantee a smooth installation process. The 32-bit DLL driver Setup program for the PCI-1752U/PCI-1752USO card is included on the companion CD-ROM that is shipped with your DAS card package. -
Page 20: Hardware Installation
2.2 Driver Installation) After the DLL driver installation is completed, you can now go on to install the PCI-1752U/PCI-1752USO card in any PCI slot on your com- puter. But it is suggested that you should refer to the computer user man- ual or related documentations if you have any doubt. - Page 21 Step 6: Insert the PCI-1752U/PCI-1752USO card into a PCI slot. Hold the card only by its edges and carefully align it with the slot. Insert the card firmly into place. Use of excessive force must be avoided, otherwise the card might be damaged.
-
Page 22: Figure 2.2:Device Name Listed On Device Manager
The following sections will guide you through the Setup, Configuration and Testing of your device. 2.4 Device Setup & Configuration On the Device Setting dialog box (Fig. 2-3), you can enable/disable the Channel-Freeze function of PCI-1752U/PCI-1752USO. PCI-1752 User Manual... -
Page 23: Figure 2.3:Device Setting Dialog Box Of Pci-1752
Following through the Setup and Configuration procedures to the last step described in the previous section, you can now proceed to test the device by clicking the Test Button on the I/O Device Manager dialog box (Fig. 2-4). Figure 2.4: Advantech Device Manager Chapter 2... -
Page 24: Figure 2.5:Digital Output In Device Test Dialog Box
On the Device Test dialog box, users are free to test various functions of PCI-1752U/PCI-1752USO on the Digital output tab. Testing Digital Output Function Click the Digital Output tab to bring up the Digital Output test panel such as seen on the next page. By pressing the buttons on each tab, users can easily set each digital output channel as high or low for the corresponding port. - Page 25 Signal Connections Sections include: • Location of Jumpers and DIP switch • I/O Connector Pin Assignment • Isolated Digital Output Connections • Field Wiring Considerations...
-
Page 26: Chapter 3 Signal Connections
Figure 3-2 shows the names and locations of jumpers and DIP switch on the PCI-1752U and PCI-1752USO. There are two jumpers, JP1 and JP2 on the PCI-1752U/PCI-1752USO. Please refer to Section 3.3 Isolated Digital Output Connection and Sec- tion 4.2 Channel-Freeze Function for more information about JP1 and JP2 configurations. -
Page 27: I/O Connector Pin Assignment
3.2 I/O Connector Pin Assignment The I/O connector on the PCI-1752U/PCI-1752USO is a 100-pin connec- tor that enable you to connect to accessories with the PCL-10250 shielded cable. Figure 3-1 shows the pin assignments for the 100-pin I/O connector on the PCI-1752U/PCI-1752USO, and Table 3-1 shows its I/O connector signal description. -
Page 28: Figure 3.2:I/O Connector Pin Assignments
Figure 3.2: I/O Connector Pin Assignments PCI-1752 User Manual... -
Page 29: Table 3.1:I/O Connector Signal Descriptions
Table 3.1: I/O Connector Signal Descriptions Signal Name Reference Direction Description IDO<00...15> PCOM0 Output Isolated digital output of group 0 IDO<16...31> PCOM1 Output Isolated digital output of group 1 IDO<32...47> PCOM2 Output Isolated digital output of group 2 IDO<48...63> PCOM3 Output Isolated digital output of group 3... -
Page 30: Isolated Digital Output Connections
3.3 Isolated Digital Output Connections Power On Configuration Default configuration after power on, and hardware reset is to set all the isolated output channels to open status ( the current of the load can’t be sink) so that users need not worry about damaging external devices during system startup or reset. -
Page 31: Figure 3.3:Isolated Do: Pci-1752U (Sink Type)
Figure 3-3 shows how to connect an external output load to the card’s iso- lated outputs. Figure 3.3: Isolated DO: PCI-1752U (sink type) Figure 3.4: Isolated DO: PCI-1752USO (source type) Chapter 3... -
Page 32: Field Wiring Considerations
3.4 Field Wiring Considerations When you use the PCI-1752U/PCI-1752USO to acquire data from out- side, noises in the environment might significantly affect the accuracy of your measurements if due cautions are not taken. The following measures will be helpful to reduce possible interference running signal wires between signal sources and the PCI-1752U/PCI-1752USO. - Page 33 Operation Sections include: • Board ID • Channel-Freeze Function...
-
Page 34: Chapter 4 Operation
4.1 Board ID The PCI-1752/PCI-1752USO have a built-in DIP switch (SW1), which is used to define each card’s board ID. You can determine the board ID on the register as shown on Table 4-1. When there are multiple cards on the same chassis, this board ID setting function is useful for identifying each card’s device number through board ID. -
Page 35: Figure 4.1:Device Number And Board Id
Advantech Device Manager, as shown in Fig. 4-1. The second way is to determine the board ID by its device number through DLL function, DRV_DeviceGetFeatures( ). For detailed information, please refer to software manual on CD-ROM. Figure 4.1: Device Number and Board ID 4.2 Channel-Freeze Function... -
Page 36: Table 4.3:Jp2: Channel-Freeze Function Input Mode
• If Channel-Freeze function is enabled, it will return the value from the buffers on host PC. The PCI-1752U/PCI-1752USO provides a digital input channel (CH_FRZ_IN) to enable the channel-freeze function. The channel-freeze function acts when the pin CH_FRZ_IN is activated. Moreover, you can... -
Page 37: Figure 4.2:Wiring In Wet/Dry Contact Input Mode
Internal Internal Extrernal Extrernal CH_FRZ_IN CH_FRZ_IN 10 ~ 50 V CH_FRZ_COM CH_FRZ_COM IGND (a) For Wet Contact (b) For Dry Contact Figure 4.2: Wiring in wet/dry contact input mode Table 4.4: Channel-Freeze function register Base Add.+decimal Abbreviation CH_FRZ_ON CH_FRZ_EN Table 4.5: Channel-Freeze function bit value CH_FRZ_EN Channel-Freeze function control Disable... - Page 38 PCI-1752 User Manual...
- Page 39 Specifications...
-
Page 40: Appendix A Specifications
Appendix A Specifications Isolated Digital Output Table A.1: Isolated Digital Output Number of Output Channels Optical Isolation 2500 V Throughput 10 kHZ Supply Voltage 5 ~ 40 V Sink Current 200 mA max/channel General Table A.2: General Specifications I/O Connector Type 100-pin SCSI-II female Dimensions 175 mm x 100 mm (6.9"... - Page 41 Block Diagram...
-
Page 42: Appendix B Block Diagram
Appendix B Block Diagram PCI-1752 User Manual... - Page 43 Register Structure and Format...
-
Page 44: Appendix C Register Structure & Format
Windows XP/2000 operating system. We advise users to program the PCI-1752U/ USO using the 32-bit DLL driver provided by Advantech to avoid the complexity of low-level pro- gramming by register. The most important consideration in programming the PCI-1752U/ USO at the register level is to understand the function of the card's registers. -
Page 45: Pci-1752 Register Format
C.3 PCI-1752 Register Format PCI-1752 Register Format Base Add. R Digital Output Group 0 Read Back W Digital Output Group 1 R Digital Output Group 1 Read Back W Digital Output Group 1 R Digital Output Group 2 Read Back W Digital Output Group 2 R Digital Output Group 3 Read Back W Digital Output Group 3... - Page 46 PCI-1752 User Manual...
- Page 47 ADAM-3951/ ADAM-3951B Pin Assignments...
-
Page 48: Appendix D Adam-3951/3951B Pin Assignments
Appendix D ADAM-3951/3951B Pin Assignments PCI-1752 User Manual... - Page 49 Appendix D...
- Page 50 PCI-1752 User Manual...
Need help?
Do you have a question about the PCI-1752USO and is the answer not in the manual?
Questions and answers