Table of Contents
Advertisement
Advertisement
Table of Contents

Subscribe to Our Youtube Channel
Related Manuals for Craftex B2397


Summary of Contents for Craftex B2397
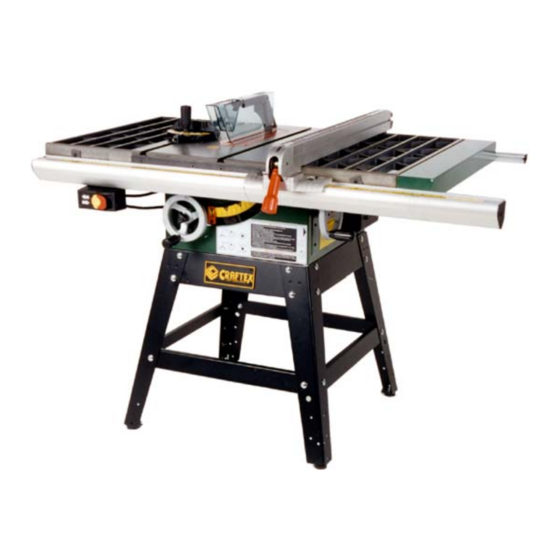
- Page 1 OWNER’S MANUAL B2397 LEFT TILTING 10” CONTRACTOR’S TABLE SAW...
-
Page 2: Table Of Contents
TABLE OF CONTENTS GENERAL SAFETY INSTRUCTIONS Page 3 Features Page 4 Shipping Carton Contents Page 5 Base Assembly Page 6 Saw Assembly Page 7 Align-A-Rip Fence Assembly Page 8 Aligning the Align-A-Rip Fence Page 9 Final Assembly Page 10 Final Assembly Continued Page 11 Replacing the Saw Blade Page 12... -
Page 3: General Safety Instructions
GENERAL SAFETY INSTRUCTIONS EXTREME CAUTION SHOULD BE USED IN OPERATING ALL POWER TOOLS. KNOW YOUR POWER TOOL, BE FAMILIAR WITH ITS OPERATION. READ THE OWNER’S MANUAL AND PRACTICE SAFE USAGE PROCEDURES AT ALL TIMES. CONNECT your machine ONLY to the matched and specified power source. WEAR SAFETY GLASSES, RESPIRATORS, HEARING PROTECTION and SAFETY SHOES when operating this machine. -
Page 4: Features
B2397. The Craftex name guarantees Craft Excellence. By following the instructions and procedures laid out in this owner’s manual, you will receive years of excellent service and satisfaction. The B2397 is a professional tool and like all power tools, proper care and safety procedures should be adhered to. -
Page 5: Shipping Carton Contents
CARTON CONTENTS Check to see that all of these components are in your carton. Your B2397 Left Tilting Table Saw carton contains all of the components necessary to provide you with years of quality service, including a quality carbide tipped blade. The individual components will be explained later in this Owners Manual. -
Page 6: Base Assembly
BASE ASSEMBLY Remove all Sheet Metal Components from the box and set aside. Remove the large plastic bag containing miscellaneous small parts and remove the small bag containing the zinc plated nuts, washers and bolts. Select the round head carriage bolts, washers nuts. -
Page 7: Saw Assembly
Thoroughly dry and apply a coat of paste wax and polish. Carefully mount the saw on the assembled base using the 4 zinc plated bolts, 8 washers and 4 nuts. The Craftex label on the base should be facing the front of the saw. -
Page 8: Align-A-Rip Fence Assembly
B2397 ALIGN-A-RIP FENCE ASSEMBLY Your CRAFTEX Table Saw is equipped with the precision Align-A-Rip fence and when assembled, will provide you with years of precise cutting. There are 5 basic components to the fence assembly, 2 front rail halves, 2 rear rail halves and the rip fence itself. -
Page 9: Aligning The Align-A-Rip Fence
Loosen the screw on the table insert with a phillips screwdriver and set the insert to one side. Your CRAFTEX table saw comes complete with 2 double- ended blade wrenches. One end is for the arbor nut while the other fits over the arbor and engages in slots that will lock the arbor. -
Page 10: Final Assembly
Your CRAFTEX B2397 table saw is a precision tool with versatility. Your Align-A- Rip fence may be used to the left or right of the saw blade by either lifting it off the rails or lowering the saw blade and simply sliding it over to the left or right side of the saw blade. -
Page 11: Final Assembly Continued
FINAL ASSEMBLY AND FINE TUNING CONTINUED There is a yellow plastic insert in the saw table top and this is used for making a pencil line to indicate the cut-line of the particular saw blade that you have installed in the saw. The on/off switch has a removable key to prevent unauthorized persons from using it. -
Page 12: Replacing The Saw Blade
REPLACING THE SAW BLADE 1. Disconnect the machine from the power source 2. Turn the saw blade raising the hand wheel to raise the blade approximately 20mm (0.79”) above the table surface 3. Remove the throat plate by loosening the cross-head screw at the front of the plate and lifting the plate out. -
Page 13: Operation Instructions
OPERATION INSTRUCTIONS The two basic kinds of cuts on a table saw are cross cutting and ripping. In general, cutting with the grain is ripping and cutting against the grain is cross cutting. However, with composite materials this distinction may be difficult to make, or not apply at all. In these cases, cutting the wood lengthwise is ripping and across the shorter dimension is cross cutting. -
Page 14: Making A Push Stick
MAKING A PUSH STICK In order to operate your table saw safely, you must use a push stick whenever the size or shape of the work piece will cause your hands to be within 6” of the saw blade. Make sure the push stick is long and sturdy enough to apply a noticeable amount of pressure. -
Page 15: Avoiding Kick-Back
KICKBACK – HOW TO AVOID IT AND PROTECT YOURSELF The dangers of kickback cannot be overstated. Most often it is caused by the work peice binding against the blade. The result is that the work piece can rapidly move in a direction opposite to the feed direction. -
Page 16: Basic Cutting Techniques
BASIC CUTTING TECHNIQUES RIPPING 1. Lock the rip fence by pressing the fence lock lever down. Remove the mitre gauge. 2. Raise the blade so that it is about 3.2mm (0.13”) higher than the top of your work piece. 3. Hold the work piece flat on the table against the rip fence. Keep the work piece about 25mm away from the blade 4. -
Page 17: Bevel Ripping, Ripping Small Pieces, Cross Cutting
BASIC CUTTING TECHNIQUES Cont…. BEVEL RIPPING Bevel ripping is performed the same as ripping but with the saw blade set at an angle not perpendicular with the table surface. After changing the bevel angle, check the alignment of the guard and splitter and make sure there is clearance with the saw blade. RIPPING SMALL PIECES Bevel ripping is performed the same way as ripping but with the saw blade set at an angle not perpendicular with the table surface. -
Page 18: Bevel Cross Cutting, Mitering, Compound Mitering
BASIC CUTTING TECHNIQUES Cont…. BEVEL CROSS CUTTING This operation is the same as cross cutting except that the bevel angle is set to an angle other that 0°. After changing the bevel angle, check the alignment of the guard and splitter and make sure there is clearance with the saw blade. -
Page 19: Maintenance
MAINTENANCE AND LUBRICATION Proper care and maintenance should be give to your B2397 to ensure a longer life. Use only mild soap and a damp cloth the clean to the tool. Do not allow liquid to enter the machine. Do not immerse any part of the table saw in liquid. -
Page 20: Grounding
If the power cord becomes damaged or worn, replace it immediately. The CRAFTEX B2397 table saw is intended for use on a circuit with an outlet for the grounding pin on the plug. If a three-prong to two-prong adapter is used, then... -
Page 21: Extension Cord Use & Voltage Information
EXTENSION CORDS If you use an extension cord, make sure that it is in good condition. An extension cord with insufficient capacity will cause a drop in line voltage and lead to a loss of power and overheating. The chart below shows the correct sizes to use depending on cord length and nameplate ampere rating. -
Page 22: Electrical Diagram
ELECRTICAL DIAGRAM... -
Page 23: Extra Blades
EXTRA BLADES... -
Page 24: Troubleshooting
TROUBLESHOOTING... -
Page 25: Machine Diagram & Parts List
MACHINE DIAGRAM AND PARTS LIST... -
Page 26: Cabinet & Table Assembly
CABINET AND TABLE ASSEMBLY... -
Page 27: Cabinet & Table Parts List
CABINET AND TABLE PARTS LIST... -
Page 28: Rail Assembly
RAIL ASSEMBLY... -
Page 29: Rail Assembly Parts List
RAIL ASSEMBLY PARTS LIST... -
Page 30: Stand Assembly & Parts List
STAND ASSEMBLY AND PARTS LIST... -
Page 31: Trunnion Assembly
TRUNNION ASSEMBLY... -
Page 32: Trunnion Assembly Parts List
TRUNNION ASSEMBLY PARTS LIST... -
Page 33: Elevation Mechanism Assembly & Parts List
ELEVATION MECHANISM ASSEMBLY AND PARTS LIST... -
Page 34: Miter Gauge Assembly & Parts List
MITER GAUGE ASSEMBLY AND PARTS LIST... -
Page 35: Spreader Assembly & Parts List
SPREADER ASSEMBLY AND PARTS LIST... -
Page 36: Motor Assembly & Parts List
MOTOR ASSEMBLY AND PARTS LIST... -
Page 37: Warranty Information
CRAFTEX 2 YEAR LIMITED WARRANTY Craftex warrants every product to be free from defects in materials and agrees to correct such defects where applicable. This warranty covers two years for parts and 90 days for labour (unless specified otherwise), to...
Need help?
Do you have a question about the B2397 and is the answer not in the manual?
Questions and answers
parts for this tablesaw B2397 still avaliable?
Replacement parts for the Craftex B2397 table saw are available directly from Busy Bee Tools.
This answer is automatically generated