Table of Contents
Advertisement
Advertisement
Table of Contents

Subscribe to Our Youtube Channel
Related Manuals for Craftex CT073


Summary of Contents for Craftex CT073
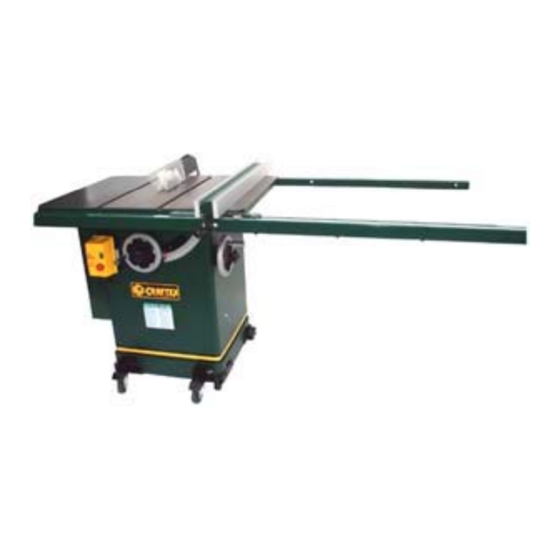
- Page 1 OWNER’S MANUAL CT073 – 10” TABLE SAW...
-
Page 2: Table Of Contents
CT073 10” LEFT TILTING ARBOR SAW INDEX GENERAL SAFETY INSTRUCTIONS Page 3 SPECIFIC SAFETY INSTRUCTIONS Page 4 CT073 Features Page 5 Unpacking Page 6 Assembly Page 7 Extension Tables Page 7 Blade Guard & Splitter Page 7 Installing Blade Guard... -
Page 3: General Safety Instructions
GENERAL SAFETY INSTRUCTIONS EXTREME CAUTION SHOULD BE USED IN OPERATING ALL POWER TOOLS. KNOW YOUR POWER TOOL, BE FAMILIAR WITH ITS OPERATION. READ THE OWNER’S MANUAL AND PRACTICE SAFE USAGE PROCEDURES AT ALL TIMES. CONNECT your machine ONLY to the matched and specified power source. -
Page 4: Specific Safety Instructions
ALWAYS make sure that your saw is in a stable position. Cutting long, heavy stock may alter the stability of the CT073. In the event that this could be a regular circumstance, the saw should be bolted to the floor. - Page 5 CRAFTEX CT073 LEFT TILTING ARBOR SAW FEATURES The Craftex CT073 Left Tilting Arbor Saw is a precision-built tool that will provide you with many years of excellent service. Motor – 3HP, 220v, single phase Blade Speed – 4,140 RPM’s. Triple ‘V’-belt drive.
-
Page 6: Unpacking
Mitre Gauge Mobile Stand A heavy-duty mobile stand is included as standard equipment in Also included in the packaging the CT073. of the CT073 is a ‘T’ slot mitre gauge. -
Page 7: Assembly
CT073 10” LEFT TILTING ARBOR SAW ASSEMBLY Your Craftex CT073, 10” Table Saw is shipped in an almost fully assembled condition. The exceptions are: 1. Cast-iron Extension Tables. 2. Blade Guard and Splitter. 3. Rip Fence Rails. 4. Rip Fence. - Page 8 CT073 10” LEFT TILTING ARBOR SAW ASSEMBLY, CONTINUED Installing the Blade Guard Position the blade guard so that it points to the front of the saw table. Attach the front of the spreader to the front attachment bracket with a hex bolt and washer.
-
Page 9: Arbor Extension
CT073 10” LEFT TILTING ARBOR SAW ASSEMBLY, CONTINUED Adjusting the Blade Guard, Continued To adjust the height of the front spreader, loosen the front attachment bolt and position the spreader up or down. The correct height will allow the guard to just touch the table surface. -
Page 10: Hand Wheels
Blade Alignment The Craftex CT073 Table Saw is shipped from the factory fully aligned so that the miter slots are parallel to the saw blade. -
Page 11: Table Insert
Adjust these in or out until the insert sits perfectly flush with the tabletop. Rip Fence Assembly The CT073 is equipped with one of the finest ‘T’ type rip fences available. This cam lever fence incorporates a Micro- adjustment and a Magnifying Cursor Lens for precision cutting. -
Page 12: Rip Fence Assembly, Continued
CT073 10” LEFT TILTING ARBOR SAW ASSEMBLY, CONTINUED Rip Fence Assembly, Continued Use the combination square and set the tail to 12mm. Use this along the back surface so that the rear rail sits 12 mm below the table surface. -
Page 13: Electrical Diagram & Wiring
CT073 10” LEFT TILTING ARBOR SAW ELECTRICAL DIAGRAM & WIRING Important The CT073 Magnetic Switch is Pre-Wired to the junction box The motor to the starter line cord is four conductors. The green conductor is ground while the other three are power conductors. -
Page 14: Electrical Diagram & Wiring Continued
CT073 10” LEFT TILTING ARBOR SAW ELECTRICAL DIAGRAM & WIRING, CONTINUED... -
Page 15: Blade Tilt Adjustment
Lock the hand wheel by rotating the lock knob. Do not over-tighten Mitre Gauge Adjustment The mitre gauge supplied with the CT073 Table Saw is equipped with individually adjustable stops at 90 and 45 degrees both left and right. Adjustment to these stops can be made by loosening the locking nut and tightening or loosening the three adjusting screws. -
Page 16: Maintenance
CT073 10” LEFT TILTING ARBOR SAW MAINTENANCE Before performing any maintenance on the CT073 Table Saw be certain that the saw is disconnected from any power source. Clean off any preservative on the saw components with mineral spirits and wipe dry. - Page 17 CT073 10” LEFT TILTING ARBOR SAW MITRE GAUGE SCHEMATIC & PARTS LIST Description Part No. Qty. Handle 1086.00 Washer, 10mm 1087.00 1088.00 Gauge 1089.00 Round-head screw 5mm 80x20 1090.00 Indicator 1091.00 Mitre Gauge Stop 1092.00 Setscrew 6mm 1.0 x 6 0964.00...
- Page 18 CT073 10” LEFT TILTING ARBOR SAW BLADE GUARD SCHEMATIC Description Part No. Qty. Push Nut 1069.00 Blade Guard 1070.00 Guard Support 1071.00 1072.00 Spring 1073.00 Spreader 1074.00 Spacer 1075.00 1076.00 Anti Kickback Pawl 1077.00 Snap Ring 1078.00 1079.00...
- Page 19 CT073 10” LEFT TILTING ARBOR SAW UPPER ASSEMBLY SCHEMATIC...
- Page 20 CT073 10” LEFT TILTING ARBOR SAW LOWER ASSEMBLY SCHEMATIC...
-
Page 21: Assembly Parts List
CT073 10” LEFT TILTING ARBOR SAW ASSEMBLY PARTS LIST... -
Page 22: Assembly Parts List, Continued
CT073 10” LEFT TILTING ARBOR SAW ASSEMBLY PARTS LIST, CONTINUED... - Page 23 CT073 10” LEFT TILTING ARBOR SAW CABINET SCHEMATIC ASSEMBLY...
-
Page 24: Cabinet Parts List
CT073 10” LEFT TILTING ARBOR SAW CABINET PARTS LIST Ref. No. Description Part No. Extension table 1037.00 Hex head Bolt, 10mm –1.5 x 35 0962.00 Lock Washer 10mm 0963.00 Blade Insert 1042.00 Setscrew, 6mm – 1.0 x 8 1043.00 Table 1044.00... - Page 25 CT073 10” LEFT TILTING ARBOR SAW FENCE SCHEMATIC ASSEMBLY...
-
Page 26: Fence Parts List
CT073 10” LEFT TILTING ARBOR SAW FENCE PARTS LIST Description Part No. Qty. Front Rail 2001.00 Rear Rail 2002.00 Guide rail 2003.00 Measure Scale 2004.00 Hex Screw, M8 x 16mm 2219.00 Lock Washer 0978.00 Pan Head Screw M8 x 16mm 2005.00... -
Page 27: Warranty
CRAFTEX 2 YEAR LIMITED WARRANTY Craftex warrants every product to be free from defects in materials and agrees to correct such defects where applicable. This warranty covers two years for parts and 90 days for labour (unless specified otherwise), to...
Need help?
Do you have a question about the CT073 and is the answer not in the manual?
Questions and answers