Table of Contents
Advertisement
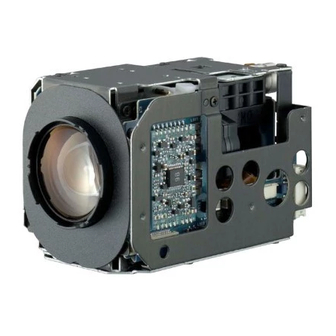
High Speed Dome Camera User's Manual
Contents
1. Attention ............................................................................................................................................................... 3
3. Function and Operation ..................................................................................................................................... 5
4 Basic Operation of Dome Camera ................................................................................................................. 7
6. Camera Parameter Setup Menu ........................................................................................................................ 9
7. Privacy Mask ..................................................................................................................................................... 16
8. User Program .................................................................................................................................................... 17
9. System Settings ................................................................................................................................................ 23
10. Language setup .............................................................................................................................................. 28
11. Camera Menu Index ........................................................................................................................................ 29
12. System Installation ......................................................................................................................................... 30
13. Dome Camera Setup ...................................................................................................................................... 37
14.Troubleshooting............................................................................................................................................... 39
Appendix A RS485 Bus Basic Knowledge .................................................................................................... 41
Appendix B The Cleaning of Clear Down Cover ........................................................................................... 42
Appendix C 24VAC Wire Diameter and Transmission Distance Comparison Chart ............................... 43
Appendix D Wire Gauge Conversion Chart ................................................................................................... 44
Appendix E Lightning Proof and Surge Signal Proof .................................................................................. 45
Appendix F Camera parameter........................................................................................................................ 47
- 1 -
Advertisement
Table of Contents

Related Manuals for Hitachi VK-S454ER


Summary of Contents for Hitachi VK-S454ER
-
Page 1: Table Of Contents
High Speed Dome Camera User’s Manual Contents 1. Attention ................................3 3. Function and Operation ............................. 5 4 Basic Operation of Dome Camera ......................... 7 6. Camera Parameter Setup Menu ........................9 7. Privacy Mask ..............................16 8. User Program ..............................17 9. - Page 2 High Speed Dome Camera User’s Manual SAFE PRECAUTIONS CAUTION RISK OF ELECTRIC SHOCK DO NOT OPEN! CAUTION: TO REDUCE THE RISK OF ELECTRICAL SHOCK, DO NOT OPEN COVERS. NO USER SERVICEABLE PARTS INSIDE. REFER SERVICING TO QUALIFIED SERVICE PERSONNEL. The requirement for the people who will install and repair the machine: Owning the certificate to install and repair CCTV system.
-
Page 3: Attention
High Speed Dome Camera User’s Manual 1. Attention Electric Safety The national and local electric safety standard must be obeyed during the installation. Shipping with Care Prevent the damage caused by stress, strenuous vibration and moist during the shipping, storing and installation. - Page 4 High Speed Dome Camera User’s Manual 2.1 Technical Parameter Electrical Set up Baud rate Rating Voltage AC24V 2400/4800/9600/19200bps (RS485) Pelco-P / Pelco-D/Phillips / Panasonic and so on, 17 Power 12W indoor, 35W outdoor Protocol Protocol choice Add. Set up 0-255 Operation Decoder Internal...
-
Page 5: Function And Operation
High Speed Dome Camera User’s Manual Auto AWB Color & B/W Transition Auto BLC Auto Frame Accumulating OSD Menu Chinese/English Menu OSD menu display; change the information and parameter of the camera by keyboard and OSD, operation becomes simple and easy. Auto activation function can be set, evoking presets or starting up tours, auto leaning and horizontal scan can be set when the camera is not in use Restoring operation before power-down or carry out appointed operation... - Page 6 High Speed Dome Camera User’s Manual Automatic Reversal If the operator pulling rocker when the lens appoint the bottom, the lens will horizontal whirl 180 º automatically and whirl 90º upwards, user can watch the views on the back side, so it can realize the 180 º entire journey surveillance.
-
Page 7: Basic Operation Of Dome Camera
High Speed Dome Camera User’s Manual Auto Cruising Auto cruising is the function of this dome. It can be settled previously, make the preset points as sequence added to the auto cruising. You can inset preset point to the cruising, can fulfill auto cruising between preset points. -
Page 8: Display Settings
High Speed Dome Camera User’s Manual 4.3 Basic Operation of Menu and Keyboard Basic Operation of Keyboard: [OPEN] When choosing image, shows increasing iris, it will save automatically after finishing setup. [CLOSE] When choosing image, shows decreasing iris, it will save automatically after finishing setup. [NEAR] focus on vicinity [FAR] focus on beyond Joystick tilt up: When choosing menu, shows choosing the previous one, when choosing image, shows... -
Page 9: Camera Parameter Setup Menu
High Speed Dome Camera User’s Manual ID label Camera title Temperature label Preset title Date label Time label Coordinate label Lens multiple 6. Camera Parameter Setup Menu 6.1 Zoom Speed MAIN MENU 1. DISPLAY SETTINGS 1. Press ‘Menu’ on the keyboard or evoke the presets no. 95 and 64 to enter 2. - Page 10 High Speed Dome Camera User’s Manual MAIN MENU 6.2 BLC 1. Press ‘Menu’ on the keyboard or evoke the presets no. 95 and 64 to enter 1. DISPLAY SETTINGS 2. CAMERA SETTINGS the main menu, or press the preset no.1 twice continuously within 1 second. 3.
- Page 11 High Speed Dome Camera User’s Manual 6.3 Frame Heap MAIN MENU 1. Press ‘Menu’ on the keyboard or evoke the presets no. 95 and 64 to enter the main menu, or 1. DISPLAY SETTINGS press the preset no.1 twice continuously within 1 second. 2.
- Page 12 High Speed Dome Camera User’s Manual MAIN MENU 6.4 D-Zoom Settings 1. DISPLAY SETTINGS 1. Press ‘MENU’ on the keyboard or evoke the presets no. 95 and 64 to enter the main menu, 2. CAMERA SETTINGS or press the preset no.1 twice continuously within 1 second. 3.
- Page 13 High Speed Dome Camera User’s Manual 6.5 Video Sync MAIN MENU 1. Press ‘Menu’ on the keyboard or evoke the presets no. 95 and 64 to enter the main menu, or 1. DISPLAY SETTINGS press the preset no.1 twice continuously within 1 second. 2.
-
Page 14: Advanced Settings
High Speed Dome Camera User’s Manual 6.7 Advanced Settings 1. Press ‘Menu’ on the keyboard or evoke the presets no. 95 and 64 to enter the main menu, or press the preset no.1 twice continuously within 1 second. B&W SETTINGS 1. - Page 15 High Speed Dome Camera User’s Manual 6.7.2 WB Mode ADVANCED SETTINGS The system has the following WB modes: [Auto], [Manu], [Self- adjustment], [Single lock], [Indoor], [Outdoor], etc. 1.EXPOSURE AUTO 2.AE 1/50 3. AI F1.4 See detailed operation steps as below: 4.BRIGHTNESS F1.4*10DB 5.WB...
-
Page 16: Privacy Mask
3. PRIVACY MASK 4. USER PROGRAM 5. SYSTEM SETTINGS Hitachi Camera: maximally supporting 8 privacy zones in 360° inspecting area, and 2 zones 6. LANGUAGE/ can be set maximally per screen. The screen will show ‘PLEASE MOVE’ once relevant area 7. -
Page 17: User Program
High Speed Dome Camera User’s Manual 8. User Program MAIN MENU 8.1 Preset Setup 1. DISPLAY SETTINGS 2. CAMERA SETTINGS 1. Press ‘MENU’ on the keyboard or evoke the presets no. 95 and 64 to enter the main menu, 3. PRIVACY MASK or press the preset no.1 twice continuously within 1 second. -
Page 18: Tour Setup
High Speed Dome Camera User’s Manual 8.2 Tour Setup Auto Tour is defined as a sequential moving from preset to preset and dwell for a specific time MAIN MENU at each preset. It is useful if you need to repeat switching among a number of presets. Each 1. - Page 19 High Speed Dome Camera User’s Manual 8.3 Auto Learning MAIN MENU The camera will at least record the special routing (Pan & Tilt control, or camera control demand, etc) for 180 seconds continuously. There are 4 auto learnings maximally. 1. DISPLAY SETTINGS 2.
-
Page 20: Scan Setup
High Speed Dome Camera User’s Manual 8.4 Scan Setup 1. Preset 2 points first, the camera will scan between 2 presets horizontally with stable speed MAIN MENU and same zoom time. A speed dome camera has 4 groups of scans. 1. - Page 21 High Speed Dome Camera User’s Manual 8.5 Timer Setup This function sets the time for executing presets, scan, tour and auto learning. MAIN MENU 1. Press ‘MENU’ on the keyboard or evoke the presets no. 95 and 64 to enter the main menu, 1.
-
Page 22: Alarm Setup
High Speed Dome Camera User’s Manual 8.6 Alarm Setup USER PROGRAM The dome camera supports 7 alarm inputs and 2 outputs; It can realize alarm-linkage, external alarm info transmitting to camera, alarm position 1. PRESET SETUP shooting (evoke presets, or startup auto touring, auto learning and scan), and 2. -
Page 23: System Settings
High Speed Dome Camera User’s Manual 9. System Settings 9.1 Camera Title MAIN MENU Dome title, it is the title of the dome. Assigning a name to a dome helps user 1. DISPLAY SETTINGS to remember which dome it is. 2. - Page 24 High Speed Dome Camera User’s Manual 9.2 Information MAIN MENU 1. DISPLAY SETTINGS 1. Press ‘Menu’ on the keyboard or evoke the presets no. 95 and 64 to enter 2. CAMERA SETTINGS 3. PRIVACY MASK the main menu, or press the preset no.1 twice continuously within 1 4.
-
Page 25: Pan And Tilt
High Speed Dome Camera User’s Manual 9.3 Pan and Tilt MAIN MENU The settings can control series of normal actions. It plays an important role to control the image display. 1. DISPLAY SETTINGS 2. CAMERA SETTINGS 3. PRIVACY MASK 1. Press ‘MENU’ on the keyboard or evoke the presets no. 95 and 64 to enter 4. - Page 26 High Speed Dome Camera User’s Manual 9.3.2 Idle Time This setting allows the PTZ camera to implement an appointed action after PAN & TILT getting into free time state for some time (1-240minutes). The default setting 1. AUTO FLIP OPEN value is 0, showing not implementing action automatically.
- Page 27 High Speed Dome Camera User’s Manual 9.4 Delete MAIN MENU 1. Press ‘Menu’ on the keyboard or evoke the presets no. 95 and 64 to enter 1. DISPLAY SETTINGS the main menu, or press the preset no.1 twice continuously within 1 second. 2.
-
Page 28: Language Setup
High Speed Dome Camera User’s Manual 9.7 Date & Time MAIN MENU 1. Press ‘MENU’ on the keyboard or evoke the presets no. 95 and 64 to enter the main menu. 1. DISPLAY SETTINGS 2. CAMERA SETTINGS 3. PRIVACY MASK 2. -
Page 29: Camera Menu Index
High Speed Dome Camera User’s Manual 11. Camera Menu Index MAIN MENU 1.DISPLAY SETTINGS 2.CAMERA SETTINGS 3.PRIVACY MASK 4.USER PROGRAM 5.SYSTEM SETTINGS 6. LANGUAGE/ 7. Exit DISPLAY SETTINGS CAMERA SETTINGS PRIVACY MASK USER PROGRAM SYSTEM SETTINGS 1. CAMERA TITLE 1. PRESET SETUP 1.CAMERA TITLE OPEN 1.ZOOM SPEED... -
Page 30: System Installation
High Speed Dome Camera User’s Manual 12. System Installation 12.1 Installation Dimension Figure 1 Installation Style Wall Installation Figure 2 - 30 -... - Page 31 High Speed Dome Camera User’s Manual Pendant Installation Figure 3 Ceiling Mounting this hatch aim at the side where cable comes out CLOSE OPEN the size of installation hole at Dome's pedestal Figure 4 - 31 -...
- Page 32 High Speed Dome Camera User’s Manual Ceiling mount Installation Size Embedded into the hole with diameter bigger than 236mm Figure 5 12.2 Installation Steps Taking wall-installation style as example: Unpacking the carton and carefully take out the dome camera and its attachments. According to the size of Dome, drill the installation hole in the wall and fixed expander bolts.(Also can drill hole according to fixed hole of bracket ) Rotate the vitreous cover CCW (counterclockwise) and take it out.
- Page 33 High Speed Dome Camera User’s Manual Figure 7 Fetch the signal cable, video cable and power wires from bracket. Fix the cover plate, tighten the knurled-screw (refer to Figure 6). Fix the assembled Dome on the wall and tighten 4 PCS knurled-screws. Connect the signal cable of the system as Figure 8.
- Page 34 High Speed Dome Camera User’s Manual Contro l lin e/ A larm lin e Po wer line r Vide o lin e G N D O U T1 O U T 2 R s485 AC 24V A LA RMS BN C Figure 9 Alarm Input: Input signal of switch type, any other input signal will damage dome.
- Page 35 High Speed Dome Camera User’s Manual 12.3 Installation Steps taking ceiling mount as an example 1. Open the package, and take out the camera and accessories. 2. Drill an installation hole in the ceiling with its diameter bigger than 236mm slightly (The ceiling support intensity shall be considered; A bracket is necessary sometimes to increase the support intensity).
- Page 36 High Speed Dome Camera User’s Manual Figure 12 12.4 Disassembly and installation of Main Body 1 Quick disassembly design, be easy to maintain and change the main body. 2 Turn vitreous cover on its axis in CCW (counter clockwise) direction and separate it down. 3 Then loosen knurled-screw as shown bellow.
-
Page 37: Dome Camera Setup
High Speed Dome Camera User’s Manual 12.5 Dome Configuration. Figure 14 13. Dome Camera Setup 13.1 Address / Protocol Coding Switch Drawing Figure 15 13.2 Address Setup. As shown in Figure 12, SW1 is used to set address of the dome camera from 1 – 1023. The coding switches from DIP-10 to DIP-1 are equivalent to a 10-bit binary digital. - Page 38 High Speed Dome Camera User’s Manual … … … … … … … … … … … 1023 Table1 For Example: 1 2 3 4 6 7 8 9 10 1 2 3 4 6 7 8 9 10 1 2 3 4 6 7 8 9 10 Speed D om e Addr ess=1...
-
Page 39: Troubleshooting
High Speed Dome Camera User’s Manual Ultrak Table 2 Some protocols and the states of the coding switches of normal baud rate of these protocols show as follows: 13.4 Communication Baudrate Setup. As shown in Figure 12, SW2 is used to set the protocol of communication and the baud rate used by the dome camera. DIP-6 and DIP-5 of SW2 are used to select the baud rate of communication and 4 different baud rates can be selected in maximum. - Page 40 High Speed Dome Camera User’s Manual RS485 bus bad connection Check the RS485 connection Normal self-check but out of control Dome ID setup is wrong Reselect Protocol setup is wrong Reset and Switch ON again Bad connection of the video Press to connect well Vague image Power supply not enough...
-
Page 41: Appendix A Rs485 Bus Basic Knowledge
High Speed Dome Camera User’s Manual Appendix A RS485 Bus Basic Knowledge Characteristics of RS485 Bus As specified by RS485 standards, RS485 Bus is of semiduplex data transmission cables with characteristic impedance as 120 . The maximum load capacity is 32 unit loads (including main controller and controlled equipment). Transmission distances of RS485 Bus When user selects the 0.56mm (24AWG) twisted pair wires as data transmission cable, the maximum theoretical transmitting distances are as follows:... -
Page 42: Appendix B The Cleaning Of Clear Down Cover
High Speed Dome Camera User’s Manual Figure 19 In such circumstances the usage of a proper RS485 distributor is recommended. The distributor can change the star configuration connection to the mode of connection stipulated in the RS485 standards. The new connection achieves reliable data transmission (refer to Figure 20). -
Page 43: Appendix C 24Vac Wire Diameter And Transmission Distance Comparison Chart
High Speed Dome Camera User’s Manual Appendix C 24VAC Wire Diameter and Transmission Distance Comparison Chart While the wire diameter determinate and 24VAC loss rate under 10%, the longest transmission distance is recommended as following chart. Wire diameter (mm) Transmission Distance 0.8000 1.000... -
Page 44: Appendix D Wire Gauge Conversion Chart
High Speed Dome Camera User’s Manual Appendix D Wire Gauge Conversion Chart Bare wire diameter Bare wire cross metric size sectional area (Approximate) (Approximate) 0.050 0.00196 0.060 0.00283 0.070 0.00385 0.080 0.00503 0.090 0.00636 0.100 0.00785 0.110 0.00950 0.130 0.01327 0.140 0.01539 0.160... -
Page 45: Appendix E Lightning Proof And Surge Signal Proof
High Speed Dome Camera User’s Manual 1.000 0.7854 1.250 1.2266 1.500 1.7665 2.000 3.1420 2.500 4.9080 3.000 7.0683 Table 6 Appendix E Lightning Proof and Surge Signal Proof The product adopts TVS lightning proof technology to prevent from damage by lightning strike below 1500 W and impulse signals such as surge;... - Page 46 High Speed Dome Camera User’s Manual Figure 21 - 46 -...
- Page 47 High Speed Dome Camera User’s Manual Appendix F Camera par VK-S454ER VK-S454R FCB-EX480C FCB-EX480CP FCB-EX45C FCB-EX45Cp FCB-EX980S FCB-EX1010P FCB-EX980 FCB-EX980P VK-S214ER Model Specification Synchronizing Internal Internal Internal / External system Color & Image Color & B/W Color & B/W Color & B/W Color &...
Need help?
Do you have a question about the VK-S454ER and is the answer not in the manual?
Questions and answers