Digital Check CheXpress CX30 User Manual
Small business remote deposit check scanner
Hide thumbs
Also See for CheXpress CX30:
- Service manual (59 pages) ,
- User manual (24 pages) ,
- Setup (2 pages)
Advertisement
Table of Contents
- 1 Table of Contents
- 2 Chexpress® CX30 Equipment
- 3 About the Chexpress® CX30 Scanner
- 4 Chexpress® Installation
- 5 Installing the Rear Endorser Inkjet Cartridge
- 6 Installing the Ink Jet Cartridge
- 7 Installing the USB Driver
- 8 Getting Started
- 9 How to Load Checks
- 10 Opening the Chexpress® CX30
- 11 Chexpress® CX30 Troubleshooting
- 12 Chexpress® Operator Maintenance
- 13 Cleaning the Scanner
- 14 Common Error Codes
- 15 Frequently Asked Questions
- 16 Chexpress® CX30 Specifications
- Download this manual
Advertisement
Table of Contents

Related Manuals for Digital Check CheXpress CX30


Summary of Contents for Digital Check CheXpress CX30
- Page 1 CheXpress® CX30 User’s Manual_Rev 020309 CheXpress® CX30 Small Business Remote Deposit Check Scanner User Manual February 2009 Rev. 020309...
-
Page 2: Table Of Contents
CheXpress® CX30 User’s Manual_Rev 020309 TABLE OF CONTENTS CheXpress® CX30 Equipment…...3 About the CheXpress® CX30 Scanner…………………….………………...4 CheXpress® Installation...6 Installing the Ink Jet Cartridge…………………………………………………...7 Installing the USB Driver……………………………………………………………………….8 Getting Started…………………………………………………………………………………..9 How to Load Checks…………………………………………………………………………..11 Opening the CheXpress® CX30……………………………………………………………..12 CheXpress® CX30 Troubleshooting...14 CheXpress®... -
Page 3: Chexpress® Cx30 Equipment
CheXpress® CX30 scanner unit USB 2.0 cable 100v-240v -50/60 hz Voltage Sensing, external power supply HP inkjet cartridge (Optional feature) CheXpress® CX30 System Requirements The following PC specifications are required to operate the CheXpress® CX30 with your scanning application software: Recommended 2.4 GHz Pentium IV processor or... -
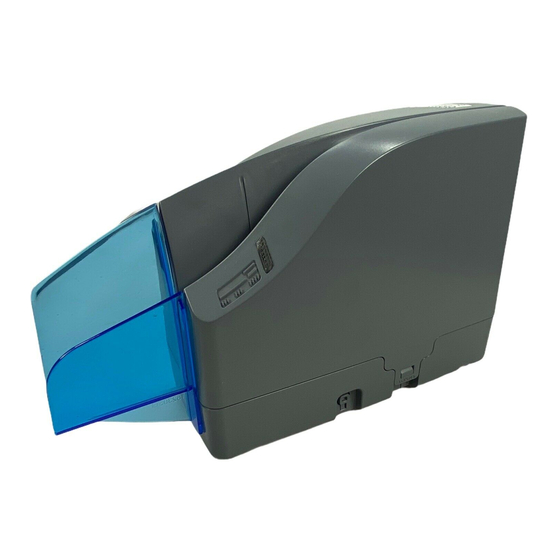
Page 4: About The Chexpress® Cx30 Scanner
The scanner does not use an On / Off switch, but does have a momentary ‘Reset Button’ that can be pressed to reload the scanner application. The CX30 is powered off when... - Page 5 CheXpress® CX30 User’s Manual_Rev 020309 Features of the CheXpress® CX30 Outside the CheXpress® CX30 Fig. 1 Top Cover Entry Pocket Entry Tray Exit Door (Shown in the closed position) LED Status Indicator Locking Tabs Reset Button Exit Door (Shown in the open position)
-
Page 6: Chexpress® Installation
CheXpress® CX30 Installation Un-Boxing the CheXpress® CX30 Step 1: Lay the box on it’s side and slide out the packaing and scanner. Lift off the top plastic insert (USB cable is inside), then lift the scanner from the bottom insert. -
Page 7: Installing The Rear Endorser Inkjet Cartridge
Fig. 4 1. Gently pull out on the tabs on the top scanner cover. Lift up on the cover for access to the inkjet platform. 2. If replacing an existing cartridge, remove the inkjet cartridge by grasping the small tab at the rear end and gently pulling upward. -
Page 8: Installing The Usb Driver
CheXpress® CX30 User’s Manual_Rev 020309 5. Insert the nozzle end of the cartridge into the cradle (Fig. 5) in the scanner and slide forward while keeping the reservoir end of the cartridge tilted slightly upward. 6. Push the cartridge downward until it snaps into position. The cartridge should be level to the baseplate when fully seated. -
Page 9: Getting Started
Select: http://www.digitalcheck.com/integration_support/drivers_and_demo_programs The demo software is a basic scan program that allows you to operate the scanner, change different scanner settings, view images, and store them on your PC’s hard disk. The demo program is not the software to run the system. Additional application software is required. - Page 10 ‘Red’. If the LED does not turn ‘Red’, check and reseat the end of the USB cable going into the PC and into the scanner and that the PC is turned on. Then check to make sure your power source is live.
-
Page 11: How To Load Checks
1. Remove all rubber bands, staples, paper clips, pins, etc. 2. Hold the item with the front of the item facing out and away from the scanner (see Fig 8). NOTE: Checks must be inserted flat into the entry tray and slide forward until it stops or is pulled into the scanner. -
Page 12: Opening The Chexpress® Cx30
CheXpress® CX30 User’s Manual_Rev 020309 Opening the CX30 Fig. 9 Gently pull out the tabs on the top scanner cover. Lift up on the cover to open. Opening the Camera Door Fig.10 Outer camera door. Pinch latch to pivot door open. - Page 13 CheXpress® CX30 User’s Manual_Rev 020309 Opening the Internal Path - Internal path – access door. Open exit door, then open the access door. Fig. 11 Replace the center cover by setting it back on the unit vertically. Fig. 12...
-
Page 14: Chexpress® Cx30 Troubleshooting
When removing or disconnecting the USB or Power Supply Cable from the CheXpress CX30, be sure to pull straight back on the cable and remove as shown in Fig. 13. DO NOT remove the cable by pulling up, vertically or at an angle (See Fig. 14). Doing so can damage the connector. -
Page 15: Chexpress® Operator Maintenance
CheXpress® CX30 Operator Maintenance Cleaning the CheXpress® CX30 Over time, ink, dirt and dust particles will collect on the scanner rollers and document track. Therefore, it is necessary to clean these areas on a regular basis to assure reliable performance. Tips for performing preventative maintenance by the user on the CheXpress®... -
Page 16: Cleaning The Scanner
2. Do not use “White Out” on scanned documents, the “White Out” can rub off the documents onto the scanner path and walls. 3. Watch for loose debris getting into the scanner such as staples and rubber bands. 4. There are no user available adjustments within the CX30. - Page 17 3. The glass area can be wiped with an alcohol swab, or damp cloth to remove any residue on the camera area. 4. Do not use any sharp, metal objects or you could scratch the glass. 5. Close the scanner door and replace the top-center cover.
-
Page 18: Common Error Codes
• When endorsing characters using the ink jet option, the print string is the first function sent down to the scanner at the start of a scan cycle. This error will come up immediately if no cartridge is present. •... - Page 19 Periodic and scheduled cleanings should be performed before determining if any further problem determination is needed. See the scanner cleaning section. The ink jet cartridge used in the CX30 is the standard HP C6602A cartridge which is available at most office supply stores. Typical yield is from 5 to 7 million characters.
-
Page 20: Frequently Asked Questions
How many checks per minute should my CX30 scan? The CX30 is a manual feed scanner and its performance is dependent upon the operator. The CX30 has a rated speed of aproximately 30 documents per minute (DPM) in scan and return mode. -
Page 21: Chexpress® Cx30 Specifications
API Toolkit 32 bit Supported under: Windows 2000, XP and Vista 32 & 64 bit. Ink jet printer (Rear endorse), Uses HP C6602A cartridge CheXpress® Cleaning Cards (25 Cards) Cleaning Kit (25 cards + 6 Swabs) Consumption: 45 watts, peak... - Page 22 CheXpress® CX30 User’s Manual_Rev 020309 Corporate Headquarters: Digital Check Corp. 466 Central Ave., Suite 31 Northfield, IL 60093 Tel: 847/446-2285 ⋅ Fax: 847/441-5507 Website: www.digitalcheck.com Email: support@digitalcheck.com...
Need help?
Do you have a question about the CheXpress CX30 and is the answer not in the manual?
Questions and answers