Digital Check CheXpress CX30 User Manual
Small business remote deposit check scanner
Hide thumbs
Also See for CheXpress CX30:
- Service manual (59 pages) ,
- User manual (24 pages) ,
- Setup (2 pages)

Related Manuals for Digital Check CheXpress CX30


Summary of Contents for Digital Check CheXpress CX30
- Page 1 CheXpress CX30 Small Business Remote Deposit Check Scanner User Manual September 2009 Rev. 091509...
-
Page 2: Table Of Contents
TABLE OF CONTENTS CheXpress® CX30 Equipment…..................3 About the CheXpress® CX30 Scanner…………………….………………......4 CheXpress® Installation....................6 Installing the Ink Jet Cartridge…………………………………………………......7 Installing the Franker Roller (Optional feature)………………………………………………8 Installing the USB Driver……………………………………………………………………….9 Getting Started…………………………………………………………………………………10 How to Load Checks…………………………………………………………………………..11 Opening the CheXpress® CX30……………………………………………………………..12 CheXpress® CX30 Troubleshooting................14 CheXpress®... -
Page 3: Chexpress® Cx30 Equipment
CheXpress® CX30 Equipment CheXpress® CX30 Equipment Checklist The CheXpress® CX30 package USB cable CX30 includes the following pieces: CheXpress® CX30 scanner unit USB 2.0 cable 100v-240v -50/60 hz Voltage Sensing, external power supply HP inkjet cartridge (Optional feature) Entry tray Power supply &... -
Page 4: About The Chexpress® Cx30 Scanner
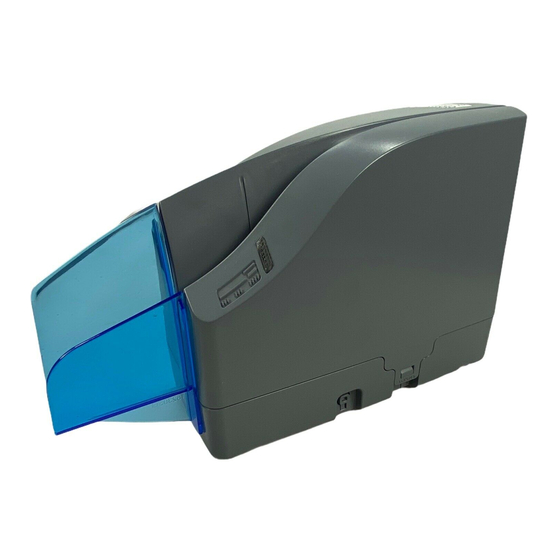
Radio Frequency Interference The CheXpress® CX30 generates, uses, and can radiate radio frequency energy. If the unit is not installed and used properly, that is, in strict accordance with the instructions in this manual it may cause harmful interference to radio communications. It has been tested and found to comply with the limits for Class B digital devices pursuant to Subpart J of Part 15 of FCC Rules, which are designed to provide reasonable protection against harmful interference when operated in a commercial environment. - Page 5 Features of the CheXpress® CX30 Outside the CheXpress® CX30 Fig. 1 Top Cover Entry Pocket Entry Tray Exit Door (Shown in the closed position) LED Status Indicator Locking Tabs Reset Button Exit Door (Shown in the open position) Bottom View of the CheXpress® CX30 Fig.
-
Page 6: Chexpress® Installation
CheXpress® CX30 Installation Un-Boxing the CheXpress® CX30 Step 1: Lay the box on it’s side and slide out the packaing and scanner. Lift off the top plastic insert (USB cable is inside), then lift the scanner from the bottom insert. Fig. -
Page 7: Installing The Ink Jet Cartridge
Installing the Rear Endorser Inkjet Cartridge Follow these instructions when installing the inkjet cartridge for the first time, or when replacing an empty cartridge: Fig. 5 Fig. 4 Gently pull out on the tabs on the top scanner cover. Lift up on the cover for access to the inkjet platform. -
Page 8: Installing The Franker Roller (Optional Feature)
Installing the Franker Roller (Optional) -
Page 9: Installing The Usb Driver
USB 1.1 port due to the slower throughput. Check with your application provider. Install the Demo Software Program (Download from the Digital Check website. Use the ScanLite program for testing the scanner and during the cleaning process) To download ScanLite Go to: http://www.digitalcheck.com/integration_support/drivers_and_demo_programs... -
Page 10: Getting Started
Getting Started with CheXpress® CX30 LED status indicator Fig. 6 The status LED with no light on. This is the normal state when waiting to be connected to the PC and to a power connection. Fig. 7 The status LED with the ‘Red’ light on. This is the normal state when waiting to be acquired and indicates a good USB and power connection. -
Page 11: How To Load Checks
4. After the CheXpress® CX30 is synchronized with the application; the LED is used to detect the presence of documents in the entry pocket and will turn ‘Orange’ once a document is loaded. 5. After a document scan using the Scan & Return mode, the check will stop in the entry pocket and show a flashing ‘Orange’... -
Page 12: Opening The Chexpress® Cx30
Opening the CX30 Fig. 9 Gently pull out the tabs on the top scanner cover. Lift up on the cover to open. Opening the Camera Door Fig.10 Outer camera door. Pinch latch to pivot door open. The internal path offers a straight through or ‘U’ path and has several doors to provide easy access for removing stuck or damaged documents. - Page 13 Opening the Internal Path - Internal path – access door. Open exit door, then open the access door. Fig. 11 Replace the center cover by setting it back on the unit vertically. Fig. 12...
-
Page 14: Chexpress® Cx30 Troubleshooting
When removing or disconnecting the USB or Power Supply Cable from the CheXpress CX30, be sure to pull straight back on the cable and remove as shown in Fig. 13. DO NOT remove the cable by pulling up, vertically or at an angle (See Fig. 14). Doing so can damage the connector. -
Page 15: Chexpress® Operator Maintenance
Check Images are streaking or fading If you notice either streaking or fading on the images, the scanheads may require cleaning. Refer to the section below on cleaning the scanheads. CheXpress® CX30 Operator Maintenance Cleaning the CheXpress® CX30 Over time, ink, dirt and dust particles will collect on the scanner rollers and document track. -
Page 16: Cleaning The Scanner
3. Cleaning Kit – Consisting of box of 25 cleaning cards & 6 cleaning swabs – (#130007-03) Cleaning The CheXpress® CX30 using ScanLite Software The ScanLite program, which is available from the Digital Check web site, is an excellent utility to run while performing the cleaning procedures recommended below. ScanLite provides an easy way to initiate the scan cycles in order to feed the cleaning cards properly through the scanner. - Page 17 Cleaning Steps 1. You should remove the center cover to blow out the path. Lift up on the top- center cover. 2. Blow out the entire path, including the dust collection bin under the front scanhead. Insert a new CheXpress® cleaning card in the entry pocket. 3.
-
Page 18: Common Error Codes
Common Error Codes From The Scanner -216 Mis-Feed (The document failed to enter the path on time). Remove the document and re-insert it. Check for bent or excessively curled leading edges and straighten as needed. If you continue to get -216 errors, this might indicate that; o The entry drive rollers may be dirty o Something may be lodged in the path Document Stopped in the path or did not exit on time... - Page 19 PC processor, memory and hard drive. For support, contact your dealer or Digital Check at 847-446-2285. The Service request form to send scanners into the plant for repair can be filled out on-line by going to the web site at: www.digitalcheck.com/clientarea...
-
Page 20: Frequently Asked Questions
Frequently Asked Questions How many checks per minute should my CX30 scan? The CX30 is a manual feed scanner and its performance is dependent upon the operator. The CX30 has a rated speed of aproximately 30 documents per minute (DPM) in scan and return mode. -
Page 21: Chexpress® Cx30 Specifications
CheXpress® CX30 Specifications Paper Size H. min. 2.12” – max. 4.13” (54-105 mm.) L. min. 3.19” – max 8.98” (81-228 mm.) Scanning Method Concurrent two-sided Duplex Image Creation: 2 x 1296 cell, 106mm CIS Light Source: Tricolor LED Transport Speed 50 cm/sec Typical scan speed of 1 second (6”... - Page 22 Corporate Headquarters: Digital Check Corp. 466 Central Ave., Suite 31 Northfield, IL 60093 Tel: 847/446-2285 Fax: 847/441-5507 Website: www.digitalcheck.com Email: support@digitalcheck.com...
Need help?
Do you have a question about the CheXpress CX30 and is the answer not in the manual?
Questions and answers
can you upgrade a CX30 to a ink jet?